GIMP (GNU Image Manipulation Program) is a powerful and free image editing software used by photographers, designers, and artists. One of the most essential tasks in GIMP is moving an
Why Moving an Image in GIMP Matters

Moving an image in GIMP isn’t just about dragging and dropping elements randomly on the canvas. It’s about placing each part of your design exactly where you want it. Here’s why this skill is so crucial:
- Design Precision: When working on detailed designs or collages, accurate placement ensures elements complement each other perfectly.
- Layering and Composition: Moving images allows you to adjust the visual hierarchy and composition of your design.
- Alignment: Placing images properly ensures that text, graphics, and other elements are aligned, creating a balanced design.
- Editing Flexibility: The ability to move and adjust images makes it easier to experiment with layouts and make quick changes.
In short, moving images in GIMP gives you complete control over your design, helping you create visually appealing and well-structured projects.
Also Read This: How to Change the Color of an Image in Figma for Custom Designs
Steps to Move an Image in GIMP Using the Move Tool

Moving an image in GIMP is easy once you understand the Move Tool. Follow these steps to start moving images or layers with precision:
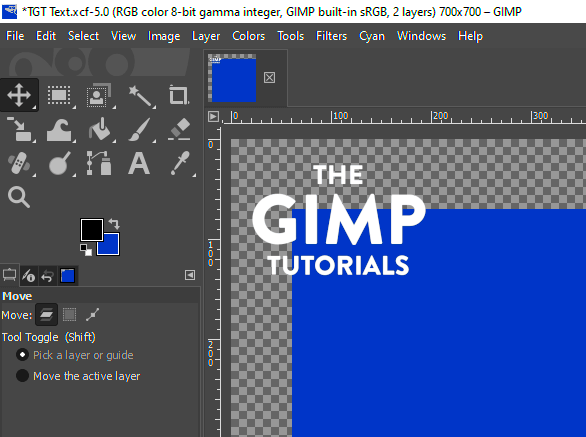
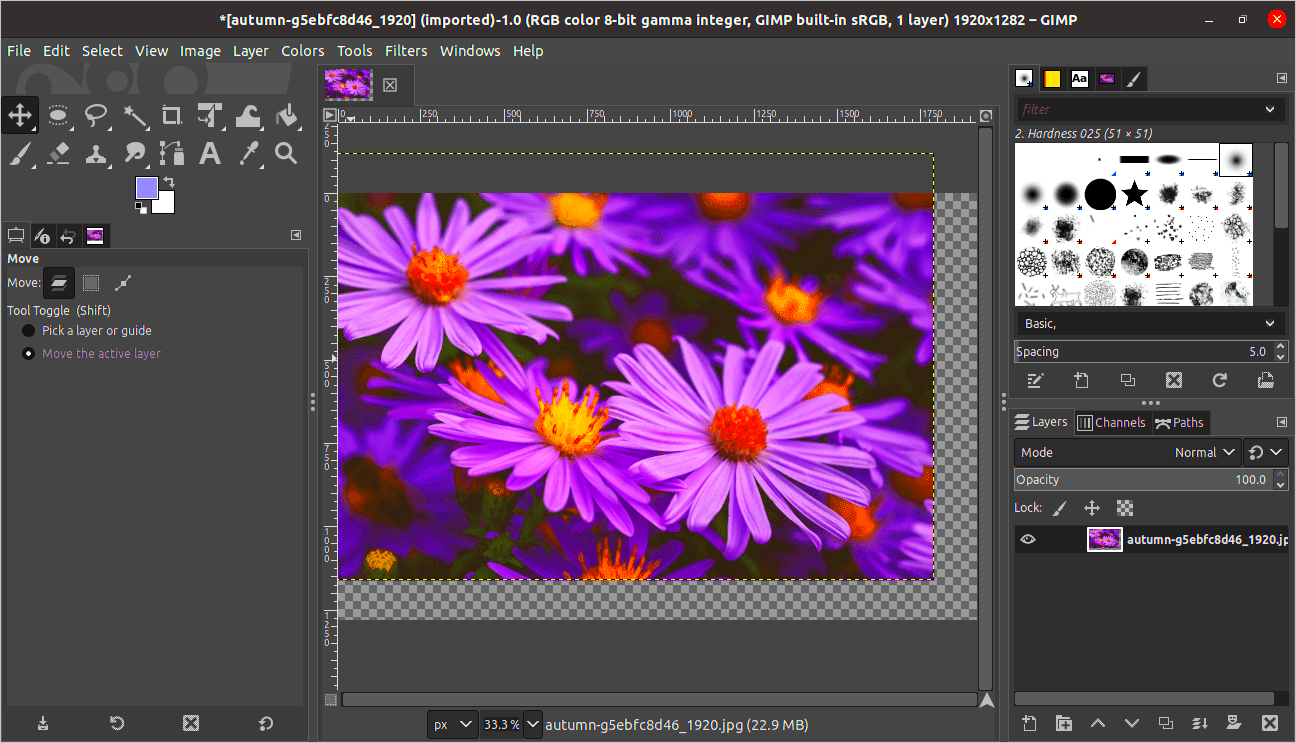
- Select the Move Tool: First, choose the Move Tool from the toolbox. You can also press the “M” key as a shortcut to select it.
- Activate the Layer: Make sure the layer you want to move is active. You can select the layer in the Layers panel. If you're moving an entire image, ensure the right layer is highlighted.
- Click and Drag: Click on the image or layer you want to move, then drag it to the desired location. The image will move with your mouse or trackpad.
- Move Multiple Layers: If you want to move multiple layers at once, hold down the Shift key while selecting the layers. This will group them together for easy movement.
If you want more control, you can move an image or layer in smaller increments using the arrow keys on your keyboard. This can be useful when you need to place it in an exact position.
With the Move Tool, you can reposition images within a design without worrying about disrupting your entire layout. Once you master the basics, you’ll be able to make your designs more dynamic and visually appealing.
Also Read This: How to Sell Stock Photos to Getty Images as a Beginner
Using Keyboard Shortcuts to Move an Image

Keyboard shortcuts can significantly speed up your workflow in GIMP, especially when you need to move an image or layer quickly. Instead of clicking and dragging with your mouse, you can use simple keyboard commands to nudge your image into place with precision. This method is especially helpful for fine-tuning the position of images without moving them too far or too fast. Here's how you can use keyboard shortcuts to move images in GIMP:
- Arrow Keys: Once you have the Move Tool selected and the layer active, use the arrow keys on your keyboard to move the image in small increments. Each tap of the arrow key will shift the image one pixel in the chosen direction.
- Shift + Arrow Keys: Hold down the Shift key while pressing an arrow key to move the image in larger increments (10 pixels at a time).
- Ctrl + Z (Undo): If you move the image too far, you can always use Ctrl + Z to undo the move and try again.
- Alt + Click: If you want to nudge the image more precisely, hold down Alt while clicking and dragging the image to its new position.
These shortcuts are ideal for making quick adjustments and ensuring that your images are in the perfect spot without wasting time. With practice, you’ll find that keyboard shortcuts make moving images in GIMP a lot more efficient and effortless.
Also Read This: How to Embed Video on Behance to Showcase Your Creative Work
Moving Multiple Images or Layers Simultaneously
Sometimes, you may want to move more than one image or layer at once. This is common when you're working on complex designs where multiple elements need to be repositioned together. Fortunately, GIMP makes it easy to move multiple images or layers simultaneously. Here's how you can do it:
- Selecting Layers: In the Layers panel, hold down the Ctrl key (or Cmd on Mac) and click on each layer you want to move. This will allow you to select multiple layers at once.
- Using the Move Tool: With the Move Tool active, click and drag one of the selected layers. All of the selected layers will move together as a group.
- Aligning Layers Together: If you want the layers to stay aligned, make sure the Align Tool is used after moving them. You can also use the Shift key to adjust their position together in smaller or larger increments.
- Grouping Layers: For even more control, consider grouping the layers. Right-click on the selected layers and choose "Group Layers." This will combine them into a single unit that you can move together as one.
Moving multiple images or layers is a great way to save time, especially when you're working with complex projects. With this method, you can easily shift entire sections of your design without losing the relative positions of each element.
Also Read This: Explore a Free Artificial Intelligence Art Generator
Adjusting Image Placement with the Align Tool
While the Move Tool is useful for general image placement, the Align Tool in GIMP gives you more control when it comes to precise alignment of images or layers. If you want to align images to the center, edges, or other objects in your design, the Align Tool is perfect for the job. Here's how to use it:
- Selecting the Align Tool: First, make sure the Align Tool is selected. You can find it in the toolbox or press Q to quickly activate it.
- Choosing the Object to Align: Click on the image or layer you want to align. This will be your reference point for alignment.
- Aligning Relative to the Canvas: You can choose to align your image to the left, right, top, bottom, or center of the canvas. To do this, choose the desired option from the tool options menu.
- Aligning Relative to Other Layers: If you want to align your image relative to another layer, select both the layer you want to align and the reference layer, then use the Align Tool. This will help you maintain a consistent layout.
- Using the Guide: To make the alignment even more accurate, you can use guides (View > Show Guides) to visually align your layers to the exact position you want.
The Align Tool is a great way to ensure your images are placed exactly where you need them, without having to manually adjust their positions. Whether you’re centering an object or lining up elements along a specific edge, the Align Tool makes the process much faster and more accurate.
Also Read This: Alamy vs Shutterstock: Which Stock Photography Platform is the Best?
Common Mistakes to Avoid While Moving an Image
When you’re moving an image in GIMP, it’s easy to make a few common mistakes that can mess up your design. These errors can make your workflow slower and leave you with unsatisfactory results. By being aware of these common pitfalls, you can avoid them and make your editing process smoother. Here are some common mistakes to watch out for:
- Not Selecting the Right Layer: One of the most frequent mistakes is moving the wrong layer. Always double-check that the correct layer is active before you start moving it. If the wrong layer is selected, you might unintentionally shift the wrong object or image.
- Forgetting to Use the Move Tool: It’s easy to forget to select the Move Tool when working on your project. If you try to move an image without it, GIMP might not register the move correctly. Always ensure the Move Tool is selected before you start moving.
- Misplacing Layers: When working with multiple layers, it's crucial to maintain their order. Moving a layer out of sequence can disrupt the visual hierarchy and make the design look unorganized. Make sure your layers are well-organized in the Layers panel to avoid this issue.
- Overmoving Images: Another common mistake is over-moving an image or layer, especially when using the keyboard shortcuts. If you’re not careful, you may accidentally shift an element too far. Take your time and use smaller increments when making precise adjustments.
- Not Using Guides for Alignment: Moving images without guides can lead to inconsistent placement. Guides help you keep your layers aligned and evenly spaced. Using them ensures that everything looks polished and professionally arranged.
By avoiding these mistakes, you can ensure that your image placement is precise and your GIMP projects are well-organized and visually appealing.
Also Read This: How to Import Data from an Image into Google Sheets
Conclusion on How to Move an Image in GIMP
Moving images in GIMP is a straightforward process, but mastering it takes practice. By using the Move Tool, keyboard shortcuts, and the Align Tool, you can make precise adjustments to your designs with ease. Whether you’re working with a single image or adjusting multiple layers, knowing how to position your elements accurately is essential for creating clean and professional-looking designs.
As you become more comfortable with GIMP, you’ll find that moving images becomes second nature. Don’t be afraid to experiment with different tools and techniques, such as using guides for alignment or working with multiple layers. The more you practice, the more confident you’ll be in your ability to manipulate images within GIMP.
In the end, the ability to move images with precision will give you complete control over your projects, helping you achieve the best results possible. So, take your time, try different methods, and enjoy the creative process!
FAQ
1. How can I move an image in GIMP without affecting other layers?
If you only want to move one layer without affecting others, make sure to select the correct layer in the Layers panel before using the Move Tool. This way, only the active layer will move, and other layers will stay in place.
2. Can I move an image freely in GIMP?
Yes, you can move an image freely in GIMP using the Move Tool. Once selected, you can drag the image or layer anywhere within the canvas. If you want more control, you can use the keyboard arrow keys for finer adjustments.
3. How do I move multiple layers at once in GIMP?
To move multiple layers at once, hold down the Ctrl key (or Cmd on Mac) and click on each layer you want to select in the Layers panel. Once selected, you can use the Move Tool to drag them together.
4. Why isn’t my image moving in GIMP?
If your image isn’t moving, make sure that you have selected the Move Tool. Also, check that the correct layer is active in the Layers panel. If you are still having trouble, ensure that the layer is not locked or hidden.
5. Can I move an image beyond the canvas in GIMP?
Yes, you can move an image beyond the canvas. If the image is moved out of the viewable area, it will still exist in the project, and you can bring it back into view by adjusting the canvas size or scrolling around the workspace.


