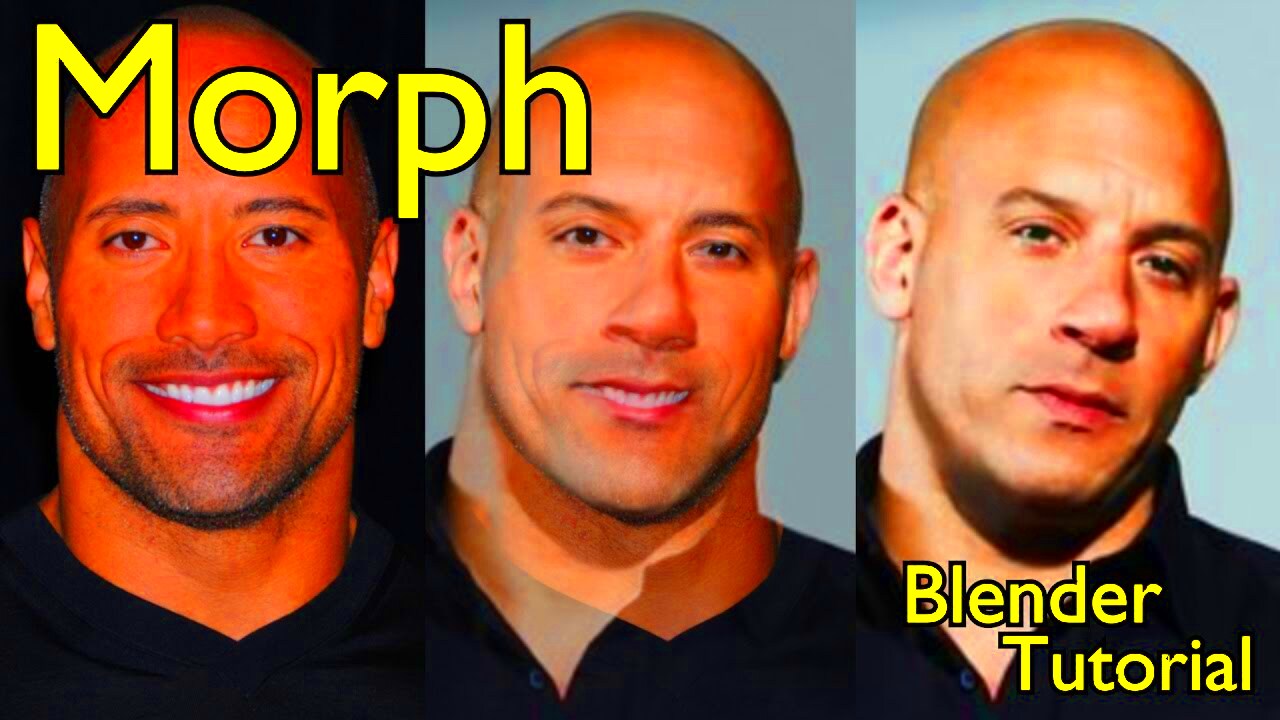
Morphing images is a creative technique where two different images are blended or transformed into one seamless visual effect. This process has been widely used in design, advertising, and entertainment to create stunning visual results. It's not just about combining two pictures but also about creating something new and artistic, which can enhance your digital projects.
Whether you're a graphic designer, a photographer, or someone looking to add a unique touch to your images, morphing can open up many possibilities. The best part is that the process is easy to learn, and with the right tools, anyone can create impressive effects. In this guide, we’ll walk through how to morph images together, why it’s useful, and how you can get started.
Why Morphing Images Together Can Be Useful

Morphing images can be incredibly useful for a variety of reasons, especially when it comes to creative projects. Here's why many people are turning to this technique:
- Enhance Creativity: Morphing allows you to experiment and create something new by blending two images into one. It helps add artistic flair to your work.
- Boost Visual Appeal: Combining two distinct visuals can catch the viewer's eye and make your design stand out from the crowd.
- Improve Marketing Campaigns: In advertising, morphing images together can help tell a story, create impact, and drive more engagement.
- Improve Social Media Content: Unique and creative visuals tend to get more attention, which can boost your social media presence.
- Enhance Digital Art: For digital artists, image morphing is a powerful tool to create stunning effects and push boundaries in art.
Whether you’re designing a logo, working on an album cover, or crafting a stunning piece of digital art, morphing images offers endless creative potential.
Also Read This: Understanding Adobe Stock Contributor Payments
Understanding the Basics of Image Morphing

Image morphing involves gradually transforming one image into another, making it look as though they are smoothly blending into each other. The process typically involves selecting two images with similar structures, such as portraits or objects that can merge well together. Here’s what you need to understand about morphing:
- Key Points: The images you choose should have clear points of similarity (e.g., shapes, contours, colors) to ensure a smooth transition.
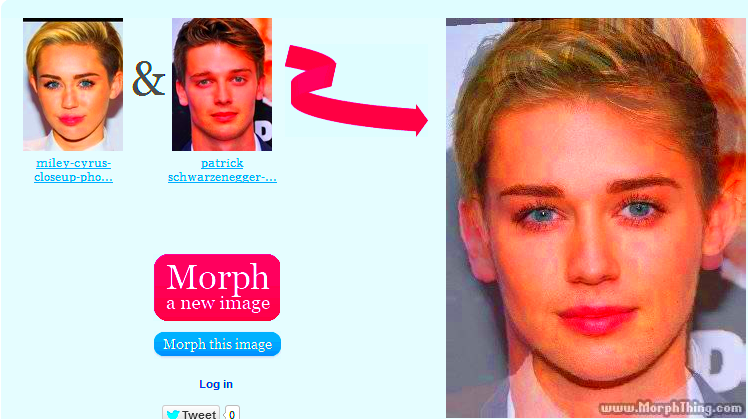
- Software Tools: You’ll need specialized software that can handle morphing. Some popular options include Adobe Photoshop, GIMP, and online morphing tools like MorphThing.
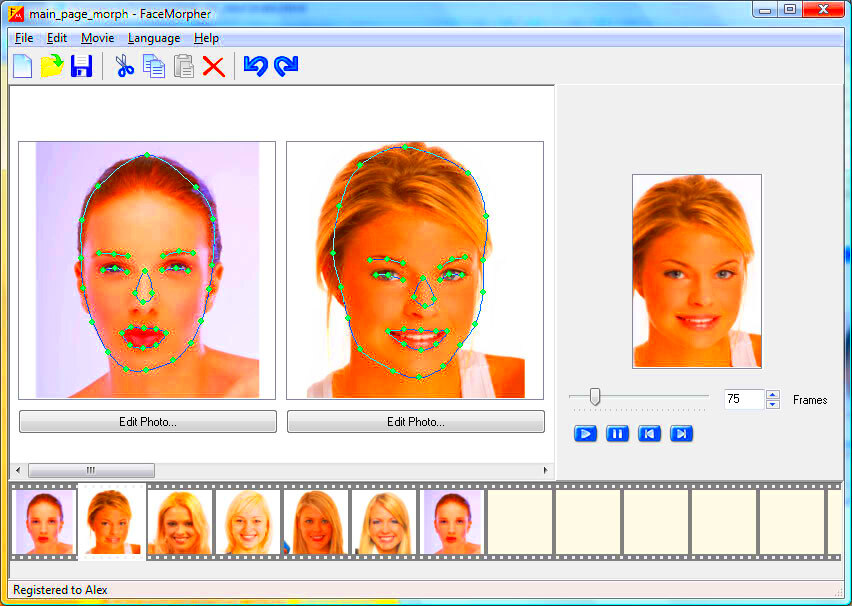
- Control Points: These are specific points you’ll define on the images to guide how they merge. In more advanced tools, the software automatically aligns these points, but manual adjustments may be needed for fine-tuning.
- Blending: Once the key points are set, the software begins blending the images by adjusting the pixels gradually to form a smooth transformation.
By understanding these basics, you’ll be better equipped to start experimenting with morphing images. The next step is diving into the software tools and learning how to manipulate images to create those amazing transformations.
Also Read This: How to Purchase a Getty Image for Your Projects
Step-by-Step Guide to Morph Two Images Together
Morphing two images together sounds complex, but it's actually quite simple once you break it down into manageable steps. Whether you're using a desktop application or an online tool, the process is generally the same. Here's a step-by-step guide to help you get started:
- Select Your Images: Choose two images that you want to morph together. Make sure the images are similar in composition, such as portraits, landscapes, or objects with similar shapes. The smoother the transition, the more closely aligned the images should be.
- Upload to Your Chosen Software: Open your selected software or online tool. Upload both images into the program. Most tools allow you to drag and drop files for easy import.
- Set Control Points: Now, you'll need to identify key points on both images. These are points of alignment that help guide the morphing process. For example, if you’re morphing two faces, you’d mark eyes, nose, and mouth. This step is crucial for a seamless transformation.
- Adjust the Morph Settings: Once control points are set, tweak the settings to refine the blending. This may include adjusting opacity, blending modes, or timing (if you're creating an animation). You’ll want to test different settings to find the most natural transition.
- Preview and Refine: After adjusting the settings, preview the morph. If the transition isn’t smooth, go back and adjust the control points or blending settings until you get the desired result.
- Export the Image: Once you're happy with the morph, export the final image or animation in your desired format. Save your work and share it with others or use it for your projects!
Following these steps, you’ll soon be able to create stunning morphs with ease. The more you practice, the better you’ll get at achieving smooth, eye-catching transitions.
Also Read This: See How to Remove Shutterstock from Your Images
Best Tools to Morph Images for Stunning Effects
There are several tools out there that can help you morph images together seamlessly. Whether you're a beginner or an advanced user, you'll find a tool that fits your needs. Here's a list of some of the best options available:
| Tool | Features | Best For |
|---|---|---|
| Adobe Photoshop | Advanced image manipulation, powerful blending modes, precise control over transitions. | Professional designers and photographers looking for full control over image edits. |
| GIMP | Free, open-source, with a range of image manipulation tools and plugins. | Users who want a free alternative to Photoshop with strong features. |
| Fotor | Online tool, easy-to-use, comes with preset morphing effects. | Beginners or casual users who need quick results without much complexity. |
| FaceMorpher | Specialized for morphing faces, simple interface, quick results. | Anyone wanting to create fun, face-based morphs without much effort. |
| MorphThing | Easy online tool, ideal for creating morphs from celebrity photos. | Users looking to morph faces in a fun, entertaining way. |
Choosing the right tool depends on your skill level and what you’re trying to achieve. For professionals, software like Photoshop provides complete control, while online tools like Fotor are great for quick and easy morphs. No matter what tool you choose, the key to success is experimenting and refining your technique.
Also Read This: how to redeem adobe 10 stock images
Tips to Achieve Smooth Transitions Between Images
One of the most challenging parts of morphing images together is ensuring the transition looks smooth and natural. Here are some tips to help you achieve flawless results:
- Choose Similar Images: The closer the two images are in terms of structure, colors, and lighting, the easier it will be to create a smooth morph. For example, if you're blending two portraits, make sure both faces are facing the same direction and have similar lighting.
- Use Fewer Control Points: It’s tempting to place many control points, but too many can make the transition look artificial. Start with the key points (eyes, nose, mouth, etc.) and see how the morph looks before adding more.
- Adjust Opacity Gradually: Smooth transitions often require a gradual fade. Adjust the opacity settings slowly to create a more organic feel. A quick shift in opacity can create harsh lines, which disrupt the natural flow.
- Match the Colors: Ensure the color balance between the two images is as similar as possible. Sometimes, tweaking the color balance or applying a light filter can help unify the two images before morphing them.
- Use Blending Modes: Many morphing tools allow you to use different blending modes to control how the images merge. Experiment with modes like "Soft Light" or "Overlay" to achieve a seamless effect.
By following these tips and practicing your skills, you'll be able to morph images together smoothly every time. Don’t rush the process—take your time, and adjust as necessary to get that perfect, smooth transition.
Also Read This: How to Upload Long Videos to YouTube
Common Mistakes to Avoid When Morphing Images
Morphing images together is a fun and creative process, but it's easy to make mistakes, especially when you're just starting. Avoiding these common pitfalls will help you achieve better, more professional-looking results. Let’s go over some mistakes to watch out for:
- Choosing Mismatched Images: One of the biggest mistakes is selecting images that are too different. For a smooth transition, the images should be similar in terms of lighting, angles, and structure. If you're merging two portraits, ensure both faces have similar expressions and are facing the same way.
- Overloading with Control Points: Adding too many control points can complicate the morphing process. While it might seem like more control points will give you better precision, it can often result in unnatural transitions. Focus on key points like eyes, nose, and mouth for faces, or key landmarks for other types of images.
- Ignoring Image Resolution: Always use high-resolution images to avoid pixelation during the morph. Low-quality images can make the final morph appear blurry or jagged, which can ruin the effect.
- Skipping the Blending Step: It’s easy to forget about the blending process, but this is crucial for a smooth transition. Don’t just jump into exporting the morph without adjusting opacity and refining the blend between images.
- Rushing the Process: Take your time! Morphing is a creative process that requires patience and attention to detail. Rushing through it can lead to mistakes and unsatisfactory results.
By avoiding these common mistakes, you’ll be able to create more polished and professional morphs that look natural and seamless.
Also Read This: Guide to Installing Adobe Stock
Enhancing Your Designs After Morphing
Once you’ve successfully morphed two images together, the real fun begins—enhancing your design. Whether you're using it for a marketing campaign, a social media post, or a creative project, enhancing the morph can make it even more striking and unique. Here are some ways you can take your design to the next level:
- Add Filters and Effects: After morphing, apply creative filters and effects to add mood or atmosphere to your design. For example, you can add a vintage filter, blur the background, or even experiment with artistic effects like watercolor or oil painting.
- Adjust Color Balance: Play with color balance and saturation to ensure the colors in both images match harmoniously. You can enhance the morph by adjusting the highlights, shadows, or midtones to unify the two images.
- Apply Textures: Textures can bring depth to your design. Adding a subtle texture overlay (like grain, paper, or fabric) can make the morph look more tactile and interesting.
- Work with Layers: If your morphing software supports layers, you can add more elements, such as text, additional imagery, or shapes, to enhance the composition. This can make your design more dynamic and visually appealing.
- Refine the Edges: Often, the edges of the morphing points can look harsh or unnatural. Smooth out the edges to create a more blended, seamless look. Use the feathering option in your tool to soften these lines.
Enhancing your design is all about experimenting and finding what works best for your project. With the right adjustments, your morphed images can become stunning works of art that stand out.
Also Read This: Reducing TIFF Image File Size Efficiently
Frequently Asked Questions (FAQ)
Here are some common questions people have about morphing images together, along with helpful answers:
- Q: What types of images work best for morphing?
A: The best images for morphing are those that are similar in structure and lighting. For example, blending two portraits works well if they have matching angles and lighting. Avoid images that are drastically different in terms of color or perspective. - Q: Do I need special software to morph images?
A: While you can do basic morphing with online tools, using professional software like Adobe Photoshop or GIMP will give you more control over the process. These tools allow for more precise control points and advanced blending options. - Q: Can I animate the morph?
A: Yes, many tools allow you to animate the morph, turning the transition into a smooth animation. This is perfect for videos, GIFs, or any project that needs a dynamic element. - Q: How can I avoid pixelation when morphing?
A: To avoid pixelation, always use high-resolution images. Low-resolution images will not hold up well during the morphing process, leading to a blurry or pixelated result. - Q: Can I morph more than two images?
A: Yes, some software allows you to morph multiple images together. The process is similar, but with more control points and adjustments needed to ensure a smooth transition between all images.
If you have any more questions, feel free to reach out to the community or consult the software’s user manual for additional tips and tricks. Morphing can be a learning process, but with patience, you'll get better with each project!
Conclusion: Creating Impactful Visuals with Image Morphing
Image morphing is a powerful and creative technique that allows you to blend two visuals into a seamless and engaging piece of art. Whether you're a designer, artist, or content creator, morphing opens up endless possibilities to experiment and bring unique ideas to life. By understanding the basics, avoiding common mistakes, and enhancing your designs after morphing, you can create visuals that leave a lasting impression. With the right tools and practice, this technique can become an essential part of your creative toolkit, helping you craft stunning, impactful designs effortlessly.


