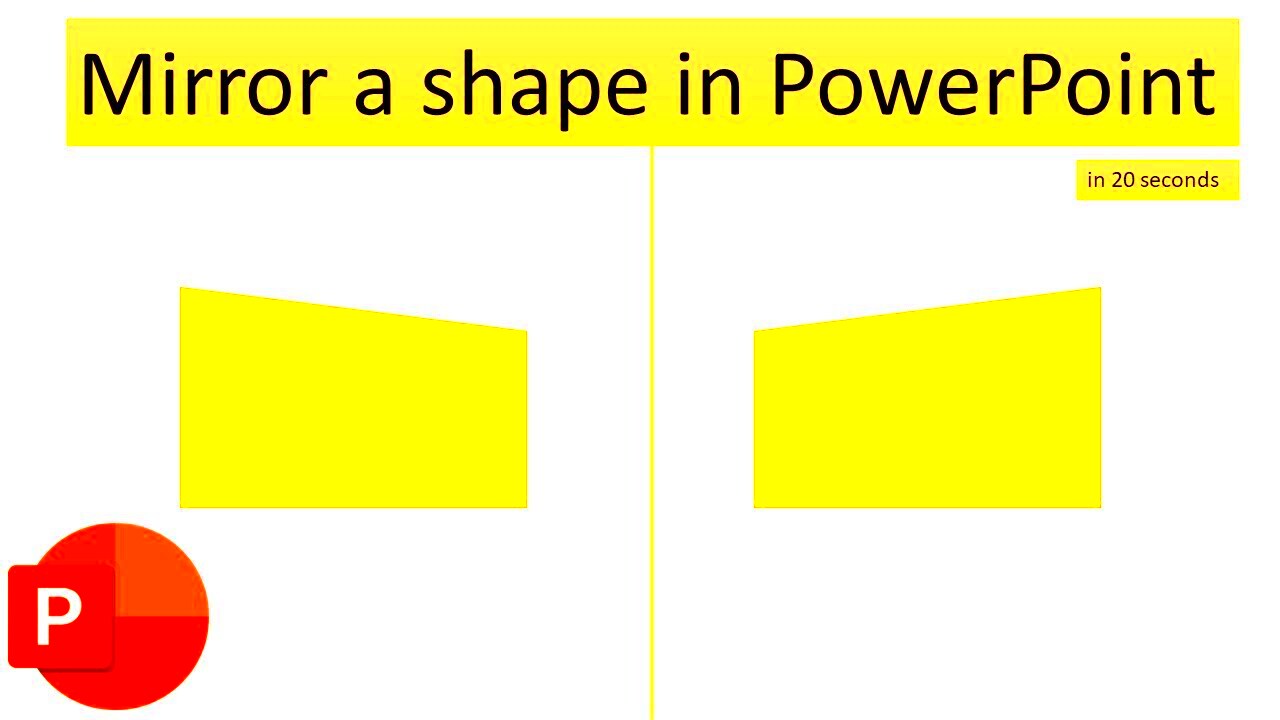
Each one of the PowerPoint presentations can have a creative touch added by mirroring an image. There are also practical reasons aside from appearance alone that make it practical to do the same thing. For example, mirroring can be helpful in:
- Enhancing Design: Mirrored images can create symmetry and balance in your slides, making them visually appealing.
- Improving Visual Clarity: Sometimes, flipping an image helps in emphasizing the subject, especially when it's combined with text.
- Creating a Reflection Effect: Mirroring can simulate reflection on surfaces, adding depth to your presentation.
By integrating reflected visuals into your slides, you may capture the attention of the audience, making them fascinated and their eyes glued to the screens.
Steps to Insert an Image in PowerPoint

Once you want to reflect an image, initially it needs to be embedded in your PowerPoint proposal. Here's a guide on how to go about it in phases:
- Open PowerPoint: Start by launching the PowerPoint application on your computer.
- Select Your Slide: Choose the slide where you want to add the image.
- Insert the Image: Go to the “Insert” tab on the ribbon. Then, click on “Pictures.” Choose “This Device” if the image is saved on your computer.
- Locate the Image: Navigate to the folder where your image is saved, select it, and click “Insert.”
After inserting the image, you are now in a position to commence the mirroring process.
How to Access the Format Picture Menu

Formatting a picture is where to go when wanting to flip an image in PowerPoint. This is how you can do this:
- Select the Image: Click on the image you want to mirror. You’ll notice a border around it, indicating it’s selected.
- Open the Format Tab: Look for the “Picture Format” tab on the ribbon at the top of PowerPoint. Click on it.
- Explore the Options: In the Picture Format menu, you’ll find various options to adjust your image. Look for the “Arrange” group, where you’ll see the “Rotate” option.
You can utilize this menu to edit any image of yours, including mirroring it according to your desired presentation style.
Using the Flip Option to Mirror the Image
Your image is inserted and you’ve opened the Format Picture menu, so now it’s time to reflect this picture of yours by using the flip options. This function is rather simple and can be done in mere clicks. Here's how you can do it:
- Select the Image: Make sure your image is still selected. If not, simply click on it to highlight it.
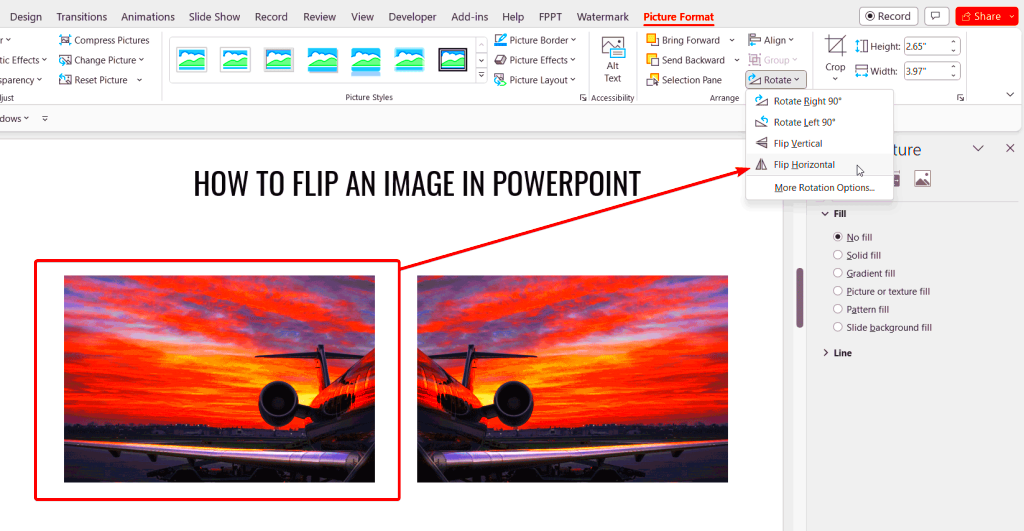
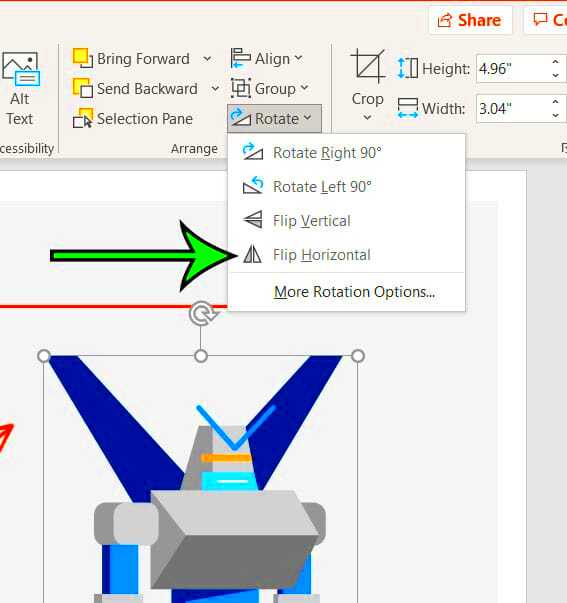
- Locate the Rotate Option: In the “Picture Format” tab, look for the “Arrange” group. Here, you will find the “Rotate” button.
- Choose Flip Options: Click on the “Rotate” drop-down menu. You’ll see options such as “Flip Vertical” and “Flip Horizontal.” Choose the option that best fits your needs:
- Flip Vertical: This will mirror your image along the horizontal axis, flipping it upside down.
- Flip Horizontal: This option will mirror your image along the vertical axis, creating a left-to-right reflection.
Presentations can be enhanced with mirrored images in an amusing and creative way: they can, however, create a surprise. Here are some simple ways to accentuate your visuals!
Adjusting the Image After Mirroring
After you rotate the picture on a pivot, you should consider making some changes so that it sits well in a slide layout. Below are simple guides:
- Resizing the Image: Click on the image, and small circles will appear on the corners and sides. You can click and drag these to resize the image. Hold down the Shift key while dragging to maintain the aspect ratio.
- Positioning the Image: Click and drag the image to reposition it on the slide. Make sure it aligns with other elements on your slide for a balanced look.
- Applying Effects: If you want to enhance your mirrored image further, explore additional formatting options such as adding borders, shadows, or reflections. You can find these options under the “Picture Format” tab.
- Using the Crop Tool: If you need to remove any unwanted parts of the image, use the Crop tool found in the “Picture Format” tab. Simply select the area you want to keep and apply the crop.
To ensure that the appearance of your participation presentation is not only beautiful but matches well with its entire design, you should adjust your mirrored image. Don’t hesitate to explore different types of adjustments before selecting one that fits perfectly!
Common Issues When Mirroring Images
Although the PowerPoint mirror pictures process is often simple, some problems may arise. To help you with this, here are common problems experienced when mirroring images and their solutions:
- Image Quality Loss: Sometimes, when you flip an image, it can appear pixelated. To avoid this, make sure you are using high-resolution images to begin with.
- Inconsistent Aspect Ratio: If your image looks stretched or squished after mirroring, check to ensure you’re resizing it while holding the Shift key to maintain the correct aspect ratio.
- Alignment Issues: After flipping the image, it may not align well with other elements on your slide. Use the “Align” tools in the “Picture Format” tab to center or align it with other objects.
- Background Conflicts: If your mirrored image doesn’t stand out, consider changing the slide background color or adding a shape behind the image to create contrast.
To ensure to improve your experience of image mirroring, you need to understand these common mistakes and their solutions. As you know, practice is key; willing to try different pictures using various effects.
Tips for Creating Effective Presentations with Mirrored Images
If you want to make your presentations really stand out then use mirrored images. Nevertheless, there are some aspects that you should consider in order for them not to be distracting but instead enhance the presentation. Below are some of the major strategies:
- Maintain Visual Balance: When you mirror an image, ensure it complements other elements on the slide. Keep a consistent style to create harmony throughout your presentation.
- Choose the Right Images: Not every image works well when mirrored. Opt for images with strong central subjects or shapes that will still be recognizable when flipped.
- Limit the Use of Mirrored Images: While mirroring can be impactful, overusing it can confuse your audience. Use it selectively for key points or to highlight important information.
- Test Your Layout: Before finalizing your presentation, run through your slides to see how the mirrored images appear in context. Adjust their positioning if needed to ensure they don’t interfere with text or other visuals.
- Incorporate Animation Wisely: If your presentation software allows it, consider adding subtle animations to your mirrored images. This can draw attention without being too flashy.
If you follow these pieces of advice, your presentations will be livelier and more attractive; thus, the reflected pictures will rightly support your message.
Frequently Asked Questions
PowerPoint's world of mirrored image might raise some questions in you. Here is the answer for some of them:
- Can I mirror images in older versions of PowerPoint?
- Yes, most versions of PowerPoint offer the flip options, but the exact location might vary. Look for the “Format” or “Picture Format” tabs to find similar tools.
- What types of images work best for mirroring?
- Images with clear subjects and backgrounds that can be visually balanced often work best. Avoid complex images where the subject might get lost when mirrored.
- Will mirroring an image affect its quality?
- Flipping an image should not affect its quality if you start with a high-resolution image. However, resizing after mirroring may lead to pixelation, so be careful.
- Can I mirror text in PowerPoint?
- Yes, you can mirror text by selecting the text box and using the flip options, but make sure it remains readable for your audience.
Should you wish more clarifications, then do not hesitate to seek web materials or the aid part of PowerPoint for further help.
Conclusion on Mirroring Images in PowerPoint
Transforming images into mirror images in PowerPoint greatly improves the effectiveness of your presentation. Doing this increases creativity and helps to stress significant aspects. By acquiring knowledge of effective flipping of
The utilization of mirrored images should be done with artfulness in its application. There is nothing as increasing audience interest in a speech than good positioning of the reflecting photograph that goes along well with overall design. However, when overdone, they may obscure what you want to communicate. The important thing is therefore to achieve equilibrium and transparency in decorating panels or posters.
In the light of these tips and insights, you have all that's necessary to utilize mirrored images effectively. Feel free to try out different things in your presentations; perhaps you will find a different way of captivating audiences!

 admin
admin


