Friendship bracelets have been a cherished craft for generations, symbolizing the bonds we share with our closest friends. These colorful, handmade accessories are not just pretty adornments; each bracelet carries a special meaning and story behind it. When you give a friendship bracelet, you’re expressing love, loyalty, and a promise of lasting friendship. The best part? Making these bracelets can be a fun activity that brings friends together, allowing you to create something special while enjoying each other’s company. So whether you’re a crafting novice or a seasoned pro, this guide will help you dive into the delightful world of friendship bracelets!
Materials Needed for Making Friendship Bracelets
Before you start knotting away, let’s gather all the materials you’ll need to make your very own friendship bracelets. Don’t worry; most of these items are easily accessible and can often be found around your home. Here’s a handy list to help you prepare:
- Embroidery floss: Choose your favorite colors! Each strand typically comes in 8-yard lengths.
- Scissors: You’ll need a good pair to cut the threads to your desired length.
- Measuring tape or ruler: To ensure you cut equal lengths of floss.
- Clip or tape: Use these to keep your bracelet secure while you work on it.
- Pencil and paper: Optional, but helpful if you want to sketch out designs or keep track of patterns.
- Beads (optional): Add some extra flair with colorful beads if you’d like to embellish your bracelet.
Once you have all your materials gathered, you’re ready to unleash your creativity and start making those beautiful friendship bracelets. Remember, the joy is in the journey, so enjoy the process as much as the final result!
Also Read This: Creative DIY Keychain Projects on Dailymotion
Step-by-Step Instructions for Crafting Bracelets
Creating friendship bracelets can be a delightful and engaging activity, especially when you follow some simple steps. Let’s break it down into easy-to-follow stages!
- Gather Your Materials: Before you start, make sure you have everything at hand. You'll need:
- Embroidery floss in your favorite colors
- Scissors
- A clipboard or tape to hold your work in place
- A ruler for measuring
- Cut Your Strings: Cut your floss into equal lengths, usually around 24 inches each. Depending on how thick you want your bracelet, you can use 3 to 6 strands.
- Secure the Strings: Tie a knot at one end of your strands and secure it to your clipboard or tape it to a flat surface. This will make it easier to braid or knot without the strings moving around.
- Start Knotting: Choose the type of knot you're interested in! A common beginner method is the square knot:
- Take the left string and place it over the center strings.
- Then take the right string and place it over the left, pulling it under and through the loop.
- Tighten it and repeat this process, alternating sides.
- Continue the Pattern: Keep knotting until your bracelet reaches your desired length. You can switch colors or patterns as you go for a more interesting design!
- Finishing Touches: When you're happy with the length, tie off the end with a knot similar to the beginning. Trim any excess string, but be careful not to cut too close!
- Wear or Share: Now your bracelet is ready to wear or to gift to a friend. Enjoy the feeling of friendship it symbolizes!
Also Read This: Is Rumble Superior to Light for Grinding in Blox Fruits
Tips and Tricks for Perfecting Your Technique
While crafting friendship bracelets can be relatively straightforward, honing your skills can make all the difference. Here are some tried-and-true tips to help you create beautiful, professional-looking bracelets:
- Choose Quality Materials: Invest in good quality embroidery floss. It’s softer and easier to work with, making your knots neater.
- Practice Makes Perfect: Don’t be disheartened if your first few attempts aren’t flawless! Keep practicing different knot types to find what you enjoy.
- Work in a Well-Lit Area: Good lighting can help you see your work clearly and avoid any mistakes. Plus, it keeps your mood uplifted.
- Use a Comb for Tidiness: If your strands get tangled, use a comb to untangle them gently. It keeps everything neat and manageable.
- Create Patterns: Try to imagine patterns beforehand or sketch them out. This can help guide your knots and color changes effectively.
- Don’t Rush: Take your time! Rushing can lead to sloppy knots or mistakes. Enjoy the process and the satisfaction of creating something beautiful.
- Watch Fun Craft Videos: Watch videos, like the one you’re reading about! They often provide visual tips that can make techniques clear and easier to grasp.
By incorporating these tips into your crafting routine, you’ll soon be making stunning friendship bracelets that you and your friends will cherish for years to come!
Also Read This: How to Create Stunning Bracelets at Home with Dailymotion DIY Videos
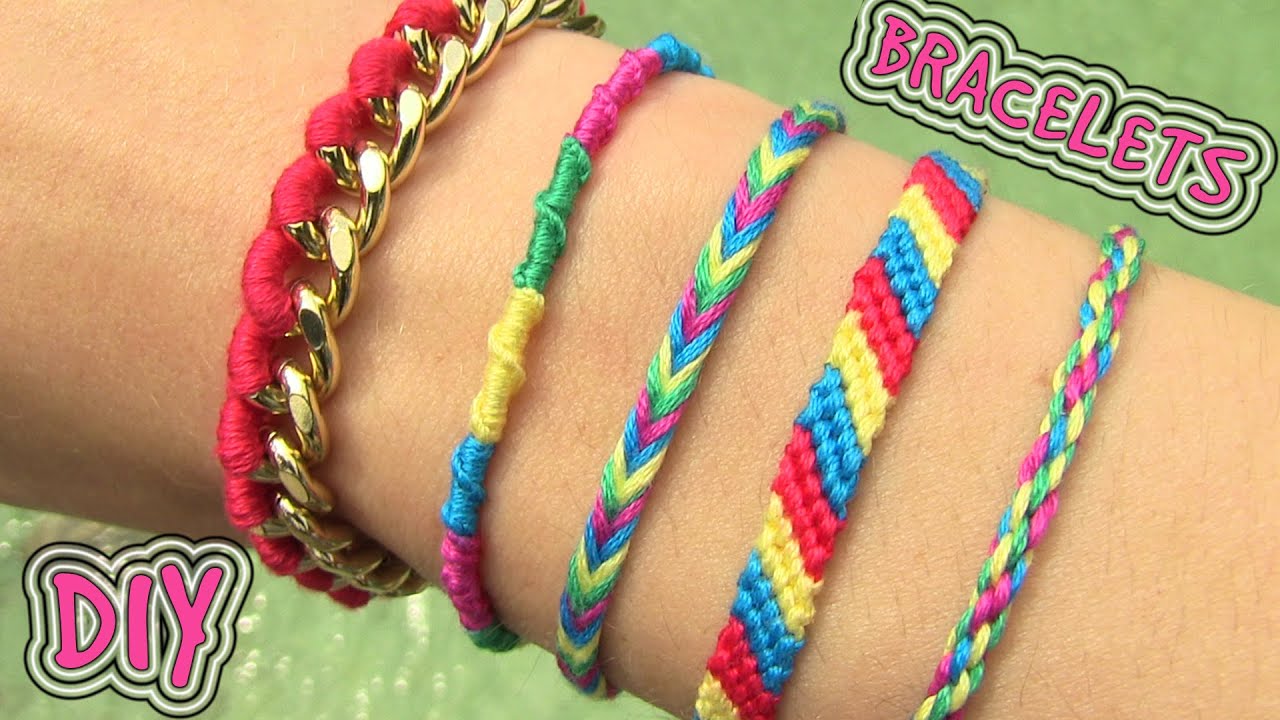
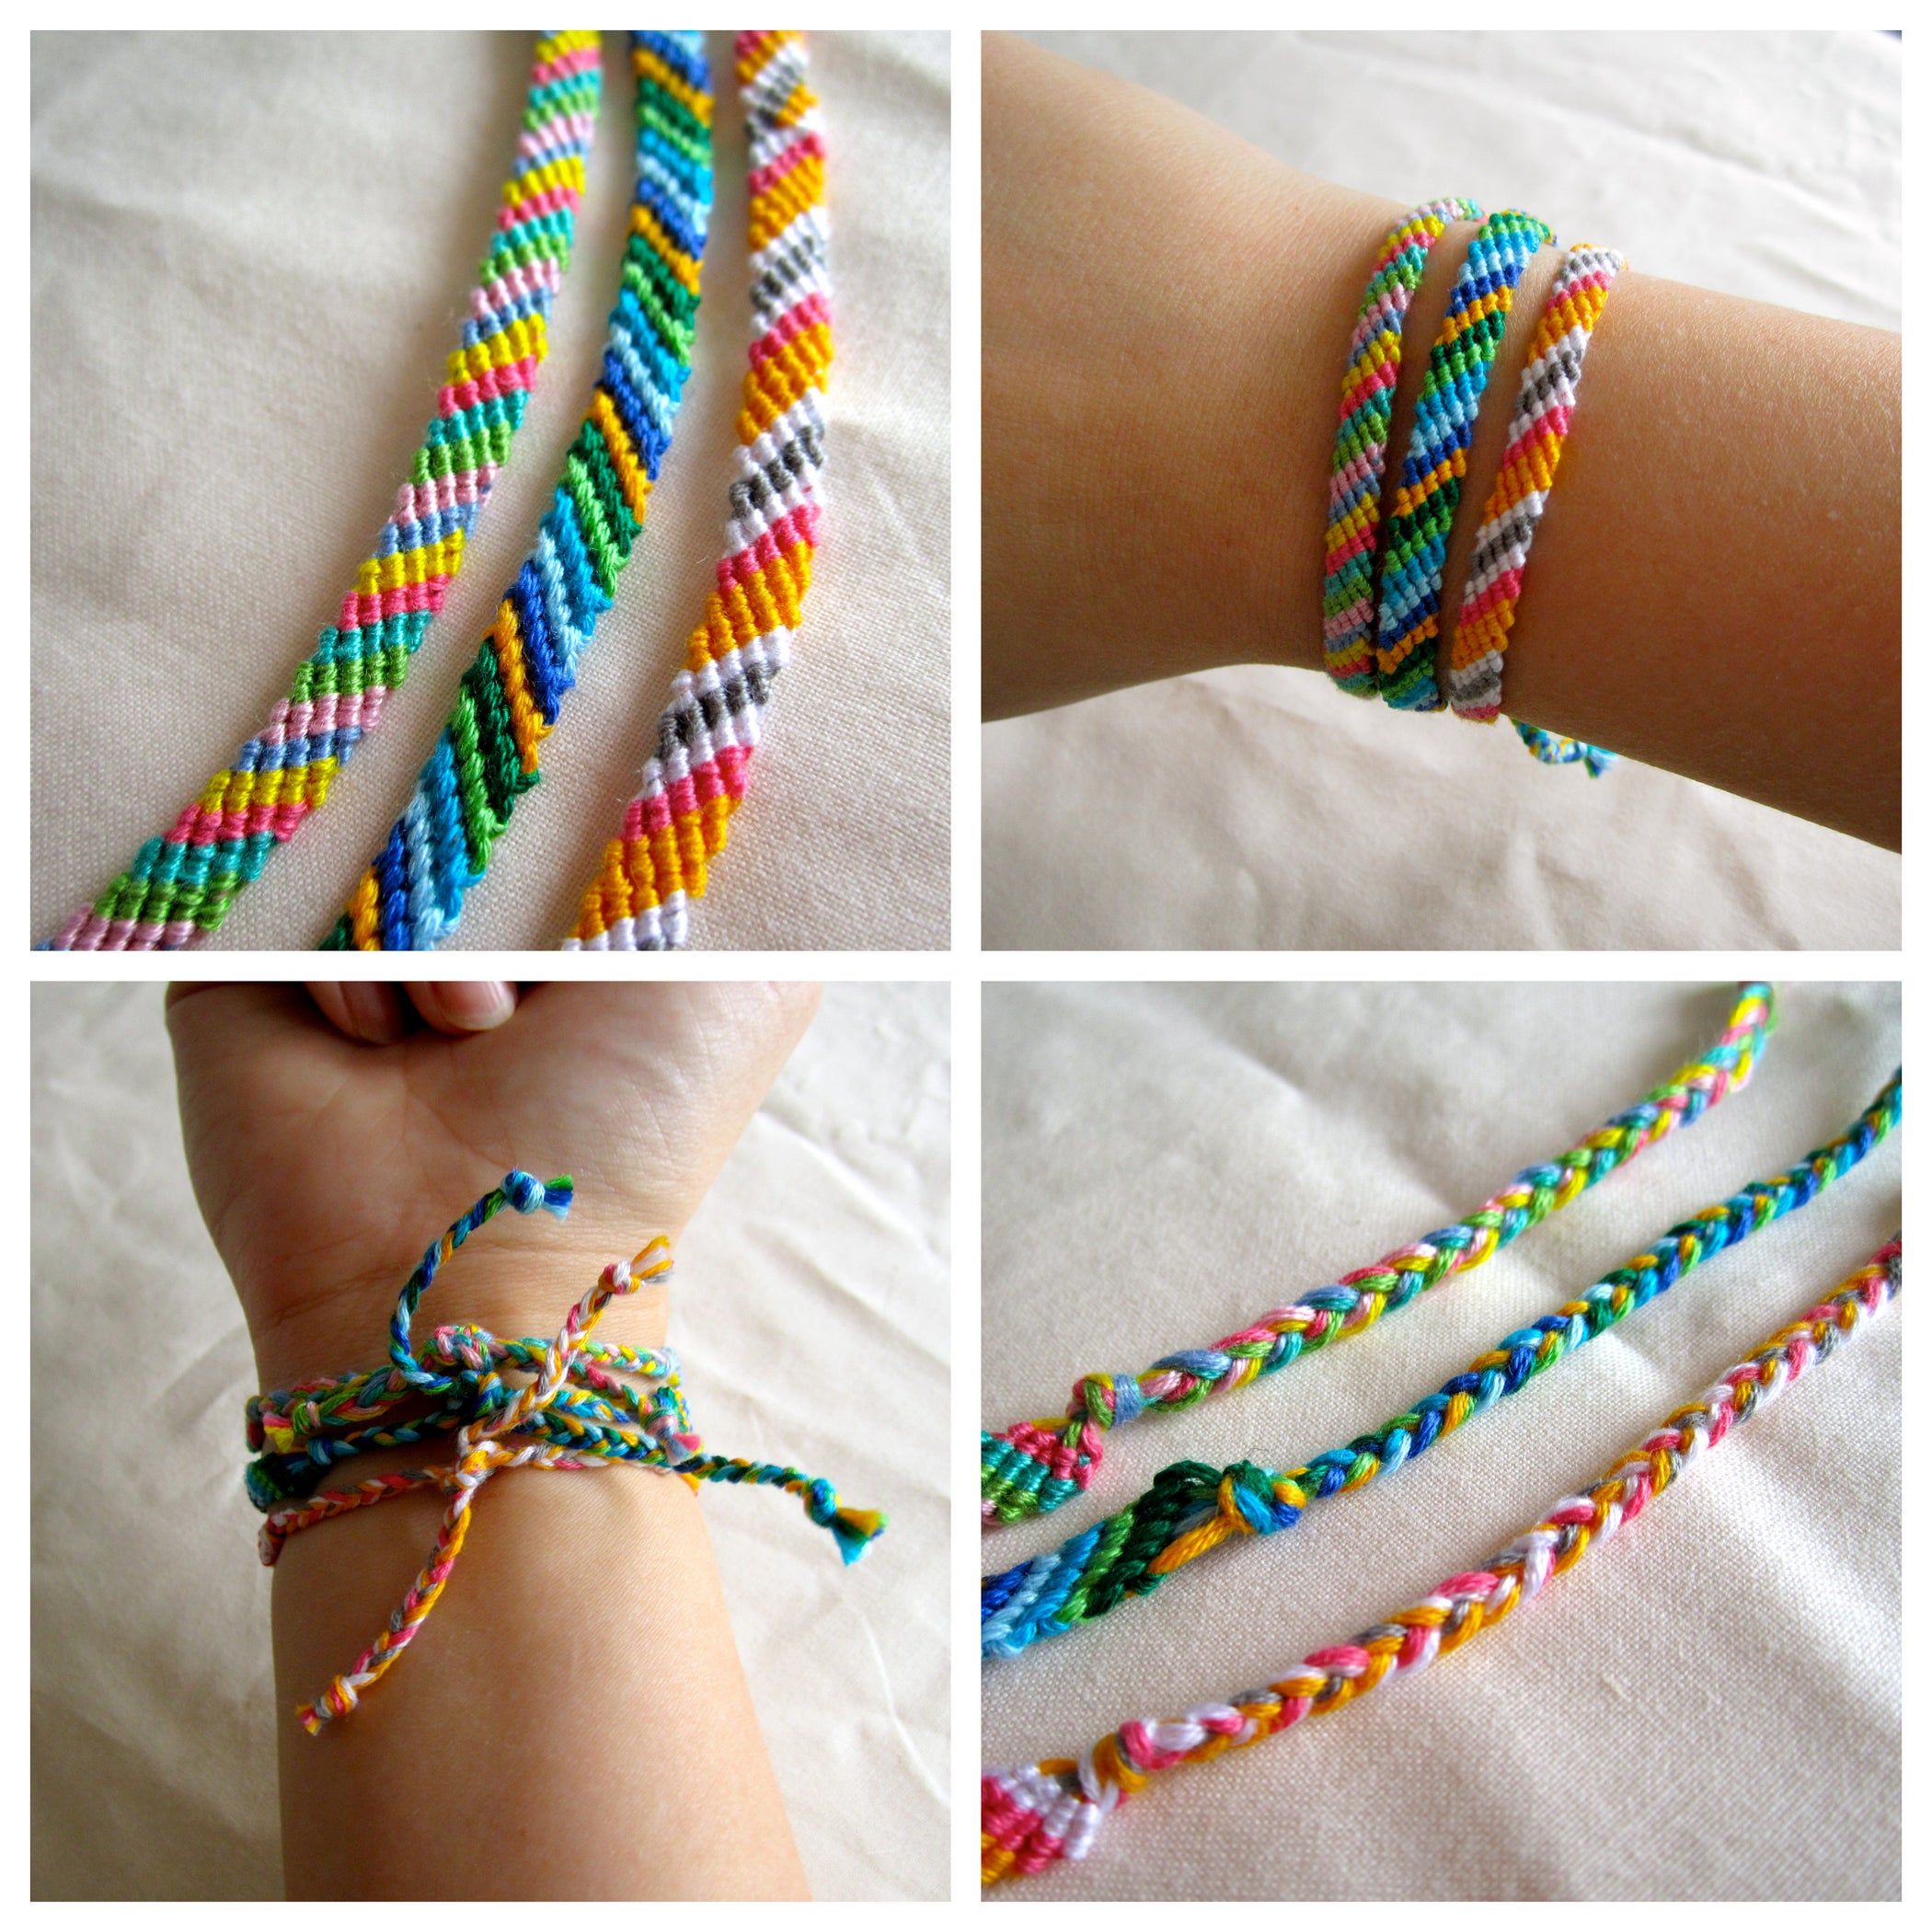
Exploring Different Styles and Designs
When it comes to making friendship bracelets, the possibilities are practically endless! Whether you're a seasoned crafter or just starting out, exploring different styles and designs can be a lot of fun. Here are a few popular styles to consider:
- Classic Braids: A timeless method that involves simple three-strand braiding. Choose colorful threads for a vibrant look!
- Macrame Knots: This intricate design features various knots that create beautiful patterns. Perfect for adding a touch of sophistication.
- Beaded Bracelets: Combine string with beads to give your bracelet a unique texture and visual interest. Don't forget to mix and match colors!
- Chevron Patterns: Zigzag patterns are visually striking and quite popular. They can be made by alternating colors in a V-shape.
- Personalized Messages: Use letter beads to create bracelets that showcase your friend’s initials, a special date, or even a meaningful word.
To get started, you may want to gather various materials like embroidery floss, beading supplies, or yarn. Consider looking at patterns online or in craft books. You’ll find plenty of tutorials that can help guide you! Don't hesitate to give your creations a personal touch; after all, these bracelets are all about celebrating friendship!
Also Read This: Creative Ideas for Making Dough Jewelry
Where to Find Inspiration and Tutorials Online
In today’s digital age, finding inspiration for your friendship bracelet projects has never been easier! There are countless resources available to help you kickstart your crafting journey. Here are some great places to find tutorials and ideas:
- YouTube: Search for channels dedicated to craft tutorials. Many creators offer step-by-step videos that make it simple to follow along.
- Pinterest: This platform is a treasure trove of creative ideas! Just search for ‘friendship bracelet tutorials’ to discover a plethora of designs.
- Instagram: Follow crafting influencers and hashtags like #FriendshipBracelet to get instant inspiration and see what others are creating.
- DIY Blogs: Many crafting enthusiasts share detailed blog posts that include pictures and instructions. A few popular crafting blogs often post about friendship bracelets.
- Online Craft Stores: Websites like Etsy not only sell materials but often have tutorials associated with their products for specific bracelet designs.
So, whether you prefer watching a video, browsing through images, or reading a detailed tutorial, there’s no shortage of resources to spark your creativity. Dive in and start crafting today—who knows what beautiful bracelet designs you’ll come up with!
How to Make Simple Friendship Bracelets with Fun Craft Video
Friendship bracelets are a delightful way to express affection and solidarity. These colorful accessories can be made using various materials and techniques, making them perfect craft projects for both kids and adults. In this blog post, we’ll guide you through the steps to create simple yet beautiful friendship bracelets while also linking to a fun craft video that will enhance your crafting experience.
To get started, you will need the following materials:
- Embroidery floss or cotton thread
- Scissors
- Tape or safety pin (for securing the bracelet while you work)
- Ruler (to measure lengths of thread)
Here’s a simple step-by-step guide to making a basic braid-style friendship bracelet:
- Measure and cut three strands of embroidery floss, each about 24 inches long.
- Select the colors you want and tie them together in a knot, leaving about an inch for the tie.
- Secure the knot with tape on a flat surface or attach it to your pants with a safety pin.
- Braid the strands: if you have three threads, take the left strand and cross it over the middle strand, then take the right strand and cross it over the new middle strand.
- Repeat the braiding process until you reach your desired length.
- To finish, tie a knot at the end and leave a little extra thread for tying around your wrist.
For a more visual approach, check out our fun craft video that demonstrates these steps clearly. Watching someone else create can often provide the inspiration needed to complete your own project!
Getting creative with colors and patterns can make your bracelet truly unique. Consider experimenting with different knotting techniques or adding beads for extra flair!
Conclusion: Making friendship bracelets is a fun and rewarding activity that fosters creativity and strengthens bonds between friends. Don’t forget to share your creations on social media and tag us to inspire others in their crafting journey!
 admin
admin


