Welcome to your guide on making delicious homemade roti! This beloved unleavened bread is a staple in many South Asian households and is perfect for pairing with curries, vegetables, or even enjoying on its own. What’s great about roti is its simplicity—both in how it’s made and the ingredients you need. Not only is it quick to prepare, but it also carries with it the warmth of home-cooked goodness. So, let’s dive into the essentials of making your own roti right in your kitchen!
Essential Ingredients for Making Roti
Creating the perfect roti is all about using the right ingredients. Here’s a list of what you’ll need along with some tips to enhance your roti-making experience:
- Whole Wheat Flour: The star ingredient! Look for chapati flour or whole wheat flour for the best results. This will give your roti a nice texture and flavor.
- Water: It's crucial for forming the dough. Adjust the amount as needed; start with less, as you can always add more.
- Salt: Just a pinch is enough! It adds flavor to the roti. If you’re looking for a healthier option, you can skip it or use a low-sodium alternative.
- Oil (optional): Incorporating a little bit of oil while kneading can help make the roti softer. You can use vegetable oil, olive oil, or ghee.
- Flour for rolling: You’ll need some extra flour for dusting while rolling out the roti to prevent sticking.
Now, you might wonder why each ingredient is important. Let’s break it down:
| Ingredient | Purpose |
|---|---|
| Whole Wheat Flour | Main ingredient for structure and nutrition. |
| Water | Helps in forming a pliable dough. |
| Salt | Enhances the flavor of the roti. |
| Oil | Can help with softness and rolling. |
| Flour for Rolling | Prevents the dough from sticking to surfaces. |
With these ingredients on hand, you’re well on your way to making fresh and fluffy roti. It's amazing how something so simple can create such an authentic and comforting dish. Once you have everything ready, you’ll find that the process is just as enjoyable as the result. So gather your ingredients, and let’s get rolling—literally!
Also Read This: How to Do Easy Makeup on Dailymotion: Quick Tips for a Natural Look
3. Step-by-Step Guide to Preparing the Dough
Making the perfect roti starts with the right dough. It’s the foundation that makes all the difference! Here’s how to prepare it step by step:
- Gather Your Ingredients: You’ll need:
- 2 cups whole wheat flour
- 1 teaspoon salt
- Water (about ¾ cup, but adjust as needed)
- 1 tablespoon oil (optional, for softer roti)
And there you have it! Your roti dough is ready to go. Remember, the key to soft and delicious roti lies in the kneading and resting. Don’t rush this process; it pays off in the end!
Also Read This: Does Rumble App Cost Money? A Look at the Pricing and Access Options for the Rumble App
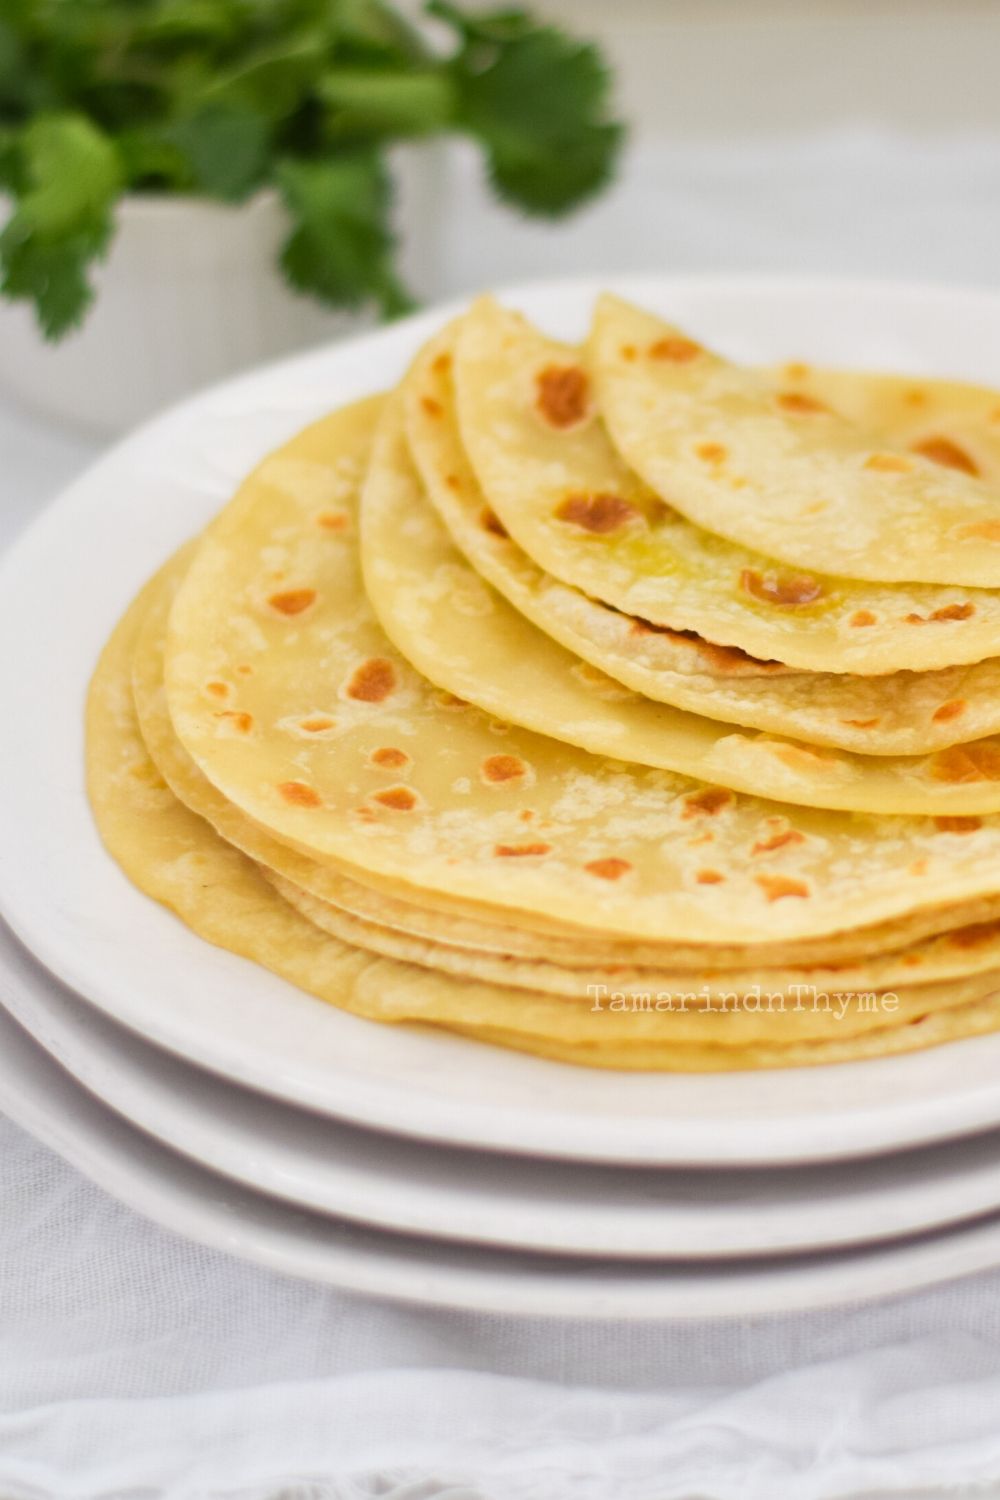
4. Rolling Out the Roti Perfectly
Now that you have your dough ready, it’s time to roll out those rotis! This is where it can get a little tricky, but don’t worry; with a few tips and techniques, you can master it in no time!
- Prepare Your Surface: Sprinkle a clean, flat surface with a little flour. This will prevent the dough from sticking as you roll it out.
- Flatten the Dough Ball: Take one of your rested dough balls and flatten it slightly with your fingers to form a small disc. This gives you a head start before rolling.
- Start Rolling: Using a rolling pin, gently roll out the dough. Start from the center and work your way outward. Use even pressure, and keep turning the dough as you go to maintain a round shape.
- Keep it Thin: Aim for about 1/8 inch thickness. If your dough is sticking, lightly dust both the surface and the top of the dough with flour. However, avoid adding too much flour as it can make your roti hard.
- Check the Shape: Don’t worry if your roti isn’t a perfect circle at first! With practice, it will get better. Ensure it’s even in thickness—all around.
- Ready for Cooking: Once your roti is rolled out, it’s ready to be cooked! Be sure to keep the rolled out rotis covered with a kitchen towel while you roll out the rest to prevent them from drying out.
Rolling out roti can feel daunting at first, but with each attempt, you’ll gain more confidence and skill. Take your time and enjoy the process. After all, homemade rotis are not just a meal; they’re a labor of love!
Also Read This: Is YouTube Currently Experiencing Issues and How to Troubleshoot Common Problems
Cooking Techniques for Fluffy Roti
When it comes to achieving that perfect, fluffy roti, mastering the technique is just as important as the ingredients. Here are some tried-and-true cooking methods that can elevate your roti game from good to outstanding!
1. Temperature Control: The heat level of your cooking surface can make or break your roti. Start with a medium to high flame when you're ready to cook. If the pan is too cold, the roti will dry out; too hot, and it will burn. A well-heated pan should be able to create a light sizzle as soon as the roti touches it.
2. Use of Dry Flour: As you roll out your roti, dust it with a small amount of dry flour to prevent it from sticking to the rolling pin or the surface. Remember, too much flour will cause your roti to become dense instead of fluffy.
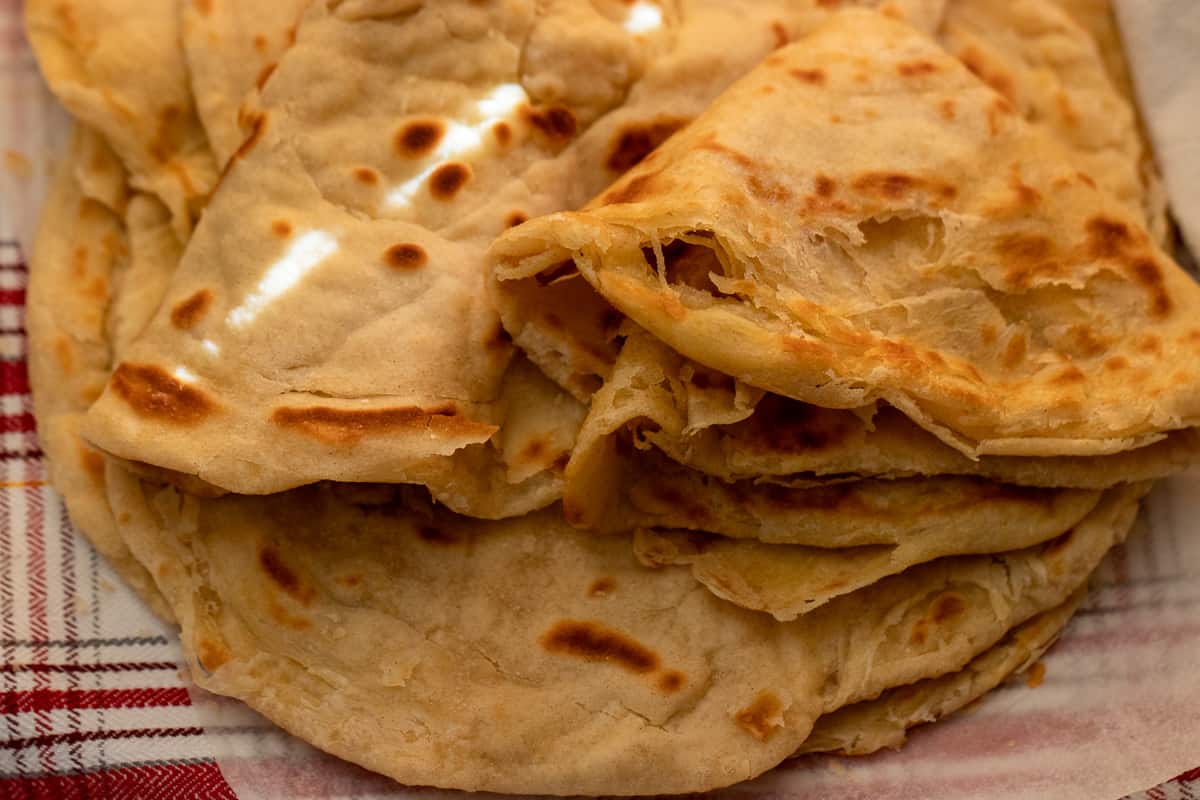
3. Pressing Technique: Once your roti is on the hot pan, let it cook until you see small bubbles forming, which usually takes about 30 seconds. Gently press the roti with a spatula or your fingers (if you’re comfortable) to encourage it to puff up. The trapped steam inside will help create that lovely layered texture!
4. Flip and Rotate: Don't forget to flip your roti! After the first side has cooked, flip it over to cook the other side for about 30 seconds. Then, rotate it frequently using tongs or a spatula to ensure even cooking on all sides. This is key for getting that beautiful golden brown color.
5. Resting Time: After cooking, let your roti rest for a minute wrapped in a clean kitchen towel. This keeps it warm and allows the steam to continue working its magic, ensuring your roti stays soft and pliable.
With these techniques, you’ll be well on your way to mastering the art of fluffy roti. Practice makes perfect, so don’t hesitate to experiment and find out what works best for you!
Also Read This: Effective Tips for Growing Long Hair According to Dailymotion Experts
Common Mistakes to Avoid When Making Roti
Even the most experienced cooks can make mistakes when it comes to making roti. Here are some common pitfalls to watch out for and how to sidestep them:
- Overworking the Dough: One of the biggest mistakes is over-kneading your dough. While it’s important to develop gluten for elasticity, too much kneading can yield tough, chewy rotis. Aim for a soft, pliable dough that isn't sticky.
- Ignoring Rest Time: Not allowing your dough to rest is another common error. Resting the dough helps to relax the gluten, making it easier to roll out and resulting in softer rotis. At least 20-30 minutes is ideal!
- Incorrect Rolling Technique: Rolling your roti unevenly can lead to inconsistent cooking. Aim for an even thickness throughout, about 1/8 inch, to ensure your roti cooks uniformly.
- Skipping the Heat Test: A pan that’s not hot enough won’t create steam, which is key for puffing your roti. Be sure to test your pan by splashing a few drops of water on it—if they sizzle away, you’re ready to go!
- Neglecting to Store Properly: After cooking, if you just leave your rotis out, they can dry out quickly. Make sure to keep them covered in a clean cloth or in a container to maintain their softness.
Avoiding these common mistakes will put you on the path to roti perfection. Remember, practice and patience are your best friends in the kitchen, so don’t be discouraged if it takes a few tries to get it just right!
Also Read This: How Low Can You Go Ludacris Performance Insights on Dailymotion
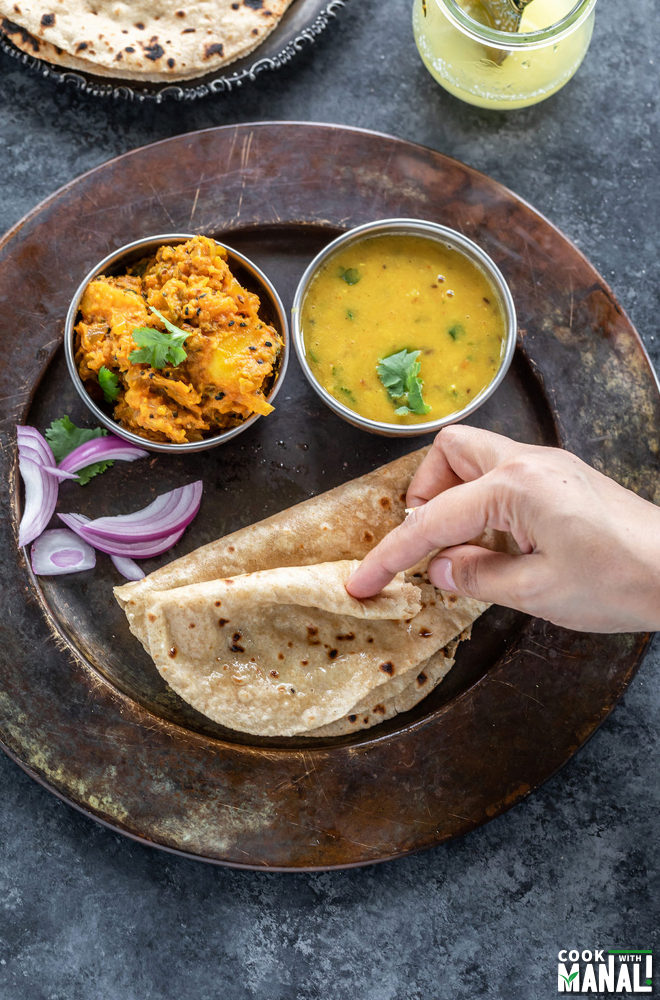
7. Serving Suggestions and Accompaniments for Roti
Roti is a versatile bread that can be paired with a myriad of dishes, making it a staple in many households. While it’s delicious on its own, the right accompaniments can elevate your roti experience to a whole new level. Let’s explore some fantastic serving suggestions and sides that complement roti beautifully.
Daal (Lentil Curry): Daal is a classic pairing with roti. The creamy texture and robust flavors of lentils are perfect for soaking up the softness of the bread. You can opt for various types—like yellow lentils (toor dal) or red lentils (masoor dal)—and add spices to suit your taste.
Vegetable Curries: Roti goes great with a variety of vegetable curries. Here are a few popular options:
- Palak Paneer: Spinach cooked with paneer (Indian cottage cheese) creates a rich, flavorful dish.
- Aloo Gobi: A delightful mix of potatoes and cauliflower, seasoned with spices.
- Chana Masala: Chickpeas cooked in a tangy tomato-based sauce, perfect for dipping!
Pickles and Chutneys: Adding a side of pickles or chutneys can brighten up your meal. Indian pickles (achar) come in various flavors and spice levels, making them a great addition. Consider mango pickle or mixed vegetable pickle. Chutneys, on the other hand, can be refreshing options like mint chutney or coriander chutney.
Yogurt or Raita: A cooling element like plain yogurt or raita (a yogurt-based side dish with herbs and spices) can balance the heat if your main dish is spicy. It's also a great way to add a creamy texture to your meal.
Salads: Simple salads with cucumbers, tomatoes, and onions can add a refreshing crunch. A dash of lemon juice or a sprinkle of chaat masala can make your salad even more exciting.
Whether you’re enjoying a simple lunch or hosting a dinner gathering, roti can be the perfect accompaniment to bring an authentic taste of Indian cuisine to your table. Don’t forget to experiment; you never know what delightful combinations you might discover!
Also Read This: Quick and Easy Methods to Upload Videos on Dailymotion
8. Tips for Storing Leftover Roti
We’ve all been there—making a lavish batch of roti and then facing the dilemma of what to do with the leftovers. Good news! With proper storage, you can enjoy your roti for days without compromising its taste or texture. Here are some handy tips for storing leftover roti:
1. Let It Cool: Before you store your leftover rotis, make sure they’ve cooled down to room temperature. This prevents condensation, which can lead to soggy bread.
2. Use Airtight Containers: To keep your rotis fresh, store them in airtight containers. You can use plastic containers, resealable plastic bags, or even aluminum foil. Make sure to remove as much air as possible before sealing them up.
3. Layering with Parchment Paper: If you have multiple rotis, consider placing parchment paper between them. This prevents them from sticking together and makes it easier to take out one at a time.
4. Refrigeration or Freezing: If you plan to consume the leftover rotis within a week, store them in the refrigerator. They can last for up to 3-5 days. For longer storage, freeze them! Roti can be frozen for up to a month.
5. Reheating Tips: When you’re ready to enjoy your leftover roti, reheating it properly is key. For refrigerated roti, you can quickly warm it on a skillet. For frozen rotis, let them thaw at room temperature first before reheating. Warm them in a pan or microwave, but be careful not to overheat, or they may become tough.
By following these simple storage tips, you can enjoy your homemade roti without waste and keep that delicious flavor intact for your next meal. It’s all about convenience and making your life just a little easier while enjoying homemade goodness!
Conclusion and Final Thoughts
In conclusion, making homemade roti is a simple and rewarding process that brings the comforting flavors of traditional cooking right into your kitchen. With just a few basic ingredients and easy-to-follow techniques, you can whip up delicious rotis in no time. Here are the key takeaways:
- Quick Preparation: The entire process, from mixing the dough to cooking the rotis, can be completed in under 30 minutes.
- Minimal Ingredients: Roti requires just flour, water, and a pinch of salt, making it an economical choice for any meal.
- Versatile Uses: Rotis can be paired with a variety of dishes, from curries to salads, adding a wholesome element to your meals.
- Health Benefits: Homemade rotis can be made healthier by choosing whole wheat flour or incorporating other flours such as besan or millet.
As you gain more experience, feel free to experiment with different flavors and techniques, such as adding herbs or spices to the dough for a twist. Remember, the key to perfect roti is practice, so don't be discouraged if your first few attempts aren't perfect. Enjoy the process and embrace the art of making roti at home—it’s a skill that can enhance your culinary repertoire.
We hope this tutorial inspires you to try your hand at making roti, and we look forward to hearing about your delicious creations!
 admin
admin