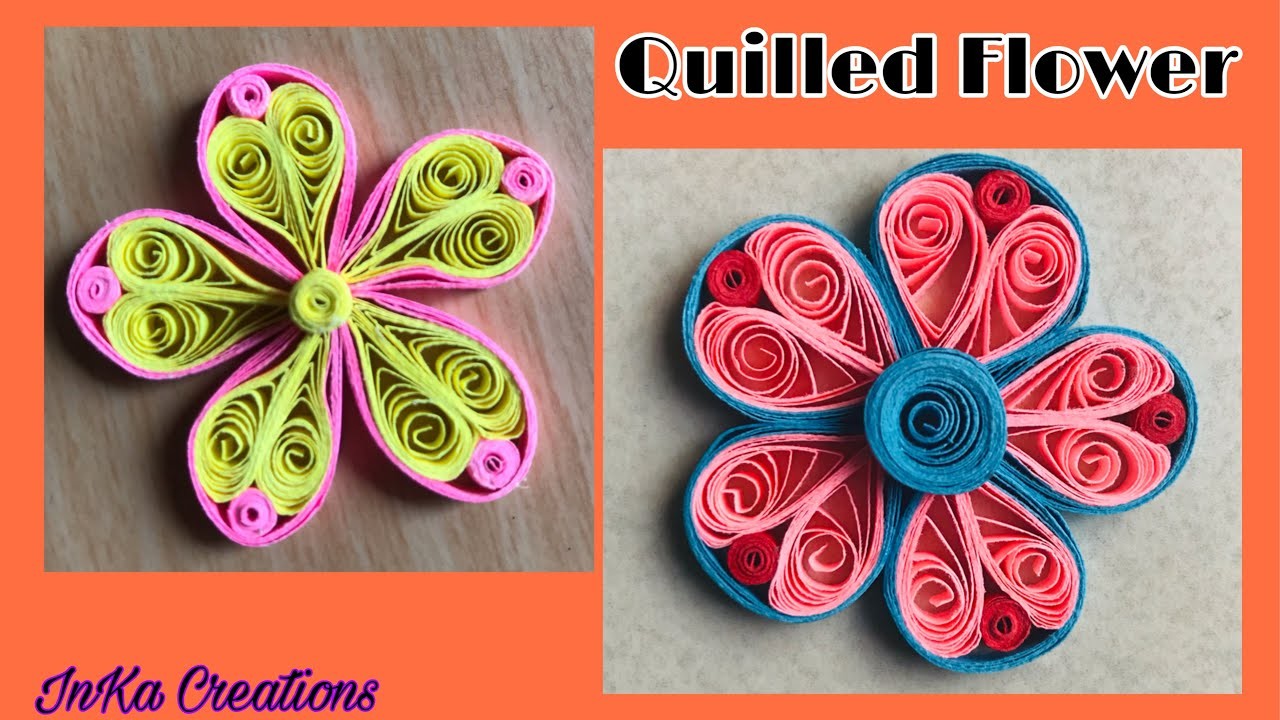
Quilling paper flowers are a delightful way to express your creativity, combining the art of rolling and shaping paper into beautiful floral designs. Whether you’re a seasoned crafter or a complete beginner, quilling can be both relaxing and rewarding. This art form allows you to create stunning decorations, cards, or personalized gifts that are sure to impress. In this guide, we’ll walk you through each step of making your very own quilling paper flowers!
Materials Needed for Quilling
Before diving into the world of quilling, it’s essential to gather all the necessary materials. Luckily, quilling doesn’t require many tools, making it an accessible craft for everyone! Here’s a handy list of what you’ll need:
- Quilling Paper Strips: These come in various widths and colors. A standard size is 1/8 inch (3mm) wide.
- Quilling Tool: This tool helps you roll the paper strips with ease. You can find both slotted and non-slotted versions; either works well.
- Craft Glue: A good-quality craft glue will help secure your flower shapes. Look for one that dries clear.
- Scissors: You’ll need scissors to cut your paper strips to the desired length, especially if you want different sizes for your flowers.
- Tweezers: These are handy for precise placement of your quilled elements.
- Ruler: Use a ruler to measure and cut your paper strips accurately.
- Pencil: A pencil can help you mark measurements on your paper strips.
- Cardstock or Base Material: This will act as the base for your flowers or any card you plan to decorate.
Having all these materials at your fingertips will set the stage for a smooth crafting experience. Don’t worry if you don’t have everything on hand; you can always improvise with what you have at home! Now that you’re equipped with the right tools, you’re ready to dive into the exciting process of creating your quilling paper flowers! Stay tuned for the next sections where we’ll outline the step-by-step process.
Also Read This: Learn How to Do a French Braid with Dailymotion Step-by-Step Videos
3. Basic Techniques for Quilling
Quilling, also known as paper filigree, is a delightful craft that involves rolling, shaping, and gluing strips of paper to create beautiful designs. Before diving into making those stunning quilling paper flowers, let’s explore some basic techniques that will serve as the foundation for your projects.
Here are some key techniques you should get familiar with:
- Rolling: This is the first step in quilling. You take a strip of paper and roll it tightly around a quilling tool or a toothpick. The tightness will affect the shape you create, so practice rolling both tightly and loosely.
- Pinching: Once you have a rolled strip, you can pinch the edges to create different shapes. Pinching one side gives you a teardrop shape, while pinching both sides can create petals or leaves.
- Shaping: Beyond the basic roll, you can shape your strips into various forms by manipulating them with your fingers or tools. Try making tight coils, loose coils, and different shapes like hearts or stars!
- Gluing: A good quiller knows that glue is essential. Use a small amount of glue to secure your shapes in place. Too much glue can make a mess, so be conservative!
As you practice these techniques, you’ll find that your confidence grows, and you’ll be able to create more intricate designs. Remember, it’s all about having fun and experimenting with what works best for you!
Also Read This: Master the Art of Applying Braces on Teeth with Dailymotion Videos
4. Step 1: Preparing the Paper Strips
Now that you've got the basic techniques down, it's time to get started on your quilling paper flowers! The first step is to prepare the paper strips. Here’s how you can go about it:
- Choose Your Paper: You can use pre-cut quilling strips, or you can make your own. If you're feeling creative, grab some colorful scrapbook paper or even old magazines. The options are endless!
- Cut the Strips: If you’re making your own strips, cut them into even widths. A common width is 1/8 inch or 3mm, but you can experiment with different sizes for varied effects. Keep a ruler handy for precision!
- Design Your Palette: Think about the colors you want to use. A combination of contrasting colors can really make your flowers pop. You might choose a vibrant color for the petals and a softer shade for the leaves.
- Store the Strips: Keep your paper strips organized. Use small containers or envelopes to separate colors and sizes. This makes it easy to find what you need while you’re crafting!
Once your strips are ready, you’re all set to start rolling and shaping them into beautiful flowers. Remember, the preparation stage is crucial—it sets the tone for the rest of your quilling project. So take your time and enjoy the process!
Also Read This: How to View Adult Content on Dailymotion
5. Step 2: Creating Basic Shapes
Welcome back to our quilling adventure! Now that we have our materials ready, it’s time to dive into the heart of quilling: creating beautiful shapes. These basic shapes will form the foundation of your stunning paper flowers.
First things first, let’s get familiar with the basic shapes you’ll be using:
- Circles: These are made by curling the paper tightly and letting it expand slightly. They can be used as flower centers or petals.
- Teardrops: A circle that’s pinch shaped at one end. These are fantastic for forming petal shapes.
- Marquise: Similar to teardrops but with pointed ends, ideal for adding texture to your flower.
- S-Shapes: These are perfect for leafy accents and can add a whimsical touch to your designs.
To start, take your quilling tool and pick a strip of colored paper (about 1/8 inch wide). Begin curling it tightly around the slotted end of the tool. As you curl, keep a gentle tension to create a smooth spiral.
Once you have your desired curl, carefully slide it off the tool. Let it loosen just a bit—this is crucial for creating those lovely round circles we talked about. If you find it too tight, don't worry! Just gently pull the edges apart until you achieve your preferred size.
For teardrops, start the same way as a circle, but this time, pinch one end after you’ve made the curl. Give it a little squeeze until you get that teardrop shape. Play around with the size and shape of your teardrops; each one can look unique!
Practice makes perfect! Spend some time creating a few of each shape. Once you’re comfortable, you’ll be ready to move on to the next step—assembling your flower design! Remember, the more shapes you create, the more options you’ll have when it comes time to put everything together.
Also Read This: How to Download TS Files from Dailymotion
6. Step 3: Assembling the Flower Design
Now for the exciting part—assembling your paper flower design! This is where your creativity can truly shine. With your collection of basic shapes ready, let’s bring them together into a beautiful flower.
Begin by selecting a central piece for your flower. This could be a simple circle that you made earlier. Apply a small amount of glue to the bottom and place it on your workspace. This will act as the anchor for the rest of your petals.
Next, it’s time to add petals. Take your teardrop shapes and arrange them around the center circle. Aim for a balanced look by spacing them evenly. You can use anywhere from 5 to 8 petals, depending on how full you want your flower to look.
Once you’ve positioned your petals, carefully glue them in place. Hold each petal for a moment until the glue sets. If you want to create a more dimensional look, try layering some petals on top of others—this adds depth and interest to your flower.
Don’t forget to incorporate some marquise shapes for added texture! These can be positioned between the petals or even around the edges for a more natural look. If you want to get adventurous, try adding some S-shapes as leaves beneath your flower.
As you assemble, it’s important to step back and assess your design. If something feels off, don’t hesitate to rearrange the shapes until you find the right balance. Quilling is all about experimenting and finding what speaks to you!
Once you’re happy with your design, let everything dry completely before moving on. After it’s all set, you can even add a touch of glitter or other embellishments to make your quilled flower pop!
And there you have it! You’ve successfully created a stunning quilled flower. This step may take some practice, but don’t rush it—enjoy the process and have fun! Next, we’ll explore how to display your beautiful creations.
Also Read This: Exploring Rumble’s Stance on Adult Content
7. Step 4: Adding Details and Finishing Touches
Now that you have your beautiful quilled flowers all set up, it’s time to add those lovely details that will make your creations truly stand out! This step is where your flowers will blossom into something magical. Here’s what you can do:
- Centerpieces: Consider adding small, tightly rolled circles in the center of your flowers. This not only gives depth but also adds a pop of color. For instance, if you’ve made a yellow flower, adding an orange or red circle can create a stunning contrast!
- Leaves and Stems: Don’t forget about the greenery! Use green strips of paper to create leaves by rolling them into different shapes. You can make them pointy or rounded, depending on the type of flower. For stems, roll a long strip and secure it with glue.
- Textures: Experiment with different techniques to add texture to your flowers. You can lightly bend the petals or use a quilling tool to create curls that give a more realistic look.
- Layering: Consider layering your flower petals. By stacking them, you create a richer 3D effect. Try using different shades of the same color to enhance this effect. For example, a dark pink layer under a lighter pink petal can add depth.
Once you’re satisfied with the details, take a moment to step back and appreciate your work. It’s amazing how a few small additions can elevate your flowers from simple to stunning!
Finally, let everything dry completely before you start handling your flowers. You wouldn’t want to ruin your hard work, right? Once dry, you can gently arrange them as you like, whether it’s for a bouquet, a card, or a decorative piece!
Also Read This: How to Use White Eye Pencil: Tips for Bright and Beautiful Eyes
8. Common Mistakes to Avoid
Like any craft, quilling has its quirks, and it’s easy to make a few mistakes along the way. But don’t worry! Knowing what to avoid can help you create beautiful quilled flowers without frustration. Here are some common pitfalls:
- Skipping the Glue: It can be tempting to skip the glue step, thinking the paper will hold itself together. However, without a good adhesive, your flowers may fall apart. Use a quality craft glue and apply it sparingly to avoid mess!
- Over-tightening or Under-tightening: When rolling your strips, find the right balance. If you roll them too tightly, they can lose shape. Too loose, and they may not hold up. Aim for a snug fit that holds its shape without being overly tight.
- Ineven Strips: Cutting strips of paper to inconsistent widths can lead to lopsided flowers. Take your time with measurements. A paper cutter can be a great investment for uniform strips!
- Neglecting Practice: Like any skill, quilling takes practice. Don’t get discouraged by initial results. Spend some time experimenting with different shapes and designs before committing to a final piece.
By being aware of these common mistakes, you can avoid unnecessary frustration and enjoy the beautiful process of crafting quilling paper flowers. Remember, every quiller has a few mishaps—the key is to learn and have fun! So grab your strips and let your creativity flow!
Also Read This: How to Shape Your Nails Perfectly with Dailymotion Tutorials
9. Tips for Perfecting Your Quilling Skills
Quilling can be a delightful and fulfilling craft, but like any skill, it requires practice and a few handy tips to really shine. Here are some tried-and-true strategies to elevate your quilling game:
- Choose Quality Materials: Invest in good quilling paper and tools. High-quality paper is easier to manipulate and will hold your shapes better. Look for paper that is at least 120 gsm for the best results.
- Maintain Consistency: Strive for uniformity in your strips. Whether you're cutting your own or buying pre-cut strips, keeping the width consistent will help your flowers look polished.
- Experiment with Shapes: Don’t just stick to the standard shapes! Get creative with tight coils, loose coils, teardrops, and more. Each shape adds a unique touch to your design.
- Practice Your Tension: The tension of your coils greatly affects the final look. Too tight can lead to a rigid flower, while too loose can cause it to fall apart. Find that perfect balance!
- Use a Quilling Tool: A quilling tool can make spiraling and shaping your paper a breeze. It's especially helpful for creating tight coils without straining your fingers.
- Work in Good Light: Poor lighting can lead to mistakes and frustration. Make sure you have a well-lit workspace to see all the details of your work clearly.
- Join a Community: Consider joining online forums or local crafting groups. Sharing your work and learning from others can offer valuable insights and inspiration.
- Take Breaks: If you find yourself getting frustrated, step away for a bit. Sometimes, a little distance helps you come back with fresh eyes and renewed energy.
Remember, the more you practice, the better you'll get. Don't hesitate to try new techniques or styles—quilling is all about creativity and expression!
10. Conclusion and Next Steps
Congratulations on making it through our step-by-step guide to quilling paper flowers! By now, you should feel more equipped to dive into this beautiful craft and create stunning floral designs. But remember, this is just the beginning of your quilling journey!
Next, consider these exciting steps:
- Take a Class: Look for local workshops or online classes. Hands-on guidance from an experienced instructor can greatly enhance your skills and expose you to new techniques.
- Create a Project: Challenge yourself with a specific project, such as a quilled greeting card or a framed piece of art. Having a goal can motivate you to practice and refine your skills.
- Explore Advanced Techniques: Once you're comfortable with the basics, experiment with advanced quilling methods, like combining paper with other materials or creating 3D designs.
- Start a Blog or Social Media Page: Share your quilling journey online! Documenting your progress can keep you motivated and inspire others to join the craft.
- Stay Inspired: Follow quilling artists on platforms like Instagram or Pinterest. Exposure to different styles and ideas can spark your creativity and help you find your own unique voice.
Quilling is a wonderful way to express yourself, and with these tips and next steps, you’re well on your way to becoming a skilled quiller. So grab your strips, unleash your creativity, and watch as your quilled flowers bloom beautifully!
 admin
admin