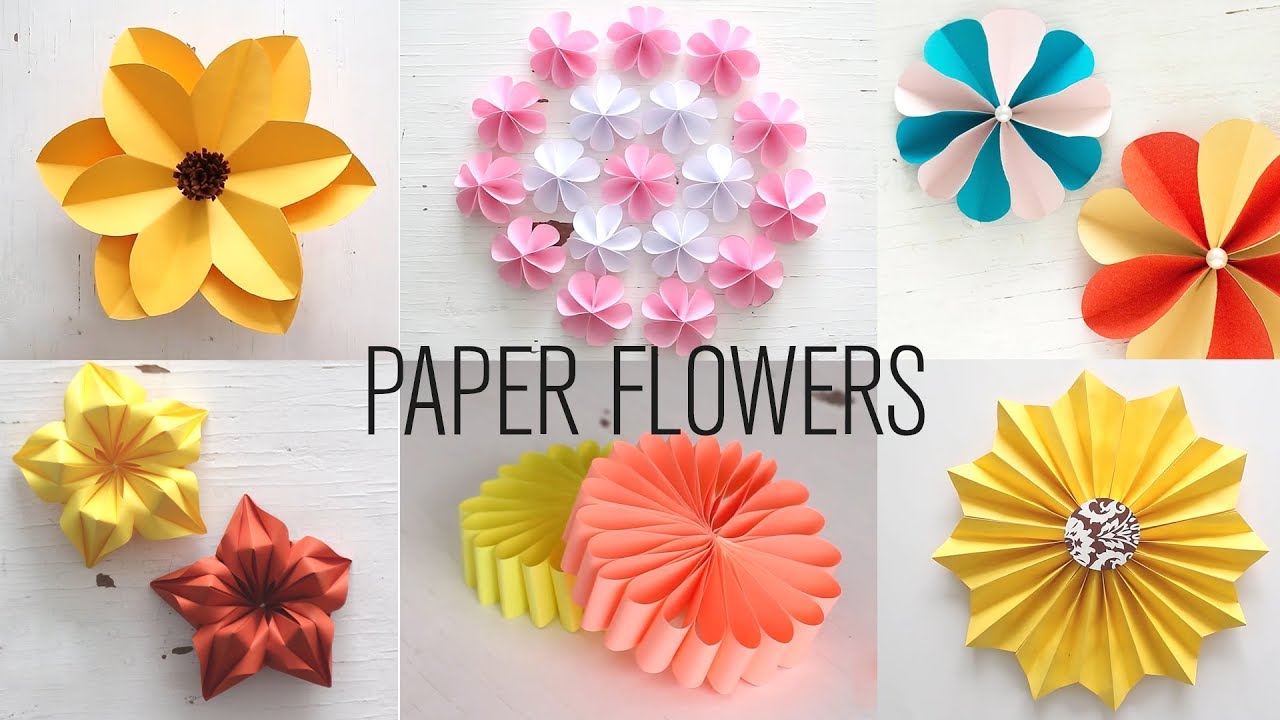
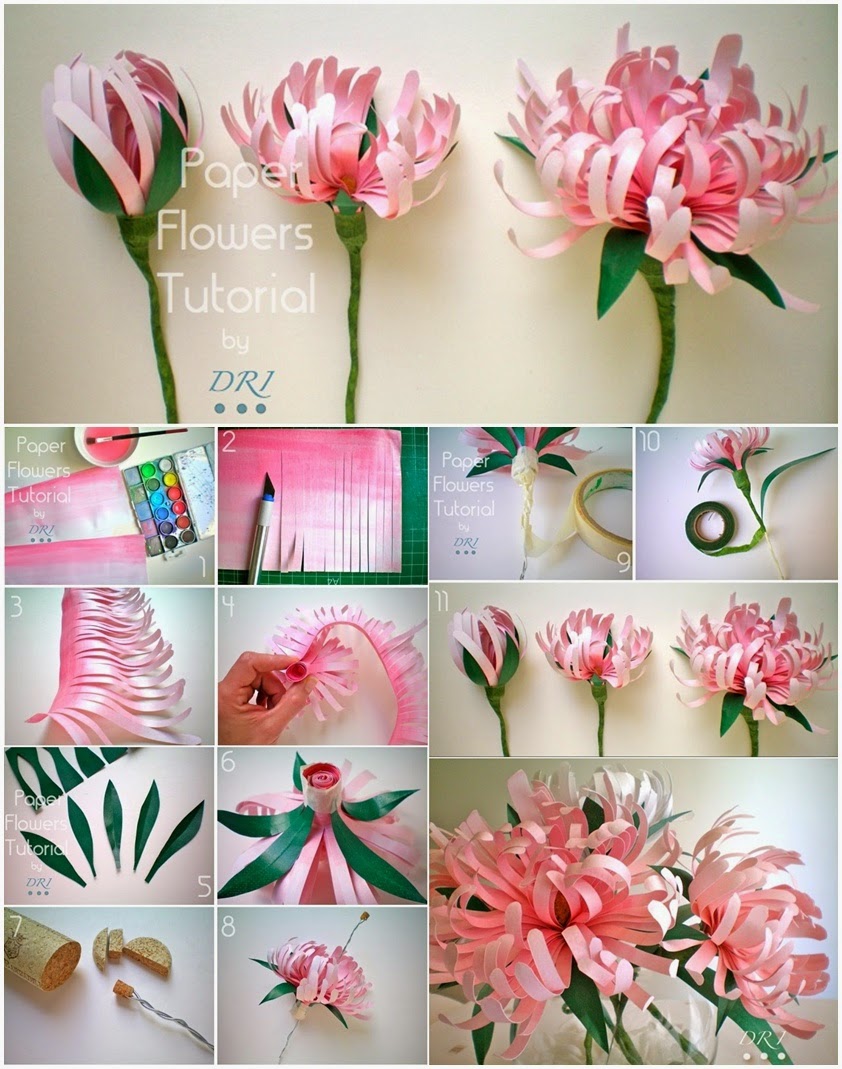
Making paper flowers at home is a delightful and creative way to add a touch of beauty to your space without spending a fortune. Whether it's for a special occasion, a gift, or just to brighten up your room, crafting paper flowers allows you to express your artistic side. Plus, it's a perfect activity for all age groups—children can enjoy the process as much as adults. In this guide, we’ll take you step-by-step through the materials needed and techniques to create stunning paper blooms that anyone would be proud to display.
Materials Needed

Before diving into the world of paper flower crafting, it’s essential to gather all the materials you’ll need. The great thing about making paper flowers is that the supplies are often things you might already have at home, or they can be easily sourced. Here’s a list of essential items:
- Paper: You can use various types of paper, including colored craft paper, tissue paper, or even old book pages for a vintage look.
- Scissors: A good pair of scissors is crucial for cutting the paper into flower shapes.
- Glue or Tape: You'll need either glue (like a glue stick or liquid glue) or double-sided tape to hold your flowers together. Choose your preference for easy assembly.
- Floral Wire or Pipe Cleaners: These will serve as the stems for your flowers. Floral wire can be wrapped with green tape to mimic real stems.
- Flower Templates: Having flower templates (either printed or drawn) can make shaping your flowers much easier. You can find these free online or create your own!
- Paint or Markers: If you want to add extra details like shading or designs, a set of paints or markers can come in handy.
Once you have these materials, you're all set to unleash your creativity and start making beautiful paper flowers. Now, let's dive into the fun part—crafting!
Basic Techniques for Paper Flower Crafting

Creating beautiful paper flowers is an art that can be mastered with just a few basic techniques. Here’s a rundown of essential methods every paper flower enthusiast should know:
- Cutting: The first step in any paper crafting project is cutting. Use sharp scissors or a craft knife for clean edges. Consider using templates for different flower styles—this helps ensure uniformity.
- Shaping: Once your petals are cut out, shaping them is crucial for realism. Use your fingers or tools like a bone folder to curl the edges of petals. This gives them a natural look, as if they’re blooming.
- Layering: Most flowers consist of several layers of petals. Stack your petal layers, varying sizes to create depth. Use glue to secure them, ensuring the flower appears fuller and more vibrant.
- Coloring: Adding color to your paper can significantly enhance the beauty of your flowers. You can use markers, ink, or paint to add depth. Consider using a sponge for soft transitions or stippling techniques.
- Glueing and Securing: Ensure you use the right type of glue. Hot glue works nicely for immediate bonding, but craft glue is excellent for slower drying projects. Remember to press firmly and hold the pieces together until secure.
- Finishing Touches: Once your petals and leaves are assembled, don’t forget the finishing touches! You might want to add floral tape to the stems or some embellishments to enhance the overall look.
By mastering these basic techniques, you’ll be on your way to creating stunning paper flowers that can brighten up any space!
Step-by-Step Tutorials for Different Flower Types
Now that you’ve got the basics down, let’s dive into some step-by-step tutorials for making different types of paper flowers. These projects vary in complexity, so pick one that suits your skill level!
1. Simple Paper Rose
- Gather your materials: You’ll need red paper, scissors, a pencil, glue, and green paper for leaves.
- Cut out five petal shapes from the red paper. Each petal can be a teardrop shape.
- Shape the petals by curling the edges with a pen or your fingers.
- Layer the petals by gluing them together, starting with the largest at the bottom.
- To create the center, take a small strip of red paper, roll it tightly, and glue it to the center of your petals.
- Cut out a few leaf shapes from the green paper and glue them to your flower’s base.
2. Delightful Daisies
- Start with white paper and cut out circular shapes for the petals. Aim for 10-12 petals per flower.
- Make a smaller circle for the center of the daisy and color it yellow.
- Glue the petals around the center in a circular fashion.
- For added flair, use scissors to add slight fringes to the edges of the petals.
- Attach a green stem using green paper or floral wire for support.
3. Vibrant Sunflowers
- For sunflowers, start with yellow paper for the petals. Cut out elongated petal shapes (about 1-2 inches long).
- Cut a dark brown circle for the center.
- Glue the yellow petals around the brown circle, overlapping slightly until the center is covered.
- Finish with a green circle or leaves at the base for a natural look.
Remember, practice makes perfect! Don’t be afraid to experiment with colors, shapes, and sizes. Happy crafting!
Tips for Enhancing Your Paper Flowers
Creating beautiful paper flowers can be a delightful craft project, but there are several ways to enhance your floral creations to make them stand out even more. Here are some tips to elevate your paper flowers:
- Use Varied Textures: Experiment with different types of paper. Textured cardstock, tissue paper, and even wrapping paper can add depth and interest to your flowers.
- Incorporate Colors: Don't stick to one shade! Use ombre techniques or a mix of complementary colors to make your flowers visually appealing. Consider creating a vibrant bouquet with mixed hues.
- Add Details: Enhance your flowers with additional elements like beads for the center, glitter for sparkle, or even paint for added depth. A little detail goes a long way!
- Experiment with Shapes: Instead of traditional flower shapes, try creating unique designs. Think about different flowers like daisies or lilies, and tweak your templates to make them your own.
- Layer Your Petals: Don’t hesitate to layer different sizes and styles of petals to give your flower a fuller, more realistic appearance. Varied petal arrangements can create dynamic shapes.
- Use Floral Wire and Tape: For a more robust structure, use floral wire for the stems and floral tape to bind them. It not only adds durability but also gives your flowers a professional look.
Remember, crafting paper flowers is all about creativity. Don't be afraid to mix and match your techniques to discover what works best for you!
Conclusion and Final Thoughts
Making paper flowers at home can be an incredibly rewarding experience. Not only is it an easy and cost-effective craft, but the possibilities are endless! After trying out various techniques, you’ll find your personal style and flair for creating stunning arrangements. In summary, here are a few final thoughts to keep in mind:
- Practice Makes Perfect: Don’t be discouraged if your first few attempts aren't as perfect as you'd like. Keep practicing, and you'll soon see improvement.
- Get Inspired: Look for inspiration in nature, online tutorials, or even from other crafters. Pinterest and Instagram are fantastic platforms for discovering new ideas.
- Have Fun: The most crucial aspect of crafting is to enjoy the process. Whether you're making flowers for home decor, gifts, or just for fun, embrace the joy of creating.
- Share Your Creations: Don’t forget to showcase your beautiful paper flowers on social media or share them with friends and family. Crafting is even more enjoyable when shared!
So gather your materials, invite some friends, and let your creativity bloom. Happy crafting!
 admin
admin


