Making lip gloss at home is not only a fun and creative activity, but it also allows you to customize your products to perfectly suit your preferences. With just a few simple ingredients, you can create glossy, nourishing lip treatments that add a pop of color and keep your lips hydrated. Whether you're looking to save money, avoid synthetic ingredients, or simply enjoy the satisfaction of crafting your own beauty products, homemade lip gloss is an excellent choice. Let’s dive into the exciting world of DIY lip gloss!
Benefits of Making Lip Gloss at Home
Making lip gloss at home comes with a plethora of advantages that store-bought versions simply can’t compete with. Here are some key benefits:
- Customization: You have full control over the ingredients, colors, and flavors. Want a hint of mint? Add some peppermint oil! Prefer a natural color? Use beetroot powder!
- Natural Ingredients: You can choose all-natural, organic components, avoiding harmful chemicals and additives that are often found in commercial products.
- Cost-Effective: Creating your own lip gloss can save you money in the long run. The initial investment in ingredients can make several batches, each costing a fraction of what you'd pay for high-end glosses.
- Eco-Friendly: By making your own lip gloss, you reduce waste from packaging and can reuse containers, making it a more sustainable choice.
- Fun and Creative: The process of mixing and matching ingredients allows you to express your creativity! Experiment with different flavors, scents, and colors.
Unleashing your inner DIY enthusiast is rewarding, empowering, and can even be a great activity to do with friends or family. Imagine hosting a fun lip gloss-making party—everyone can leave with their own unique creations!
In addition, homemade lip gloss can be an excellent gift option. Everyone appreciates a personal touch, and a beautifully packaged lip gloss made just for them can make a thoughtful present for birthdays, holidays, or just because.
Lastly, knowing exactly what goes into your lip gloss allows you to create formulations that suit your skin type. For instance, if your lips are particularly dry, you can focus on ingredients that hydrate and soothe, like coconut oil and shea butter. This level of personalization isn't possible with mass-produced products.
In conclusion, the benefits of making lip gloss at home go beyond just the final product. It's about the experience, creativity, and the satisfaction of making something unique that you can truly love. So gather your ingredients, and let's get started on your lip gloss journey!
Also Read This: French Kissing 101: A Step-by-Step Guide for Beginners
3. Essential Ingredients for DIY Lip Gloss
Creating your own lip gloss at home is not only a fun and satisfying craft, but it also allows you to customize the ingredients to suit your preferences and needs. Here’s a rundown of the essential ingredients you’ll need to whip up your very own lip gloss:
- Base: The base is what creates the glossy texture. Common options include:
- Vaseline (petroleum jelly) - A popular choice for a smooth consistency.
- Coconut oil - Moisturizing and adds a yummy scent!
- Shea butter - Nourishing and great for hydration.
- Beeswax - Helps to thicken the gloss and provides a nice sheen.
- Coloring Agent: To add a pop of color to your gloss, you can use natural colorants:
- Natural pigments from fruit or vegetables - Like beet juice for a red tint.
- Cosmetic mica powder - Available in various colors and gives a sparkling effect!
- Flavors and Scents: Who doesn’t love a flavored lip gloss? You can use:
- Essential oils - Like peppermint or vanilla for a delightful taste.
- Flavor oils - Specifically made for cosmetics, these are great for adding flavor.
- Sweetener (Optional): To sweeten the deal (literally!), consider:
- Stevia - A natural sugar substitute.
- Honey - A little bit goes a long way for sweetness and added moisture!
With these ingredients on hand, you’re well on your way to crafting a personalized lip gloss that not only looks good but feels good too!
Also Read This: How to Install Dailymotion on LG or Samsung Smart TVs
4. Step-by-Step Guide to Making Lip Gloss
Ready to dive into the world of DIY lip gloss making? Let’s break it down step-by-step to make sure your gloss turns out perfectly!
- Gather Your Ingredients: Before you start, make sure you have all the ingredients listed above. It’s best to work with clean, organized space to avoid any mess.
- Choose Your Base: Depending on your preference for texture, select your base (Vaseline, coconut oil, etc.) and measure out about 2 tablespoons.
- Melt the Base: Use a double boiler or microwave to gently melt the base. If using a microwave, heat in 15-second intervals to avoid overheating.
- Add Color: Once the base is melted, it’s time to add color! Start with a small amount of your chosen coloring agent and mix thoroughly. You can always add more for a bolder hue.
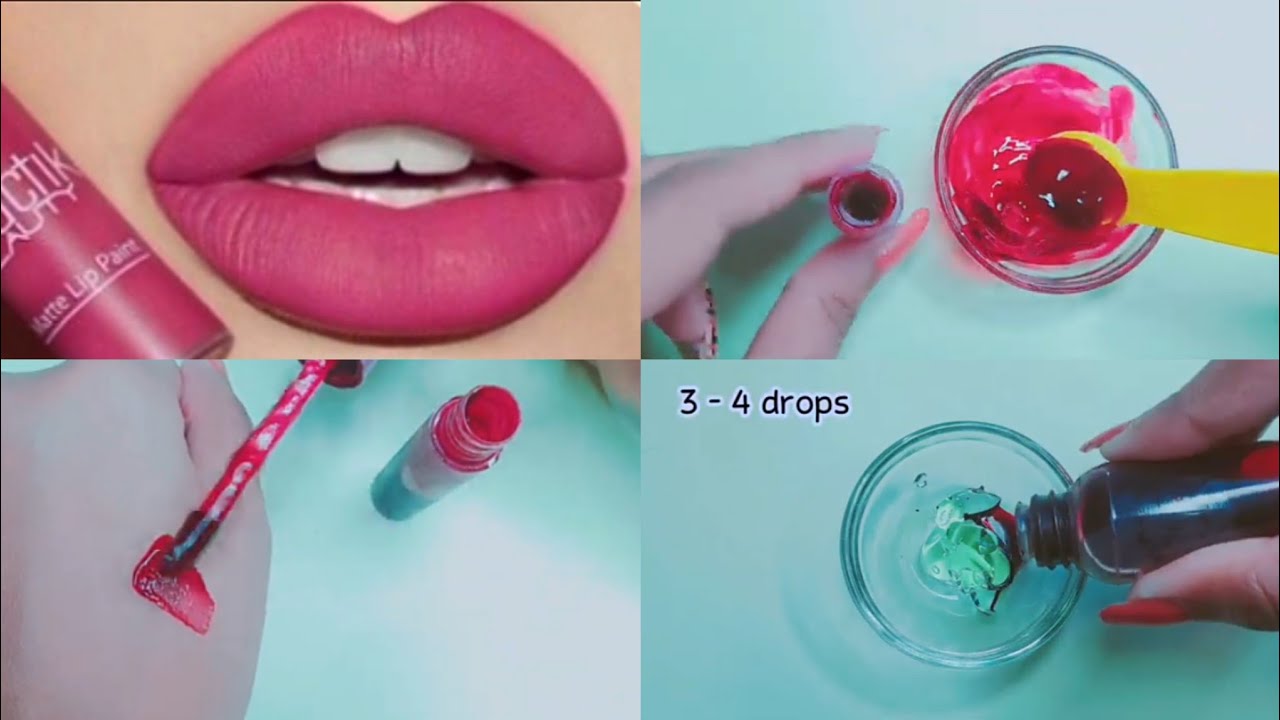
- Add Flavor: Incorporate your desired essential or flavor oil. About 5-10 drops should be perfect, but feel free to adjust to your taste!
- Sweeten (Optional): If you want a sweeter gloss, add a small amount of your sweetener now. Mix well to ensure everything is evenly distributed.
- Pour into Containers: Carefully pour your mixture into lip gloss containers or small jars. Use a small funnel if necessary to avoid spills!
- Let It Set: Allow the gloss to cool and set completely. This usually takes a couple of hours at room temperature, but you can speed it up by placing it in the refrigerator.
- Enjoy!: Once set, your homemade lip gloss is ready to use! Apply it to your lips and flaunt your beautiful, glossy creation!
And there you have it—your very own lip gloss made with love! Now you can experiment with different flavors, colors, and textures until you find your perfect mix. Happy crafting!
Also Read This: How to Download from Dailymotion on Android
5. Tips for Customizing Your Lip Gloss
Making your own lip gloss is a fun and creative endeavor, and one of the best parts is that you can customize it to match your personal style and preferences! Here are some tips to help you create the perfect personalized lip gloss:
- Choose Your Base: The base of your lip gloss can significantly affect its texture and feel. Experiment with different ratios of shea butter, coconut oil, and beeswax to find the consistency you love.
- Experiment with Scents: A little essential oil goes a long way in adding a delightful fragrance to your lip gloss. Popular choices include peppermint, vanilla, and citrus scents. Just remember to use them sparingly to avoid overwhelming your senses!
- Add a Pop of Color: You can use natural colorants like beetroot powder, mica powder, or even a bit of lipstick for a bold look. Start with a small amount, blend thoroughly, and gradually add more until you reach your desired shade.
- Enhance with Flavor: Want a delicious taste? Consider adding food-grade flavoring oils or extracts like strawberry, mint, or coconut. Always choose high-quality, safe-to-consume flavorings that won't irritate your lips.
- Make It Sparkly: If you love a little shimmer, mix in some cosmetic-grade glitter or shimmer powder. Be careful not to go overboard—just a pinch can make a big difference!
- Test on Your Skin: Before finalizing your formulation, always perform a patch test to ensure you're not allergic to any ingredients. It's better to be safe, especially when applying something to your lips.
- Label Your Creations: If you end up making several different lip glosses, consider labeling them with names or ingredients. It adds a personal touch and helps you keep track of what you’ve made!
By incorporating these creative elements, you can create lip gloss that is not only functional but truly reflects your personality. Plus, it's an excellent way to make gifts that your friends and family will love—after all, who wouldn’t want a customized lip gloss?
Also Read This: How to Use an ATM Machine Step-by-Step on Dailymotion: A Complete Tutorial
6. Where to Find Supplies for Your DIY Lip Gloss
Now that you’re excited to dive into the world of DIY lip gloss, you might be wondering where to gather all your supplies. Luckily, sourcing materials for your lip gloss project can be quite easy! Here are some options:
- Local Craft Stores: Craft stores like Michael's or Hobby Lobby often have a great selection of ingredients and supplies for DIY beauty projects. You can find bases like beeswax and shea butter, essential oils, and even containers.
- Health Food Stores: Take a trip to your local health food store for organic oils and butters. You can find high-quality carrier oils and essential oils that are perfect for your lip gloss.
- Online Retailers: Websites like Amazon and Etsy are treasure troves for DIY supplies. You can find everything from pigment powders to empty lip gloss tubes, and often at competitive prices.
- Beauty Supply Shops: Some beauty supply stores also cater to DIY enthusiasts. They may offer specialized ingredients like cosmetic-grade colorants and preservatives that can enhance your lip gloss formulation.
- Wholesale Suppliers: If you’re planning to make lip gloss in larger batches or even start a small business, consider looking into wholesale suppliers. They often have better prices on bulk ingredients.
When shopping for supplies, always check the ingredient list and ensure you’re using high-quality materials, especially for anything that will go on your skin. With the right ingredients in hand, you'll be ready to whip up your very own batch of personalized lip gloss in no time!
Also Read This: How to Watch a Specific Video on Dailymotion App: Find Your Favorite Videos Easily
7. How to Store Your Homemade Lip Gloss
So, you’ve made your fabulous homemade lip gloss, and now you’re probably wondering how to store it properly to keep it fresh and effective. Good storage is key to ensuring your lip gloss lasts as long as possible and maintains its lovely texture and scent. Here are some tips on how to store your creation:
- Choose the Right Container: Use a clean, airtight container. Small glass jars or lip gloss tubes work wonderfully. Glass containers are often preferred as they don’t react with the ingredients and keep the gloss safe from air and contaminants.
- Keep It Cool: Store your lip gloss in a cool, dry place, away from direct sunlight. Heat can cause the oils to break down, changing the texture and scent of your gloss.
- Avoid Humidity: Bathrooms can be humid, which is not ideal for storing lip products. Try to keep your lip gloss in a bedroom or a cooler area in your home.
- Label Your Gloss: If you've made multiple batches or have different flavors, be sure to label them. Use masking tape and a marker to write the date made and any flavors or ingredients used. This will help you keep track of when to use or toss your gloss.
DIY lip gloss can last anywhere from 6 months to over a year, depending on the ingredients you used. If you're using fresh ingredients like fruit extracts, opt for a shorter shelf life and keep an eye (or nose!) on any changes in smell or texture.
Finally, if you’re unsure whether your homemade gloss is still good, give it a quick sniff and check the consistency. If it smells odd or has changed texture, it’s best to toss it and make a fresh batch!
8. Conclusion and Final Thoughts on Homemade Lip Gloss
Making your own lip gloss at home is not just a fun project; it’s an opportunity to express your creativity, make personalized gifts, and control what goes on your skin. Throughout this blog, we’ve covered everything from the benefits of homemade lip gloss to step-by-step instructions for making various kinds of gloss. Now, let's wrap things up with a few final thoughts.
Empowering your Beauty Routine: Crafting your own lip gloss allows you to choose the colors and flavors that suit your personality. Whether you favor a luscious berry, a vibrant coral, or a classic clear gloss, the world of DIY lip care is all yours to explore!
Safe Ingredients: By making your lip gloss at home, you know exactly what goes into your product. No harmful chemicals or questionable additives—just nourishing ingredients that will keep your lips soft and hydrated.
Endless Possibilities: Don't hesitate to experiment! You can mix different oils, add essential oils for benefits and scent, or even mix in a bit of natural color from beetroot powder or cocoa powder. The possibilities are endless, and each batch can be a reflection of your personal style!
In summary, whether you're making lip gloss to pamper yourself, create custom gifts for friends, or even start a little side hustle, the process is simple, rewarding, and entirely customizable. So gather your supplies, put on your favorite playlist, and embrace the creativity of making your own lip gloss at home!
 admin
admin


