Have you ever thought about making your own glue at home? Well, here’s a fun and simple solution—milk-based glue! This eco-friendly adhesive is not only easy to whip up, but it also works wonders for various crafting projects. Whether you’re a parent looking for a safe option for your kids or a DIY enthusiast searching for natural alternatives, milk glue is a fantastic option. Let’s dive into what milk glue is and why it’s gaining popularity!
Benefits of Using Milk Glue
Milk-based glue is not just a nostalgic throwback to childhood crafting; it comes with several compelling benefits that make it an excellent choice for both casual and serious crafters. Here are some of the standout advantages:
- Eco-Friendly: Since it’s made from natural ingredients, milk glue doesn’t contain harmful chemicals that can be found in many commercial adhesives. This makes it a safer choice for both the environment and your home.
- Non-Toxic: If you have little ones around or are working on projects with kids, milk glue is a safe option. You won’t have to worry about ingestion or skin irritation.
- Cost-Effective: Making milk glue is incredibly affordable! With just a few household ingredients—milk, vinegar, and baking soda—you can create an ample supply of glue without breaking the bank.
- Versatile: Milk glue can be used for a variety of applications, including paper crafts, school projects, and even some light woodworking. It’s perfect for collages, scrapbooking, and more!
- Easy to Make: The process is straightforward, requiring minimal equipment. You can create this glue in just minutes, making it a perfect last-minute solution.
Beyond these benefits, milk glue also has a unique property: it dries clear, leaving your projects looking neat and polished. Plus, it can be reactivated with a little water if you need to adjust or reposition your pieces while crafting. Whether you’re creating art projects or repairing books, milk glue is a handy addition to your crafting toolkit.
So, why not give it a try? Making your own milk glue can be a fun and rewarding experience. Plus, you’ll feel great knowing you’re using a natural, safe adhesive that proudly supports your creative endeavors!
Also Read This: Creative Invitation Cards for DIY at Home on Dailymotion
3. Ingredients Needed for Making Milk Glue
Making milk-based glue is not only easy, but it also requires just a few simple ingredients that you likely already have at home. Here’s what you’ll need:
- Milk: 1 cup of whole or skim milk will work fine. Whole milk might give a slightly creamier glue, but skim milk will do the job just as well.
- White Vinegar: 4 teaspoons. This is crucial as it helps to curdle the milk, creating the necessary base for your glue.
- Baking Soda: 1 teaspoon. This helps to neutralize the vinegar and gives the glue a better consistency.
- Mixing Bowl: A medium-sized bowl to combine your ingredients.
- Spoon or Whisk: For mixing everything together.
- Strainer or Cheesecloth: This helps separate the curds (the glue) from the whey (the liquid). If you don't have a strainer, a fine mesh sieve will work as well.
And there you have it! These ingredients are not only easy to find but also safe and non-toxic, making this glue perfect for kids' crafting projects. Now that you know what you need, let’s dive into how to make your very own milk glue!
Also Read This: Is Dailymotioncom a Safe Site
4. Step-by-Step Guide to Making Milk Glue
Creating your milk glue is a fun and straightforward process. Just follow these steps, and you’ll have a great adhesive for all your crafting needs:
- Heat the Milk: Start by pouring the 1 cup of milk into a saucepan. Heat it gently on low to medium heat. You want the milk warm but not boiling. Stir occasionally to prevent it from scorching on the bottom.
- Add Vinegar: Once the milk is warm, gradually add 4 teaspoons of white vinegar while stirring. You should notice the milk curdling almost immediately. This is your milk separating into curds (solid) and whey (liquid).
- Let It Sit: Remove the saucepan from heat and let the mixture sit for about 5-10 minutes. This allows the curds to form properly and settle.
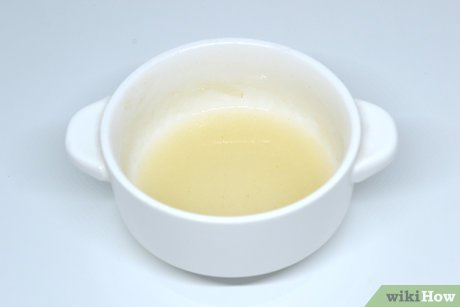
- Strain the Mixture: After letting it sit, take your strainer or cheesecloth and place it over another bowl. Pour the curdled mixture into the strainer, allowing the whey to drain out. You should be left with a thick, curd-like substance.
- Mix in Baking Soda: In the bowl with the strained curds, add 1 teaspoon of baking soda. Mix it thoroughly. The baking soda will help to neutralize the acidity from the vinegar and make the glue smoother.
- Store Your Glue: Transfer the milk glue into a clean container with a lid. It can be stored in the refrigerator for up to a week. Just remember to give it a good stir before using it again, as it might separate while sitting.
And voila! You now have your very own milk-based glue ready for use. Whether you’re crafting with kids or tackling a DIY project, this glue is an excellent non-toxic option that’s easy to make and use. Happy crafting!
Also Read This: Understanding the Dailymotion App Features and Usage
5. Tips for Best Results
Making your own milk-based glue can be a fun and rewarding DIY project! To ensure you get the best results, here are some handy tips:
- Use fresh ingredients: Always opt for fresh milk to avoid any unwanted odors or spoilage. If you can, use whole milk for a creamier texture.
- Choose the right vinegar: White vinegar works best for this recipe. It helps with the curdling process and gives you a smooth glue.
- Strain thoroughly: After curdling the milk, make sure to strain it well. Any leftover lumps can affect the glue's consistency, making it harder to apply.
- Add a pinch of salt: Adding about a teaspoon of salt not only helps preserve the glue but also improves its adhesive properties.
- Experiment with texture: If you prefer a thicker glue, add a bit more cornstarch. For a thinner version, adjust the water content accordingly.
Additionally, remember to mix your ingredients well. A smooth paste will result in a better application and stronger bond. Don’t hesitate to test your glue on scraps before using it on your final project. This way, you can gauge its effectiveness and make any necessary adjustments.
Lastly, keep an eye on the drying time. Depending on the thickness of your application, the glue may take longer to dry. Patience is key here, as rushing the process can lead to weaker bonds.
Also Read This: Try This Simplest Way to Download Videos from Dailymotion on Any Device
6. How to Store Your Milk Glue
Proper storage of your milk-based glue is crucial to ensure its longevity and effectiveness. Here are some simple steps to follow:
- Use airtight containers: Store your glue in clean, airtight containers. Glass jars with tight-fitting lids work best, but plastic containers can also do the trick.
- Keep it cool: Ideally, your glue should be stored in the refrigerator. This will help slow down any bacterial growth and keep your glue fresh for longer.
- Label your container: Don’t forget to label your glue with the date you made it. This way, you’ll know how long it’s been stored and when to toss it out if it starts smelling funky.
- Check for separation: Before each use, give your glue a good stir. It may separate over time, but a little mixing will help restore its original consistency.
- Use it within a week: For the best results, try to use your milk glue within a week. Although it can last longer if stored properly, the quality may degrade over time.
If you notice any off smells or changes in texture, it’s best to discard the glue and whip up a fresh batch. Homemade glue can be a bit less resilient than store-bought options, but with these storage tips, you can extend its usability and keep your craft projects flowing smoothly!
Also Read This: How to Straighten Dailymotion Videos for Perfect Video Alignment
7. Creative Uses for Milk Glue
Milk-based glue is not just a simple craft supply; it can be a versatile companion in various creative projects. Here are some imaginative uses for this eco-friendly adhesive:
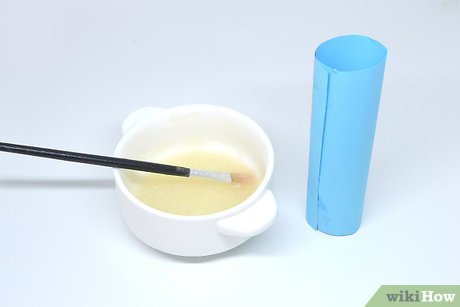
- Paper Crafts: Use milk glue to bond paper in scrapbooking, card making, or creating unique paper mâché sculptures. Since it dries clear, it won’t mar the aesthetics of your artwork.
- Homemade Playdough: Add a touch of milk glue to your homemade playdough recipe. It enhances the texture and helps the dough hold together better, making it more enjoyable for children to mold.
- Fabric Projects: Milk glue can be used for light fabric projects, like attaching small fabric patches to clothing or for simple fabric crafts. Just remember, it’s not a substitute for stronger fabric adhesives.
- Kids’ Art Projects: Encourage your kids to create with milk glue! It's safe and non-toxic, making it perfect for school projects. They can use it to stick glitter, sequins, and other embellishments onto their crafts.
- DIY Bookbinding: If you're into making your own journals or notebooks, milk glue works great for bookbinding. It provides a strong hold for pages and covers, and you can easily customize it with colors or patterns.
- Natural Decorations: Create seasonal decorations by mixing milk glue with natural elements like leaves or twigs. They can be adhered together to form beautiful, rustic decor.
- Homemade Envelopes: Need an envelope in a pinch? Use milk glue to seal the flaps of homemade envelopes, whether they’re made from crafting paper or old magazines!
These are just a few examples of how you can incorporate milk glue into your creative endeavors. The beauty of milk glue lies in its simplicity and safety, making it an excellent choice for both kids and adults alike. So, the next time you're working on a project, consider reaching for that milk bottle instead of conventional glue!
8. Conclusion and Final Thoughts
In a world filled with synthetic materials, milk-based glue stands out as a charming, eco-friendly alternative. Not only is it easy to make, but it also opens up a realm of creative possibilities that can engage your imagination and hands-on skills.
Whether you're a parent looking to provide safe crafting options for your children or an adult wanting to explore sustainable crafting, milk glue can be a fantastic addition to your toolkit. Remember that it may not replace heavy-duty adhesives but shines in lighter applications and educational activities.
If you decide to try making your own milk glue, don’t hesitate to experiment with different ratios of milk to vinegar to find the consistency that best suits your needs. You might even enjoy customizing it with colors or scents for a personalized touch!
So, gather your supplies, unleash your creativity, and enjoy the fun of using this natural adhesive. Happy crafting!
 admin
admin


