Introduction to Fondant
Fondant is a sweet, pliable icing that can transform ordinary cakes into extraordinary works of art! Whether you're looking to create a smooth finish for wedding cakes or playful decorations for birthdays, fondant is your go-to. It's made primarily from sugar, water, and gelatin, resulting in a soft, malleable texture that hardens as it dries. With its versatility, you can mold it into shapes, roll it out for smooth coverings, or even use it for intricate decorations. The best part? You can easily make it right in your kitchen!
Also Read This: How to Create Stunning Bracelets at Home with Dailymotion DIY Videos
Why Make Fondant at Home?
Making fondant at home comes with a host of benefits that elevate your baking game. Here’s why you should consider whipping up your own batch:
- Quality Control: When you make fondant at home, you control the ingredients. No artificial flavors or preservatives—just pure, delicious goodness!
- Customization: Want a specific flavor? You can infuse your fondant with vanilla, chocolate, or even citrus zest. The possibilities are endless!
- Cost-Effective: Store-bought fondant can be pricey. By making it yourself, you save money while still achieving professional-quality results.
- Creative Freedom: Homemade fondant opens up a world of creativity. You can experiment with colors, shapes, and designs that showcase your personal style.
- Fun Activity: Making fondant can be a fun, hands-on activity, perfect for baking enthusiasts or a creative project for kids. Get the family involved!
Plus, when you see your fondant creations adorning your cakes, there's an incredible sense of accomplishment that store-bought simply can't match. So, gather your ingredients, roll up your sleeves, and let's dive into the delightful world of homemade fondant!
Also Read This: How to Make a Paper Ship: Easy Step-by-Step Guide on Dailymotion
3. Ingredients Needed for Homemade Fondant
Making fondant at home is not only fun but also quite simple with just a few ingredients. Here’s what you’ll need to get started:
- Powdered Sugar: About 8 cups, sifted. This is the main ingredient that gives fondant its sweet flavor and smooth texture.
- Gelatin: 1 tablespoon. This helps to give the fondant its structure.
- Water: 1/4 cup. You’ll need this to dissolve the gelatin.
- Glycerin: 1 tablespoon. Glycerin keeps the fondant moist and pliable.
- Glucose or Corn Syrup: 1/2 cup. This adds sweetness and helps with the fondant’s consistency.
- Flavor Extract: Optional, about 1 teaspoon. Vanilla or almond extract can enhance the taste of your fondant.
- Food Color: Optional. If you want to color your fondant, gel food colors work best for vibrant results.
With these ingredients, you’re on your way to creating a delightful fondant that’s perfect for covering cakes or making decorative shapes. The best part? You can customize it to suit your taste or the occasion!
Also Read This: How to Make Cabbage Soup for Weight Loss: Healthy Recipe on Dailymotion
4. Step-by-Step Guide to Making Fondant
Ready to dive into the world of homemade fondant? Follow these easy steps, and you’ll have smooth, workable fondant in no time!
- Dissolve the Gelatin: In a small bowl, sprinkle the gelatin over the 1/4 cup of water. Let it sit for about 5 minutes until it blooms (looks spongy).
- Melt the Gelatin: Once bloomed, microwave the bowl for about 10-15 seconds until the gelatin is fully melted. Be careful not to overheat it.
- Add Glycerin and Glucose: Stir in the glycerin and glucose (or corn syrup) into the melted gelatin until well combined.
- Combine with Powdered Sugar: In a large bowl, gradually add the sifted powdered sugar to the gelatin mixture. Use a spatula to mix until it starts coming together.
- Knead the Fondant: Transfer the mixture to a clean, powdered sugar-dusted surface. Knead the fondant like dough until it’s smooth and pliable. If it feels too sticky, add a little more powdered sugar.
- Coloring: If you want colored fondant, divide it into portions and add gel food color. Knead the color into the fondant until evenly distributed.
- Wrap and Store: Shape the fondant into a ball and wrap it tightly in plastic wrap. Store it in an airtight container at room temperature for up to two weeks.
And there you have it! Making fondant at home is a straightforward process that yields delicious results. You can now use your homemade fondant to create beautiful cakes and treats that will impress your friends and family!
Also Read This: Learn to Dance Freestyle on Dailymotion
5. Tips for Perfecting Your Fondant
Creating the perfect fondant can feel like a daunting task, but with a few handy tips, you'll be rolling out smooth, beautiful sheets of fondant in no time! Here are some essential pointers to elevate your fondant game:
- Use Quality Ingredients: The foundation of great fondant starts with quality ingredients. Opt for premium powdered sugar and gelatin. Your fondant will taste better and have a more appealing texture.
- Temperature Matters: Fondant loves a comfortable room temperature. If your kitchen is too hot, your fondant may become sticky. Conversely, if it's too cold, it might crack. Aim for a cozy climate around 70°F (21°C).
- Knead, Knead, Knead: Just like dough, the more you knead fondant, the better it becomes. Knead it until it’s smooth and pliable, which helps develop the right consistency. If it’s too stiff, you can add a tiny bit of shortening to soften it.
- Coloring Techniques: When adding color to your fondant, use gel food colors for vibrant results without altering the texture. Start with a small amount and gradually add more until you achieve your desired shade.
- Store Properly: If you have leftover fondant, wrap it tightly in plastic wrap and store it in an airtight container. This keeps it fresh for future use. Just make sure to knead it again before rolling it out!
By incorporating these tips, you’ll be well on your way to crafting flawless fondant creations. Remember, practice makes perfect, so don't hesitate to experiment and find what works best for you!
Also Read This: How to Create 3D Pictures on Paper Using Dailymotion’s Easy Methods
6. Common Mistakes to Avoid
As with any culinary endeavor, making fondant comes with its own set of challenges. Here are some common mistakes that many beginners make and how you can avoid them:
- Using Too Much Powdered Sugar: It's tempting to keep adding powdered sugar when your fondant feels sticky. However, too much sugar can make it dry and hard to work with. Instead, dust your work surface lightly and knead in more sugar gradually.
- Not Kneading Enough: Fondant that isn’t kneaded properly can crack or tear easily. Make sure to knead it until it’s completely smooth and pliable. If it feels too dry, a bit of vegetable shortening can help.
- Ignoring Humidity: Humidity can wreak havoc on fondant. On humid days, consider using less liquid in your recipe or refrigerating your fondant for a short time before working with it. If it gets too sticky, dust your surface with cornstarch or powdered sugar as you roll it out.
- Rushing the Rolling Process: Patience is key! Rolling out fondant too quickly can lead to uneven thickness and tears. Take your time, and roll it out slowly to achieve a uniform thickness that’s easy to work with.
- Skipping the Cornstarch: When rolling out fondant, don’t forget to dust your work surface with cornstarch or powdered sugar to prevent sticking. Skipping this step can lead to a frustrating mess!
Avoiding these common pitfalls will help you create a smoother, more enjoyable fondant experience. Remember, every mistake is just a learning opportunity, so keep trying and have fun with it!
Also Read This: How to Wear Hijab Without Pins on Dailymotion: Tips for Easy Styling
7. How to Color and Flavor Your Fondant
Now that you've mastered the basics of making fondant, it’s time to add some personality to it through coloring and flavoring! Whether you want a vibrant hue for a birthday cake or a subtle flavor for a wedding dessert, customizing your fondant is simple and fun.
Coloring Fondant: The best way to color your fondant is by using gel or paste food colors. These types are more concentrated than liquid colors, which means you can achieve bright, bold shades without altering the consistency of your fondant. Here’s how to do it:
- Start with a small piece of fondant. It's easier to color smaller amounts and then combine them later if needed.
- Take a toothpick and dip it into your gel food color.
- Press the toothpick into the fondant and knead the fondant until the color is evenly distributed.
- Add more color as needed, repeating the process until you achieve your desired shade.
Flavoring Fondant: To make your fondant not just look good but taste amazing, consider flavoring it! Here are some popular options:
- Vanilla Extract: A classic choice that pairs well with almost any cake.
- Almond Extract: Perfect for a nutty twist, especially in marzipan-like fondants.
- Citrus Zest: Adding zest from lemons or oranges can give a refreshing flavor.
- Chocolate Flavoring: Use cocoa powder for a rich chocolate fondant.
To flavor your fondant, add a few drops of your chosen flavoring while you’re kneading it. Start with just a little and taste as you go—just like coloring, you can always add more, but you can't take it away!
Also Read This: Don’t Give Up the Sheep on Dailymotion: Watch the Full Video
8. Using Fondant for Decorating Cakes and Cupcakes
Once your fondant is colored and flavored, you’re ready to start decorating! Working with fondant opens up a world of creative possibilities, so let’s explore some ways to use it for cakes and cupcakes.
Covering Cakes: To cover a cake with fondant, follow these easy steps:
- Ensure your cake is cool and crumb-coated. This helps the fondant adhere better.
- Roll out your fondant on a clean, lightly powdered surface to about 1/8 inch thick.
- Gently lift the fondant using a rolling pin and place it over your cake.
- Using a fondant smoother, smooth the fondant down the sides of the cake, trimming any excess at the base.
Don’t worry if it seems challenging at first; practice makes perfect! You can also use leftover fondant to create decorations like flowers, bows, or figurines to enhance your cake’s look.
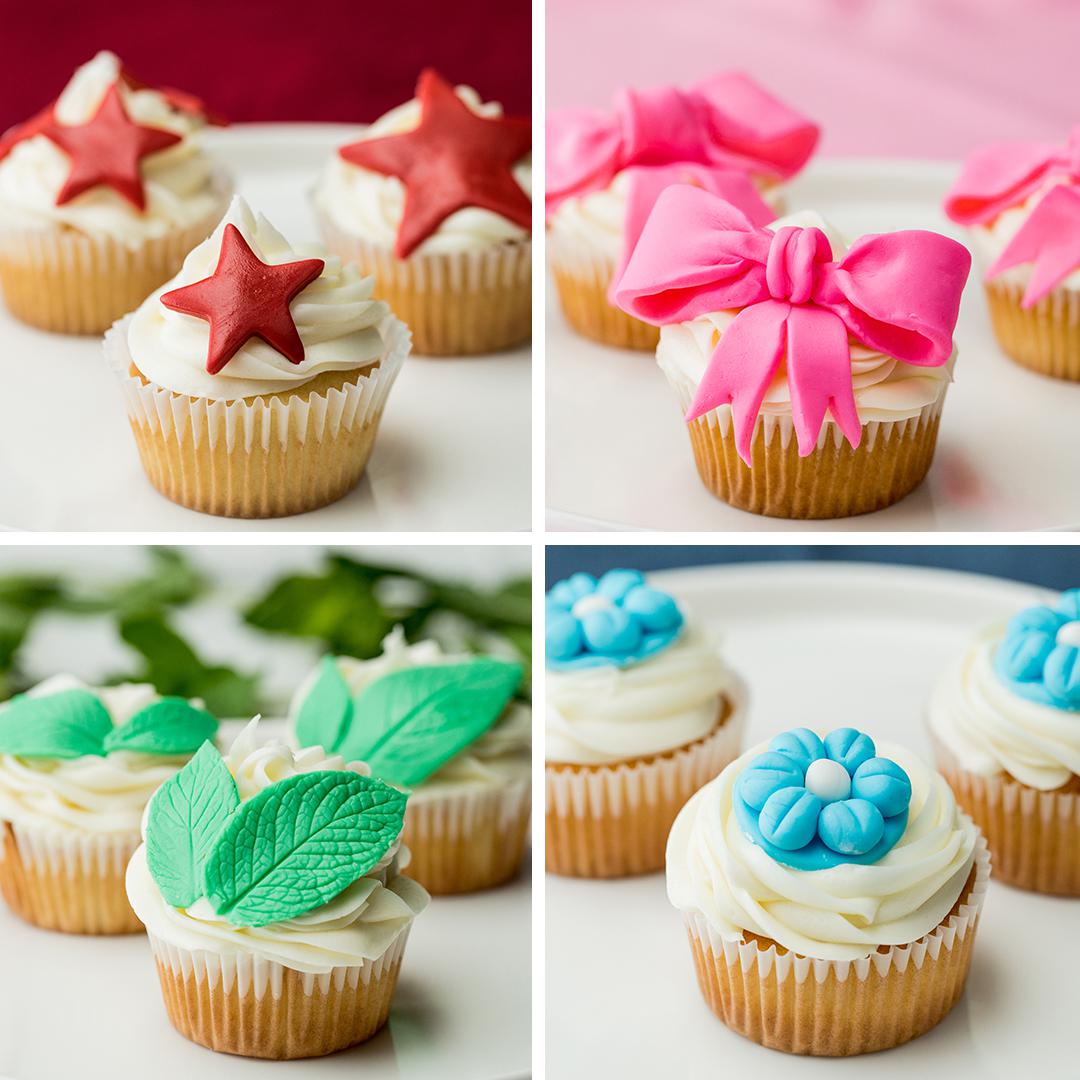
Decorating Cupcakes: Fondant isn’t just for large cakes; it can also be used to fancy up your cupcakes! Here’s how:
- Roll small balls of fondant and flatten them into discs to top your cupcakes.
- Use cookie cutters to create fun shapes like stars, hearts, or seasonal designs.
- For an extra touch, use edible glitter or luster dust to make your fondant decorations sparkle.
Using fondant can elevate your baking game, making your desserts not only delicious but also stunning to look at. So, roll up your sleeves, get creative, and let your imagination run wild with your fondant decorations!
Also Read This: How to Make a French Braid Video on Dailymotion
9. Storage and Shelf Life of Fondant
When you’ve put in the effort to make delicious fondant, it’s essential to store it correctly to keep it fresh and ready for your next baking project. Proper storage can significantly extend its shelf life and maintain its texture and flavor. Let’s dive into how to store fondant effectively!
Short-Term Storage: If you plan to use your fondant within a few days, you can simply wrap it tightly in plastic wrap. Be sure to eliminate any air pockets, as exposure to air can cause fondant to dry out. Once wrapped, place it in a zip-top bag or an airtight container. This will keep it pliable and ready for rolling out when you need it.
Long-Term Storage: If you’ve made a big batch or want to save some for later, here’s what you should do:
- Wrap the fondant in plastic wrap as you would for short-term storage.
- Then, place it in an airtight container or a freezer-safe bag to prevent moisture loss.
- Label the container with the date of preparation so you can keep track of its age.
Fondant can be stored in the refrigerator for up to two weeks or in the freezer for several months. When you’re ready to use frozen fondant, simply let it thaw at room temperature before kneading it back to a workable consistency.
Signs of Spoilage: While fondant has a relatively long shelf life, it’s important to check for signs of spoilage. If you notice:
- Cracking: This often means it’s dried out and may no longer be usable.
- Off Smells: If it smells strange or sour, it’s best to discard it.
- Color Changes: If your fondant has changed color or developed spots, it’s likely time to toss it.
By following these storage tips, you can ensure that your homemade fondant stays fresh and ready for your next creative baking adventure!
10. Conclusion and Final Thoughts
Making fondant at home can be a delightful and rewarding experience! Not only does it allow you to customize flavors and colors, but it also gives you a sense of accomplishment when you see your beautifully decorated cakes and cupcakes. By following the steps outlined in this blog, you can create smooth, delicious fondant that’s perfect for any occasion.
Remember: Practice makes perfect! Don’t be discouraged if your first batch doesn’t turn out exactly as you hoped. Fondant can be a bit finicky, but with time and experimentation, you’ll find your rhythm.
Here are a few final tips to keep in mind:
- Always measure your ingredients carefully to ensure the right consistency.
- Don’t hesitate to experiment with flavors and colors. The possibilities are endless!
- When in doubt, watch some online tutorials for visual guidance and inspiration.
Now that you’re armed with knowledge on how to make, store, and use fondant, it’s time to roll up your sleeves and get started. Whether you’re making a birthday cake, a wedding cake, or just some fun treats for a family gathering, fondant can elevate your baking game to a whole new level.
Happy baking, and may your fondant adventures be as sweet as your creations!
 admin
admin


