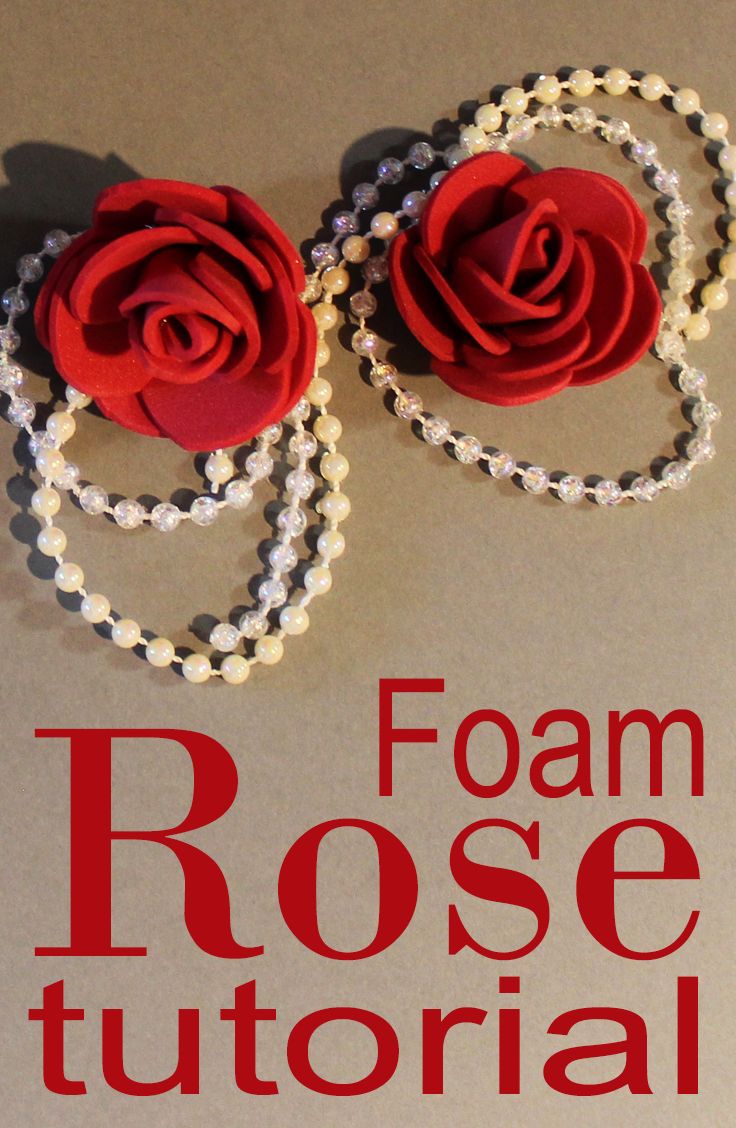
Welcome to the delightful world of foam roses! If you’ve ever admired beautiful floral arrangements but felt overwhelmed by the idea of working with real flowers, foam roses are your perfect solution. They’re not only easy to make but also offer endless creative possibilities. In this guide, we'll take you step-by-step through the process of crafting these charming blooms, perfect for decorations, gifts, or personal projects. So grab your crafting supplies, and let’s get started on your journey to creating stunning foam roses!
Materials Needed for Foam Roses
Before we dive into crafting our foam roses, it’s essential to gather all the necessary materials to ensure a smooth and enjoyable experience. Here’s a detailed list of what you’ll need:
- Foam Sheets: Choose high-quality foam sheets in your desired colors. Popular options include soft pastels or vibrant shades.
- Scissors: A good pair of scissors is crucial for precisely cutting your foam into petal shapes.
- Glue Gun and Glue Sticks: A hot glue gun will be your best friend for assembling the petals and securing your roses.
- Wire or Stems: Use floral wire or pre-made stems to give your roses a sturdy base.
- Floral Tape: This tape will help secure the petals and cover any exposed wire.
- Heat Source: A heat tool or hair dryer can help shape the petals and give them a more realistic look.
- Templates: You can either print templates for petal shapes or freehand your designs for a more personal touch.
- Optional - Decorative Elements: Ribbons, beads, or glitter can add a unique flair to your foam roses.
Now that you have your materials ready, you’re all set to begin crafting! Each item plays a crucial role in creating beautiful, lifelike foam roses, so make sure you have everything at hand before we move on to the next steps. Happy crafting!
Also Read This: Step-by-Step Guide to Training Your Cat to Use the Toilet with Ease
3. Preparing the Foam
Before we dive into creating our beautiful foam roses, it's crucial to prepare the foam properly. This step sets the foundation for your flowers, ensuring they look lifelike and vibrant. Here's what you'll need and how to get started:
- Materials: You'll need sheets of floral foam (you can find this at any craft store), scissors, and possibly a heat gun for shaping.
- Workspace: Make sure you have a clean, flat surface to work on. Lay down some newspaper to catch any scraps.
Now, let’s begin the preparation process:
- Choose Your Foam: Select the right thickness of foam sheets. A 2mm thickness is ideal for petals, as it allows for flexibility while maintaining structure.
- Cutting the Foam: Using your scissors, cut the foam sheets into squares or rectangles. The size can vary but aim for pieces that are around 4x4 inches. This will give you enough material to shape into petals later.
- Conditioning the Foam: If you’re using a heat gun, gently warm the foam. This makes it softer and easier to manipulate. Be careful not to overheat it, as you want it pliable, not melted!
- Coloring the Foam: If you want to add a touch of color, you can use acrylic paints or dye sprays. Lightly mist the foam and let it dry completely before moving on.
With your foam well-prepared, you're now set to move on to shaping those petals. Remember, the more care you take in this step, the more realistic your roses will look!
Also Read This: How to Make a Flying Lantern: Dailymotion’s DIY Guide for Beginners
4. Shaping the Foam into Petals
Now that we have our foam ready, it’s time to get creative! Shaping the foam into petals is where your artistic flair really shines. Let's break down the steps to achieve beautiful, realistic petals for your foam roses:
- Petal Shapes: Real rose petals are not all the same. They vary in size and shape, so you’ll want to create a variety of petal forms. Think about the different sizes you need:
- Outer petals (larger)
- Inner petals (smaller)
Here’s how to shape your foam:
- Cut Petal Shapes: From your prepared foam, cut out petal shapes. For a classic rose, aim for a teardrop shape. Make some petals larger and others smaller to mimic the natural growth of a flower.
- Softening Edges: Use your heat gun to gently soften the edges of each petal. This allows you to curl and shape them more easily. Remember to wear gloves to avoid burns!
- Creating Texture: To give your petals a more realistic look, you can use a ball tool or your fingers to gently press into the foam. This creates subtle grooves and adds dimension.
- Forming the Petals: Start forming the petals by curling the edges slightly inwards. You can hold them in place for a few seconds until they hold their shape.
Once you have your shaped petals, it’s time to assemble them into a gorgeous rose. Keep experimenting with different sizes and shapes to create a stunning bouquet that truly reflects your unique style!
Also Read This: How to Add Dailymotion to Roku TV to Watch Your Favorite Videos Anywhere
5. Assembling the Foam Roses
Now that you've crafted your individual foam petals, it's time to bring everything together and assemble your beautiful foam roses. This is where your creativity truly shines! Follow these steps to create a stunning rose:
Gather Your Materials:
- Foam petals (the ones you've made earlier)
- Hot glue gun and glue sticks
- Floral wire or pipe cleaners (for the stem)
- Green floral tape (optional, for a more natural look)
Step-by-Step Assembly:
- Start with the Center: Take one petal and roll it tightly to form the center of the rose. Use a small dot of hot glue to secure it. This will be the heart of your flower.
- Add More Petals: Gradually add your next petals around the center. Apply a bit of glue to the base of each petal before attaching it. Make sure to stagger the petals for a natural look.
- Layering is Key: As you move outward, use larger petals. Each layer should overlap the previous one slightly, giving your rose depth and fullness. Don’t rush—take your time here!
- Secure Your Flower: Once you’re satisfied with the shape, use more glue to secure any loose petals and ensure everything holds together firmly.
- Attach the Stem: If you’re using floral wire, cut it to your desired length, then poke it through the base of the flower. Secure it with glue to keep the flower in place. If you prefer a pipe cleaner, wrap it around the base of the flower.
Tip: If you want to create a bouquet, simply repeat this process for multiple roses and arrange them together. You can vary the petal sizes and colors for a more dynamic look.
Also Read This: Fun Ideas to Make Millions Before Grandma Passes Away
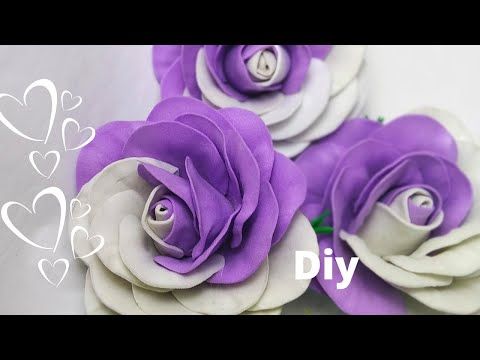
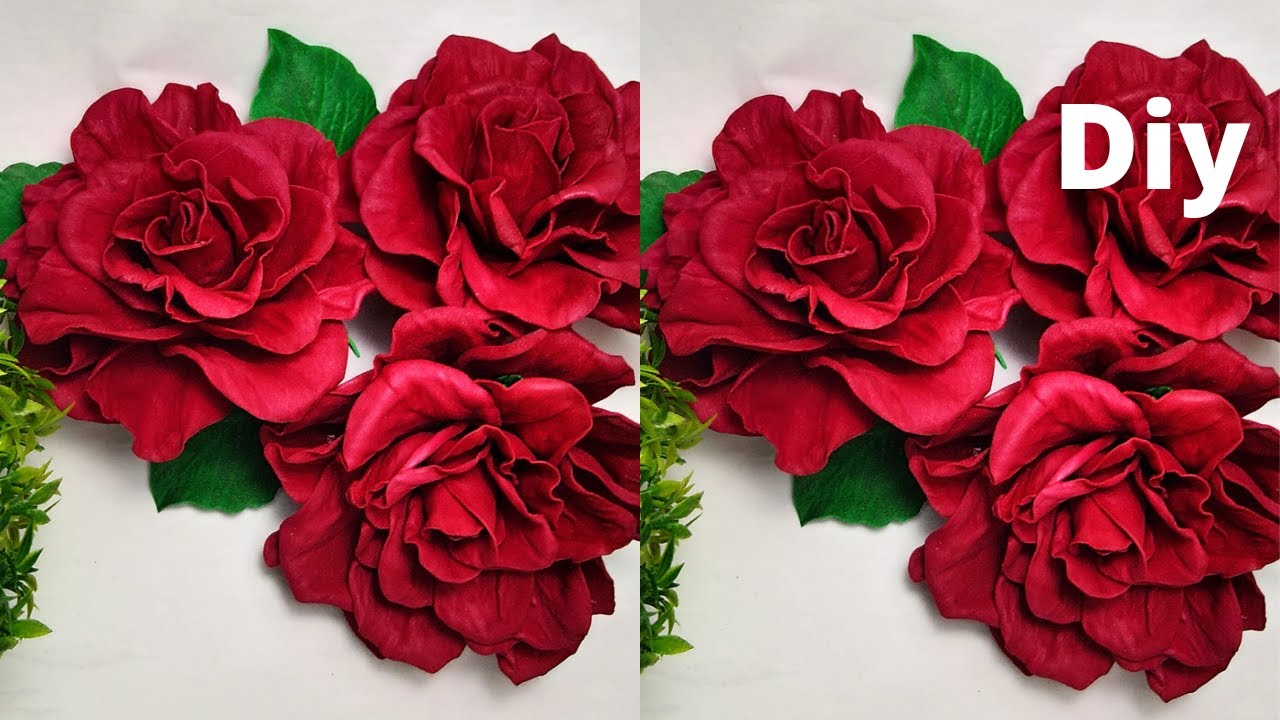
6. Painting and Finishing Touches
Your foam roses are almost complete! Now it's time for the fun part—adding color and finishing touches to make them truly pop. Here’s how you can do it:
Materials Needed:
- Acrylic paints (in colors of your choice)
- Paintbrushes (various sizes)
- Soft cloth or sponge (for blending)
- Sealer spray (optional, for extra durability)
Painting Steps:
- Base Coat: Start by applying a base coat of paint to your petals. If you want a classic red rose, use red acrylic paint. For a soft pastel look, consider pink or lavender. Cover the entire petal surface evenly.
- Add Depth: Once the base coat is dry, you can add depth by mixing a darker shade of your base color. Use a smaller brush to highlight the edges and the centers of the petals. This will create a more realistic look.
- Blending: Use a damp sponge to gently blend the colors for a smooth transition. This technique creates a soft gradient effect that adds beauty to your roses.
- Final Touches: After painting, let your roses dry completely. If you want to protect your work, a light coat of sealer spray can give your flowers a lasting finish.
And there you have it! Your foam roses are now beautifully assembled, painted, and ready to be displayed. Whether you're creating a stunning centerpiece or a heartfelt gift, these roses are sure to impress. Happy crafting!
Also Read This: Downloading Dailymotion Videos Without Software: A Complete Overview
7. Where to Find Foam Rose Tutorials on Dailymotion
Are you excited to dive into the world of foam rose crafting? Dailymotion is an excellent platform where you can find a plethora of tutorials to guide you through the process step by step. Here are some tips on how to efficiently search for the best foam rose tutorials:
- Use Specific Keywords: When you search, use precise terms like "foam roses tutorial," "how to make foam roses," or "DIY foam flower." This will help narrow down your results to the most relevant videos.
- Check Channel Reputations: Look for channels that specialize in crafting or floral arrangements. Creators with a focus on DIY projects often provide detailed instructions and tips. Channels like "Crafting with Love" or "Floral Design 101" are great examples to start with!
- Watch for User Engagement: Pay attention to videos with a high number of views and positive comments. This indicates that other viewers found the tutorial effective and easy to follow.
- Explore Playlists: Many creators compile their tutorials into playlists. This can be a fantastic way to binge-watch and gather all the techniques you need without hopping from video to video.
- Follow Along in Real Time: Look for tutorials that provide clear instructions and visuals. Some creators even include time stamps to help you skip to specific sections, making it easier to follow along as you craft.
Another tip is to take notes while you watch. Jot down any tools or materials you might need, as well as key steps that stand out. This will make your crafting experience smoother when you start making your foam roses!
Overall, the vibrant community on Dailymotion offers a wealth of knowledge for both beginners and experienced crafters. Dive in, explore different styles and techniques, and find tutorials that inspire your creativity!
8. Conclusion and Tips for Success
Congratulations, you’re on your way to mastering the art of foam roses! As you wrap up your crafting journey, here are some final tips to ensure your foam roses turn out beautifully:
- Practice Makes Perfect: Don’t get discouraged if your first few roses don’t look like the ones online. With practice, your skills will improve, and you’ll develop your unique style!
- Experiment with Colors: Foam comes in a variety of colors. Feel free to mix and match or even paint your foam to create custom shades that suit your project.
- Stay Organized: Keep your workspace tidy and all materials organized. This will help you stay focused and enjoy the process without unnecessary distractions.
- Join Online Communities: Consider joining forums or groups focused on DIY crafts or floral arrangements. Sharing your creations and getting feedback can be incredibly motivating!
- Have Fun! Remember that crafting should be enjoyable. Don’t stress too much about perfection; embrace the process and let your creativity flow.
In conclusion, making foam roses is not just about the end product; it’s about the joy of creation. With the right tutorials, a bit of practice, and a sprinkle of creativity, you’ll be creating stunning foam flowers in no time. Happy crafting!
 admin
admin


