
Edible images are a fun and creative way to enhance cakes, cupcakes, and other treats. Instead of using traditional decorations, you can print colorful designs that are safe to eat. Whether you want to celebrate a birthday, a wedding, or just make an everyday treat special, edible images can add that perfect touch. In this guide, we will walk you through how to create these images without needing a fancy printer.
Understanding Edible Printing Techniques
Edible printing involves using special materials that can be consumed safely. Here’s a quick overview of how it works:
- Edible Ink: This is a food-grade ink made from natural ingredients. It’s safe for consumption and is available in various colors.
- Edible Paper: This is typically made from rice or frosting. It's thin and easy to work with, allowing for detailed designs.
- Transfer Process: The design is printed onto the edible paper using the edible ink, and then transferred onto the dessert.
While traditional edible printing requires specific equipment, we’ll explore some DIY methods that don’t involve a printer.
Gathering Your Materials for Edible Images
To get started with edible images, you’ll need a few essential materials. Here’s a simple list of what you should gather:
- Edible Paper: Choose between rice paper, frosting sheets, or wafer paper based on your preference.
- Food Coloring Pens: These are perfect for hand-drawing or adding details to your designs.
- Scissors: A good pair of scissors will help you cut out your images precisely.
- Food-Safe Adhesive: This is essential for attaching the edible images to your treats. Look for options like edible glue or water.
- Storage Containers: Keep your edible images fresh by storing them in airtight containers.
Once you have your materials ready, you’ll be all set to create your edible images and make your desserts vis
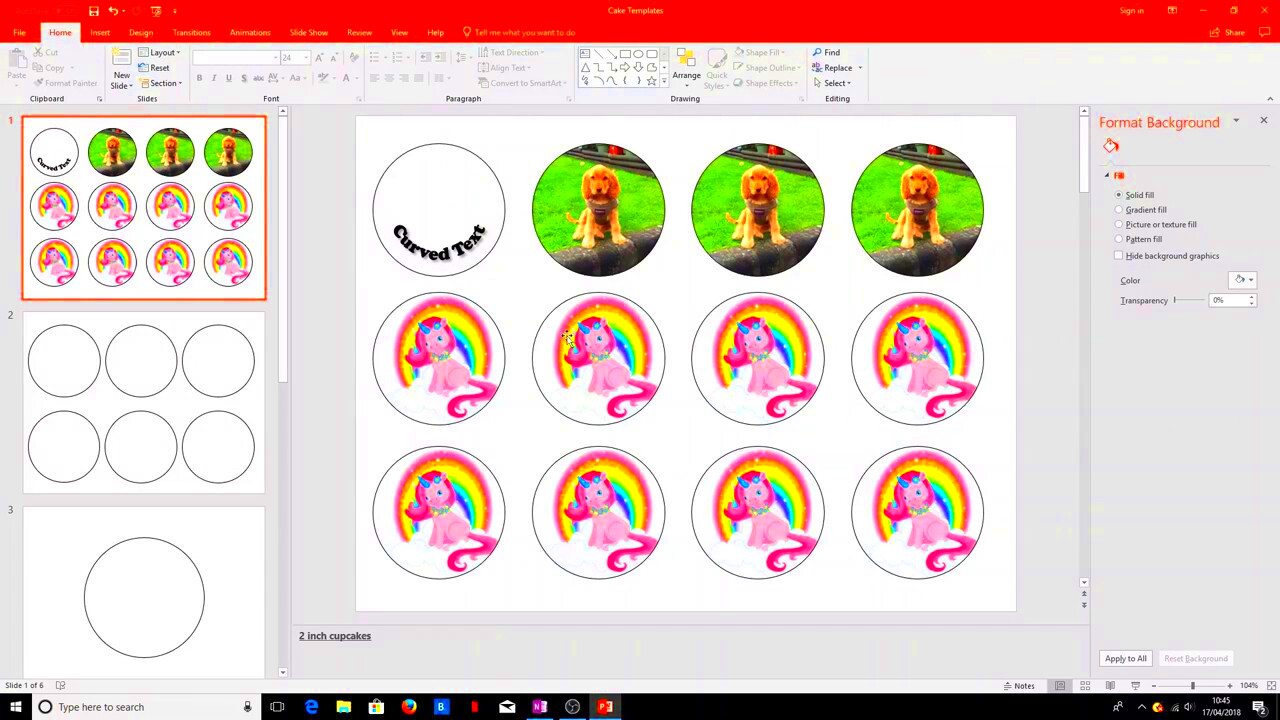
Creating Your Edible Image Designs
Now that you have your materials, it’s time to get creative! Designing your edible images can be a fun and rewarding process. You don’t need to be an artist; just let your imagination flow. Here are some tips to help you create stunning designs:
- Choose Your Theme: Decide on the occasion or message. Is it a birthday, anniversary, or just a fun treat? Your theme will guide your design.
- Use Simple Shapes: If you’re unsure about your drawing skills, stick to basic shapes like hearts, stars, or flowers. These are easy to create and look great.
- Color Palette: Select a color scheme that fits your theme. Bright colors work well for kids’ parties, while softer tones suit elegant occasions.
- Consider Text: Adding a short message or name can personalize your treats. Just keep the text legible and straightforward.
Once you’ve planned your design, you can use food coloring pens or edible ink to bring your vision to life. Don't be afraid to experiment and have fun!
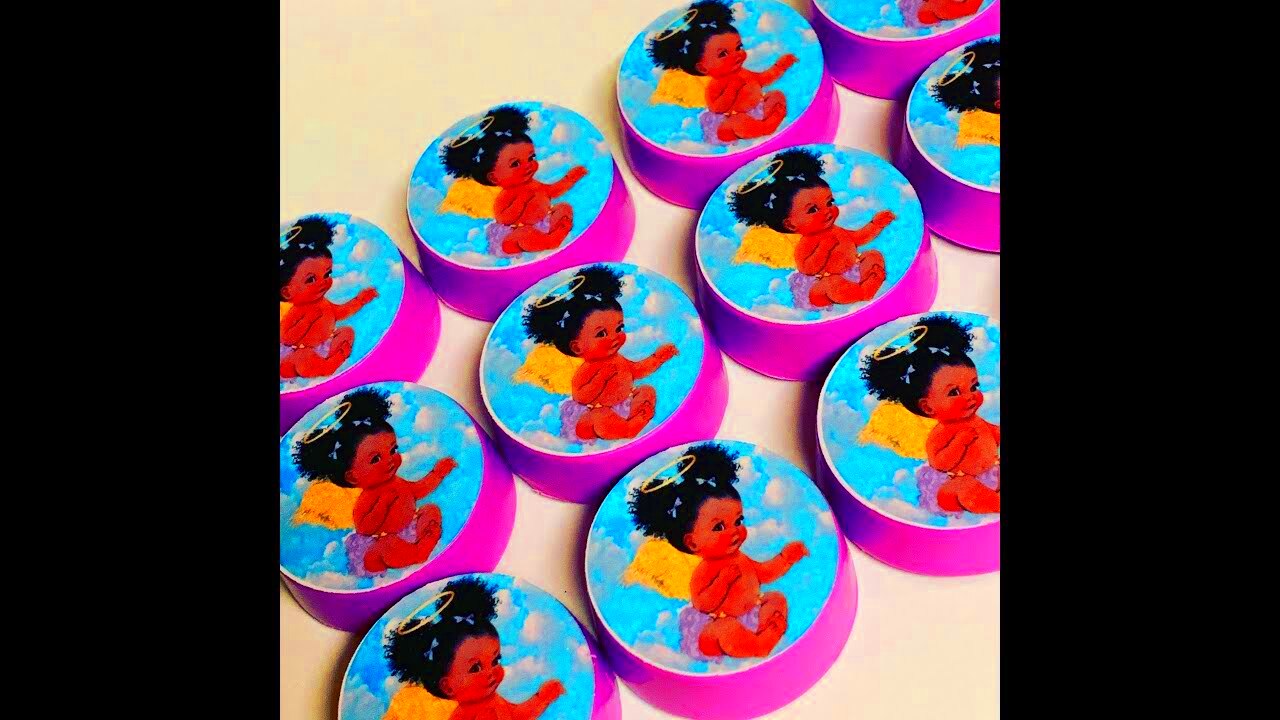
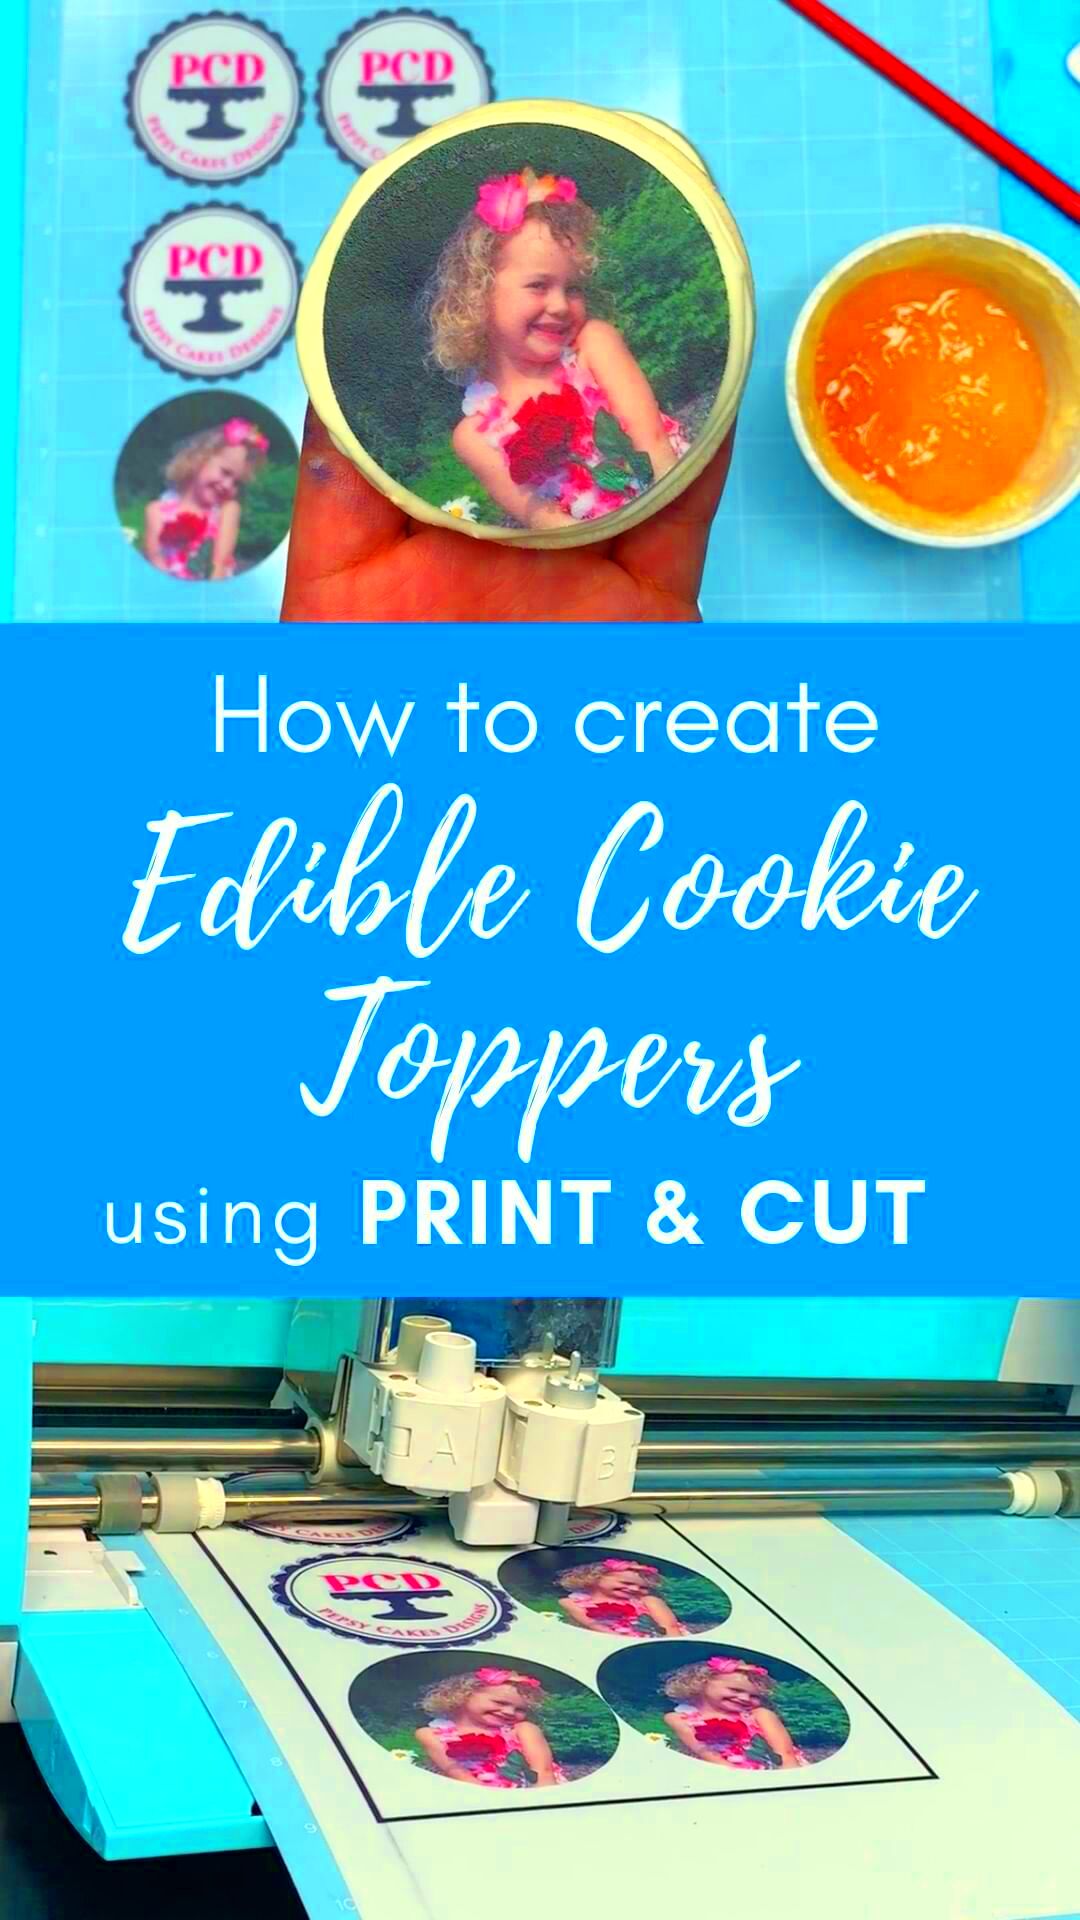
Applying Edible Images to Your Treats
After creating your edible images, it’s time to apply them to your delicious treats. This is where your hard work pays off! Here’s how to do it effectively:
- Prepare Your Treats: Make sure your cakes, cupcakes, or cookies are cool and ready for decoration. A smooth surface works best.
- Cut Your Edible Image: Use scissors to trim your edible image to the desired shape. Ensure the edges are clean for a professional look.
- Use Edible Adhesive: Lightly brush the back of your edible image with edible glue or a few drops of water. Be careful not to soak it; a little goes a long way!
- Position Carefully: Place the image on your treat and gently press down. Ensure there are no air bubbles for a seamless finish.
Let your decorated treats sit for a few minutes to allow the adhesive to set. Now, they are ready to impress!
Storing and Handling Edible Images
To keep your edible images looking fresh and tasty, proper storage and handling are essential. Here are some best practices:
- Airtight Containers: Store your edible images in airtight containers to prevent moisture from ruining them.
- Cool and Dark Place: Keep them away from direct sunlight and heat. A pantry or cupboard works well.
- Avoid Humidity: Excess moisture can make your images soggy. Keep them in a dry environment.
- Handle with Care: When applying or moving your edible images, use clean, dry hands to avoid smudging or tearing.
By following these tips, you can ensure your edible images stay beautiful and delicious for any event. Enjoy making and sharing your creations!
Common Mistakes to Avoid with Edible Images
Creating edible images is exciting, but it can also come with some pitfalls. To ensure your designs turn out beautifully, here are some common mistakes to avoid:
- Using the Wrong Ink: Always use food-safe edible ink. Regular printer ink can be toxic, so make sure to stick to the right materials.
- Ignoring Paper Types: Not all edible papers are the same. Choose the right type for your dessert—frosting sheets work best on cakes, while rice paper is great for cupcakes.
- Skipping the Testing Phase: Before applying your image, test a small piece to see how it adheres to the treat. This helps you avoid mishaps.
- Not Allowing Time to Set: After applying your edible image, give it time to set. Rushing this step can lead to smudging or peeling.
- Overlooking Storage Conditions: Humidity can ruin your edible images. Store them properly to maintain their freshness.
Avoiding these mistakes will help you achieve the best results and ensure your edible creations look and taste amazing!
Frequently Asked Questions about Edible Images
Let’s address some common questions people have about edible images. This can help clear up any confusion you might have:
- Can I eat edible images? Absolutely! Edible images are made from food-safe materials and are safe to consume.
- How long do edible images last? When stored properly, edible images can last for several months. However, they are best used fresh.
- Can I print photos on edible paper? Yes, you can print photos! Just ensure you’re using the right equipment and edible ink.
- Do I need a special printer for edible images? While some people use edible ink printers, you can also create designs by hand using food coloring pens.
- Can I freeze treats with edible images? It’s best to avoid freezing decorated treats, as moisture can affect the image’s quality.
These FAQs should help you feel more confident as you embark on your edible image journey!
Conclusion on Making Edible Images
Making edible images can be a delightful and creative way to personalize your desserts. With the right materials and techniques, you can create stunning designs that will impress your friends and family. Remember to avoid common mistakes, store your images properly, and feel free to experiment with different designs and themes.
Whether it’s for a special occasion or just a sweet treat, edible images can add a unique touch to your creations. So gather your materials, unleash your creativity, and enjoy the fun of making edible images. Happy decorating!
 admin
admin


