Have you ever wondered about distilled water and its unique properties? Distilled water is purified through a process of boiling and condensation, which removes impurities like minerals, contaminants, and even chemicals. It's not just for car batteries and steam irons; many people are incorporating it into their daily lives. In this guide, we'll explore the benefits of using distilled water and how you can easily make it at home. Let's dive in!
Benefits of Using Distilled Water
Now that we've covered what distilled water is, let's talk about why you might want to consider using it. Below are some notable benefits:
- Purity and Safety: Distillation removes harmful substances, providing you with clean, safe water devoid of bacteria, viruses, and heavy metals.
- Improved Taste: Without the presence of minerals like calcium and magnesium, distilled water has a neutral taste, which some people prefer for drinking and cooking.
- Essential for Specific Appliances: Using distilled water in steam irons and humidifiers can help prolong their lifespan by preventing mineral buildup.
- Better for Hair and Skin: Many people find that washing hair or rinsing skin with distilled water reduces irritation, as it lacks chlorine and other harsh chemicals.
- Ideal for Medical Uses: If you use a CPAP machine or need water for certain medical devices, distilled water is recommended to prevent contamination.
Now, you might think, with all these benefits, distilled water has to come at a hefty price, right? Not quite! Making distilled water at home can be an easy and cost-effective way to reap its benefits without breaking the bank.
In comparison to regular tap water, the advantages of distilled water are compelling. Of course, it's essential to drink water that has minerals your body needs. However, many people find that alternating between distilled and mineral water can make for a balanced approach. It’s crucial to remember that while distilled water is great for certain uses, it's always a good idea to consult health professionals regarding what’s best for your personal hydration needs.
In summary, whether you’re looking to improve your health, enhance your appliances' performance, or simply enjoy purer water, incorporating distilled water into your routine is a great choice! Keep reading to learn how you can create your own distilled water at home. You’ll soon see just how simple and rewarding it can be!
Also Read This: How Creative Videos Like A Foolish Stag Teach Life Lessons on Dailymotion
3. Materials Needed for Distilling Water at Home
Before diving into the distillation process, let's gather all the necessary materials. Don't worry, you won't need any fancy equipment, and most of these items can be found around the house. Here's what you'll need:
- A heat source: This can be a stove, hot plate, or even a campfire if you're feeling adventurous!
- A large pot with a lid: This will serve as your distillation vessel. Ideally, choose a pot with a tight-fitting lid to prevent any steam from escaping.
- A heat-resistant bowl or container: You'll need this to collect the distilled water. Ensure it's smaller than the pot's diameter and can withstand heat.
- Ice or cold water: Placing ice on the lid will help condense the steam back into water faster, but you can also use cold water.
- Measuring cup: For measuring the water you'll be distilling.
- A towel or mitts: Safety first! You'll want these handy to protect your hands from heat during the process.
With these materials in hand, you're well-equipped to start your distillation adventure. The beauty of this process lies in its simplicity! Now, let’s move on to the exciting part: actually distilling that water.
Also Read This: How to Insert a SIM Card into Various Smartphone Models
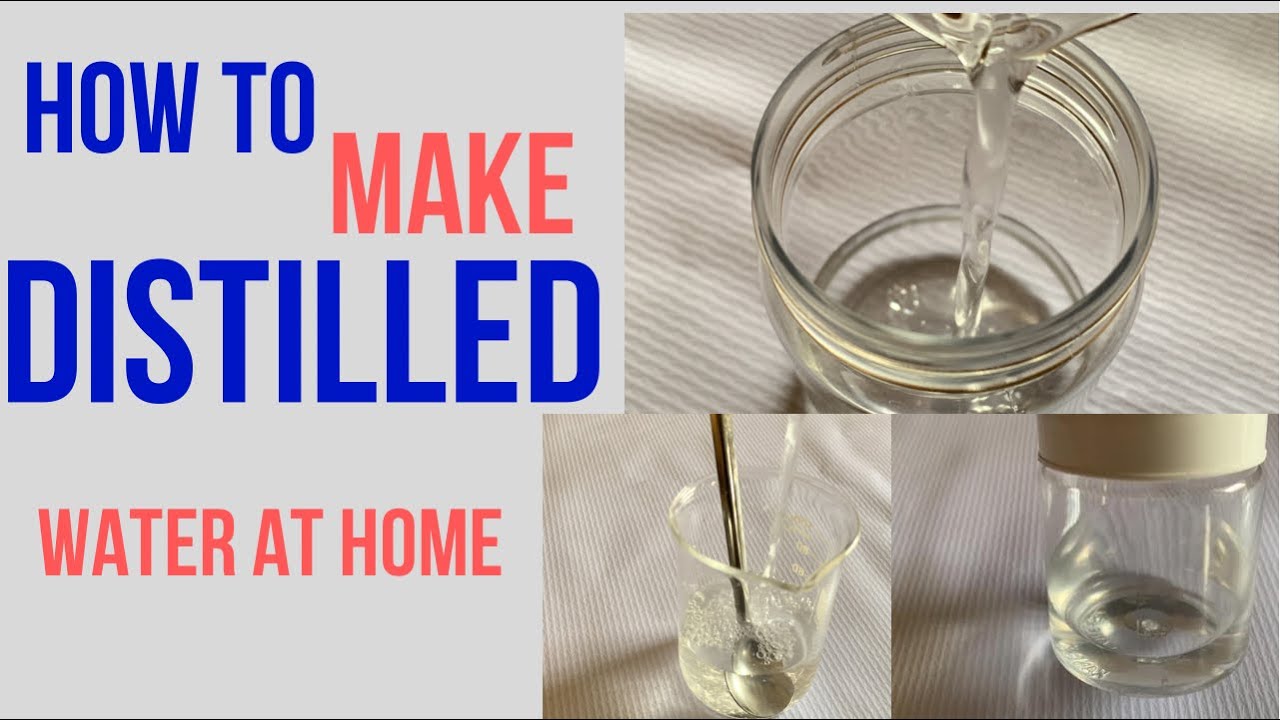
4. Step-by-Step Guide to Distilling Water
Ready to distill some water? Great! Follow this step-by-step guide to ensure you create pure, clear distilled water right in your kitchen. Let’s get started:
- Fill the pot with water: Pour your tap or mineral water into the large pot. Make sure to fill it no more than halfway to leave enough space for the steam.
- Place the bowl in the pot: Set your heat-resistant bowl in the center of the pot. It should float a bit or sit comfortably without touching the bottom. This is where your distilled water will collect!
- Seal it up: Cover the pot with the lid upside down. The lid's convex side should face down toward the bowl to allow the condensed water droplets to drip into it. If it's a tight fit, all the better!
- Add ice: If you're using ice, fill the top of the lid with ice cubes. This chilling effect will help steam condense back into water more efficiently. Alternatively, you can run cold water over the lid.
- Heat it up: Turn on your heat source to medium. Let the water in the pot start to boil. Keep an eye on it; it should reach a simmer.
- Collect the distilled water: After a while (usually around 30-60 minutes, depending on the amount of water), you'll start to see water collecting in your bowl. Once it's done, turn off the heat and remove the lid carefully—watch out for the steam!
- Let it cool: Allow everything to cool down before handling the bowl of distilled water. Use your towel or mitts when touching hot materials.
- Store the distilled water: Pour your distilled water into a clean, dry bottle or jar. Ensure it’s sealed tightly for later use.
And there you have it! You’ve just distilled your own water at home. This process not only provides purified water but also gives you a great sense of accomplishment. Whether you’re using it for drinking, cooking, or even in your plants, distilled water has numerous benefits!
Also Read This: Don Omar "Danza Kuduro" Featured in Fast and Furious: Watch on Dailymotion
5. Common Methods for Home Distillation
If you're looking to make distilled water at home, there are a few common methods that you might find useful. Each method has its own advantages and can be done with materials you likely already have around the house. Let’s take a look at some popular techniques!
- The Stovetop Method: This classic approach involves boiling water in a pot and collecting the steam. Here’s how it works:
- Fill a large pot with water and place the lid upside down on top. This creates a sort of mini distillation unit.
- As the water heats up, steam will rise and condense on the lid.
- Put a bowl or cup in the center of the pot, and the condensed water will drip into it - voila, distilled water!
- The Solar Distillation Method: If you have a sunny day and a bit of patience, this eco-friendly method could suit you. Here’s what you do:
- Take a shallow basin and fill it with water. Place a smaller container in the middle, so it’s floating but not submerged.
- Cover the basin with a clear plastic wrap, ensuring it’s tight and secure.
- The sun will warm the water, and the steam will condense on the underside of the plastic, dripping into your smaller container.
- The Electric Distiller: If you're looking for a more automated solution, you might consider investing in an electric distiller. This appliance simplifies the process significantly:
- Just fill it with water, turn it on, and let it do its job.
- Most models have a built-in mechanism to ensure the container stays at the correct temperature for optimal distillation.
- The Pressure Cooker Method: This method might surprise you, but it’s quite effective. Here’s how to do it:
- Fill the bottom of the pressure cooker with water, then place an empty glass jar inside it.
- Seal the cooker and heat it until steam starts to form.
- The steam will keep condensing and dripping into the jar, leaving impurities behind.
Each of these methods has its pros and cons, but they all have one thing in common: they can effectively produce distilled water right from the comfort of your home! Choose the one that fits your lifestyle and resources best.
Also Read This: How to Watch Dailymotion on Xbox One
6. Safety Tips When Making Distilled Water
Making distilled water at home is generally safe, but it's crucial to take some precautions. Safety should always be a priority in any DIY project. Here are some essential tips to keep in mind:
- Always Supervise Heating: When boiling water on the stovetop or using a pressure cooker, never leave the process unattended. Keep an eye on it to prevent any accidents or overflows.
- Use Safe Containers: Ensure that any containers or pans you use can withstand high temperatures. Using glass or stainless steel is preferred, especially when dealing with steam.
- Watch Out for Steam: Be cautious with the hot steam when removing lids from pots or containers. Steam can cause burns, so it’s best to use an oven mitt and open the lid away from your face.
- Keep It Clean: Make sure all equipment and containers are thoroughly cleaned before starting. Any residue can contaminate your distilled water.
- Awareness of Chemical Leaching: If you’re using plastic containers or wraps, be aware that some plastics can leach harmful chemicals when heated. Opt for glass wherever possible.
- Stay Hydrated and Take Breaks: Distillation can take time, especially with solar methods. While you’re waiting, don’t forget to drink fresh water and take breaks.
By following these safety tips, you can enjoy the process of making distilled water at home, ensuring it’s both safe and effective. Happy distilling!
Also Read This: Master the Art of Making Your Videos Public on Dailymotion
7. Storing Distilled Water Properly
Once you've gone through the effort of making distilled water at home, it's essential to store it properly to maintain its purity and prolong its shelf life. Here are some helpful tips:
- Choose the Right Containers: Glass or food-grade plastic containers are your best bets. Avoid using containers that have previously held chemicals or non-food substances.
- Keep It Sealed: After filling your container, make sure to seal it tightly. This minimizes the risk of contaminants entering the water.
- Avoid Direct Sunlight: Store your distilled water in a cool, dark place. Exposure to sunlight can cause algal growth and degrade the quality of the water over time.
- Label and Date: If you make distilled water in batches, label your containers with the date of distillation. This helps you keep track of freshness.
- Refrigerate for Long-Term Storage: If you plan to keep the distilled water for an extended period, consider refrigerating it. However, room temperature is fine if the water is consumed within a few days or weeks.
By paying attention to storage conditions, you’ll ensure that your distilled water remains pure and safe for use, whether you're using it for drinking, cooking, or even for your household appliances. Remember, while distilled water doesn't spoil, maintaining its quality is crucial to enjoying the benefits it provides.
Also Read This: Creating a New Facebook Account on Dailymotion with Ease
8. Frequently Asked Questions About Distilled Water
Distilled water is gaining popularity for its purity and versatility, but you might have some questions before diving in. Let's tackle some of the most frequently asked questions about distilled water:
What is distilled water?
Distilled water is water that has been boiled to produce steam, and then condensed back into liquid form. This process removes impurities, minerals, and contaminants, resulting in very pure water.
Is distilled water safe to drink?
Absolutely! Distilled water is safe to drink. However, because it lacks minerals found in regular drinking water, some people might find the taste to be a bit flat. You can always add minerals back in if you prefer!
Can I use distilled water in my appliances?
Yes, many people use distilled water in appliances like steam irons, humidifiers, and CPAP machines. It helps prevent mineral buildup, extending the life of these devices.
Can I cook with distilled water?
Certainly! Using distilled water for cooking is safe and can be particularly beneficial if you want to avoid any potential impurities found in tap water. Just be aware that it might not add any extra flavor to your meals, which is why many choose to add spices or herbs when cooking with it.
How long can I store distilled water?
While distilled water doesn’t “expire,” it’s best consumed within six months to a year for the freshest taste. Store it properly in a sealed container, and it will remain safe for much longer. Just be sure to check for any signs of contamination before use!
Hopefully, this FAQ section has answered your burning questions about distilled water. Whether you're drinking it, cooking with it, or using it in appliances, understanding more about distilled water can help you utilize it effectively in your daily life!
Conclusion: Enjoying the Benefits of Homemade Distilled Water
Making distilled water at home is not only easy but also offers numerous advantages. By engaging in this simple process, you can ensure that the water you consume is free from impurities and contaminants. Here are some key benefits of enjoying your very own homemade distilled water:
- Purity: Distilled water is stripped of minerals, chemicals, and pathogens, providing you with the cleanest possible hydration.
- Cost-effective: Creating distilled water at home can save you money in the long run compared to purchasing bottled distilled water.
- Environmental benefits: By producing your own distilled water, you reduce plastic waste associated with bottled water usage.
- Health advantages: Distilled water can aid in detoxification and serve as a great option for those on specific diets requiring low mineral intake.
- Versatility: Use distilled water for cooking, making baby formula, or even in appliances like steam irons and humidifiers to prevent mineral buildup.
To maximize the benefits of your homemade distilled water, ensure regular maintenance of your distillation setup. Clean your equipment frequently to keep it functioning efficiently and providing high-quality water. With these simple steps, you'll be able to enjoy pure, great-tasting water while also reaping various health and environmental benefits. Embrace the DIY spirit and savor the advantages of your homemade distilled water!
 admin
admin


