Have you ever dreamed of wearing a unique dress that you made yourself? DIY fashion is not just a trend; it's a creative outlet that allows you to express your personal style. With the right resources and a pinch of inspiration, you can transform your wardrobe into a collection of one-of-a-kind pieces. Platforms like Dailymotion offer a treasure trove of fashion tips and tutorials that make the journey of dressmaking accessible and enjoyable. So, roll up your sleeves, and let’s dive into the world of DIY designer dress making!
Choosing the Right Materials for Your Designer Dress
When it comes to creating your own designer dress, choosing the right materials is crucial. The fabric you select will not only determine the look and feel of your dress but also its durability and comfort. Here are some key considerations:
- Fabric Type: Different fabrics lend themselves to different styles. For example, lightweight cotton is perfect for summer dresses, while heavier fabrics like wool or velvet are great for winter wear.
- Color and Pattern: Don’t be afraid to express your personality! Consider vibrant colors or unique patterns that resonate with your style. Dailymotion has great videos showcasing how to mix and match colors effectively.
- Quality: Invest in high-quality materials. They may cost more upfront, but they will last longer and make your dress look more professional.
Here’s a quick guide to some popular fabric choices:
| Fabric | Best For | Care Instructions |
|---|---|---|
| Cotton | Casual dresses, summer wear | Machine wash, low heat |
| Satin | Evening wear, elegant dresses | Hand wash or dry clean |
| Chiffon | Layered dresses, flowy styles | Hand wash, air dry |
| Linen | Beachwear, casual summer dresses | Machine wash, cool iron |
Once you’ve selected your fabric, consider the trims and embellishments. Ribbons, lace, and buttons can elevate your design and add that designer touch. Don’t forget to check out Dailymotion for tutorials on how to work with different materials and create stunning finishes!
In summary, the right materials can make or break your DIY designer dress. Take your time to explore options and choose what feels right for you. Remember, your creativity is your greatest asset!
Also Read This: How to Use Hair Color Spray: A Quick and Easy Way to Transform Your Hair
Essential Tools You Need for Dressmaking
Getting started with dressmaking can feel overwhelming, but having the right tools makes all the difference. Here’s a handy list of essential tools you’ll need to embark on your DIY designer dress journey:
- Sewing Machine: A reliable sewing machine is your best friend. Look for one that’s user-friendly and has various stitch options. Brands like Brother and Singer offer great starter machines.
- Fabric Scissors: Invest in a good pair of fabric scissors for clean cuts. Dull scissors can ruin your fabric, so keep them sharp.
- Measuring Tape: Accurate measurements are crucial for a well-fitting dress. A flexible measuring tape is perfect for taking body measurements and checking fabric lengths.
- Pattern Weights: These help hold your fabric and patterns in place while you cut, preventing any slipping.
- Tailor's Chalk: Use tailor's chalk to mark your fabric before cutting. It washes out easily, leaving no trace.
- Needles and Thread: Choose needles appropriate for your fabric type. Cotton thread works well for most projects, but specialty threads like silk or polyester are also great for specific fabrics.
- Pin Cushion: Keep your pins organized with a pin cushion. It’s a small but mighty tool that saves time and adds safety.
- Iron and Ironing Board: Pressing your fabric is essential for a polished look. A good steam iron can help you achieve crisp seams.
Having these tools at your disposal will set you up for success. Once you’re equipped, you’ll be ready to dive into the fun part—creating your dress!
Also Read This: Learn How to Stream Dailymotion Videos from Your iPhone to Your TV
Step-by-Step Guide to Creating Your Designer Dress
Now that you have your tools ready, let’s walk through a straightforward process to create your very own designer dress. Follow these steps, and you’ll be wearing your masterpiece in no time!
- Choose Your Fabric: Start with selecting the right fabric for your dress. Consider weight, drape, and feel. Cotton, silk, and jersey are popular choices. Don’t forget to wash and iron it before cutting!
- Find a Pattern: Look for a dress pattern that suits your style. You can find great options online or at fabric stores. Make sure to check the size and complexity of the pattern.
- Take Accurate Measurements: Use your measuring tape to measure your bust, waist, and hips. This ensures a flattering fit. Write these down, and compare them to your pattern's size chart.
- Cut the Fabric: Lay your fabric flat and pin the pattern to it. Use your fabric scissors to cut around the pattern, leaving a seam allowance as indicated.
- Start Sewing: Thread your sewing machine and begin by sewing the main seams together, following the pattern instructions. Start with the bodice, then attach the skirt. Don’t rush; take your time!
- Finish Edges: To prevent fraying, finish the edges with a zigzag stitch or a serger if you have one. This step is vital for durability.
- Add Details: This is where you can get creative! Add pockets, embellishments, or a unique hemline to personalize your dress.
- Press Your Seams: Press the seams flat with your iron for a clean finish. This step can transform your dress from good to stunning!
- Final Fit: Try on the dress and make any necessary adjustments. It’s normal to need minor tweaks for the perfect fit!
And there you have it! A step-by-step guide that not only breaks down the process but also encourages you to let your creativity shine. Don’t be afraid to experiment and enjoy the journey of making your designer dress at home!
Also Read This: Methods for Downloading Dailymotion Videos on Mac Without Software
5. Inspiration from Dailymotion Fashion Videos
If you’re looking to elevate your DIY dress-making journey, Dailymotion is a treasure trove of inspiration! With countless fashion channels and creative minds sharing their expertise, you can explore everything from vintage styles to modern chic looks. Here’s how you can tap into this resource:
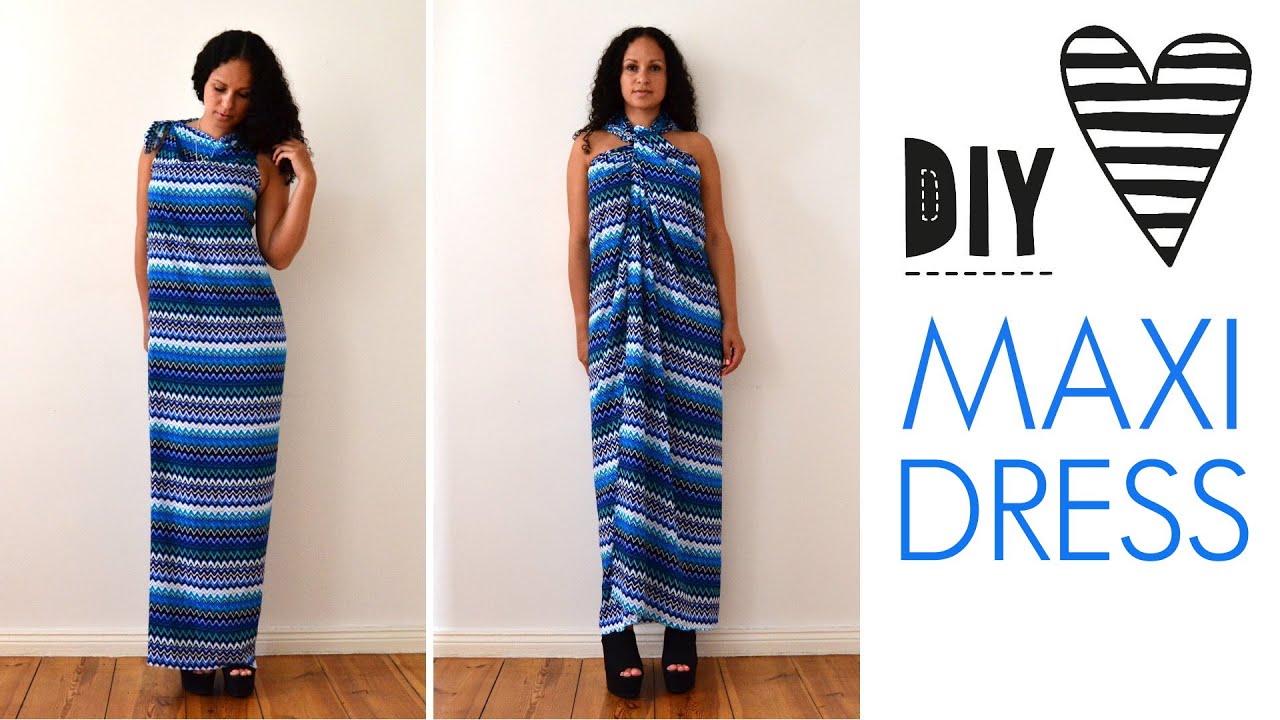
1. Discover Unique Styles: Start by searching for specific dress styles that catch your eye. Whether it’s boho, A-line, or maxi dresses, you’ll find videos showcasing various designs. One of my favorites is the channel “Fashion Inspirations,” which features tutorials on making dresses that are both stylish and easy to replicate at home.
2. Follow Tutorials: Many creators provide step-by-step tutorials. For instance, the video series "DIY Fashion Hacks" breaks down complex designs into manageable steps. You can pause, rewind, and take notes as you work through your dress-making process.
3. Trend Alerts: Keep an eye on trending designs! Fashion enthusiasts often upload videos discussing seasonal trends and how to incorporate them into your wardrobe. Look for videos tagged with “Spring Fashion Trends” or “2023 Summer Styles” to stay up-to-date.
4. Create a Mood Board: As you watch these videos, take screenshots or jot down ideas that resonate with you. Creating a mood board from your favorite clips can help visualize your final design. You can use platforms like Pinterest or even a simple sketchbook to compile these inspirations.
5. Engage with the Community: Dailymotion’s comment sections often feature discussions among viewers. Don’t hesitate to join in! Ask questions or share your own tips. Engaging with others can spark new ideas and help perfect your dress-making skills.
By immersing yourself in Dailymotion’s vibrant fashion community, you’ll find endless ideas that will ignite your creativity and enhance your DIY dress-making project!
Also Read This: Don’t Think I Have Forgotten on Dailymotion: Stream the Documentary
6. Tips for Customizing Your Dress Design
Customizing your dress allows you to express your unique style and personality. Here are some practical tips to help you put your own spin on your creations:
1. Choose Your Fabric Wisely: The fabric you select will significantly affect the look and feel of your dress. For a flowy, romantic vibe, consider lightweight fabrics like chiffon or georgette. If you prefer a structured look, heavier materials like denim or cotton twill can work wonders. Don’t be afraid to mix and match textures!
2. Play with Colors and Patterns: Experimenting with color can transform a simple dress into something extraordinary. Use fabric dyes to create ombre effects or stencils for unique prints. Consider using bold patterns for a statement piece or soft pastels for a more subtle elegance.
3. Add Personal Touches: Incorporate elements that reflect your personality. This can be as simple as adding pockets (who doesn’t love pockets?) or as elaborate as incorporating beading or embroidery. Try adding lace trims or fabric appliqués for a whimsical touch!
4. Adjust the Fit: Nothing makes a dress feel more special than a perfect fit. Take your measurements accurately and make adjustments accordingly. If you want a more fitted silhouette, consider adding darts or side seams. Alternatively, you can create a looser, more relaxed fit by opting for an empire waist design.
5. Experiment with Silhouettes: Don’t feel constrained to just one style! Try modifying the silhouette. For example, if you’ve got a basic A-line dress pattern, consider adding a peplum at the waist or a high-low hem for added drama. The more you experiment, the more you’ll discover what flatters you best!
Customizing your dress design can be one of the most rewarding aspects of the DIY dress-making process. Embrace the creativity, and let your imagination run wild!
Also Read This: How to Create a Gmail Account Video Tutorial: Step-by-Step Instructions on Dailymotion
7. Final Touches: Hemming and Accessories
Once you’ve stitched together the main parts of your dress, it’s time for those all-important final touches! These are the details that can elevate your creation from “just another dress” to something that looks straight out of a boutique. Let’s dive into hemming and accessorizing your DIY masterpiece.
*Hemming is crucial for achieving a polished finish. Here’s a quick guide:
- Measure Twice, Cut Once: Before you start, try on your dress and determine the desired length. Use pins to mark where you want the hem to fall.
- Choose Your Hem Style: There are several options:
- Blind Hem: Nearly invisible on the outside, great for formal looks.
- Rolled Hem: Perfect for lightweight fabrics, giving a delicate finish.
- Double Turn Hem: A sturdy choice for heavier fabrics.
- Press, Pin, and Sew: Iron the hem allowance, pin it in place for accuracy, and sew carefully along the edge.
Now that your hem looks fantastic, let’s talk about accessories*. Accessories can completely transform your dress, so think about what complements your design:
- Belts: A statement belt can cinch the waist and add a pop of color.
- Jewelry: Consider bold earrings or a layered necklace to draw attention.
- Scarves: A chic scarf can be tied around the neck or used as a hair accessory.
Lastly, don’t forget about shoes! The right pair can elevate your entire outfit. Whether it’s classy heels or trendy flats, consider the occasion and comfort.
8. Showcasing Your Finished Dress
Congratulations! You’ve successfully crafted a stunning dress. Now it’s time to show it off and bask in the glory of your handiwork. Here are some fun ways to showcase your finished dress:
- Photoshoot: Organize a mini-photoshoot! Find a picturesque location, wear your dress, and snap away. Consider using natural light for that perfect glow.
- Social Media: Share your creation on platforms like Instagram or Pinterest. Use hashtags like #DIYFashion or #SewingProjects to connect with fellow fashion enthusiasts.
- Fashion Show: Host a small gathering or virtual showcase with friends and family. Show off your dress and maybe even invite them to share their creations!
Finally, consider wearing your dress to a special event. Whether it’s a gathering, a casual outing, or even a date night, nothing beats the feeling of wearing something you’ve made yourself!
As you step out in your beautiful DIY dress, remember that fashion is about expressing your unique style. Each stitch and embellishment tells a story, and now you have a piece that reflects your creativity. Happy sewing!
 admin
admin


