Are you craving that velvety, smooth taste of dairy milk chocolate but want to steer clear of store-bought options? Making chocolate at home can be a delightful adventure! With just a few simple ingredients and a bit of patience, you can create a rich chocolate treat that rivals any gourmet brand. In this blog post, we'll explore the art of crafting your very own dairy milk chocolate right in your kitchen. Yes, it's easier than you think and oh-so-rewarding! Let’s dive into the joys of homemade chocolate-making.
Benefits of Making Chocolate at Home
Making chocolate at home isn't just a fun hobby; it also comes with a host of benefits that make it an appealing choice for chocolate lovers and home cooks alike. Here are some of the fantastic reasons you should consider giving this a try!
1. Freshness and Quality:
When you create chocolate at home, you have complete control over the quality and freshness of your ingredients. You can choose high-quality cocoa powder, fresh dairy, and even organic sweeteners. This results in a chocolate that is not only delicious but also free from preservatives and artificial flavors often found in commercial chocolates.
2. Tailored Flavor:
One of the most exciting aspects of making your chocolate at home is the ability to customize the flavor profile. Want to add a dash of sea salt? Go for it! Craving a hint of vanilla or maybe some nuts for crunch? The possibilities are endless! You can experiment with different add-ins like:
- Spices (cinnamon, chili powder, etc.)
- Fruits (dried raspberries, orange zest)
- Nuts (almonds, hazelnuts, walnuts)
- Herbs (mint, lavender)
Making your chocolate allows you to create unique flavors tailored to your taste buds.
3. Healthier Option:
When you make chocolate at home, you can easily control the sugar content, opting for natural sweeteners or reducing the amount altogether. You can also skip the unhealthy additives that may be present in store-bought options. This is especially beneficial for those with dietary restrictions or anyone looking to indulge more mindfully without compromising flavor.
4. Fun Activity:
The process of making chocolate can be a fun and rewarding activity, whether alone or with friends and family. It’s perfect for cooking enthusiasts who love experimenting in the kitchen. Children can also get involved, making it a great bonding experience. You can turn it into a fun project by:
- Hosting a chocolate-making party
- Creating seasonal flavors for holidays
- Starting a family tradition of homemade chocolates
Engaging in this activity provides not just a tasty treat but also cherished memories!
5. Cost-Effective:
While it may seem that making chocolate at home requires a significant investment in ingredients, it can often be more economical than purchasing premium quality chocolates from stores. In the long run, a small number of high-quality ingredients can yield a sizable amount of delicious chocolate.
In conclusion, the benefits of making chocolate at home go far beyond just satisfying your sweet tooth. From ensuring high quality and freshness to the joy of personalization, it’s an experience worth embarking on. So gather your ingredients and get ready to indulge in the wonderful world of homemade dairy milk chocolate!
Also Read This: Creating a Fire Balloon on Dailymotion
3. Ingredients Needed for Dairy Milk Chocolate
Making homemade dairy milk chocolate is not just a fun project—it’s also a delicious way to indulge in your own creations! Before you roll up your sleeves, let’s gather all the ingredients you’ll need. The beauty of this recipe is that it uses simple, easily accessible items that you might already have in your pantry.
Here’s a list of ingredients:
- 1 cup cocoa butter - This is the fat extracted from cocoa beans and helps give the chocolate a smooth texture.
- 1 cup powdered sugar - This sweetens the chocolate. You can adjust the quantity based on your taste preference.
- ½ cup cocoa powder - Adds that rich chocolate flavor we all love!
- 1 cup whole milk powder - The star of the show—it gives the chocolate its creamy, milky taste.
- 1 teaspoon vanilla extract - For an added layer of flavor, enhancing the overall taste of your chocolate.
- A pinch of salt - This brings out the sweetness and balances the flavor!
Optional ingredients include:
- Nuts or fruits - For added texture and flavor. Think almonds, hazelnuts, or dried fruits!
- Sea salt flakes - If you’re a fan of sweet and salty, sprinkle some on top!
Gather these ingredients and prepare for a delightful chocolate-making journey! Trust me; the final product will be worth every moment you spend in the kitchen.
Also Read This: Creative Tutorials for DIY Magic Stick on Dailymotion
4. Step-by-Step Instructions for Making Dairy Milk Chocolate
Now that we have all our ingredients, let’s dive into the fun part—making our homemade dairy milk chocolate! Follow these simple steps, and you'll be enjoying delicious, melt-in-your-mouth chocolate in no time.
- Melt the Cocoa Butter: Start by chopping your cocoa butter into small pieces to ensure it melts evenly. Place it in a double boiler over low heat. Stir occasionally until fully melted and smooth. If you don’t have a double boiler, a heatproof bowl set over a pot of simmering water works just as well!
- Mix the Dry Ingredients: In a separate bowl, combine the cocoa powder, powdered sugar, milk powder, and salt. Whisk these ingredients together until they are well combined. This step is crucial to prevent any lumps in your chocolate!
- Combine Wet and Dry: Once the cocoa butter is melted, remove it from the heat and let it cool slightly. Gradually add the dry mixture to the melted cocoa butter, stirring continuously. Make sure to work quickly to prevent the cocoa butter from hardening.
- Add Vanilla: After the mixture is well combined and smooth, stir in the vanilla extract. This will enhance the flavor and make your chocolate even more delightful!
- Pour into Molds: Once everything is mixed, pour the chocolate mixture into silicone molds or a lined baking dish. Don't worry if the mixture looks a bit thick; that's perfectly normal.
- Chill to Set: Place your molds in the refrigerator for about 1-2 hours or until the chocolate is hard. Patience is key here—the longer you let it chill, the better it will set!
- Unmold and Enjoy: Once the chocolate has set, gently pop it out of the molds. If you used a baking dish, simply cut it into your desired shapes. And voila, your homemade dairy milk chocolate is ready to be enjoyed!
Feel free to experiment with different add-ins like nuts or fruit chunks for a personalized touch. Enjoy your homemade creation with friends, family, or keep it all to yourself—no judgment here!
Also Read This: How to Use Aloe Vera on Skin for Smooth and Glowing Skin: Dailymotion Video Guide
5. Tips for Perfecting Your Chocolate Making Skills
Making homemade dairy milk chocolate can be a delightful experience, but like any art, it takes practice to perfect. Here are some helpful tips to elevate your chocolate-making game:
- Choose Quality Ingredients: The flavor of your chocolate starts with the ingredients. Opt for high-quality cocoa powder and fresh whole milk or cream. This makes a noticeable difference in both taste and texture.
- Watch the Temperature: Chocolate is sensitive to temperature. When melting, keep the heat low. A double boiler works wonders to prevent overheating. Aim for around 110°F to 120°F (43°C to 49°C) when melting your chocolate.
- Don’t Rush the Process: Take your time. The cooling and tempering stages are crucial for achieving the right texture. Even if you’re eager to taste your creation, patience is a virtue in chocolate making!
- Use a Thermometer: Investing in a good kitchen thermometer can help you maintain the ideal temperatures when melting and tempering chocolate. This precision is key to creating that beautiful shine and snap.
- Experiment with Additives: Want to give your chocolate a unique twist? Consider adding sea salt, nuts, or dried fruits. Just remember, a little goes a long way, and these additions can significantly enhance the flavor.
- Practice Tempering: This technique can be tricky, but it's essential for solid chocolate with that lovely snap. Using the seeding method (adding shaved chocolate to melted chocolate) can make the process easier.
- Store Properly: Once your chocolate is set, store it in a cool, dry place wrapped in parchment paper or in an airtight container. Avoid the fridge unless necessary, as moisture can ruin its silky texture.
By following these tips and continuing to practice, you'll find that chocolate making can become a rewarding and enjoyable hobby. Who knows? Soon, you might be gifting beautifully crafted dairy milk chocolates to friends and family!
Also Read This: How to Apply Stick Foundation: Watch the Video Tutorial on Dailymotion
6. Creative Variations of Dairy Milk Chocolate
Now that you’ve mastered the basic recipe for homemade dairy milk chocolate, it’s time to have some fun and get creative! Here are some exciting variations to make your chocolate standout:
1. Cookies and Cream Chocolate
Add crushed Oreo cookies or any chocolate sandwich cookies to your melted chocolate mixture for a crunchy, creamy twist. Simply fold in the crushed cookies just before pouring the mixture into molds.
2. Nutty Chocolate Delight
Incorporate your favorite nuts, such as almonds, hazelnuts, or pecans, directly into the chocolate. A nutty chocolate bar not only enhances the flavor but also adds a delightful crunch!
3. Fruity Fusion
Dried fruits like cranberries, blueberries, or cherries can provide a burst of flavor to your chocolate. Chop them finely and stir them in before pouring your chocolate into molds.
4. Spiced Chocolate
Spice things up by adding a pinch of cayenne pepper, cinnamon, or even chili powder to your chocolate mixture. This unexpected twist can elevate your chocolate experience to new heights!
5. Minty Fresh Chocolate
For a refreshing taste, add a few drops of mint extract to your melted chocolate. This works wonderfully for a nice after-dinner treat or a holiday-themed dessert.
6. Sea Salt Caramel Chocolate
Drizzle homemade or store-bought caramel over your chocolate before it sets, then sprinkle some coarse sea salt on top. This combination of sweet and salty is utterly irresistible!
These creative variations are just the beginning! The beauty of homemade dairy milk chocolate is the freedom to experiment. So don’t hesitate to try different ingredients and ratios until you find the perfect combination that suits your taste buds!
Also Read This: How to Make Anniversary Cards for Parents at Home: DIY Tutorial on Dailymotion
7. Storage Tips for Homemade Chocolate
Congratulations on making your very own dairy milk chocolate! Now that you’ve crafted this delicious treat, it’s crucial to store it properly to maintain its freshness and flavor. Here are some simple yet effective storage tips:
- Cool, Dry Place: Store your chocolate in a cool, dry area away from direct sunlight. Ideally, a pantry or a cupboard works well. Avoid places with fluctuating temperatures.
- Airtight Container: Use an airtight container to keep your chocolate safe from moisture and odors. This will also help prevent it from acquiring an unwanted taste from other foods.
- Refrigeration: If your home tends to get warm, it’s better to store homemade chocolate in the refrigerator. Just remember to let it come to room temperature before consuming it, as this will enhance the flavor and texture.
- Do Not Freeze: Freezing is not recommended for chocolate, as it can lead to condensation and change the texture when thawed. Stick to keeping it cool in the fridge instead.
- Check for Bloom: If you notice a white, powdery coating on your chocolate, that’s called “bloom.” It happens when the cocoa butter separates and is usually harmless, but it can affect the texture.
By following these simple storage guidelines, you can enjoy the delicious taste of your homemade dairy milk chocolate for weeks, or even months, depending on how quickly you consume it!
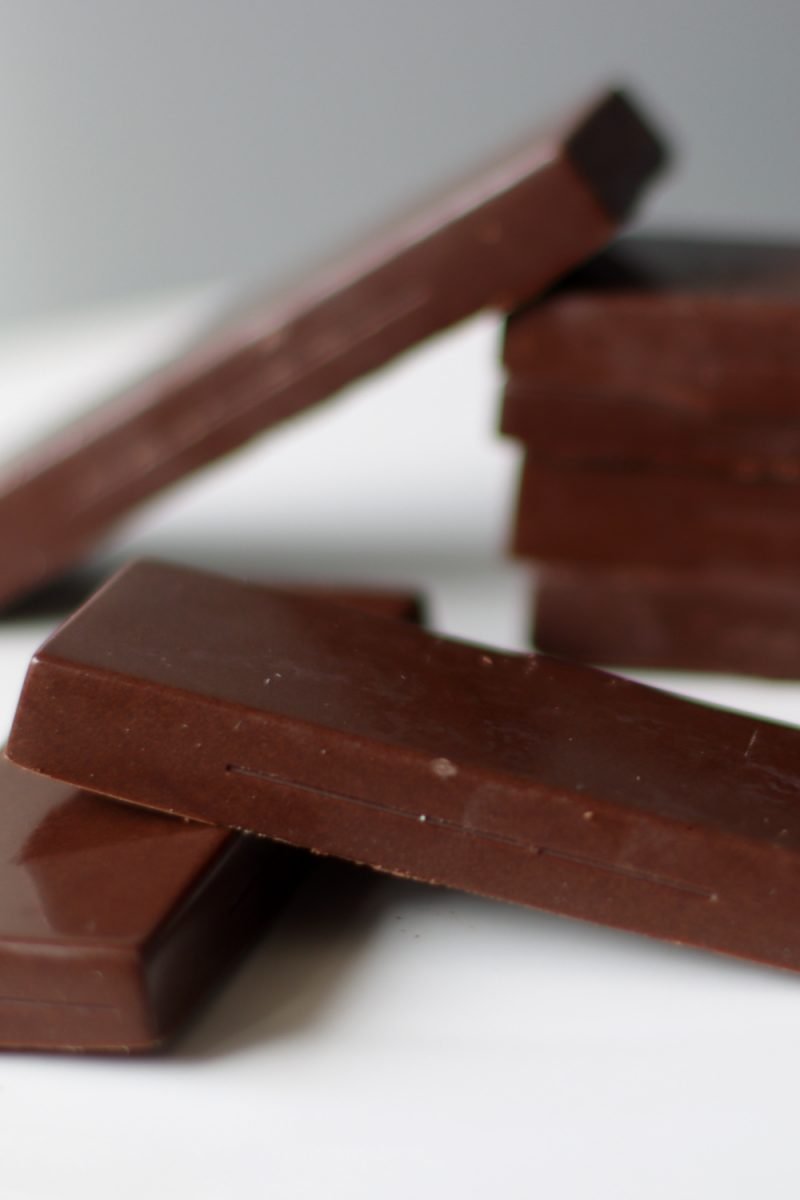
8. Conclusion: Enjoying Your Homemade Dairy Milk Chocolate
Making your own dairy milk chocolate at home is not just a delightful culinary project but also a rewarding and enjoyable experience. There’s something incredibly satisfying about creating sweet treats from scratch, and nothing quite compares to the taste of freshly made chocolate.
So now that you’ve crafted your homemade chocolate, how should you enjoy it? Here are a few ideas:
- Snacking: Break off a piece whenever you need a little pick-me-up! Homemade chocolate is perfect for satisfying a sweet craving.
- Baking: Use your chocolate in various recipes, like brownies or chocolate chip cookies. It will elevate your baked goods with its rich, creamy flavor.
- Gifts: Package your homemade chocolate in pretty gift boxes or wrapping, and share the love with friends and family. Homemade gifts are always cherished!
- Hot Chocolate: Melt your chocolate in warm milk for the ultimate indulgent hot chocolate. Add a pinch of cinnamon or a splash of vanilla for extra flavor.
- Pair with Flavors: Experiment with flavor pairings. Your chocolate would pair beautifully with nuts, dried fruits, or even a sprinkling of sea salt.
Now, go ahead and indulge in your sweet creation! Whether you’re sharing it with loved ones or savoring it all by yourself, your homemade dairy milk chocolate is sure to bring joy and sweetness to any moment. Enjoy every bite!
 admin
admin


