Creating your own curtains is not just a fun project—it's a fantastic way to personalize your space and save some money! With a few simple tools and a bit of creativity, you can transform any room in your home. Whether you're looking for a cozy vibe or a modern touch, DIY curtains allow you to tailor the style, color, and length to fit your unique taste. Let’s explore some tips to get you started on this rewarding endeavor!
Choosing the Right Fabric for Your Curtains
When it comes to making curtains, the fabric you choose plays a crucial role in both the functionality and aesthetic of your finished product. Here are some key factors to consider:
- Thickness: The thickness of your fabric will determine how much light enters your room. For a cozy atmosphere, opt for heavier fabrics like velvet or canvas. If you prefer a lighter, airy feel, consider sheer materials or cotton blends.
- Pattern: Think about the overall theme of your room. Floral patterns can add a touch of romance, while geometric designs can bring a modern flair. Don’t be afraid to mix and match patterns, but keep the color palette cohesive.
- Durability: If your curtains will be exposed to direct sunlight, choose fade-resistant fabrics to prevent discoloration. Consider using materials like polyester, which is known for its resilience and easy maintenance.
- Care: How easy is the fabric to clean? If you have pets or young children, you might want to pick machine-washable fabrics. Cotton is generally a good choice for easy care, while some heavier materials may require dry cleaning.
To help you further, here’s a quick comparison table of popular fabric options:
| Fabric Type | Light Control | Durability | Easy Care |
|---|---|---|---|
| Cotton | Medium | Medium | Yes |
| Velvet | Low | High | No |
| Sheer | High | Low | Yes |
| Polyester | Medium | High | Yes |
Ultimately, the right fabric will depend on your personal style and the specific needs of your space. Take your time to browse through fabric stores or online shops, and don’t hesitate to bring home samples to see how they look in your room. Happy decorating!
Also Read This: How to Download Free Videos from Dailymotion: Free and Fast Guide
3. Essential Tools Needed for Curtain Making
Making your own curtains can be a rewarding experience, and having the right tools makes the process smooth and enjoyable. Let’s dive into the essential tools you’ll need to create beautiful curtains at home!
1. Sewing Machine
No DIY sewing project is complete without a sewing machine. A basic machine will do just fine for curtain making. Look for one with adjustable stitch lengths and various stitch options. Brands like Brother and Singer offer great machines for beginners.
2. Fabric Scissors
Investing in a good pair of fabric scissors is crucial. Unlike regular scissors, fabric scissors are designed to cut through fabric without fraying the edges. Keep them sharp and dedicated solely to fabric to ensure precision cuts.
3. Measuring Tape
Accurate measurements are key to curtain-making success. A flexible measuring tape helps you measure your windows and fabric lengths with ease. Don’t forget to add extra inches for hems!
4. Pins and Pin Cushion
Pins are your best friend when it comes to holding fabric pieces together before sewing. A pin cushion keeps them neatly organized and easily accessible, preventing those pesky pin pricks!
5. Iron and Ironing Board
Pressing your fabric before and after cutting is essential for achieving crisp, professional-looking curtains. An iron and a good ironing board will help remove wrinkles and ensure that your hems lay flat.
6. Thread and Bobbins
Choose thread that matches your fabric for a seamless finish. Make sure to have enough bobbins on hand for your sewing machine, as running out mid-project can be frustrating!
7. Hemming Tape (Optional)
If you’re not quite ready to dive into sewing yet, hemming tape is a fantastic alternative. This double-sided tape will help you create clean hems without any sewing, making it a great shortcut for beginners.
With these essential tools in your arsenal, you’re well on your way to crafting stunning curtains that will elevate your home decor!
Also Read This: Natural Solutions for Removing Facial Hair Permanently
4. Step-by-Step Guide to Sewing Curtains
Now that you’ve gathered your tools, let’s walk through a step-by-step guide to sewing your very own curtains. Follow these instructions, and you’ll have beautiful custom curtains in no time!
Step 1: Measure Your Windows
- Start by measuring the width and height of the window you want to cover.
- Add an extra 4 to 6 inches to the width for gathering and 8 to 12 inches to the height for hems.
Step 2: Choose Your Fabric
Select a fabric that complements your room’s decor. Consider the room's lighting; lighter fabrics allow more light in, while heavier fabrics provide more privacy.
Step 3: Cut the Fabric
Using your fabric scissors, cut the fabric according to your measurements. Don’t forget to add seam allowances—typically 1 inch on each side and bottom!
Step 4: Prepare the Hems
- Fold the bottom edge of the fabric up by 1 inch and press with an iron.
- Then fold up another inch and press again. This will create a clean hem.
- Pin the hem in place to secure it while you sew.
Step 5: Sew the Hems
Using your sewing machine, stitch along the hem edges you pinned. Remember to sew slowly and steadily for the best results!
Step 6: Add Curtain Rod Pocket (Optional)
If you want to hang your curtains with a rod, fold down the top of the fabric by 3 inches to create a pocket. Pin it in place, then sew along the bottom edge of the fold, leaving the sides open for the rod.
Step 7: Final Touches
Once everything is sewn, press your curtains again to eliminate any wrinkles from sewing. Then, hang them up and admire your handiwork!
And there you have it—a simple yet effective guide to sewing your own curtains. It’s a project that not only enhances your decor but also gives your space a personal touch!
Also Read This: Quick Tips on Uploading URLs on Dailymotion Using Desktop
5. Creative Curtain Styles and Designs
When it comes to home decor, curtains can completely transform a space. They not only provide privacy but also add character and style to your rooms. Here are some creative curtain styles and designs you might want to try:
- Layered Curtains: Combine sheer and opaque fabrics for a dynamic look. Sheer curtains can let in light while the heavier ones provide privacy. Choose a light pastel for the sheer layer and a deep jewel tone for the heavier layer to create a beautiful contrast.
- Tab Top Curtains: These are great for a casual, relaxed vibe. By using fabric loops at the top, they slide easily on the rod. Try a fun print or a textured fabric to add depth to your room.
- DIY Roman Shades: If you're looking for something a bit more structured, Roman shades are perfect. You can customize them with a fabric that matches your decor. Plus, they fold up neatly and don’t take up much space when opened.
- Pallet or Wooden Rods: Instead of traditional curtain rods, consider using wooden pallets or branches for a rustic touch. This approach works particularly well in country-style or bohemian-themed homes.
- Patterned Curtains: Bold patterns can be a focal point in any room. Floral prints, geometric designs, or even stripes can add energy and character. Just remember to balance them with more muted decor elements.
These styles not only enhance the aesthetics of your rooms but can also reflect your personal style. Don’t hesitate to mix and match fabrics and patterns to find what suits you best!
Also Read This: How to Make Coffee with Milk Easy Coffee Recipe on Dailymotion
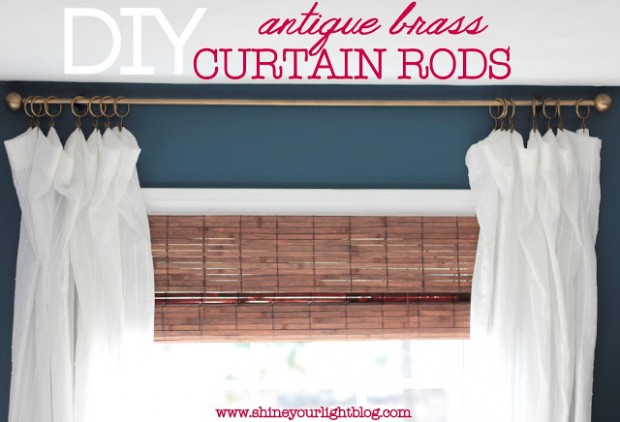
6. Tips for Installing Your Curtains
Installing curtains may seem daunting, but with a few simple tips, you can achieve a professional look at home. Here’s how you can make the process smooth and effective:
- Measure Twice, Cut Once: Before drilling any holes, make sure to measure your window’s width and height accurately. A good rule of thumb is to extend the rod 3-6 inches beyond the window frame to give the illusion of larger windows.
- Choose the Right Height: Hanging your curtain rod higher than the window frame can make your ceilings appear taller. Aim to install the rod 4-6 inches above the window, unless you want a more cozy feel.
- Use Proper Hardware: Ensure you have the right brackets and anchors for your walls. If you’re using heavier curtains, opt for wall anchors to secure the rod, especially if you’re mounting on drywall.
- Check the Curtain Length: Decide whether you prefer your curtains to touch the floor, hover above it, or puddle slightly for a more dramatic effect. Use a step stool for accurate height adjustments.
- Get a Helping Hand: Don’t hesitate to ask someone to help you hold the curtains up while you’re installing. This way, you can ensure everything is aligned properly before securing it all in place.
With these tips, your curtain installation will be a breeze. Remember, the goal is to enhance your home’s beauty while reflecting your personal style. Happy decorating!
Also Read This: Is Dailymotion Safe from Viruses in 2023
7. Maintaining and Cleaning Your Homemade Curtains
Maintaining and cleaning your homemade curtains is essential to keep them looking fresh and vibrant. Here are some tips to help you out:
Regular Dusting: Curtains can accumulate dust, especially if they hang near windows. A quick dusting with a microfiber cloth or a vacuum with an upholstery attachment can do wonders. Aim to do this at least once a month to prevent dust buildup.
Washing Fabrics: Before washing your curtains, always check the care label for specific instructions. Most fabric curtains can be machine-washed, but delicate fabrics might require hand washing. Here’s a simple washing routine:
- Remove Curtain Rod: Take your curtains down carefully.
- Shake Out Debris: Give them a good shake outdoors to remove any loose dust or crumbs.
- Choose the Right Cycle: Use a gentle cycle with cold water for machine washing.
- Use Mild Detergent: Avoid harsh chemicals that can fade colors or damage fibers.
Drying Tips: After washing, avoid using the dryer, which can shrink or damage the fabric. Instead, hang them back up while they're still damp or lay them flat on a clean surface. If you want to speed things up, consider:
- Using a Clothesline: Hang them outdoors on a sunny day for a fresh scent.
- Steam Ironing: While they’re damp, a steam iron can help remove any wrinkles and freshen them up.
Stains and Spot Cleaning: For stubborn stains, act quickly! Blot (don’t rub) the stain with a clean cloth and a mild detergent solution. For tougher stains like wine or grease, consider using a fabric-safe stain remover. Always test a small, inconspicuous area first!
Seasonal Changes: If you switch curtains seasonally, make sure to clean them before storing. Use acid-free tissue paper to prevent creasing and store them in a cool, dry place away from direct sunlight to avoid fading.
8. Conclusion and Final Thoughts
Creating your own curtains at home is not just a fun DIY project; it’s an excellent way to inject your personality into your living space. You’ve learned how to select the right fabric, measure accurately, and sew your curtains, but the journey doesn’t end there!
With proper maintenance and cleaning, your homemade curtains can last for years, enhancing the beauty of your home. Remember, taking a little time to care for them can save you money in the long run and keep your space looking inviting.
Final Tips:
- Always wash fabrics before sewing to prevent future shrinkage.
- Experiment with different styles and patterns to find what resonates with your decor.
- Don’t be afraid to get creative with embellishments like lace trim or fabric paint for a personal touch.
So grab your fabric, gather your tools, and embrace the rewarding experience of DIY home decor. Your windows will thank you, and you’ll feel a sense of accomplishment every time you walk into a room adorned with your homemade curtains!
 admin
admin


