Welcome to the delightful world of crochet! If you’re looking for a fun and creative way to make adorable outfits for your little ones, you've landed in the right place. Crochet baby frocks are not only sweet and stylish but also allow you to express your creativity while crafting something totally unique. In this guide, we'll walk you through everything you need to know, from materials to tips for beginners. Are you ready to pick up that hook and yarn? Let’s get started!
Essential Materials and Tools Needed
Before diving into your crochet project, it’s important to gather all the essential materials and tools you'll need to create those lovely baby frocks. Here’s a handy list to get you started:
- Yarn: Choose soft, baby-friendly yarn. Cotton or acrylic blends are ideal, as they’re soft against delicate skin and offer good durability. Look for yarn labeled as “baby” to ensure comfort.
- Crochet Hook: The size of the crochet hook depends on the yarn you choose. Generally, a 5mm (H-8) hook works well for medium-weight yarn. Check the yarn label for specific recommendations.
- Scissors: A good pair of fabric scissors is essential for cutting yarn cleanly and accurately.
- Tapestry Needle: This is used for weaving in loose ends and adding any decorative accents or buttons. A plastic needle is best for beginners and is safe to use.
- Measuring Tape: Accurate measurements are crucial for creating well-fitting frocks. A flexible measuring tape will help you determine the size needed.
- Stitch Markers: These can be incredibly helpful, especially when keeping track of stitches in larger projects. They help you mark the beginning of rounds or indicate specific stitch counts.
- Pattern or Tutorial: Whether you're following a book, a downloadable pattern, or a free online tutorial, having clear instructions will guide you through the making process step-by-step.
Once you have all your materials in hand, you can embark on this fun adventure. Remember, the key to crochet is patience and practice, so don’t be discouraged if your first frock doesn’t come out perfect. With each stitch, you’ll improve, and before you know it, you’ll be creating beautifully crafted dresses that your little one will adore!
Also Read This: How to Use Revlon Hair Color: Tips for a Gorgeous Hair Makeover
3. Step-by-Step Instructions for Crochet Baby Frocks
Are you ready to dive into the delightful world of crochet? Making a baby frock is a fantastic project that’s both fun and practical. Here is a simple step-by-step guide that will make your frock-making journey smooth and enjoyable!
Materials You'll Need:
- Yarn (recommended: soft cotton or acrylic)
- Crochet hook (size will depend on your yarn, typically G or H)
- Scissors
- Tapestry needle
- Measuring tape
- Stitch markers (optional)
Step 1: Measure & Gauge
First things first, let’s get some measurements! You’ll want to measure the baby’s chest, waist, and the desired length of the frock. A common size for infants is around 0-3 months, usually having a chest measurement of about 18 inches. It's also wise to crochet a gauge swatch to ensure your stitches match the pattern you're following.
Step 2: Start with the Bodice
Begin by creating a foundation chain. For example, if you’re aiming for a chest measurement of 18 inches, chain enough stitches to reach that length, plus a few extra for ease (usually about 5 additional stitches).
Once your chain is completed, work in single crochet (SC) for the bodice. Continue crocheting rounds without joining if you're making a circular frock, or join at the end of each row if you prefer a rectangular bodice.
Step 3: Add the Skirt
Once the bodice is the desired height (typically around 6-8 inches for a baby), it’s time to add the skirt. For this part, you’ll switch to a larger hook or work with longer stitches (like double crochet) to create a more flared effect. Increase your stitch count on every few rows to give it that lovely shape.
Step 4: Finishing Touches
After you've crocheted the desired length for the skirt, fasten off and weave in the ends with a tapestry needle. You can also add embellishments like ruffles or flowers; simply crochet them separately and sew them onto the frock!
Step 5: Try It On!
Once your frock is finished, give it a gentle wash (to smooth it out) and try it on your little bundle of joy. Don’t forget to take lots of pictures; after all, you’ve just created something beautiful!
Also Read This: COPPA FTC Attacking Dailymotion and Its Impact on Content Creators
4. Tips for Choosing Yarn and Patterns
Choosing the right yarn and pattern can make or break your crochet experience. Here are some handy tips to keep in mind while selecting materials for your baby frocks:
Choosing Yarn:
- Softness: Babies have delicate skin, so opt for yarn that is soft and gentle. Cotton or acrylic blends work wonderfully!
- Washability: Babies can be messy, so choose yarn that is machine washable. Look for labels that state 'washable' clearly.
- Weight: A medium (worsted) weight yarn is ideal for beginners, as it’s easier to handle than lighter or heavier yarns. This weight also provides a nice structure to the frock.
Selecting Patterns:
- Beginner-Friendly Designs: Start with simple patterns that use basic stitches such as single crochet, double crochet, and chains. Look for patterns that specify ‘beginner’ to avoid getting overwhelmed.
- Color and Texture: Choose color combinations that resonate with your aesthetic! Consider textures, too; a pattern that plays with different stitch types can add charm.
- Consider Versatility: Patterns that can easily modify the size or style can save time and provide longevity. Opt for versatile designs that can grow with the baby!
Remember, crochet is not just a craft; it's a way to show love. Whichever yarn or pattern you choose, let your creativity shine through. Happy crocheting!
Also Read This: Discovering Dailymotion Features for Beginners and Enthusiasts
5. Common Mistakes to Avoid When Crocheting
Hey there, crochet enthusiasts! Whether you’re just starting your journey into the enchanting world of crochet or you're honing your skills, it’s essential to be aware of some common pitfalls. The last thing you want is to frogging (that’s crochet lingo for rip it, rip it!) your hard work because of a simple mistake. Let’s dive into some frequent blunders and how to steer clear of them!
- Inconsistent Tension: One of the most common issues beginners face is inconsistent tension. If your stitches are tighter in some areas and looser in others, it may lead to a lopsided project. A good tip is to practice on a simple swatch before starting your actual project. Find a comfortable grip on your hook and try to maintain that tension throughout your work.
- Skipping Stitches: It can be easy to accidentally skip a stitch, especially when you’re focused on counting. This can create holes or an uneven fabric. To avoid this, count your stitches regularly and put markers in your rows whenever possible.
- Not Reading the Pattern Carefully: Crochet patterns can have a lot of different instructions hidden within them. Skimming through may lead to mistakes. Always take the time to read through the pattern entirely before you start; this will give you a better understanding of what to expect.
- Using the Wrong Hook Size: Each pattern recommends a specific hook size for a reason! If you use a different size, it may alter your tension and the size of the finished product. Always check your hook size against the pattern and do a gauge swatch if you’re unsure.
- Not Keeping Up with Yarn Count: Losing track of how much yarn you have left can put a damper on your project’s progress. It’s beneficial to keep the yarn label with you, especially when working on larger pieces. Remember to check if you have enough yarn before you start.
By being mindful of these common mistakes, you can save yourself a lot of time and frustration. After all, the goal is to enjoy the crafting process as much as the final product!
Also Read This: Exploring the Holiday Spirit with A Very Vintage Christmas on Dailymotion
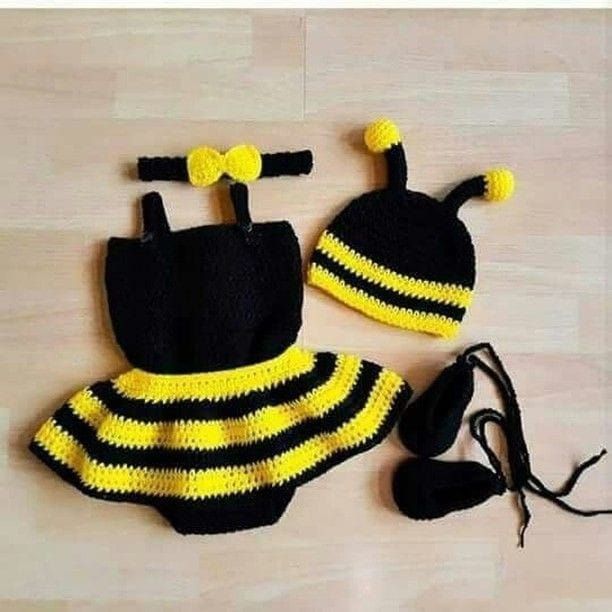
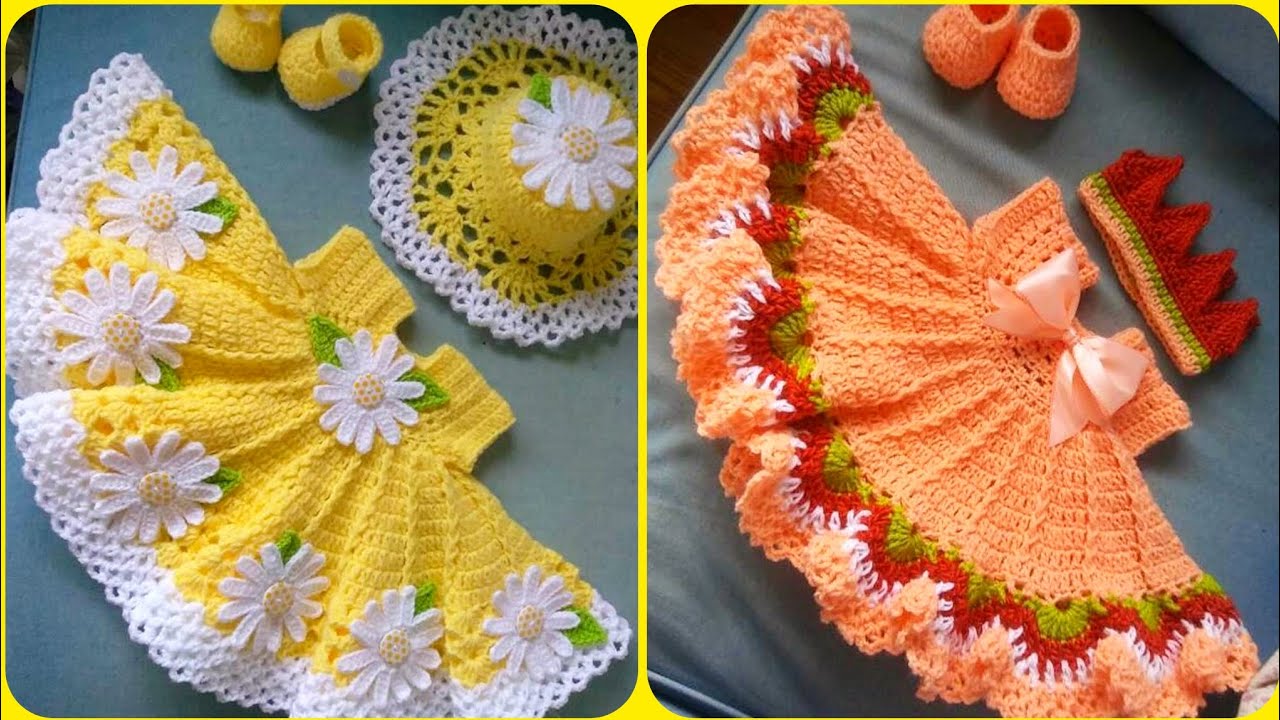
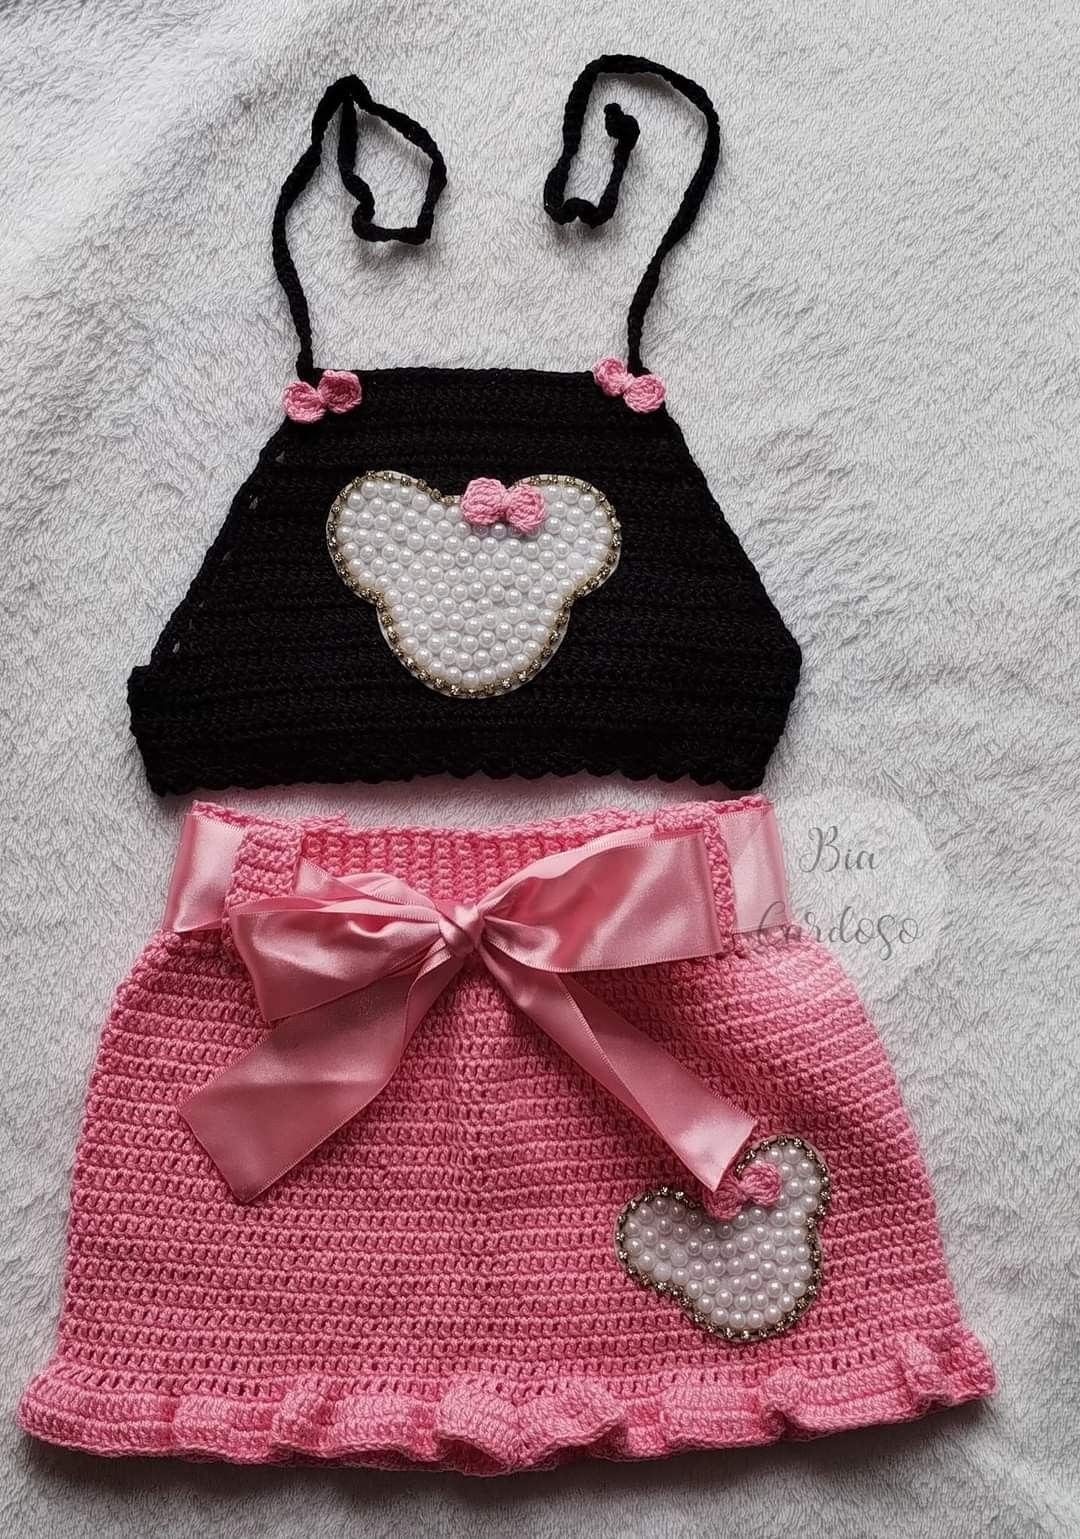
6. Finishing Touches: Embellishments and Accessories
You’ve crocheted the frock, and now it’s time to add those finishing touches that can make your creation truly stand out! Embellishments and accessories are like the cherry on top of your crochet sundae. Let’s explore some fun and simple ways to elevate your baby frocks!
- Buttons: Adding cute buttons can give your frock personality! Try using wooden buttons for a rustic charm or colorful plastic ones for a playful look. You can sew them onto the bodice or along the straps.
- Flower Appliqués: Crochet some tiny flowers in different colors to add a touch of sweetness. You can sew them onto the frock or attach them to a hairband for a matching accessory!
- Ribbons: Incorporating ribbons in contrasting colors can give your frock an additional flair. Consider threading a ribbon through the waistline or using it to tie off the straps.
- Pockets: Small, crochet pockets can be a functional and adorable addition. They’re perfect for little treasures like tiny toys or snacks!
- Hats and Booties: Why stop at just the frock? Create coordinating accessories such as hats and booties! A matching set is always a hit and makes for adorable gift sets.
Don’t be afraid to experiment with colors, styles, and textures! The embellishments you choose can reflect your personality and style, so let your creativity shine. With the right finishing touches, your DIY crochet baby frocks will not only look fabulous but will also be cherished keepsakes for years to come!
Also Read This: Craft a Paper Basket at Home: Easy Steps on Dailymotion
7. Care Instructions for Crochet Baby Frocks
Congratulations on crafting your very own crochet baby frock! Now that you’ve put in the time and effort, it's important to ensure that it stays beautiful and lasts for many adorable photo opportunities. Here are some essential care instructions to keep your crochet baby frocks looking fresh:
- Hand Wash Only: Avoid tossing your frock into the washing machine. Instead, fill a basin with lukewarm water and a gentle detergent. Soak the garment for about 10-15 minutes, gently agitating the water to help release any dirt.
- Rinse Carefully: After soaking, carefully rinse the frock under cool running water until all detergent is removed. Be gentle to prevent stretching the delicate fibers.
- Avoid Wringing: Instead of wringing out excess water—which can distort the shape—press the frock between two clean towels to absorb moisture.
- Dry Flat: Lay the frock flat on a clean, dry towel. Reshape it gently to its original form and allow it to air dry completely away from direct sunlight. This will help maintain its color and shape.
- Store Properly: Once your frock is dry, store it folded in a cool, dry place. Avoid hanging it up, as this could cause it to stretch over time.
- Ironing: If your frock looks a little wrinkled after washing, use a low heat setting on your iron and place a piece of cloth between the iron and the crochet to protect it.
By following these simple care instructions, you can keep your crochet baby frock looking as lovely as the day you made it. Plus, it ensures that your little one can wear it time and time again, spreading joy and cuteness!
Also Read This: Make Delicious Homemade Nuggets in Urdu: Step-by-Step on Dailymotion
8. Where to Share Your Finished Projects
There’s no denying that completing a crochet project is a major accomplishment! Now that you have a beautiful baby frock to show off, why not share your handiwork with the world? Here are some wonderful places to showcase your finished projects:
- Social Media: Platforms like Instagram and Facebook are fantastic for sharing your creations. Use relevant hashtags like #CrochetBabyFrock or #HandmadeBabyClothes to reach a wider audience.
- Crafting Forums: Websites such as Ravelry and Crochetville are communities specifically for crafters. These platforms allow you to interact with fellow crochet enthusiasts, exchange tips, and show off your work!
- Blogs: Consider starting your own crafting blog or contributing to existing ones. Share your tutorial, along with pictures of your finished projects, to inspire fellow crocheters.
- Local Craft Fairs: Participating in local craft fairs can be a fun way to connect with your community. Not only can you showcase your frocks, but you can also meet other crafters and potential customers!
- Pinterest: This platform is perfect for visually displaying your work. Share stunning photos of your frock with links back to your tutorials or crafting blog.
Regardless of where you choose to share, connecting with other crafters and showcasing your crochet baby frock can be incredibly rewarding. Plus, you might inspire someone else to take up crochet, spreading the joy of crafting far and wide!
Conclusion and Encouragement for New Crocheters
Congratulations on taking the first step into the world of crochet! As you embark on your journey to create beautiful baby frocks, remember that every expert was once a beginner. Here are a few reassuring thoughts to keep in mind:
- Practice Makes Perfect: Don’t be discouraged by initial mistakes. Each row you crochet improves your skill.
- Celebrate Small Wins: Completing even a small project, like a simple baby frock, is a significant achievement.
- Join a Community: Seek out local or online crochet groups. Sharing your experiences can provide support and inspiration.
As you work through your projects, consider these tips:
| Tip | Description |
|---|---|
| Stay Organized | Keep your materials tidy and accessible to make crocheting more enjoyable. |
| Learn from Mistakes | If something goes wrong, unravel it and try again. It’s all part of the learning process. |
| Have Fun! | Enjoy the creative process, and let your imagination guide your designs. |
In conclusion, embrace your creativity and let your passion for crochet flourish. With patience and perseverance, you will create stunning baby frocks that will be cherished by families. Happy crocheting!
 admin
admin


