Have you ever wondered how to make cream from milk right in your own kitchen? It's simpler than you might think! Creating homemade cream is not only a fun DIY project but also allows you to control the ingredients and achieve that perfect richness without any artificial additives. Whether you want to whip it up for desserts, use it in coffee, or add it to savory dishes, homemade cream can elevate your culinary creations. So, let’s dive into this delightful process and discover why making cream at home is a worthy endeavor!
Benefits of Making Cream at Home
Making cream at home comes with a treasure trove of benefits that can enhance your cooking experience. Here are some of the most notable advantages:
- Quality Control: When you make cream yourself, you know exactly what goes into it. You can use fresh, high-quality milk from your local dairy or organic sources, ensuring a superior product compared to store-bought options.
- No Additives: Commercial creams often contain stabilizers and preservatives to increase shelf life. Homemade cream is free from these additives, making it a healthier choice for you and your family.
- Customization: Want your cream a bit thicker? Or perhaps you’d like it slightly sweeter? When you make cream at home, you can adjust the texture and flavor to suit your personal taste.
- Freshness: Nothing beats the taste of freshly made cream. It's incredibly rich and flavorful, which can elevate any dish it’s added to, giving your recipes a homey, wholesome touch.
- Cost-Effective: Making cream at home can be more economical than buying it, especially if you already have milk on hand. Plus, you can avoid the premium prices often associated with organic or specialty creams.
- Fun and Educational: DIY cooking can be a fun activity! Involving family or friends in the process can turn cooking into a bonding experience, teaching skills that might just become a tradition.
Ultimately, making cream at home gives you a rewarding sense of accomplishment. It’s amazing to transform simple milk into something so rich and creamy. Plus, it opens up endless possibilities in the kitchen, allowing you to create fabulous dishes with a personal touch!
Also Read This: Easy Tutorials for Cake Icing on Dailymotion
3. Ingredients Needed
Making cream at home is not just easy but also incredibly rewarding. To get started, you only need a few simple ingredients. Here’s what you’ll need:
- Whole Milk: The star of the show! You’ll want to use good quality whole milk for the best results. The cream will separate better from whole milk than from low-fat or skim milk.
- Heavy Cream (optional): If you’d like to enhance the richness of your homemade cream, adding a touch of heavy cream can do wonders. It’s not mandatory, but it gives a lovely texture.
- Salt (optional): A pinch of salt can enhance flavor, especially if you plan to use the cream in savory dishes. If you’re making it for desserts, you might prefer to skip the salt.
And that’s it! Just with these few ingredients, you’re on your way to creating creamy goodness right in your kitchen. Remember, the fresher the milk, the better the cream will be, so try to get your milk from a local farm if possible.
Also Read This: Creative DIY Room Decoration Ideas from Dailymotion
4. Step-by-Step Guide to Making Cream
Alright, let’s roll up our sleeves and get started on making your very own cream! It’s a straightforward process that comes with a little bit of waiting, but the results are totally worth it. Here’s a simple step-by-step guide:
- Gather Your Supplies: First things first, make sure you have a deep bowl or container that’s large enough to hold the milk you’ll be using. Grab a spoon for stirring and a ladle for separating the cream later.
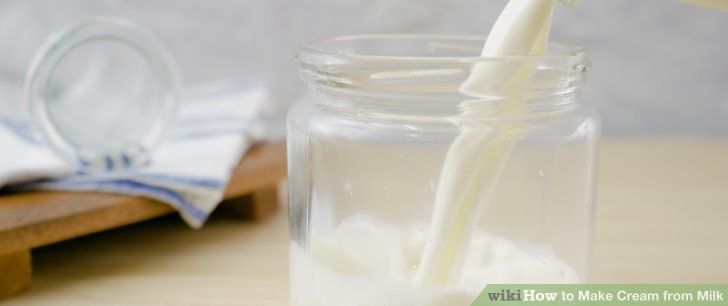
- Pour the Milk: Take your whole milk and pour it into the bowl or container. If you’re using heavy cream, consider adding it in at this stage. You want to leave some space in the bowl, as the cream will rise to the top!
- Let it Sit: Now comes the hard part—patience! Cover your bowl with a clean cloth and let it sit at room temperature for about 12 to 24 hours. This resting period allows the cream to rise to the top naturally, thanks to the fat content in the milk.
- Skim off the Cream: After the resting period, you’ll notice that a layer of cream has formed on top. Using your ladle or a spoon, carefully skim the thickened layer of cream off the top of the milk. Try to be gentle, as you don’t want to disturb the milk underneath too much.
- Store Your Cream: Transfer your freshly made cream into a clean jar or container. If you’ve added a pinch of salt for flavor, now’s the time to mix it in. Seal the container and store it in the fridge. Your homemade cream can last about a week to ten days. Just give it a good stir before using!
- Enjoy: Now that you have your cream, the possibilities are endless! Use it in your favorite coffee, drizzle it over desserts, or whip it up for topping on cakes and pastries.
Making cream at home is not just satisfying; it also allows you to enjoy a fresh product free of preservatives. So go ahead, give it a try, and relish the delightful richness of homemade cream!
Also Read This: How to Cook Chicken Karahi: A Step-by-Step Recipe Featured on Dailymotion
5. Tips for Achieving the Best Results
Making cream from milk at home can be an enjoyable experience, but to make sure your efforts yield the best results, here are some helpful tips to consider. The quality of your ingredients and your technique can make a significant difference!
- Choose High-Quality Milk: The fresher the milk, the better your cream will taste. Whole milk from a local farm is ideal because it has a higher fat content compared to store-bought options. Look for milk that is labeled as 'non-homogenized' to ensure the cream rises to the top more easily.
- Chill Your Equipment: Before you start, place your mixing bowl and whisk or mixer attachments in the refrigerator for about 30 minutes. Cold equipment helps the cream whip better and increases the final volume.
- Allow the Milk to Sit: After you've poured your milk into the container, let it sit undisturbed in the fridge for at least 24 hours. This resting time allows the cream to rise to the top, making it easier to skim off. Don't shake the milk; we want that lovely cream layer to develop!
- Skim Off Gently: When you're ready to collect the cream, use a ladle or a spoon to gently skim the creamy layer from the top. Be careful not to disturb the milk below too much, as we want to leave as much of the fat in the cream as possible.
- Watch Your Temperature: If you choose to whip your cream, remember that room temperature cream whips faster and can hold its shape longer than cold cream. So, you might want to let it sit out for about 10-15 minutes before whipping.
By following these tips, you’ll ensure that your homemade cream is rich, delicious, and ready to elevate your culinary creations!
Also Read This: Creating Friendship Cards at Home on Dailymotion
6. Ways to Use Homemade Cream
Now that you've whipped up some luscious cream, how can you incorporate it into your meals and treats? The versatility of homemade cream means it can be used in a variety of ways, elevating both sweet and savory dishes alike. Here are some delicious ideas:
- Whipped Topping: Use your cream as a topping for cakes, pies, or even fresh fruit. Just whip it up with a bit of sugar and vanilla extract for a delightful finishing touch.
- In Coffee: Add a splash of your homemade cream to your morning coffee for a rich, velvety texture. It’s like having a fancy café experience right in your kitchen!
- Cooking Sauces: Incorporate cream into savory dishes such as pasta, soups, or sauces. Just simmer it with herbs and spices to create a flavorful sauce that adds depth to your meals.
- Ice Cream Making: Use your cream as a base for homemade ice cream. Combine it with your favorite flavors and freeze for a deliciously creamy dessert.
- Custards and Puddings: Homemade cream is perfect for making rich custards or puddings. For a luxuriously creamy texture, use it as a base in your favorite dessert recipes.
As you can see, the possibilities are endless! Whether you're whipping up a sweet dessert or enriching a savory dish, your homemade cream will add a touch of indulgence that’s sure to impress.
Also Read This: How to Make a Projector at Home: Easy DIY Guide on Dailymotion
7. Common Mistakes to Avoid
Making cream from milk at home might sound simple, but there are a few pitfalls you can easily fall into. Here are some common mistakes to watch out for:
- Using Low-Fat Milk: The fat content in your milk is crucial. Using low-fat or skim milk won't yield the creamy texture you're aiming for. Always go for whole milk, or even better, milk that is labeled as cream-top which retains more fat.
- Shaking Too Vigorously: While shaking the milk is necessary to separate the cream, shaking it too hard can break down the fat particles more than needed. This can lead to a grainy texture rather than a smooth cream. Gentle shaking is the way to go!
- Overheating the Milk: If you're heating the milk to separate the cream, make sure not to overheat it. Heating milk too much can scald it, affecting the flavor and aroma. Keep an eye on the temperature and aim for a gentle warmth.
- Not Allowing Enough Time: Patience is key! You can't rush the process. Make sure to leave your milk undisturbed for at least 24 hours. If you check too early, you may miss out on that fantastic layer of cream that forms.
- Skipping the Refrigeration: If you want your cream to be the best it can be, make sure to chill the milk thoroughly and keep it cold throughout the process. Warm temperatures can hinder the separation process, making it less effective.
- Not Using Clean Utensils: Cleanliness is next to creamy! Always use clean jars and utensils to prevent unwanted bacteria from affecting your cream. It's a simple step that can make a huge difference.
By keeping an eye on these common missteps, you'll be well on your way to creating delicious homemade cream that you can be proud of!
8. Conclusion and Encouragement to Try
So there you have it! Making cream from milk at home is not only easy but also rewarding. There's something truly satisfying about transforming a simple ingredient like milk into a rich, luscious cream all on your own. Plus, it adds a little personal touch to your recipes, whether you’re whipping it into desserts, using it in pasta sauces, or dolloping it on top of your favorite fruits.
If you're hesitant to dive in, remember that every expert was once a beginner. Don’t stress if it doesn’t come out perfectly the first time. Every attempt is a stepping stone towards mastering this delightful process. Here’s a little encouragement to get you started:
- Experiment: Each batch may turn out a bit different, and that’s perfectly fine! Try using different types of whole milk or adjust your techniques to see what works best for you.
- Share Your Experience: Don’t hesitate to share your homemade cream journey with friends or on social media. You might inspire someone else to try their hand at it!
- Enjoy the Process: Making cream can be a fun and fulfilling kitchen project. Take your time, enjoy the anticipation, and savor the results.
Now, armed with the tips and tricks from this guide, why not give it a try? Gather your ingredients, set aside a little time, and soon you’ll be enjoying the creamy goodness of homemade cream. Happy cooking!
 admin
admin


