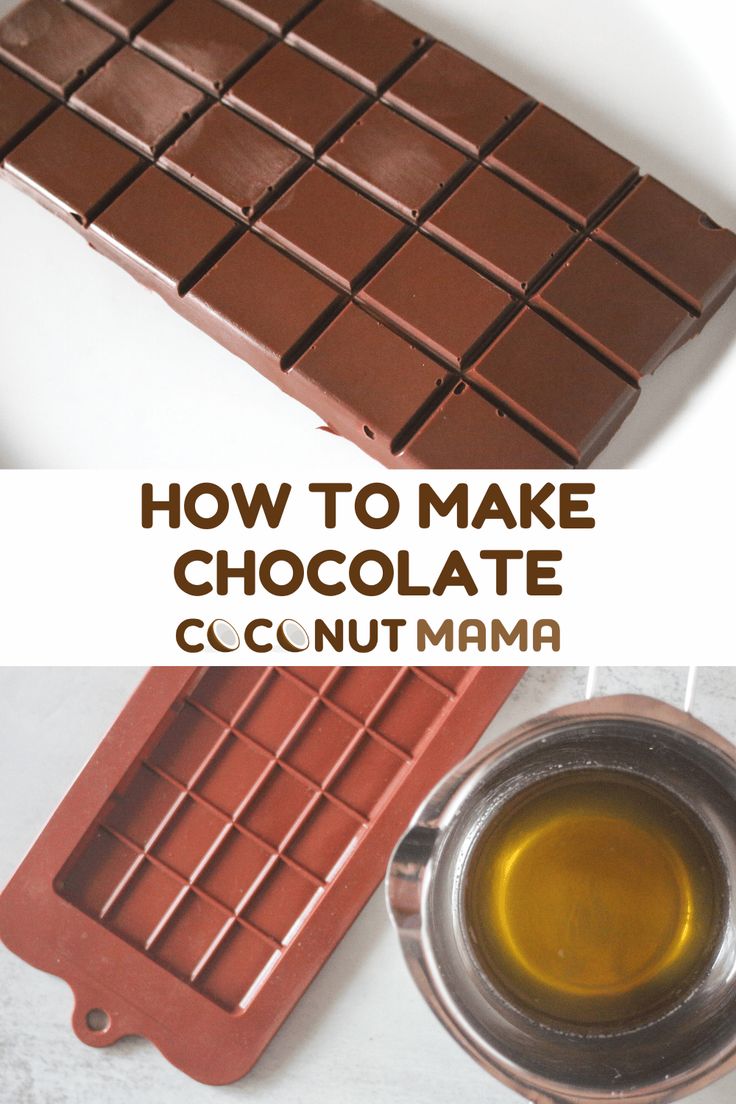
Have you ever craved that rich, luxurious taste of chocolate only to find that making it from scratch seems daunting? Well, fear not! Making chocolate at home is not only simple, but it can also be a delightful experience. With just a handful of ingredients, including cocoa powder, sugar, and a few others, you can whip up your own batch of chocolate in no time. Let's dive into the exciting benefits of creating your own sweet treats right in your kitchen!
Benefits of Making Chocolate at Home
When it comes to indulging in chocolate, the benefits of making it at home go beyond just satisfying your sweet tooth. Here are some fantastic reasons to roll up your sleeves and get started:
- Control Over Ingredients: One of the primary advantages of making chocolate at home is that you get to choose exactly what goes into it. Store-bought chocolates often contain preservatives, artificial flavors, and high levels of sugar. By making your own, you can use quality cocoa powder, and sweeteners, and even opt for organic ingredients.
- Customization: Everyone has unique taste preferences. When you make chocolate yourself, you can customize flavors to your liking. Want to add a hint of sea salt, peppermint extract, or perhaps some chili powder for a spicy kick? Go for it! The possibilities are endless.
- Healthy Alternatives: You can create healthier versions of your favorite chocolate treats by experimenting with alternative sweeteners like honey, maple syrup, or coconut sugar. Plus, you can incorporate nut butters or even superfoods like chia seeds or flaxseeds to boost the nutrition factor.
- Cost-Effective: High-quality chocolates can be pretty pricey. Making chocolate at home can save you money in the long run, especially if you indulge frequently. A little bit of cocoa powder goes a long way, and you can make larger batches for special occasions.
- Fun Activity: Making chocolate can also be a fun and rewarding activity to do with friends or family. You can turn it into a creative project, experimenting with different molds and toppings. It’s perfect for parties or just a relaxing evening at home!
Overall, the joy of crafting chocolate in your own kitchen can lead to a sense of fulfillment that pre-packaged treats simply can't match. Not only do you get to enjoy delicious chocolate, but you also gain a new skill and knowledge about what goes into your food. So why not take the plunge and try making your very own chocolate? Your taste buds will thank you!
Also Read This: Quick Guide to Exiting Dailymotion on Firestick for Beginners
3. Ingredients Needed for Chocolate
Making chocolate at home can be a delightful experience, and it starts with gathering the right ingredients. Here's what you'll need:
- Cocoa Powder: This is the star of the show! Use high-quality unsweetened cocoa powder for the best flavor.
- Cocoa Butter: This will give your chocolate its smooth texture. You can find cocoa butter in health food stores or online.
- Sweetener: You can choose from granulated sugar, honey, maple syrup, or even stevia, depending on your preference.
- Milk Powder (optional): If you like milk chocolate, adding milk powder can create a creamier texture.
- Vanilla Extract: A splash of vanilla adds depth to the flavor, making your chocolate even more delicious.
- Salt: Just a pinch helps to enhance the sweetness and overall flavor of your homemade chocolate.
Here's a simple list of the amounts you'll typically need for a small batch of chocolate:
| Ingredient | Amount |
|---|---|
| Cocoa Powder | 3/4 cup |
| Cocoa Butter | 1/2 cup |
| Sweetener | 1/4 cup (adjust to taste) |
| Milk Powder | 1/4 cup (optional) |
| Vanilla Extract | 1 tsp |
| Salt | A pinch |
With these ingredients in hand, you're well on your way to making some delicious chocolate at home!
Also Read This: How to Make Your Likes Private on Dailymotion
4. Step-by-Step Instructions to Make Chocolate
Ready to transform those ingredients into delectable chocolate? Follow these simple steps to make your very own chocolate at home:
- Prep Your Workspace: Ensure your kitchen space is clean and free of any distractions. It's always good to have everything organized before you start cooking!
- Melt the Cocoa Butter: In a small saucepan, gently heat the cocoa butter over low heat until it's completely melted. Be careful not to overheat it; you just want it to become liquid. Stir occasionally to help it along.
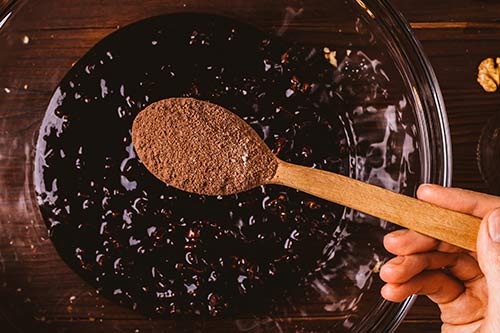
- Mix in Cocoa Powder: Once the cocoa butter is melted, slowly add the cocoa powder, stirring continuously. This will create a smooth, rich mixture. Make sure there are no lumps!
- Add Sweetener: Gradually add your choice of sweetener to the melted mixture. Taste as you go; you can always add more if you’d like it sweeter!
- Incorporate Milk Powder and Vanilla: If you’re making milk chocolate, mix in the milk powder next. Then, add the vanilla extract and a pinch of salt, stirring until everything is well combined and smooth.
- Pour the Mixture into Molds: Once everything is well mixed, pour the chocolate mixture into silicone molds or a parchment-lined dish. Smooth out the top with a spatula if needed.
- Let It Set: Place the molds in the refrigerator for at least an hour, or until the chocolate is fully hardened. Patience is key here!
- Enjoy Your Homemade Chocolate: Once set, pop the chocolates out of the molds and indulge in your delicious creation! Store any leftovers in an airtight container at room temperature or in the fridge.
And there you have it! A simple and enjoyable process to whip up your own chocolate at home. You'll never want to go back to store-bought once you taste the difference!
Also Read This: How to Eliminate the YouTube Ad Blocker Pop-Up
5. Tips for Perfecting Your Homemade Chocolate
Making chocolate at home can be a wonderfully rewarding experience, but it does come with a few challenges. Here are some handy tips to ensure you create the smoothest, most delicious chocolate possible!
- Quality Ingredients Matter: Always opt for high-quality cocoa powder and other ingredients. The flavor of your final chocolate will reflect the quality of what you use. Look for cocoa powder that is unsweetened and from a reputable brand.
- Temperature Control: When melting your cocoa butter or coconut oil, do so gently. Use a double boiler or microwave in short intervals to prevent overheating. If the fat gets too hot, it can separate and ruin the texture of your chocolate.
- Blend Well: Once you combine all your ingredients, make sure to blend them thoroughly. Using an immersion blender can help achieve a smooth consistency, eliminating any graininess.
- Cooling and Setting: After pouring your chocolate into molds, let it cool at room temperature before transferring it to the refrigerator. Rapidly cooling chocolate can lead to a dull appearance and poor texture.
- Experiment with Sweetness: Start with a little sweetener and taste as you go. Depending on the bitterness of your cocoa powder, you might find that you need more or less sugar than you initially thought!
With these tips under your belt, you'll be well on your way to mastering the art of homemade chocolate. Remember, practice makes perfect, so don’t be discouraged by the first batch not being completely flawless!
Also Read This: Creating a Perfect French Tail Hairstyle on Dailymotion
6. Variations on the Basic Recipe
Once you've nailed the basic recipe for homemade chocolate with cocoa powder, why not have some fun and get creative? Here are a few delicious variations to enjoy and surprise your taste buds!
1. Nutty Chocolate
Add some crunch by incorporating nuts! Chopped almonds, hazelnuts, or walnuts can be mixed into the chocolate before it sets. Not only do they add texture, but they also elevate the flavor.
2. Fruity Chocolate
For a refreshing twist, consider adding dried fruit like cranberries, cherries, or orange zest. Just fold these into your melted chocolate for a delightful burst of flavor with each bite.
3. Spiced Chocolate
Feeling adventurous? Experiment with spices! A pinch of cinnamon or a dash of cayenne pepper can provide a lovely warmth and depth to your chocolate. Try a mix of various spices to achieve a chocolate that really stands out.
4. Mint Chocolate
If you’re a mint lover, a few drops of peppermint extract can transform your chocolate into a minty treat. Perfect for those chocolatey mint cravings!
5. Dark Chocolate Bliss
For pure dark chocolate, increase the cocoa powder and reduce the sweetener. You can also add a touch of vanilla extract to round out the flavor.
These variations are just the tip of the iceberg. The beauty of making chocolate at home is that you can customize each batch to suit your preferences. Don't be afraid to experiment—try combining different flavors until you find your perfect match!
Also Read This: Complete Tutorial for Streaming Dailymotion to Roku Devices
7. Common Mistakes to Avoid
Making chocolate at home can be incredibly rewarding, but it’s easy to run into pitfalls if you're not careful. Here are some common mistakes that you should watch out for to ensure your homemade chocolate turns out delicious every time:
- Using Low-Quality Cocoa Powder: Always opt for high-quality cocoa powder. The taste and texture of your chocolate depend heavily on the quality of the ingredients. Cheap cocoa powders may have fillers that can ruin your chocolate.
- Incorrect Tempering: If you’re trying to achieve that glossy finish and satisfying snap in your chocolate, tempering is crucial. Many people skip this step, thinking it’s unnecessary, but it can lead to dull, streaky chocolate that doesn’t set properly. Invest time in mastering this technique.
- Not Sifting Cocoa Powder: Cocoa powder can clump together, leading to uneven mixing when you incorporate it into your chocolate. Always sift it to avoid those pesky lumps that spoil the texture.
- Overheating Ingredients: Whether you’re melting chocolate or mixing in cocoa powder, high temperatures can burn your chocolate. Use gentle heat and stir constantly to prevent this disaster. A double boiler is a great method to control temperature efficiently.
- Skipping the Flavoring: If you opt to add flavorings like vanilla or a pinch of salt, don’t skip it! These enhancements can elevate your chocolate from ordinary to extraordinary. Just a tiny bit can make a world of difference!
- Not Cooling Properly: When you pour your chocolate into molds, ensure it’s cooled in an environment without direct heat or humidity. Improper cooling can lead to a cloudy finish. Remember, patience is key!
- Failing to Clean Utensils: Residue from previous recipes can affect the taste of your chocolate. Always thoroughly clean your utensils before starting. A greasy spoon can ruin your chocolate's smooth texture.
By avoiding these common mistakes, you'll be well on your way to creating homemade chocolate that’s not only beautiful but delicious too. Happy chocolate making!
Also Read This: Explore Unique Stories and Craft Tutorials Available Free on Dailymotion
8. Storage and Shelf Life of Homemade Chocolate
After you’ve put in the effort to create your delicious homemade chocolate, you’ll want to ensure it stays fresh and tasty for as long as possible. Below are some tips on storage and the shelf life of your delectable treats:
- Cool and Dry Place: Store your homemade chocolate in a cool, dry place away from sunlight. Heat can cause the chocolate to melt or lose its texture, while humidity can lead to unwanted moisture.
- Airtight Containers: Always use airtight containers to prevent your chocolate from absorbing odors and flavors from other foods. This also helps to avoid exposure to moisture.
- Refrigeration: While chocolate can be refrigerated, it’s usually best to avoid it if possible. If you're in a warm climate, however, refrigeration might be necessary. When refrigerating, ensure the chocolate is well wrapped to avoid condensation when removing it.
- Freeze for Long-Term Storage: If you have a lot of chocolate and need to store it for an extended period, consider freezing it. Wrap it tightly in plastic wrap and then place it in an airtight container. Properly stored, chocolate can last for several months in the freezer!
- Shelf Life: Homemade chocolate typically lasts 2-3 weeks at room temperature, while chocolate stored in the fridge can last up to 1-2 months. If you freeze it, it may retain its quality for 6-12 months.
With these storage tips, you can enjoy your homemade chocolate at its best! Share with friends or keep them all to yourself—either way, you’ll savor every bite!
Also Read This: Understanding the Legality of Dailymotion in Canada
9. Conclusion
And there you have it! Making chocolate at home with cocoa powder is not only easy but incredibly satisfying. You’ve taken simple ingredients and transformed them into something delightful. Whether you're indulging in a piece after dinner, sharing with friends, or surprising your loved ones with a homemade gift, your chocolate will bring smiles.
Remember, the beauty of homemade chocolate lies in the ability to customize it. Want it sweeter? Add more sweetener. Prefer a nutty flavor? Toss in some crushed nuts or a spoonful of nut butter. The options are nearly endless! Plus, you’ll know exactly what goes into your chocolate, allowing you to avoid preservatives and artificial ingredients.
So why not channel your inner chocolatier? Grab your ingredients, roll up your sleeves, and start experimenting! Whether you stick to the classic recipes or try your hand at innovative variations, making chocolate at home is a hobby you’ll likely fall in love with. Who would have thought that whipping up cocoa powder could turn into a fun, delicious adventure? Dive into the world of chocolate-making and enjoy every sweet moment!
10. FAQs about Making Chocolate at Home
To wrap things up, let's tackle some frequently asked questions you might have about making chocolate at home. It’s always good to clear up any doubts so you can whip up your next batch with confidence!
- Can I use any type of cocoa powder?
Yes, you can use natural cocoa powder or Dutch-processed cocoa powder, although they might produce slightly different flavors and colors. Natural cocoa is typically more acidic, whereas Dutch-processed is smoother. - What sweeteners can I use?
You can use granulated sugar, powdered sugar, honey, maple syrup, agave nectar, or even sugar substitutes like stevia or erythritol. Just keep in mind that liquid sweeteners may change the texture, so adjust your other ingredients accordingly. - How do I store my homemade chocolate?
Store your chocolate in an airtight container in a cool, dry place. If your kitchen is warm, consider refrigerating it to maintain its texture. Just let it come to room temperature before enjoying! - Can I add flavors to my chocolate?
Absolutely! You can infuse your chocolate with flavors like vanilla extract, peppermint, orange zest, or even spices like chili or cinnamon. Get creative and experiment with your favorite flavors! - How can I ensure my chocolate sets smoothly?
To ensure a smooth finish, try tempering your chocolate by carefully heating and cooling it. This process gives your chocolate a glossy appearance and prevents it from being too crumbly.
Feel free to explore, ask questions, and even share your own tips. Making chocolate at home is a delightful journey, and everyone's experience is unique. So, get those creative juices flowing and enjoy the sweet rewards of your homemade treats!
 admin
admin


