Thread bracelet making is a fun and creative craft that allows you to express your personality and style. Whether you’re looking to create something special for yourself or a meaningful gift for a friend, thread bracelets are simple, customizable, and can be made in just a few steps. This DIY guide will walk you through the basics, making it easy for beginners and experienced crafters alike to dive into this colorful world. Plus, you can experiment with different patterns, colors, and styles to make each bracelet uniquely yours!
Materials Needed for Your Thread Bracelets
Before you start crafting your beautiful thread bracelets, it's essential to gather all the necessary materials. Here's a handy list of what you'll need:
- Thread: Choose embroidery floss or colorful threads. You can find these in various colors at craft stores.
- Scissors: A sharp pair of scissors will help you cut the thread with precision.
- Tape or Clip Board: To hold your bracelet in place while you work, you can use tape or a clipboard.
- Measuring Tape: This will help you measure the length of the thread needed for your wrist size.
- Beads (optional): Adding beads can enhance your bracelet's design and give it a personal touch.
Here’s a quick table summarizing the materials:
| Material | Purpose |
|---|---|
| Thread | Form the base of the bracelet. |
| Scissors | Cut the thread to the desired length. |
| Tape/Clip Board | Hold the bracelet in place while you work. |
| Measuring Tape | Ensure the thread is the right length for your wrist. |
| Beads (optional) | Decorate and personalize your bracelet. |
Gathering these materials will set you up for a successful and enjoyable bracelet-making experience!
Also Read This: How to Make Crochet Flowers Step by Step: Detailed Tutorial on Dailymotion
Step-by-Step Instructions for Making Thread Bracelets
Creating your own thread bracelets can be a fun and rewarding experience! Let’s dive into some easy-to-follow steps to help you craft beautiful bracelets in no time.
- Gather Your Materials: You’ll need thread or embroidery floss, scissors, tape or a clipboard, and optional beads or charms for decoration. Choose colors that resonate with you!
- Measure Your Thread: Cut three strands of thread, each about 24 inches long. This length generally works well for a standard bracelet. Feel free to adjust according to your wrist size!
- Secure the Thread: Tie a knot at one end and secure it to your workspace using tape or a clipboard. This will keep your thread in place while you work.
- Choose Your Bracelet Style: Decide on the pattern or style you want. A simple braid, a knotting technique, or even adding beads can work wonders!
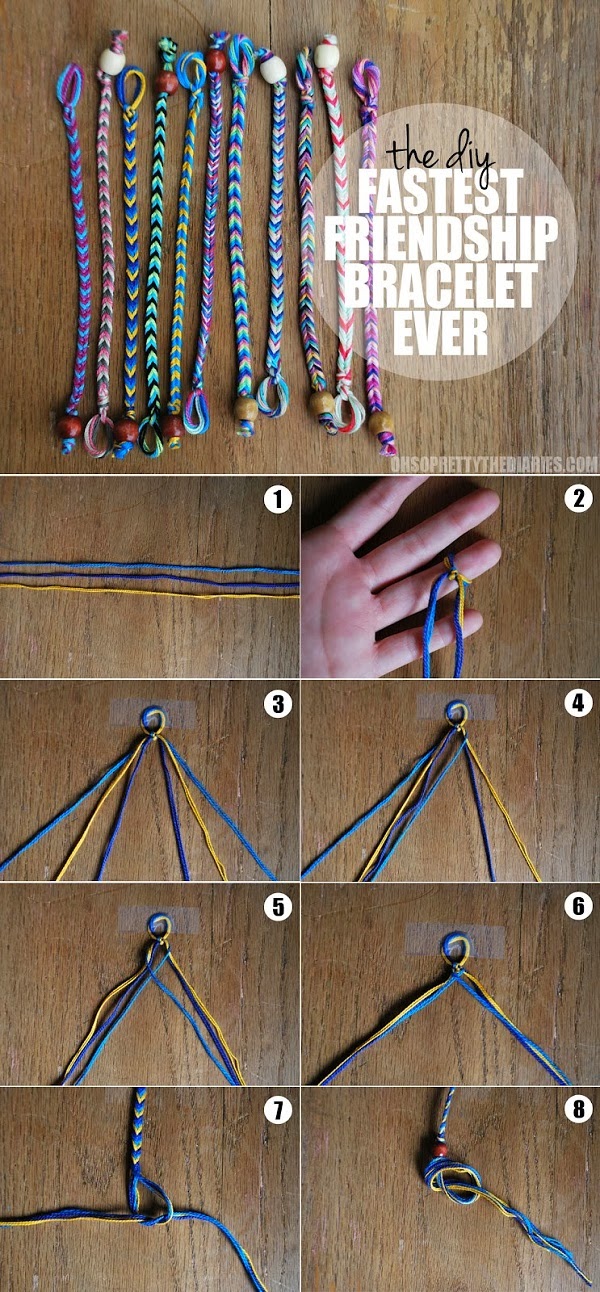
- Start Crafting: If you’re braiding, divide the threads into three sections and start braiding them tightly, maintaining even tension. For knotting, follow your chosen design, ensuring each knot is snug.
- Finish It Off: Once you reach your desired length, tie a secure knot at the end. If you’re using beads, incorporate them into the design as you go.
- Final Touches: Trim any excess thread and add a clasp if desired. Your bracelet is now ready to wear or gift!
Also Read This: How to Make a Fishtail Loom Band: Dailymotion’s Simple Guide
Tips and Tricks for Successful Bracelet Making
Making thread bracelets is not just about following steps; it’s also about enhancing the overall experience! Here are some tips to help you along the way:
- Choose Quality Thread: Opt for durable thread or floss to ensure your bracelet lasts. Cotton or polyester blends are excellent choices.
- Experiment with Patterns: Don’t hesitate to mix colors and patterns! Try alternating colors or using different knot styles to create unique designs.
- Take Your Time: Crafting is an art! Be patient and enjoy the process. Rushing can lead to mistakes.
- Use a Beading Needle: If you’re adding beads, a beading needle can help thread the string through smaller openings easily.
- Practice Makes Perfect: If you’re trying a new style, practice on scraps of thread first. It’ll increase your confidence.
- Stay Organized: Keep your workspace tidy and your thread organized to avoid tangles. Use small containers for different colors.
With these tips in mind, you’re all set to create stunning thread bracelets with ease. Enjoy the crafting journey!
Also Read This: How to Make Dailymotion Playlists Private in a Few Steps
5. Inspirational Ideas for Bracelet Designs
Creating your own bracelets is not just a fun activity; it’s also a fantastic way to express your personality and style! Here are some inspiring ideas that can spark your creativity:
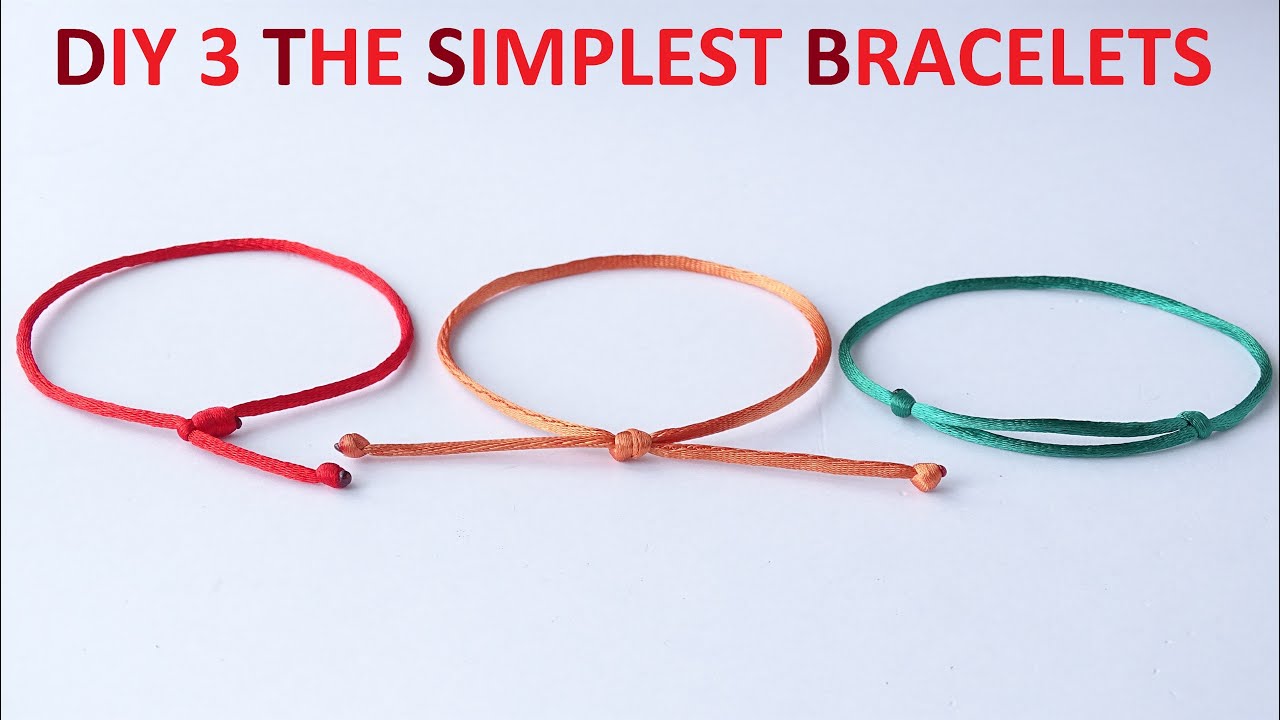
- Colorful Friendship Bracelets: Combine vibrant threads to weave eye-catching patterns. Think of classic designs like the chevron or the spiral. These bracelets are not only trendy but also symbolize the bond between friends.
- Nature-Inspired Designs: Use earthy tones like greens and browns to create a bracelet that reflects the outdoors. You can incorporate small charms like leaves or flowers to give it that extra touch of nature.
- Beaded Accents: Incorporate beads into your thread bracelets for added texture and flair. Experiment with different shapes and colors. For example, a mix of turquoise and gold beads can create a stunning contrast!
- Seasonal Themes: Create bracelets that represent different seasons. For instance, pastel colors for spring, bright hues for summer, warm tones for autumn, and icy shades for winter.
- Personalized Messages: Use alphabet beads to spell out meaningful words or names. This adds a personal touch and can make a heartfelt gift for a loved one.
Feel free to mix and match these ideas. The beauty of DIY bracelet-making is the endless possibilities! Grab your threads and let your imagination run wild.
6. Conclusion and Next Steps
Now that you’ve explored various designs and techniques for making thread bracelets, it’s time to put your newfound skills to the test! Embrace this creative journey, and remember that the key to great bracelet-making is practice and experimentation.
Here are some next steps to consider:
- Gather Your Materials: Stock up on different colored threads, beads, and charms. Having a diverse selection will keep your creativity flowing.
- Join a Community: Connect with other DIY enthusiasts on platforms like Dailymotion or social media groups. Sharing your creations can provide inspiration and feedback.
- Challenge Yourself: Set a goal to create a new bracelet design each week. This will not only refine your skills but also build a beautiful collection.
- Host a Bracelet-Making Party: Invite friends over for a fun DIY session. It’s a perfect way to bond and share ideas!
Remember, the most important aspect of this craft is to enjoy the process. Happy crafting!
 admin
admin


