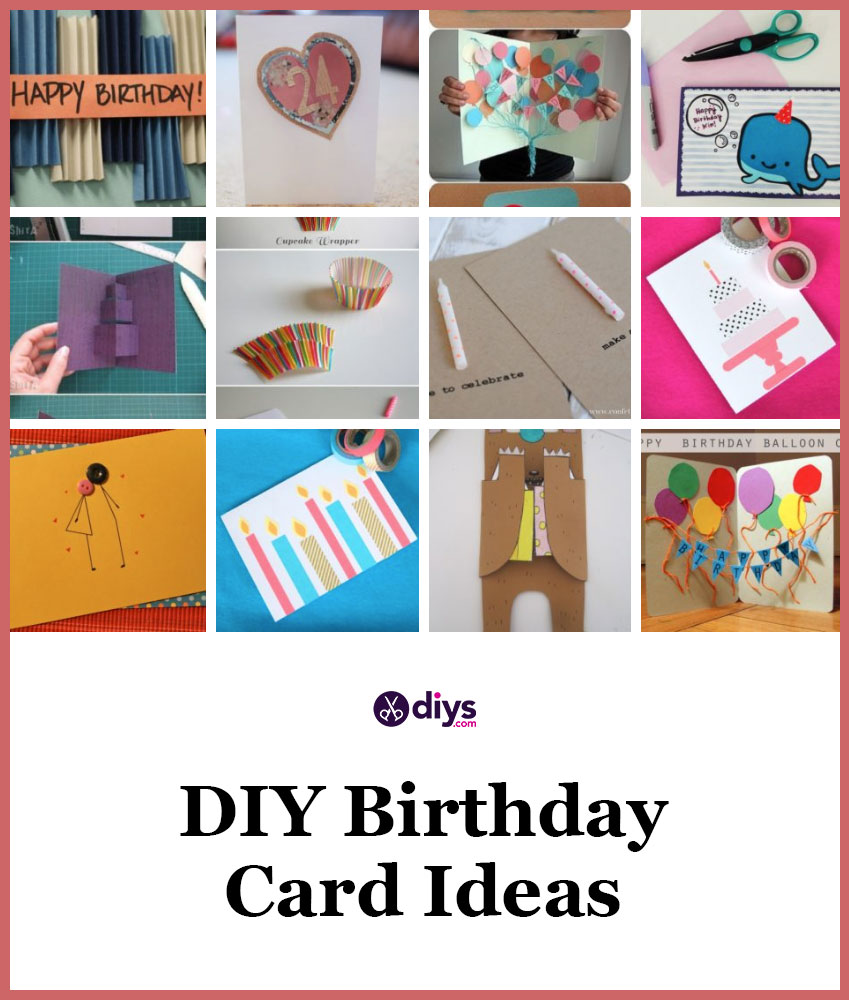
Creating beautiful birthday cards at home is a fun and rewarding way to show your loved ones just how much you care. Forget the store-bought options! DIY cards are not only more personal but also allow you to express your creativity and tailor your designs to the recipient's tastes. Whether you're a beginner or a seasoned crafter, making your own birthday cards can be an enjoyable and relaxing hobby. Get ready to unleash your imagination and spread some birthday joy with your handmade creations!
Materials You Will Need
Before you dive into the exciting world of DIY birthday cards, it's essential to gather the right materials. Having everything ready at your crafting station can make the process smooth and enjoyable. Here's a handy list of what you'll need:
- Cardstock or Card Blank: This will be your card's foundation. Choose vibrant colors or classic white for a clean slate.
- Decorative Paper: Scrapbook paper, patterned paper, or even wrapping paper can add texture and personality.
- Scissors: A good pair of scissors is a must for cutting paper and creating shapes.
- Glue or Adhesive Tape: For sticking various elements together. Hot glue guns can also work great for heavier decorations.
- Markers or Colored Pencils: Perfect for adding personalized messages or doodles to your card.
- Stickers and Embellishments: Think sequins, ribbon, or thematic stickers to jazz up your design.
- Stamps and Ink Pads: If you're feeling artistic, stamps can add unique patterns and designs.
- Ruler and Pencil: These are useful for measuring and marking where to cut or fold.
Here’s a quick table summarizing the essentials:
| Material | Purpose |
|---|---|
| Cardstock | Base for the card |
| Decorative Paper | Add visual interest |
| Scissors | Cutting elements |
| Glue or Tape | Assembling components |
| Markers/Pencils | Writing messages |
| Stickers/Embellishments | Adding fun details |
| Stamps/Inks | Designing patterns |
| Ruler/Pencil | Precision cutting/folding |
Remember, while having these materials will set you up for success, the most important ingredient for making beautiful birthday cards is your creativity and personal touch. So grab your supplies, find a cozy spot, and let’s get crafting!
Also Read This: Craft a Simple Paper Gun: Step-by-Step Video on Dailymotion
3. Simple Techniques for Card Design
Creating your own birthday cards can be fun and satisfying, especially with the right techniques! With just a few tools and a little creativity, you can produce eye-catching cards that spread joy and love. Here are some simple techniques to help you design cards that stand out:
1. Layering: One easy way to add depth to your cards is through layering. Use different sizes of cardstock or patterned paper. Start with a base card, and then add a smaller piece on top for visual interest. You can even layer various textures—like felt or burlap—for a unique touch that adds tactile appeal.
2. Stamping: Stamping can really elevate your card game! Invest in a few good-quality stamps—like birthday-themed ones featuring cakes, balloons, or candles. Choose colorful inks, and don’t be shy about mixing and matching colors. Experiment with layering stamps, too! You can create beautiful patterns that form the backdrop of your message.
3. Hand-lettering: Instead of printing out text, why not try your hand at lettering? Use colored pens or markers to add a personal touch. Simple phrases like “Happy Birthday” or “Make a Wish” can easily be turned into works of art. If you’re unsure about your lettering skills, practice makes perfect. You could even explore calligraphy courses online!
4. Adding Texture: Texture can make your card feel more special. Use items like ribbons, buttons, or even natural elements like pressed flowers. For example, a card adorned with a textured ribbon can add elegance, while a button can give a playful vibe. Don’t hesitate to explore your scrap drawer for things you can repurpose!
5. Incorporating Photos: A personal photograph can make your card extra memorable. You can either include a cute snapshot of yourself or the birthday person or print images that relate to their interests. A collage of moments shared can evoke nostalgia and warmth.
6. Digital Designs: If you prefer an ultra-modern approach, consider creating digital designs. Various online tools and apps allow you to design cards digitally, using templates that you can customize with graphics and text. Once you're satisfied with your creation, simply print it out on high-quality cardstock!
These techniques can be mixed and matched to create unique cards that show your personal style. Remember, the beauty of DIY is that there are no strict rules—just have fun and let your creativity flow!
Also Read This: Easy Yoga Poses to Get Started on Dailymotion
4. Creative Themes and Ideas for Birthday Cards
When it comes to birthday cards, a creative theme can make your design truly shine! Here are some fun themes and ideas to get your creative juices flowing:
- Nature-Inspired: Use earthy tones and embellishments like leaf cutouts or floral designs. Consider a watercolor background with a hand-painted flower or a tree to signify growth and new beginnings!
- Movie or TV Show Favorites: Incorporate references from the birthday person’s favorite film or series. For instance, you can create a card designed like a movie ticket or mimic the style of their favorite show's promotional art. This personal touch is sure to be a hit!
- Color Themes: Some people have favorite colors. Craft a card using shades of their preferred hue. You could go for a monochromatic palette or create a vibrant rainbow explosion!
- Funny/Quirky Themes: Inject some humor into your card! Use funny quotes, puns, or whimsical character drawings. A light-hearted card can bring a smile to anyone's face!
- Retro/Vintage: Tap into nostalgia by using vintage patterns, colors, and fonts. Think old-school birthday cards with lace or polka dots. This theme can evoke warm memories and vibe!
- Pop Culture: Draw inspiration from current trends or celebrities. Create cards that feature quotes from popular songs or memes. This will resonate with younger generations and bring in some current flavor!
Don’t forget to personalize your wording to suit the chosen theme. It doesn’t have to be overly elaborate—just heartfelt and resonant with the theme you’ve selected! The important thing is to have fun and express your creativity, knowing that your efforts will be appreciated by the birthday celebrant.
Also Read This: How to Watch Dailymotion on Sony Smart TV: A Step-by-Step Guide
5. Step-by-Step Guide to Making Your First Card
Creating your very first homemade birthday card can feel like a daunting task. But fear not! With a few easy steps, you’ll be on your way to crafting something truly meaningful and beautiful. Grab your supplies, and let’s dive in!
Step 1: Gather Your Supplies
Before you start, make sure you have everything you need. Here’s a basic list to help you:
- Cardstock or thick paper (any color you like)
- Scissors
- Glue or double-sided tape
- Colored markers or pencils
- Stickers, washi tape, or embellishments
- A ruler and pencil for measurements
Step 2: Cut Your Cardstock
Decide on the size of your card. A standard size is 5 x 7 inches, but feel free to get creative! Use the ruler and pencil to mark where you need to cut, then carefully trim your cardstock to the desired size. Fold the card in half so that the front and back are equal.
Step 3: Design the Front
This is where the magic happens. Think about the recipient’s personality and what colors or themes they love. You might choose to draw something directly on the card, use printed images, or add some beautiful stickers. If you're feeling artistic, hand lettering a sweet message could add a lovely touch!
Step 4: Add Your Message Inside
Once the front is looking fabulous, open the card and prepare to write your heartfelt message. Use colored markers to make your writing pop! To make your card feel extra special, consider adding a personal memory or an inside joke that will bring a smile to their face.
Step 5: Decorate the Inside
Don’t forget to decorate the inside of the card as well! Simple designs like a tiny heart, stars, or even a small watercolor painting can elevate the overall look. You can also include a small photo of you and the birthday person for that warm, nostalgic vibe!
Step 6: Final Touches
Take a moment to review your card. Add any finishing touches, like a bit of glitter, some washi tape along the edges, or even a ribbon if you're feeling fancy. The little details really can make a big difference!
Also Read This: Essential Tips for Safeguarding Your Facebook Account with Dailymotion Insights
6. Adding Personal Touches and Decorations
Now that you’ve got the basic birthday card down, let’s talk about personal touches and decorations that can truly make your card shine. Personalization is what sets a homemade card apart from something store-bought.
Incorporate Personal Memories
One of the best ways to personalize your card is to incorporate shared memories. Think about your favorite times spent together with the birthday person. You could write a short anecdote, include a memorable quote, or draw a simple sketch that relates to a fun day you've shared.
Use Their Favorite Colors and Themes
What are their favorite colors? Do they have hobbies or passions? Tailoring your card to reflect their personality can make your card more meaningful. If they love gardening, consider adding floral decorations or a garden-themed background. If they’re a fan of a particular movie or book series, use elements from that theme.
Decorative Elements
Here are some decorative ideas to elevate your card:
- Stickers: A great way to add fun elements. Choose ones that match the theme or the recipient’s style!
- Handmade Embellishments: Create your own flowers, stars, or shapes from colored paper to give a 3D effect.
- Washi Tape: This decorative tape can add color and patterns along the edges or as dividers for your message.
- Hand Lettering: Practice some calligraphy or unique lettering styles for the recipient's name or your main message.
Add a Special Envelope
Don’t forget about the envelope! Decorate it to match your card's theme, or use a unique paper that excites the recipient even before they open their card. You might want to add a personal note on the envelope itself or include a little surprise inside, like a gift card or a small photo.
Remember, the beauty of a DIY card lies in your creativity and the love you put into it. With these steps and ideas, you're well on your way to creating a birthday card that will be cherished for years to come. Happy crafting!
Also Read This: How to Increase Nail Growth Overnight with Home Remedies
7. Tips for Writing Heartfelt Messages
When it comes to creating birthday cards, the message you write can often be just as important as the design itself. A heartfelt note can make your card unforgettable. Here are some tips for crafting those meaningful messages:
- Personalize It: Instead of a generic greeting, include the recipient’s name and something specific that you appreciate about them. For example, “Happy Birthday, Sarah! I love how you always brighten my day with your smile.”
- Share a Memory: Reflect on a cherished moment you shared. This adds a personal touch, like, “I’ll never forget our road trip to the coast. Let’s do that again soon!”
- Express Your Wishes: Clearly articulate what you hope for them in the coming year. Use phrases such as, “May this year be filled with adventure and joy!”
- Incorporate Quotes: Sometimes a well-chosen quote can capture your feelings perfectly. Something inspirational or funny can add a unique flavor. For example, "Count your life by smiles, not tears. Count your age by friends, not years." – John Lennon
- Keep It Brief: While it’s great to express your feelings, try to keep your message concise. A few well-chosen sentences can leave a strong impression.
- Use Humor (if appropriate): If the recipient appreciates a good laugh, don’t hesitate to add a joke or witty remark. Just make sure it suits their personality!
- Sign Off with Love: End your note with a heartfelt closing, such as “Lots of love,” “With warm wishes,” or even a simple “Cheers!”
Remember, the most important part of your message is your sincerity. Write from the heart, and your words will surely resonate with the birthday person!
Also Read This: How to Install Tekken 3 on PC for Classic Gaming
8. Alternative Card-Making Techniques
If you’re ready to take your card-making skills to the next level, there are plenty of innovative techniques you can try. Here are some creative alternatives that could spark your inspiration:
- Pop-Up Cards: Adding dimension to your card can create a delightful surprise. There are various tutorials online for making pop-up designs, from simple geometric shapes to intricate scenes.
- Watercolor Techniques: Why not swap traditional card stock with watercolor paper? Use watercolors to create dreamy backgrounds, or try watercolor lettering for a personal touch!
- Fabric and Textiles: Get crafty by incorporating fabric pieces into your cards. A small swatch of patterned fabric can add texture and warmth.
- Collage Art: Utilize old magazines, newspapers, or scrap paper to create vibrant collages. Layer images and text to tell a story or evoke a certain mood.
- Stamping & Embossing: If you enjoy rubber stamping, you can create unique designs that stand out. Embossing techniques can also add elegance and a tactile experience to your cards.
- Digital Card Making: Don’t overlook the power of technology! Tools like Canva allow you to create stunning digital cards that you can print at home or send directly via email.
- Sculptural Cards: Take inspiration from 3D art and create cards that are more like sculptures. Think intricate folds, interlocking pieces, or even a miniature version of something meaningful to the recipient.
Each of these techniques has its own unique flair and can elevate your DIY cards from simple creations to cherished keepsakes. Experiment with different methods and find the ones that reflect your style best!
Also Read This: How to Hide Folders on Windows 7 for Privacy
9. Sharing Your DIY Cards on Social Media
Once you’ve poured your creativity into making those beautiful birthday cards, it's time to show them off! Sharing your DIY cards on social media is not only a way to celebrate your craft but can also inspire others to unleash their artistic side. Here are some tips on how to effectively showcase your creations:
- Choose the Right Platform: Think about where your friends and family spend their time. Instagram is great for visuals, while Facebook is perfect for sharing stories.
- Use Natural Light: When taking photos of your cards, try to do so in natural light to bring out the true colors and textures. A well-lit photo can make your creation feel even more vibrant!
- Get Creative with Backgrounds: Use different backdrops to enhance your cards. A simple wooden table or a soft fabric can make your cards pop in photos.
- Incorporate a Personal Touch: When sharing, add a little story about the card—what inspired you, or a fun memory associated with it. This makes your post relatable and engaging.
- Engage with Your Audience: Don't just post and run! Respond to comments and questions. Engaging with your audience will help create a community around your crafting.
- Use Hashtags: Utilize relevant hashtags like #DIYCards, #HandmadeGifts, or #CraftingCommunity to reach a broader audience. This can help connect you with other makers and enthusiasts.
- Host a Contest: If you’re feeling adventurous, consider hosting a contest inviting your friends to share their own DIY cards. This could spark creativity and participation!
Finally, remember that sharing is about connection. So, when you showcase your DIY cards, you’re not just displaying your art; you’re also inviting others into your world of creativity. Whether you get a few likes or a viral post, the joy of sharing your passion is what truly counts!
10. Conclusion and Final Thoughts
Creating beautiful DIY birthday cards at home is not only a delightful pastime but also a heartfelt way to connect with friends and family. In a world flooded with digital messages, receiving a handcrafted card can mean so much more. It shows effort, thoughtfulness, and love—qualities that cannot be replicated by a store-bought card.
To wrap things up, here are a few final thoughts to keep in mind:
- Be Yourself: Your cards are an extension of your personality. Don’t be afraid to let your unique style shine through in your designs!
- Practice Makes Perfect: Like any skill, card making improves with practice. So don’t be discouraged if your first few attempts aren’t perfect. Enjoy the journey!
- Prices and Budgets Matter: You don’t need to spend a fortune on supplies. Look for sales, use what you already have, or swap materials with friends. Creativity can thrive on a budget!
- Keep It Fun: Remember that the primary goal is to have fun and express yourself. If you’re feeling stuck, take a break and come back with a fresh perspective.
In the end, creating DIY birthday cards can be a relaxing and fulfilling experience. Whether you are celebrating milestones, showing appreciation, or just spreading joy, your handmade cards have the power to touch hearts. So gather your materials, unleash your creativity, and let those cards reflect your unique voice. Happy crafting!
 admin
admin


