Changing the shape of an image in Google Slides might seem complicated, but it's actually quite simple. If you want to give your presentation a more professional or creative look, transforming your images into circles is a great way to do it. Circular images can help focus attention, highlight important content, and add a polished touch to your slides.
In this guide, we'll show you how easy it is to turn any image into a circle and offer tips on how to customize it further. Whether you're a beginner or have some experience with Google Slides, you'll find these steps straightforward and helpful for improving your presentations.
Why You Might Want to Use a Circular Image

Circular images can add a visually appealing element to your Google Slides presentations. Here are a few reasons why you might want to consider using them:
- Focus and Attention: A circular image draws the viewer's attention to the center, making it great for profile pictures or key visual content.
- Modern and Professional: Circular shapes tend to look cleaner and more modern than square or rectangular images, giving your presentation a polished feel.
- Consistency: If you're using multiple images, making them all circular helps create a consistent and harmonious design throughout your slides.
- Highlighting Key Elements: Circular images are great for isolating and highlighting important visuals, like logos, portraits, or product images.
- Better Fit for Certain Layouts: Circular images fit well in some design templates and may complement other elements in your slide more effectively than other shapes.
These advantages can make a big difference in the overall impact of your presentation, ensuring that your slides are both functional and aesthetically pleasing.
Steps to Make an Image a Circle in Google Slides

Turning an image into a circle in Google Slides is quick and easy. Follow these simple steps:
- Insert Your Image: Start by adding your image to the slide. Click on "Insert" from the menu, then choose "Image" and select the image from your computer or from an online source.
- Select the Image: Once the image is on your slide, click on it to select it.
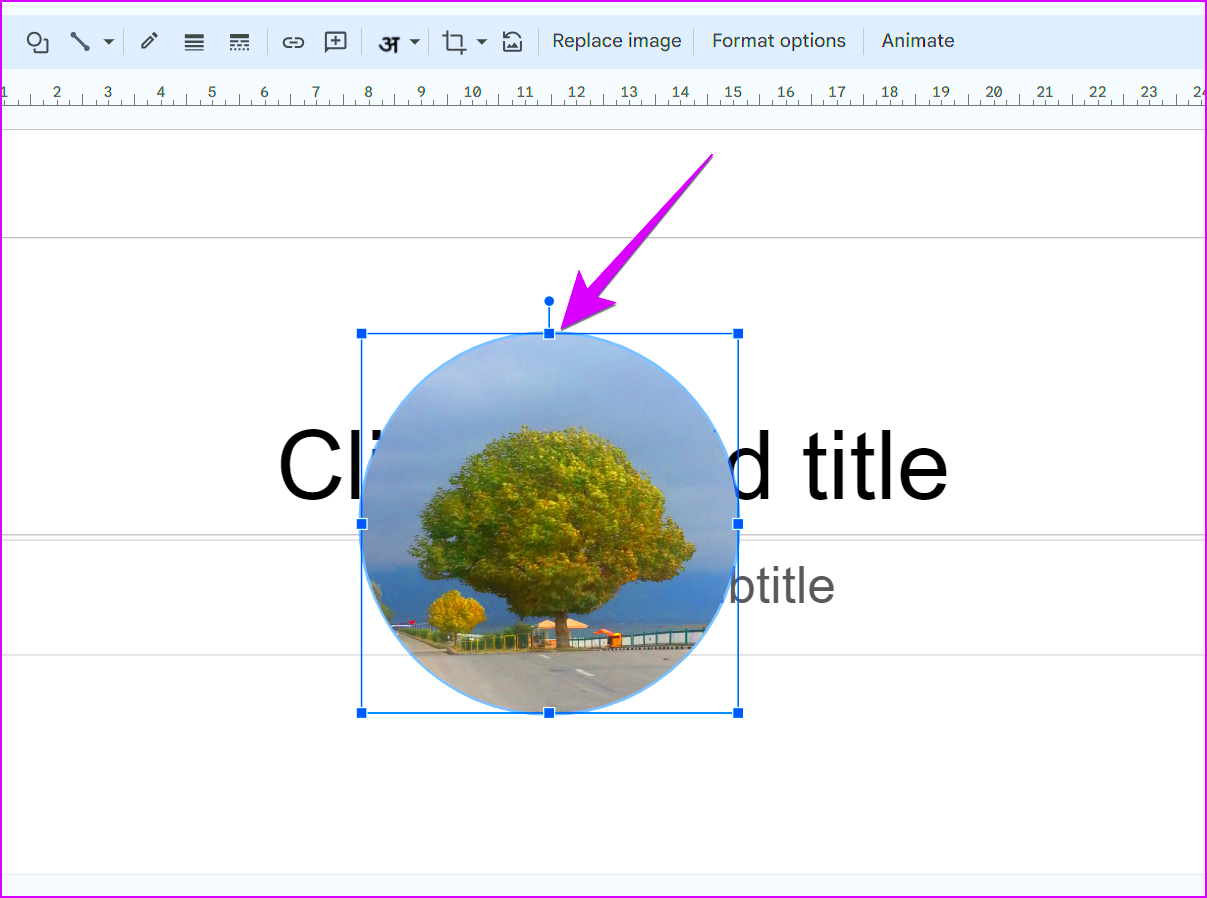
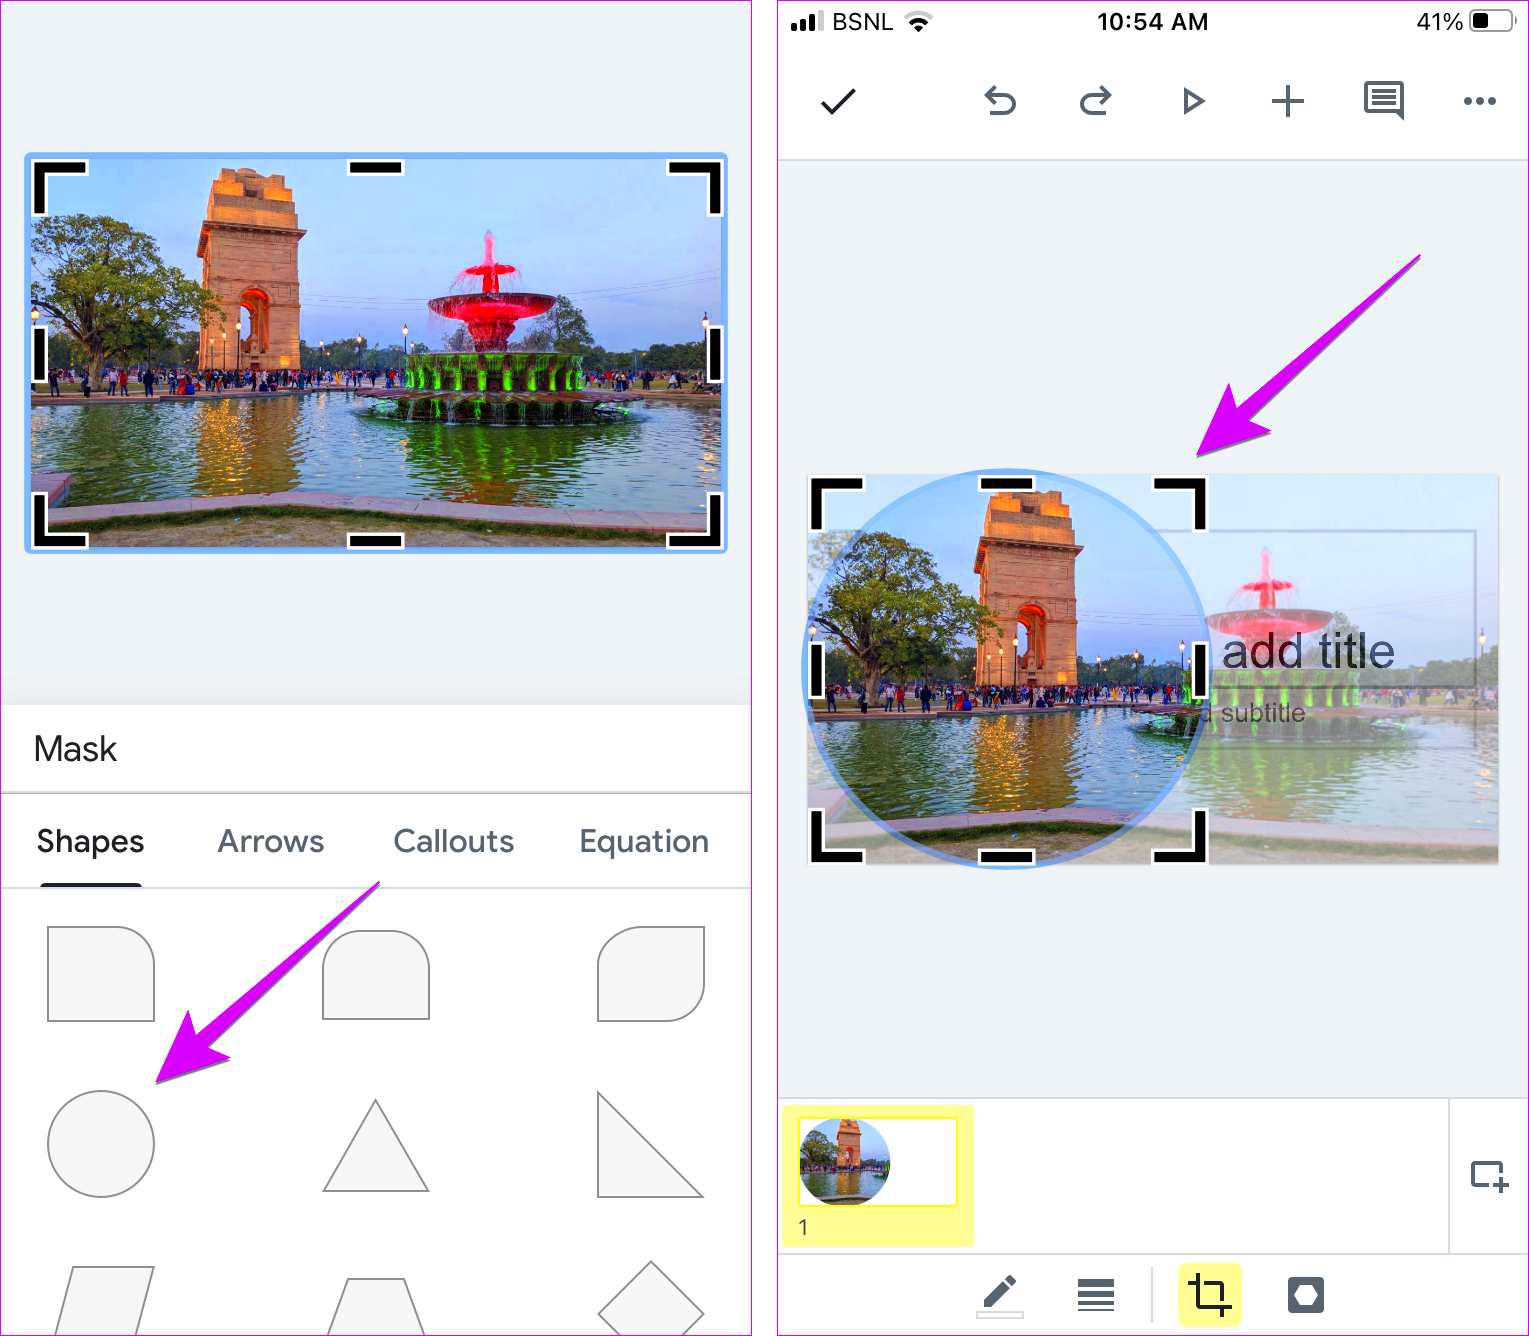
- Crop to Shape: With the image selected, click the "Crop" icon (the little crop tool) in the toolbar at the top. In the dropdown menu, choose "Shapes" and then select the circle shape.
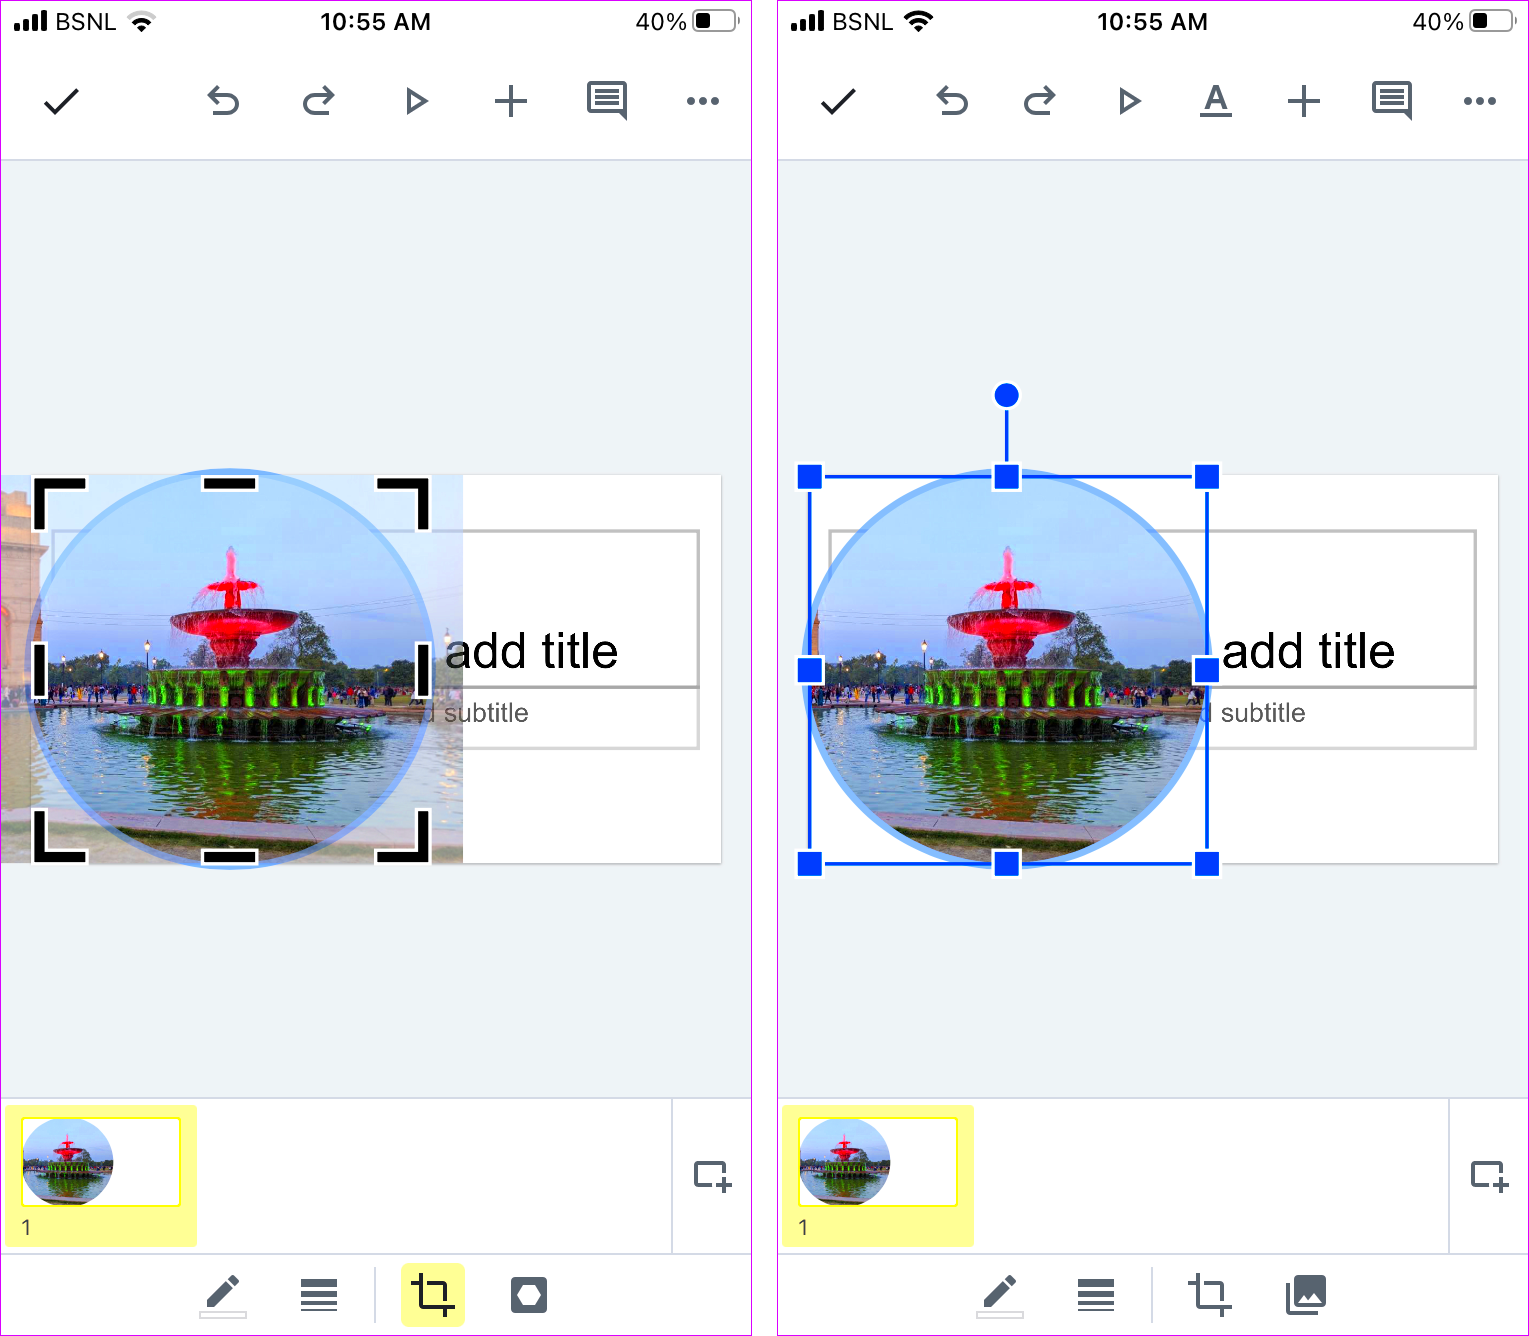
- Adjust the Circle: Your image will automatically be cropped into a circle. You can adjust its size by dragging the corners of the image to make it fit perfectly.
- Fine-Tune the Image: If needed, click on the image again, and use the "Crop" tool to adjust the positioning of the image within the circle to ensure the important parts are visible.
- Resize and Position: Resize the circular image to fit your slide design and adjust the position as needed to create a balanced layout.
That's it! With just a few clicks, you've successfully turned an image into a circle. It's a fast and simple way to elevate the visual quality of your Google Slides presentation.
Adjusting the Image Size After Making it a Circle

Once you've made your image a circle in Google Slides, you may want to adjust its size to fit better within your slide's layout. Whether you're aiming for a larger focal point or a smaller, subtle image, resizing is simple. Here's how to do it:
- Click to Select: First, make sure the image is selected by clicking on it.
- Resize Using the Handles: Once selected, you'll see small boxes (handles) around the edges of the image. Hover over one of the corner handles until you see a double arrow cursor.
- Hold Shift for Proportions: To maintain the circular shape while resizing, hold down the "Shift" key on your keyboard as you drag the corners. This keeps the aspect ratio intact.
- Adjust to Fit the Slide: Drag the image to resize it until it fits well within the available space on your slide, ensuring it's not too big or too small for the design.
- Use the Arrow Keys for Precision: For fine-tuned adjustments, you can use the arrow keys on your keyboard to nudge the image into position once it's resized.
Resizing the circular image allows you to create balance and harmony in your slide layout. Whether it's for emphasis or a smaller visual element, resizing lets you maintain control over the look and feel of your presentation.
Adding Borders to Your Circular Image
Adding a border to your circular image can make it stand out more and give your slide a more polished look. Google Slides makes it easy to add borders around images. Here's how:
- Select the Image: First, click on the circular image to select it.
- Open the Border Settings: Once the image is selected, you'll see options in the toolbar. Look for the "Border color" button (it looks like a pencil) and click on it.
- Choose the Border Color: A color palette will appear. You can select a color that matches your presentation theme or choose a contrasting color for more emphasis.
- Set Border Width: To adjust the thickness of the border, click on the "Border weight" icon (next to the color option). You can select from various thicknesses ranging from thin to thick.
- Optional: Border Dash Style: For more creativity, you can also select the "Border dash" option to make your border dotted or dashed instead of solid.
Adding a border around your circular image not only improves its visual impact but also helps it blend better with the other elements of your slide. Experiment with different border styles to create the right look for your presentation.
Common Mistakes When Making an Image a Circle
While making an image a circle in Google Slides is straightforward, there are a few common mistakes that people often make. Understanding these can help you avoid frustration and achieve a more polished result. Here are some mistakes to watch out for:
- Not Maintaining the Aspect Ratio: When resizing a circular image, make sure to hold the "Shift" key. If you don't, you might end up distorting the circle into an oval, which defeats the purpose of making it a circle in the first place.
- Not Centering the Image Inside the Circle: After cropping, your image may not be centered properly within the circular shape. Make sure you adjust the positioning within the crop tool to highlight the most important parts of your image.
- Choosing the Wrong Image: Some images, especially those with intricate edges or lots of detail, might not look great in a circular shape. It's best to use images with clear subjects that work well within a circular frame.
- Forgetting to Adjust Image Quality: If your image is low resolution, it might look pixelated after being cropped into a circle. Make sure the image quality is high enough to maintain clarity after resizing.
- Overcrowding the Slide: It's easy to go overboard with images, but overcrowding your slide can make it look busy and cluttered. Keep your circular images balanced with the overall slide design.
By avoiding these mistakes, you'll create cleaner, more professional slides with circular images that enhance your presentation rather than distract from it.
Alternatives to Using Circular Images in Google Slides
While circular images are a popular choice for presentations, they aren't always the best option for every situation. There are several other ways to format your images in Google Slides, depending on the look you're going for. Here are some alternatives that can also add style and structure to your presentation:
- Square Images: If you're looking for a clean, traditional layout, square images work well. They fit neatly into grids or alignments and are easy to position on your slide without worrying about distortion.
- Rectangular Images: Rectangular images can be great for displaying wide visuals, like landscape photos or website screenshots. They're a practical choice when you want to showcase detailed images with more context.
- Polaroid Style: Adding a little flair, you can use the "Polaroid" style. By adding a white border around an image and tilting it slightly, you create a nostalgic, informal look that still stands out.
- Shape Masks: Google Slides lets you crop images into other shapes like stars, triangles, or hearts. If you want something more creative, you can experiment with these shape masks to add more variety to your presentation's visuals.
- Transparent Background Images: Sometimes, you don’t need a shape at all! Transparent background images allow the visuals to seamlessly blend into your slide's background, making the image look more integrated with the design.
These alternatives offer different looks and flexibility, so you can choose the one that best fits your presentation’s theme or message. Each option helps keep your content engaging and visually interesting.
FAQ: Frequently Asked Questions about Circular Images in Google Slides
If you're new to working with circular images in Google Slides, you might have some questions. Here are answers to some common queries that could help you get the most out of your images:
- How do I make sure the image stays perfectly circular? To maintain the perfect circular shape, always hold the "Shift" key while resizing. This will prevent any distortion and keep your image in proportion.
- Can I use circular images for logos? Yes! Circular images are a great choice for logos, especially if you want them to stand out or match a clean, modern look. Just make sure the logo is centered and fits well inside the circle.
- What if my image gets blurry after cropping it to a circle? If your image becomes blurry after cropping, it’s likely because the resolution was too low to begin with. Try using a higher-resolution image to ensure it looks sharp and clear.
- Can I add a border to a circular image? Yes, you can! After selecting the image, click on the "Border color" option in the toolbar and choose the color and thickness of the border you want to add around your circular image.
- Is it possible to add text inside a circular image? While you can't directly add text inside the circle itself, you can create a text box over or around the image to include captions, titles, or other text that complements the visual.
If you have any other questions or need further help, feel free to experiment with these features or consult the Google Slides help center for more tips!
Conclusion
Turning an image into a circle in Google Slides is a simple yet effective way to enhance your presentations. Whether you're looking to create a more professional look or highlight specific images, circular shapes provide a clean, modern touch that can make your content stand out. By following the easy steps outlined here, you can quickly master this technique and start using circular images in your slides.
Remember, there are plenty of other design options available in Google Slides, so don’t hesitate to experiment with shapes, borders, and layouts to make your slides unique. With the right visual choices, your presentations will capture the attention of your audience and communicate your message more clearly.


