Resizing images is a common task in the digital world. Whether you're working on a blog, a social media post, or a personal project, knowing how to resize images can save you time and enhance your content. In this guide, we'll explore the basics of resizing images and focus specifically on making them 3000 by 3000 pixels. Let's get started!
Understanding Image Dimensions
When we talk about image dimensions, we're referring to the size of an image in terms of width and height, usually measured in pixels. Here's a quick breakdown:
- Pixels: The tiny dots that make up your image. More pixels typically mean better quality.
- Aspect Ratio: The relationship between the width and height. Keeping this ratio is important to avoid stretching your image.
- Resolution: The number of pixels in an image. Higher resolution means more detail.
For example, an image that's 3000 pixels wide and 3000 pixels tall has an aspect ratio of 1:1, making it a perfect square. Understanding these terms is essential as you resize images to meet specific requirements.
Also Read This: Adding Inline Images in Emails
Why You Might Need 3000 by 3000 Pixels
Choosing an image size of 3000 by 3000 pixels can serve several purposes:
- Social Media: Many platforms, like Instagram, favor square images for posts, making 3000 by 3000 pixels ideal.
- Print Quality: If you're looking to print images, a larger size ensures better quality and clarity.
- Website Use: Larger images can improve the visual appeal of your website, providing a professional look.
- Flexibility: A 3000 by 3000 image gives you more options for cropping and editing while maintaining quality.
In summary, opting for 3000 by 3000 pixels can help your images stand out, whether online or in print.
Also Read This: How to Sell Your Photos to Getty Images and Earn Money as a Contributor
Tools for Resizing Images
When it comes to resizing images, having the right tools can make all the difference. Thankfully, there are plenty of options available, ranging from online tools to software you can install on your computer. Here are some popular tools you might consider:
- Online Tools:
- Canva: A user-friendly graphic design platform that allows for easy resizing.
- ResizeImage.net: A simple website for quickly resizing images without much fuss.
- Simple Image Resizer: A straightforward tool for resizing images in a few clicks.
- Software:
- Adobe Photoshop: A powerful image editing tool that provides extensive options for resizing.
- GIMP: A free alternative to Photoshop that offers many features, including resizing.
- Paint.NET: An easy-to-use image editor that is great for basic resizing tasks.
Choosing the right tool depends on your specific needs, whether it's a quick resize or more detailed editing. Each of these tools has unique features, so explore them to find what works best for you!
Also Read This: How to Achieve Success on Behance with a Strong Online Portfolio
Step-by-Step Guide to Resize an Image
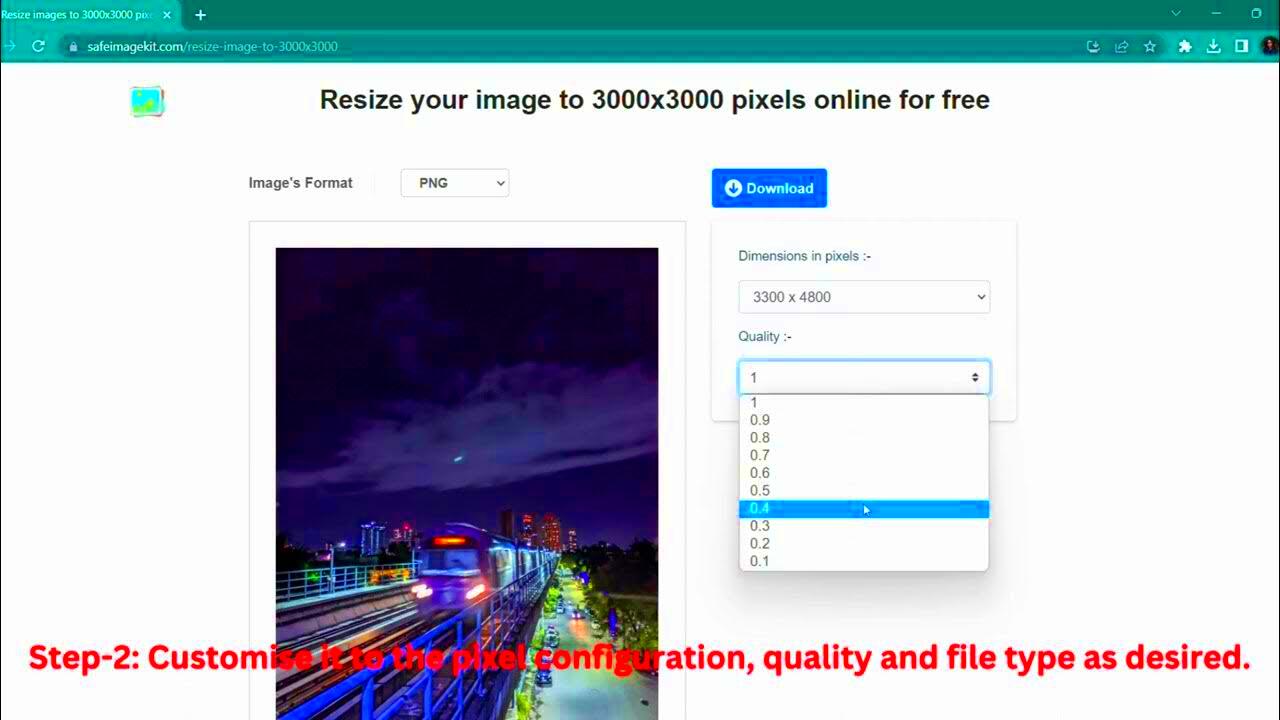
Now that you have your tools ready, let’s walk through the steps to resize an image. We’ll use an online tool as an example, but the general process is similar for most software:
- Select Your Image: Start by uploading the image you want to resize.
- Choose Dimensions: Input the desired size—in this case, 3000 by 3000 pixels. Most tools allow you to enter width and height separately.
- Maintain Aspect Ratio: If your tool has this option, make sure to check it if you're resizing to a different aspect ratio to avoid distortion.
- Preview Changes: Most tools provide a preview option. Check how your resized image looks before saving it.
- Download the Resized Image: Once you’re satisfied, click the download button to save your new image to your computer.
That’s it! Resizing images is straightforward, and with a bit of practice, you’ll get the hang of it in no time.
Also Read This: Editing Images in PDF Format Made Simple
Common Issues When Resizing Images
While resizing images is generally simple, a few common issues can crop up. Here are some challenges you might encounter and tips to handle them:
- Loss of Quality: Resizing an image to a larger size can result in a blurry or pixelated appearance. To avoid this, always start with the highest resolution image available.
- Incorrect Aspect Ratio: If you don’t maintain the aspect ratio while resizing, your image can look stretched or squished. Always check this option if available.
- File Format Compatibility: Some tools might not support certain file formats. Make sure your image is in a common format like JPEG or PNG.
- Color Changes: Occasionally, colors may look different after resizing. If this happens, check your tool’s settings for color management options.
Being aware of these issues can help you troubleshoot and ensure your resized images look just the way you want!
Also Read This: How to Use PowerPoint 2007 for Professional Presentations
Best Practices for Image Quality
Maintaining high image quality is essential, especially when resizing images. Here are some best practices to help you preserve the clarity and detail of your images:
- Start with High-Resolution Images: Always begin with the highest resolution version of your image. This gives you more room to resize without losing quality.
- Use Lossless Formats: When saving images, opt for formats like PNG or TIFF that don't lose quality during compression. JPEGs are fine, but they do compress the image and can lose some detail.
- Keep the Aspect Ratio: To avoid distortion, maintain the original aspect ratio when resizing. Most tools have an option to lock this ratio.
- Sharpen After Resizing: After resizing, apply a slight sharpening filter. This can help bring back some detail that may have been lost during the resizing process.
- Test Different Formats: Experiment with different file formats and settings to see which gives you the best quality for your specific image.
By following these best practices, you can ensure your resized images look crisp and professional, whether you're using them online or in print.
Also Read This: How to Add a Portfolio to Behance and Showcase Your Creative Work
FAQ About Image Resizing
When it comes to resizing images, you might have a few questions. Here are some frequently asked questions that can help clarify the process:
- What is the best size for images on the web? Generally, a size of 1200 pixels wide is a good standard for web images, but it can vary based on your design needs.
- Can I resize images without losing quality? Yes, as long as you start with a high-resolution image and follow best practices for resizing.
- How do I know what aspect ratio to use? It depends on where you plan to use the image. Common ratios include 1:1 for square images and 16:9 for widescreen.
- What tools can I use to resize images? You can use online tools like Canva and ResizeImage.net or software like Adobe Photoshop and GIMP.
- How can I ensure my images load quickly on the web? Compress your images without sacrificing quality and choose the right file format. JPEG is usually best for photos, while PNG is better for graphics.
These FAQs should help you navigate the image resizing process more smoothly!
Conclusion on Resizing Images Effectively
Resizing images is an important skill for anyone working in the digital space, whether you're a blogger, a marketer, or just someone who enjoys creating content. By understanding the tools available and following best practices, you can easily resize images while maintaining their quality. Remember to:
- Start with high-resolution images.
- Maintain the aspect ratio to avoid distortion.
- Choose the right file format for your needs.
- Be mindful of quality during the resizing process.
As you get more comfortable with resizing images, you'll find it becomes second nature. This skill can significantly improve the visual appeal of your content, making it more engaging for your audience. So go ahead and start resizing, and don’t hesitate to experiment with different tools and techniques!
 admin
admin


