Have you ever looked up at the skies and felt the thrill of flying? Making a DIY aeroplane at home can turn that dream into a fun and fulfilling project. Whether you’re a parent looking for an engaging activity with your kids or a hobbyist wanting to explore aerodynamics, building a model aeroplane can be a fantastic way to unleash your creativity. In this guide, we’ll walk you through the basics of aeroplane making—no engineering degree required. So, grab your tools and let’s soar into the exciting world of DIY aeroplanes!
Materials Needed for Your Aeroplane Project
Creating your own aeroplane might sound daunting, but with the right materials, it's a breeze! Here’s a comprehensive list of what you’ll need to kickstart your DIY aeroplane project. Don’t worry—most of these items can be found around your home or easily sourced from your local craft store.
- Wooden Dowels or Balsa Wood: Great for creating the frame and wings. Balsa wood is lightweight and easy to cut, making it a popular choice for model airplanes.
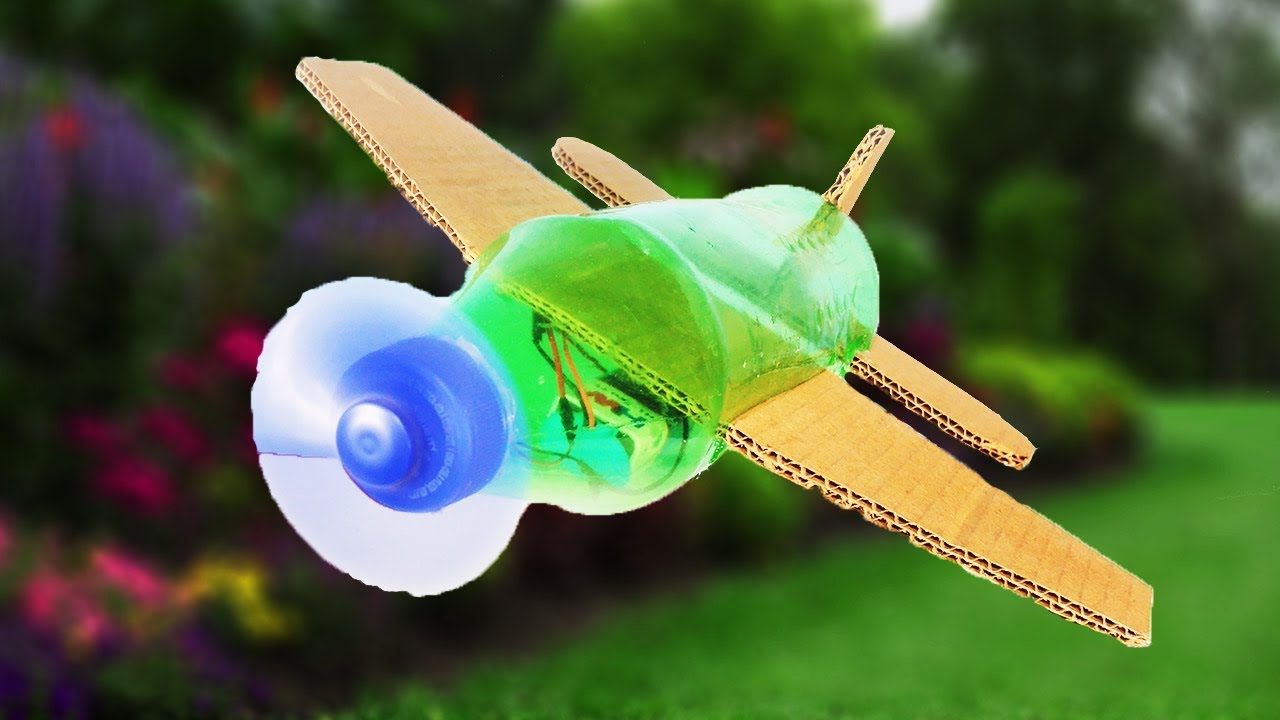
- Cardboard: Perfect for crafting the body and other parts. Corrugated cardboard is strong yet light. You can repurpose old boxes to save money!
- Glue: A strong adhesive is crucial. Hot glue, wood glue, or craft glue will work well, depending on your materials.
- Scissors and a Craft Knife: Essential for cutting wood, cardboard, and other materials with precision.
- Ruler and Measuring Tape: Accurate measurements are key to ensuring your parts fit together seamlessly.
- Pencil: Ideal for marking cutting lines and measuring points on your materials.
- Paint and Brushes: For adding personal flair and making your aeroplane visually appealing. You can even use stickers for decals!
- Rubber Bands: These can be used to create propulsion systems in some designs, adding to the fun of your DIY project!
- Small Weights: If you want to experiment with balance and aerodynamics, small weights can help correct any issues.
- Propellers (optional): If you're feeling adventurous, look for lightweight hobby-grade propellers that can be included in your design for powered flight!
Before you dive in, it’s also helpful to have a clean and spacious workspace. This will allow you to spread out your materials and work comfortably. If you're working with children, ensure all tools and materials are safe for their age group. As you gather these materials, let your imagination take flight—there are no limits to what kind of aeroplane you can create!
Also Read This: Can You Upload Videos to Dailymotion? A Beginners Guide
3. Step-by-Step Guide to Building Your Aeroplane
So, you’re ready to get those creative juices flowing and embark on a fun DIY project! Making an aeroplane at home can be an exciting challenge. Trust me, it’s more straightforward than you might think! Just follow these steps, and you’ll be soaring through the skies of your imagination in no time.
Materials Needed:
- Cardboard or foam board
- Scissors or a craft knife
- Ruler
- Glue (hot glue or craft glue)
- Markers or paint (for decoration)
- Straws (for stability and structural support)
Step 1: Design Your Aeroplane
Before diving into construction, sketch out your design! Think about the shape and size of your wings, body, and tail. A simple plane design is a good starting point, perhaps a classic biplane or a sleek glider. Use a ruler to ensure everything is proportional!
Step 2: Cut Out the Pieces
Once you have your design locked down, it’s time to cut out the parts. You will need:
- 1 large rectangle for the body
- 2 wing shapes
- 1 tail piece (horizontal stabilizer)
- 1 vertical stabilizer (the upright tail section)
Be careful with scissors or a craft knife, and always cut on a safe surface!
Step 3: Assemble the Body
Start building your aeroplane by gluing the body piece together. Make sure it’s sturdy, as this will hold the entire structure. Add straws inside for additional support if needed. Once the body is secure, attach the wings. Position them about a third of the way down from the front to give your plane proper balance.
Step 4: Add the Tail
Next, attach the tail piece to the rear of your body. Secure the vertical stabilizer upright on top of the horizontal stabilizer. This will help with the aerodynamics of your model plane, making it look more like a real aircraft!
Step 5: Final Checks
Double-check all the connections and ensure everything is glued tightly. Give your aeroplane a moment to dry completely, and then it's time for the fun part – decorating!
Also Read This: How to Use Concealer on Dark Circles: A Dailymotion Guide for a Bright and Refreshed Look
4. Tips for Decorating and Personalizing Your Aeroplane
Now that you've built your aeroplane, it's time to let your creativity shine through decoration! Here are some tips to help you personalize your model and make it truly unique.
Use Bright Colors:
Grab those markers or paint and start adding vibrant colors! Bright patterns can really make your aeroplane stand out. You can replicate your favorite airline livery, or simply go with your favorite colors!
Add Stickers and Decals:
Stickers are a quick and easy way to jazz up your creation. Look for aviation-themed stickers or even use ones you have at home – the more, the merrier! Create your own decals by printing images from the internet and gluing them on.
Create a Personalized Logo:
Design your own logo and paint or draw it on the sides of your plane. This could be the initials of your name or a symbol that represents you. It adds a personal touch that makes your craft feel special.
Experiment with Textures:
Feel free to experiment with different textures by adding materials like fabric, felt, or even textured paper. The mix of textures can make your aeroplane visually interesting and unique!
Don’t Forget the Finishing Touches:
Once you're satisfied with the main design, consider adding details like propellers or even windows. Small items like beads or buttons can be used as cockpit windows, creating a more realistic look.
Finally, display your masterpiece proudly! Whether it’s flying through the living room or sitting on a shelf, your DIY aeroplane is a testament to your creativity and craftsmanship. Enjoy the process, and most importantly, have fun!
Also Read This: Exploring Android Compatibility with Dailymotion on Android 4.1.1
5. Testing Your DIY Aeroplane: What to Consider
So, you've crafted your DIY aeroplane, and now it’s time for the moment of truth: testing it out! This is an exciting phase, but it’s important to approach it with care. Here are a few key considerations you should keep in mind to ensure a safe and successful test flight:
- Choose the Right Location: Find an open area, like a park or a large backyard, away from trees, buildings, and other potential hazards. You want plenty of space for both takeoff and landing.
- Check the Weather: Ideal flying conditions are typically calm and clear. Avoid testing on windy days or during rainy weather, as this can impact your aeroplane's performance.
- Inspect Your Aeroplane: Before you launch, give your creation a thorough once-over. Look for any loose parts, structural weaknesses, or damages that might affect its flight. Make sure everything is securely attached!
- Start Small: On your first few tries, it’s wise to do short, controlled launches. This helps you understand how your aeroplane behaves without losing it to a long-distance flight right away.
- Monitor Performance: As you test fly, pay attention to how it glides, whether it climbs or descends, and how stable it feels. Adjustments might be necessary based on its performance.
Remember, testing is all about learning! Document your findings, so you can make improvements or adjustments for future flights.
Also Read This: Step by Step Instructions for DIY Hair Removal Wax on Dailymotion
6. Common Mistakes and How to Avoid Them
No DIY project comes without its hiccups, and building a DIY aeroplane is no exception. Here’s a quick rundown of common pitfalls and how to steer clear of them:
| Mistake | How to Avoid |
|---|---|
| 1. Ignoring Weight Distribution: If the weight isn’t balanced, your aeroplane will struggle to fly straight. | Ensure the design supports even weight distribution. Place heavier components toward the front for stability. |
| 2. Using Poor Materials: Cheap or incompatible materials can lead to a fragile structure. | Opt for lightweight but sturdy materials, like balsa wood or foam, to maintain durability without adding unnecessary weight. |
| 3. Not Testing Enough: A quick trial may not reveal issues that need addressing. | Conduct multiple test flights and tweak your design based on each performance. It’s an iterative process! |
| 4. Overcomplicating the Design: A too-complex design can get frustrating and hard to fly. | Stick to a simpler design when starting out. You can always add features once you master the basics! |
| 5. Neglecting Safety: Flying near people or obstacles can lead to accidents. | Prioritize safety by keeping a safe distance during test flights and ensuring an unobstructed area around you. |
By staying mindful of these common mistakes, you can enhance your building and flying experience, making it both fun and educational. Mistakes are merely stepping stones on your journey to creating the perfect DIY aeroplane!
Also Read This: How to Unlock iPhone 5 Passcode Lock with Easy and Effective Methods
7. Benefits of DIY Projects and Creative Play
Engaging in DIY projects, like crafting your own aeroplane at home, offers a treasure trove of benefits. Not only do these projects serve as a fantastic way to spend time, but they also improve various skills and foster creativity!
Here are a few compelling reasons to dive into DIY projects:
- Enhances Problem-Solving Skills: Working on a DIY aeroplane challenges you to think critically. Whether you're choosing the materials or figuring out how to balance weight, each decision hones your ability to solve problems creatively.
- Boosts Creativity: There are no strict rules when it comes to DIY. You can experiment with colors, designs, and functionalities. This freedom inspires out-of-the-box thinking, giving your creative muscles a strong workout!
- Offers a Sense of Accomplishment: Completing a DIY project brings a rush of satisfaction. The moment you see your aeroplane take flight (even if it’s just a few inches), it’s a testament to your hard work and creativity.
- Promotes Quality Family Time: DIY projects are a great way to bond with family or friends. Working together to create something can strengthen relationships and create lasting memories.
- Encourages Learning: You’ll likely pick up many new skills along the way. Whether it’s understanding aerodynamics or mastering tools, you’ll be building knowledge as you build your aeroplane!
- Affordable Entertainment: Instead of spending money on expensive toys or outings, DIY projects can be a cost-effective way to have fun, as many materials can be sourced from around the house.
In a world dominated by screens, DIY projects offer a breath of fresh air. They encourage hands-on engagement and can be especially beneficial for children, allowing them to explore their creativity and develop essential skills. So, whether you're a parent looking for a fun activity for your kids or an adult searching for a fulfilling hobby, diving into DIY projects is undoubtedly a win-win!
8. Conclusion: Enjoy Your Homemade Aeroplane
Congratulations! Now that you've crafted your very own aeroplane, it's time to celebrate your hard work and enjoy the fruits of your labor. Remember, this isn’t just about the aeroplane itself; it's been about the journey of creating it, experimenting, and bringing your ideas to life.
Once your aeroplane is ready, take it outdoors on a clear, breezy day. Here are a few tips to maximize your enjoyment:
- Choose the Right Launch Spot: Find an open area free of obstacles like trees, buildings, or power lines. A park or a spacious backyard works great!
- Test Different Designs: Feel free to modify your aeroplane. Try different wing shapes or weights to see how they affect flight. This is all part of the fun!
- Involve Family and Friends: Gather your family or friends for a mini “aeroplane launch day.” It can be a fun mini-competition to see whose design flies the farthest!
Keep in mind that the real joy of your DIY aeroplane is in the creativity and learning that comes with it. You’re not just making a toy; you’re creating memories, learning about aerodynamics in a hands-on way, and embracing the spirit of innovation. Remember to take lots of pictures as you launch and experiment; these moments will become cherished memories.
So go out there, let your aeroplane soar, and continue exploring the endless possibilities of creativity that DIY projects offer. Happy flying!
 admin
admin


