Welcome to the world of ribbon roses! These delicate flowers are not only beautiful but also versatile, perfect for embellishing gifts, decorating clothing, or adding flair to home decor. Making a ribbon rose is a delightful craft that anyone can enjoy, regardless of their crafting experience. With just a few simple materials and steps, you’ll be able to create stunning roses that look intricate but are surprisingly easy to make. Let’s dive into the materials you’ll need for this lovely DIY project!
Materials Needed for the DIY Ribbon Rose
Before you get started on your ribbon rose journey, gather the following materials. Don’t worry; most of these are easy to find and might already be in your crafting stash!
- Ribbon: Choose a satin or silk ribbon, 1.5 inches wide. You can opt for any color that sparks joy!
- Scissors: A sharp pair will help you cut your ribbon cleanly.
- Hot Glue Gun: This will be your best friend for securing the petals together.
- Floral Wire: About 12-gauge wire works best for creating sturdy stems.
- Floral Tape: This will be used to cover the wire stems once your rose is complete.
- Optional Embellishments: Beads, glitter, or other decorative elements to personalize your roses!
Now that you have your materials ready, you’ll be all set to craft these gorgeous ribbon roses. Each item plays a crucial role in bringing your floral creation to life, so don’t skip anything!
Also Read This: How to Download Removed Videos from Dailymotion
3. Step-by-Step Instructions for Crafting a Ribbon Rose
Ready to dive into crafting your very own ribbon rose? Let’s break it down into simple steps that you can easily follow. Grab your materials, and let’s get started!
Materials You'll Need:
- Ribbon (satin works best for a beautiful finish)
- Scissors
- Hot glue gun and glue sticks
- Wire (floral wire or any thin, flexible wire)
- Felt or fabric for the base
Step 1: Cut Your Ribbon
Start by cutting a length of ribbon. A good starting point is about 24 inches long. This gives you enough length to create a nice rose without running out of material.
Step 2: Create the Petals
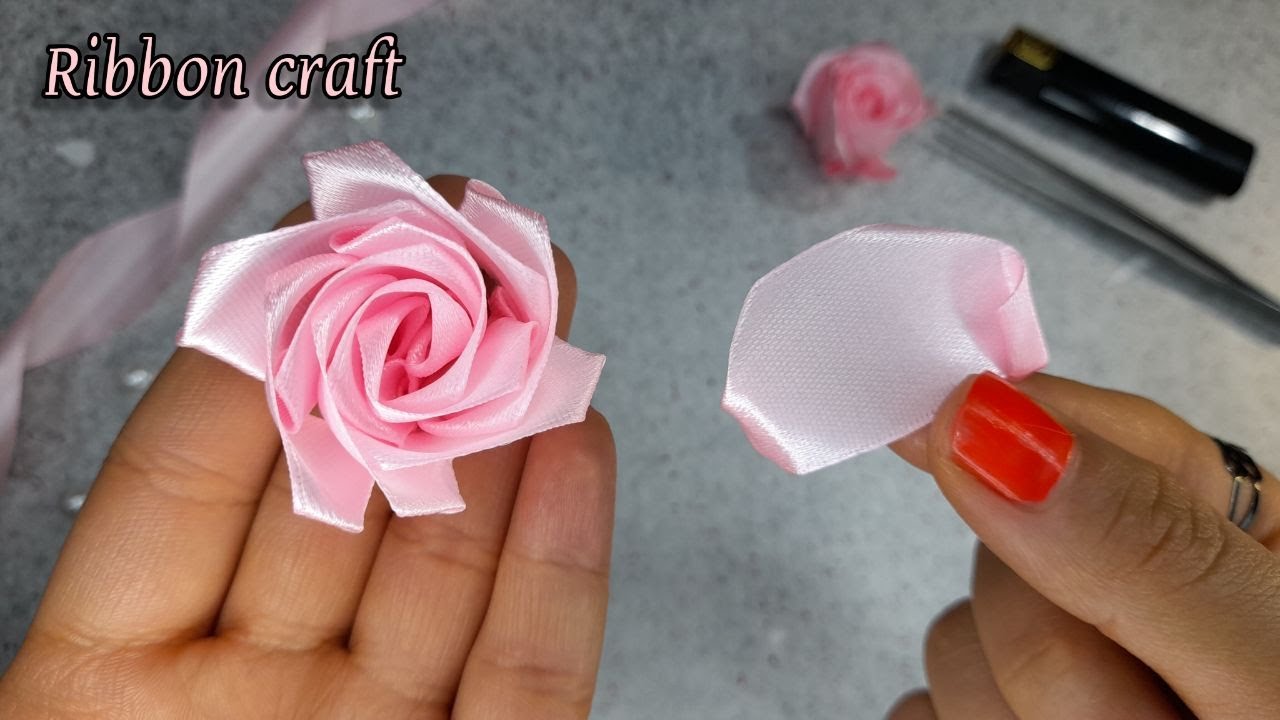
Now it’s time to fold your ribbon. Take one end of the ribbon and fold it back on itself to create a loop. Secure it with a dot of hot glue. Repeat this process, creating several loops along the length of the ribbon. Aim for about 6 to 8 loops, depending on how full you want your rose to be.
Step 3: Form the Rose
Once you have your loops glued in place, gently twist and shape the ribbon to start forming a rose. Start from one end and roll it tightly, making sure to keep the loops on the outside. As you roll, add small dots of glue to hold everything in place.
Step 4: Secure the Base
After rolling the ribbon into the rose shape, take your wire and insert it through the base of the flower. Wrap it around to secure the rose tightly. You’ll want to leave some wire sticking out to attach it to your project later.
Step 5: Add the Base
Cut a small circle from your felt or fabric to act as a base for your rose. This will help hide any glue and give your flower a finished look. Glue the base to the bottom of your rose, and trim any excess ribbon if necessary.
And just like that, you’ve crafted a beautiful ribbon rose! Feel free to make several in different colors to create a stunning bouquet or use them as embellishments for gift wrapping or decorating your home.
Also Read This: Step-by-Step Guide to Making Playdough at Home
4. Tips for Perfecting Your Ribbon Rose Technique
Now that you’ve mastered the basics, let’s discuss some tips that can take your ribbon rose-making skills to the next level!
Experiment with Ribbon Types: Different ribbons can produce varied looks. Try using organza for a more delicate appearance or grosgrain for a sturdier rose. Each type brings its unique charm!
Use Heat to Shape: If your ribbon has a tendency to fray or isn’t holding its shape well, consider lightly passing it over a low flame (carefully!) to seal the edges. This can help keep the ribbon looking pristine and enhance the overall flower shape.
Practice Your Petal Shapes: The beauty of a ribbon rose lies in how you shape the petals. Don’t hesitate to customize the loops—make some larger or more pronounced for a different look. Practice makes perfect!
Color Combinations: Try using two different colors of ribbon to create a multi-toned flower. For instance, a darker ribbon can serve as the inner layer while a lighter shade makes up the outer petals. This adds depth and interest to your design.
Stay Patient: Remember, crafting is all about enjoying the process. If your rose doesn’t turn out perfect on the first try, don’t get discouraged! Keep practicing, and soon you’ll find your rhythm.
With these tips in your toolkit, you’ll be well on your way to creating ribbon roses that not only look fantastic but also reflect your personal style. Get creative and have fun! Happy crafting!
Also Read This: How to Chromecast Dailymotion Videos from iPad
5. Creative Uses for Your Ribbon Roses
Now that you’ve mastered the art of making beautiful ribbon roses, you might be wondering how to incorporate these lovely creations into your life. The good news? The possibilities are endless! Here are some creative uses for your ribbon roses that can add a touch of elegance and charm to various projects:
- Hair Accessories: Attach your ribbon roses to hair clips, headbands, or even bobby pins. They instantly elevate your hairstyle and are perfect for special occasions or everyday wear.
- Gift Wrapping: Use ribbon roses as delightful embellishments on your gift packages. Instead of a standard bow, a handcrafted ribbon rose adds a personal touch that shows you care.
- Home Decor: Create a beautiful display by arranging ribbon roses in a vase or incorporating them into a floral arrangement. You can also glue them onto picture frames or mirrors for an artistic flair.
- Greeting Cards: Enhance handmade cards by adding ribbon roses to the front. They’re a lovely way to convey your heartfelt messages for birthdays, anniversaries, or just because!
- Clothing Embellishments: Sew or glue ribbon roses onto jackets, bags, or even scarves. They can turn a simple piece into a standout item, giving your wardrobe a fresh upgrade.
Not only do ribbon roses add charm and character to your projects, but they also showcase your creativity and craftsmanship. So, go ahead and experiment with these ideas—your friends and family will surely be impressed!
6. Conclusion and Invitation to Share Your Creations
Creating ribbon roses is not just a fun and relaxing craft, but it also opens up a world of creative possibilities. Whether you’re using them for personal projects or gifting them to loved ones, these little beauties are sure to bring joy and charm wherever they go.
We’d love to see how you’ve utilized your ribbon roses! Did you create a stunning hair accessory or perhaps a unique piece of home decor? Share your creations with us! You can post your photos on social media and tag us, or join our community online to show off your handiwork. Sharing your projects not only inspires others but also connects you with fellow crafters who appreciate the art of DIY.
So gather your materials, unleash your creativity, and let your ribbon roses bloom in the most delightful ways. We can’t wait to see what you come up with!
 admin
admin


