Have you ever wanted to watch your favorite movies or shows on a giant screen without breaking the bank? Well, you'll be pleased to know that creating your own home projector is easier than you might think! With just a few basic materials and a little creativity, you can transform your living room into a cozy cinema. Not only will it save you money, but it will also bring a sense of accomplishment every time you watch a film. In this guide, we'll break down the steps and the materials you'll need to get started.
Materials Needed for Your DIY Projector
Gathering the right materials is crucial for building your own DIY projector. Don't worry; you don't need a lot of fancy equipment! Here’s a simple list of things you'll need:
- Smartphone or Tablet: This will serve as your media source. Make sure it has a good resolution for the best viewing experience.
- Magnifying Glass Lens: A high-quality lens will be the heart of your projector. Look for one that is at least 3 inches in diameter.
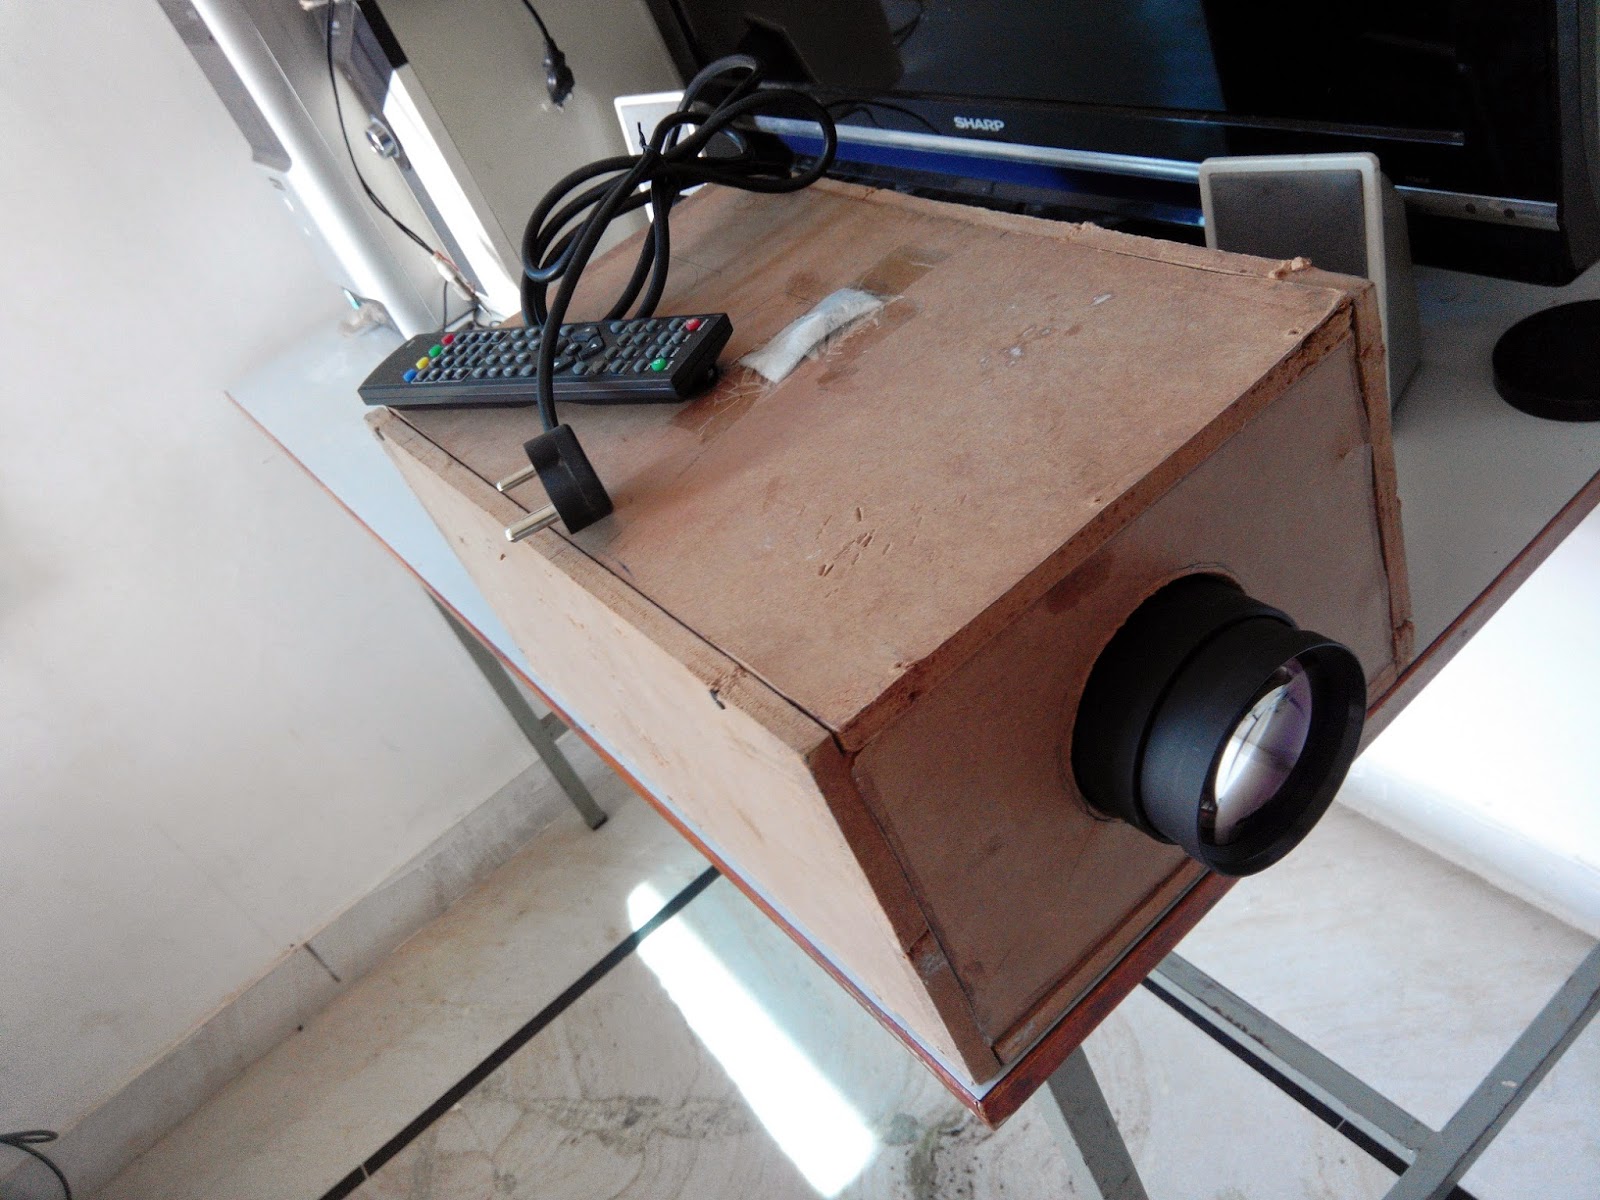
- Cardboard Box: An old shoebox or any cardboard box will work. This will serve as the projector's body.
- Black Paint or Black Cloth: To reduce light reflection and create a better viewing experience, make sure the inside of your box is dark.
- Tripod or Stand (Optional): If you want to mount your projector for stability, a small tripod can be very helpful.
- Scissors and Tape: These are essential for cutting your box and securing everything in place.
- Ruler and Pencil: To measure and mark your cuts accurately.
Once you've collected these materials, you’ll be ready to start your DIY projector project. Each item plays an important role in ensuring you end up with a functioning, fun projector that you can use for movie nights or presentations. Take a moment to look through these items and gather them—you'd be surprised at what you might already have at home!
Next, we’ll dive into the building process, but before that, take a moment to familiarize yourself with how lens optics work. Understanding how the magnifying lens focuses light will help you position everything perfectly in your homemade setup.
Also Read This: How to Make Pizza by Chef Zakir: Video Tutorials on Dailymotion
3. Step-by-Step Instructions to Build Your Projector

Creating your own projector at home might sound like a daunting task, but with the right materials and some follow-along instructions, you’ll see that it can be both fun and rewarding! Let’s break down the process into easy steps to help you get your DIY projector up and running in no time.
Here’s what you’ll need to collect:
- A magnifying glass (the larger, the better for projection)
- A cardboard box (think shoebox size or similar)
- A smartphone or tablet (this will be your source of content)
- Black paint or black fabric (to reduce light leakage)
- Scissors and/or a craft knife
- Hot glue gun (or tape, but glue is more dependable for securing the lens)
- A ruler (to measure and make precise cuts)
- A small piece of white cardboard or a sheet of plain paper (for the projection surface)
- Optional: a tripod or stand to secure your projector at the right angle
Now, let’s dive into the building process:
- Prepare the Box: Start by painting the inside of your cardboard box with black paint. This will help prevent light reflection that could interfere with your image quality. If you prefer, you can also use black fabric to line the inside.
- Cut the Hole for the Lens: Measure and cut a hole in one end of the box that fits snugly around the magnifying glass. This will be the lens through which your images are projected. Make sure the hole is slightly smaller than the glass, so you can secure it firmly in place.
- Secure the Lens: Insert the magnifying glass into the hole and use a hot glue gun or tape to hold it securely. Ensure it’s aligned properly so that it sits flat and stable.
- Prepare Your Screen: Place your white cardboard or paper on a wall or a flat surface where you want the images to be projected. The farther away the screen is from your lens, the larger the image will appear. Adjust the distance until you find the best size and clarity.
- Position Your Phone/Tablet: Inside the box, place your smartphone or tablet near the lens. You might have to prop it up to position it correctly. Ensure that your screen is facing the lens and is held securely, so it doesn’t move.
- Test Your Projector: Now, it’s time for a test run! Play a video or display an image. Turn off the lights for the best visibility, and adjust your projector’s distance from the screen to get the clearest image.
And there you have it! Your very own DIY projector is ready to use! With a bit of creativity and some tweaks as needed, you can enjoy movie nights or presentations in a totally unique way.
Also Read This: Step-by-Step Guide for Accessing Age-Restricted Videos on Dailymotion
4. Tips for Optimizing Your Projector Experience
Now that you’ve built your DIY projector, it’s all about optimizing that experience to make movie nights truly memorable! Here are some handy tips to level up your home viewing:
- Lighting: Control your environment! A dark room will significantly enhance the quality of the image projected. Close curtains, turn off any stray lights, and aim for the darkest setting possible.
- Distance and Alignment: Experiment with the distance between your projector and the screen. The closer you place the projector, the smaller the image will be, so find that sweet spot where the image remains sharp and clear.
- Quality Source Material: Use high-resolution videos or artwork to make the most of your projector. Streaming services often offer HD content that will look fantastic when projected.
- Sound Setup: Don't forget audio! Since your DIY projector relies on your smartphone or tablet, consider connecting it to an external speaker for better sound quality.
- Image Adjustment: If your image appears blurry, check the focus of the magnifying glass and adjust as needed. You can also try different angles to see what works best.
- Use a Tripod: If possible, use a camera tripod to stabilize your projector. This makes adjustments easier, and allows you to find the perfect angle without hassle.
By following these tips, you’ll not only enjoy a more vibrant viewing experience but also make your DIY projector project truly shine for you and your guests. Happy projecting!
Also Read This: Celebrating Festive Stories and Uplifting Content on Dailymotion
5. Common Issues and Troubleshooting
Creating your own projector can be an exciting project, but like any DIY endeavor, it can come with its own set of challenges. Here, we’ll explore some common issues you might run into, along with tips on how to troubleshoot them effectively.
- Image Quality Problems: If your projector images are blurry or not as sharp as you expected, check the focus mechanism.
- Color Distortion: Sometimes, colors can appear off or washed out. This might be due to the type of lens you’re using. Make sure you have a good quality lens that can handle light dispersion effectively.
- Overheating: If your projector gets too hot, it might shut down unexpectedly. Ensure that your setup includes proper ventilation. Consider using a small fan to keep air circulating.
- Alignment Issues: If your image appears skewed or misaligned, ensure that your projector is positioned directly in line with your screen. Small adjustments to the position can make a big difference.
- Noise Levels: DIY projectors can sometimes be noisy, especially with fans running. You can mitigate noise by using quieter fans or ensuring that your projector is placed on a solid surface to reduce vibrations.
For more complex issues, refer to online forums or communities focused on DIY electronics. They’re a treasure trove of information and can provide specific advice based on your setup. Remember, patience is key—every DIY project is a learning experience!
6. Conclusion and Final Thoughts
Creating your own projector at home is not just a fun DIY project; it's also a fantastic way to understand optics, electronics, and even a bit of engineering. With some basic materials, a little bit of creativity, and a willingness to troubleshoot, you can craft a personalized projector that meets your entertainment needs. Here’s a quick recap of what you have learned:
- Choose the right materials for your projector, considering factors like lens quality and light source.
- Follow setup instructions carefully to ensure good image quality and brightness.
- Troubleshoot common issues like image distortion or overheating to improve performance.
There's a sense of accomplishment when you create something with your own hands. Plus, it opens up a world of possibilities for movie nights, outdoor screenings, or even video game marathons!
Don't forget to experiment with your projector. Adjusting the distance from the wall, playing with different angles, or using various screens can all lead to improved results. And if you feel adventurous, consider adding features like sound systems or additional lighting effects to enhance the viewing experience.
In closing, the journey of creating your own DIY projector is as rewarding as its destination. So grab those materials, gather your friends or family, and let the movie magic begin! Who knows? You might just find a hidden talent for DIY electronics.
 admin
admin


