Welcome to the world of paper crafting! It's a fun, creative outlet that doesn't require a ton of fancy materials or experience. Whether you're a beginner or a seasoned crafter, making a paper mobile phone can be a delightful project. This craft is perfect for kids, a playful activity for adults, and an excellent way to engage your imagination. Picture yourself creating a mini version of your favorite device, complete with all the tiny details, using just colorful paper and a few simple tools. Let’s dive into the enchanted realm of crafting!
Materials Needed for Your Paper Mobile Phone
Now that you’re excited about creating your paper mobile phone, let’s gather all the materials you'll need. Don’t worry—most of these items are likely already in your home or are inexpensive to purchase!
Here's a list of everything you'll need:
- Colored Paper: Choose your favorite colors! You can use construction paper, origami paper, or even recycled materials from old magazines.
- Scissors: A good pair of scissors is essential for cutting your paper into the right shapes.
- Glue or Tape: These will help you stick your pieces together. A glue stick is great for paper projects, but double-sided tape can also work wonders!
- Pencil: For sketching out your designs before you cut. It’s always good to have a plan!
- Ruler: This will come in handy for measuring and making straight lines—especially for proportional details on your mobile phone.
- Markers or Colored Pencils: Use these to add details, like app icons, buttons, or designs to your phone.
- Optional: Decorative Items: Think stickers, glitter, or washi tape to make your phone truly unique!
Tips for Choosing Materials:
When picking your colored paper, consider selecting a base color for the phone and additional colors for the screen and buttons. If you want to challenge yourself, try making a smartphone that resembles your actual device. Gather photos of your phone from online sources to get an accurate look at the shape and colors.
Also, ensure that the scissors you use are safe, especially if kids are involved. Kids’ safety scissors can be a great alternative for younger crafters.
Preparation Steps:
- Gather all your materials in one place. A clear workspace is essential for a smooth crafting experience!
- Decide on the design for your paper mobile phone. Sketch out a rough outline of how you want it to look.
- Measure and cut out your paper pieces following your design. If you’re unsure about the sizes, look for templates online that you can print and trace.
With your materials ready and your design planned, you're now set to embark on a fun and rewarding crafting journey! Next up, we’ll dive into the step-by-step process of actually assembling your paper mobile phone. Enjoy the process—there's no right or wrong way to make it!
Also Read This: How to Make a Feather Braid with a Creative Hairstyling Tutorial
3. Step-by-Step Instructions to Create a Paper Mobile Phone
Ready to dive into the creative world of crafting? Making a paper mobile phone is a fun and straightforward project. Let’s break it down into easy steps to ensure you enjoy every moment of this DIY adventure. Grab your materials and let’s get started!
Materials You'll Need:
- Colored paper or cardstock
- Scissors
- Glue or tape
- Pencil
- Ruler
- Markers or colored pencils
- Decorative stickers (optional)
Now, let’s walk through the steps:
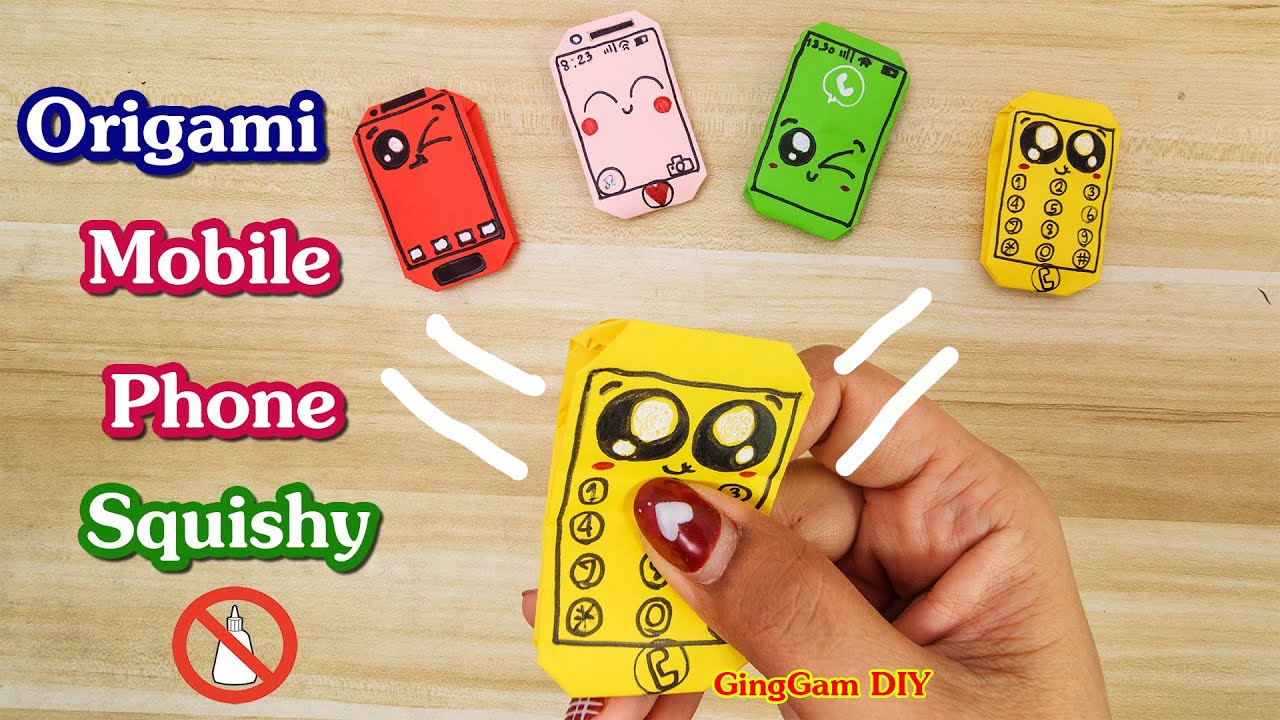
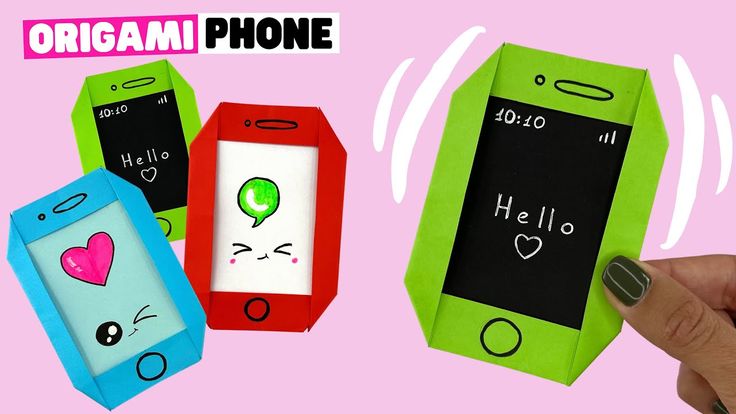
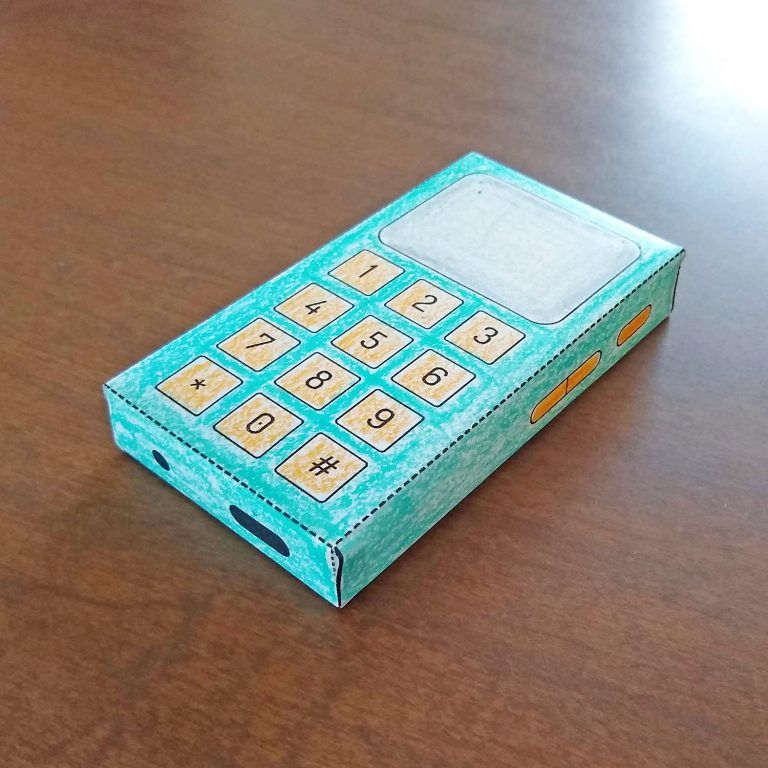
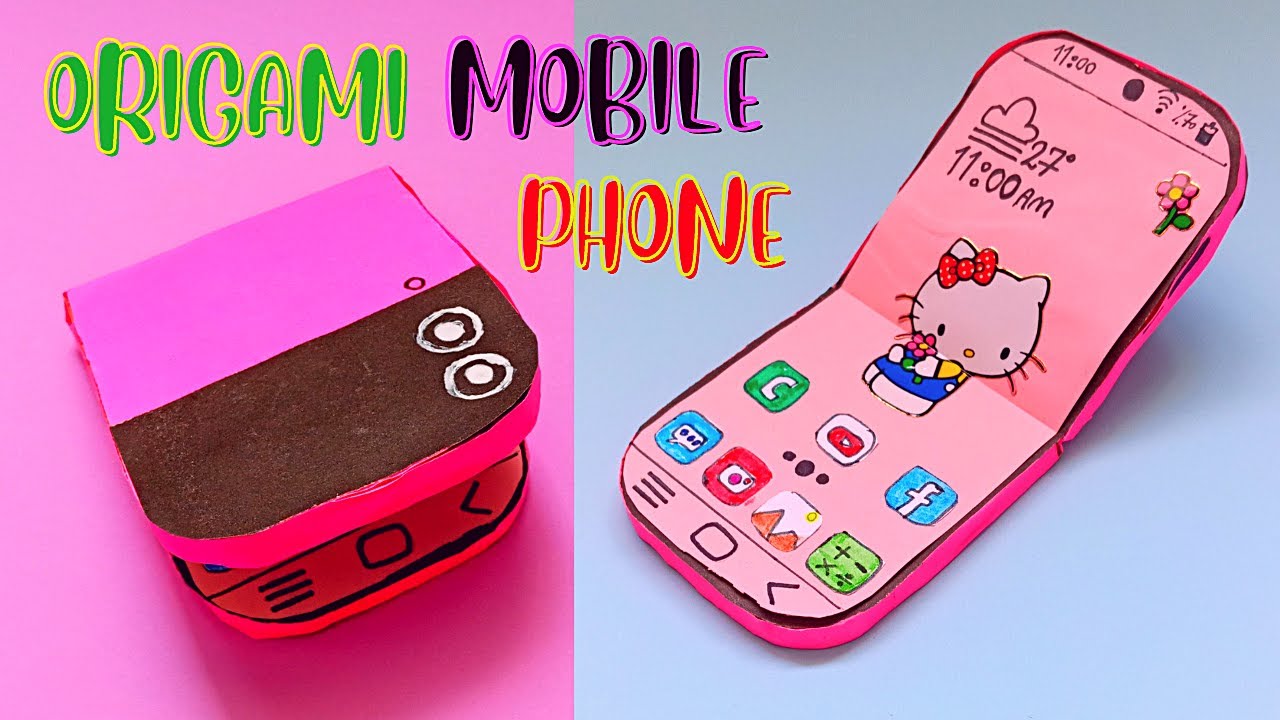
- Draw the Phone Outline: Start by drawing a rectangle on your colored paper. Use the ruler to measure about 3 inches wide by 6 inches tall for a smartphone size. Feel free to adjust these dimensions to create your ideal phone size.
- Cut Out the Shape: Carefully cut along the lines you’ve drawn. It helps to use sharp scissors for cleaner edges. Once you have the rectangle cut out, you can set it aside for later.
- Add the Screen: Grab another color of paper and cut out a slightly smaller rectangle for the screen. A good measurement is about 2.5 inches wide by 5 inches tall. This adds dimension to your phone.
- Decorate the Screen: Use markers or colored pencils to draw icons, apps, or even a fun wallpaper on this screen piece. Get creative! You can also add stickers – think of it like personalizing your phone screen.
- Attach the Screen: Once you’re satisfied with your screen design, glue or tape it onto the main phone shape. Make sure it’s centered for that professional look!
- Create Buttons: Cut out small circles or rectangles from black or another color paper to create buttons. Typical buttons might include the home button, volume control, or camera. Attach these to your phone with glue.
- Add Final Touches: Take a moment to personalize it further. You can draw lines for the speaker, add a front-facing camera icon, or even write your name on it. This is your creation, so make it unique!
- Make a Stand (Optional): If you’d like your mobile phone to stand upright, cut an additional strip of paper about 1 inch wide and 6 inches long. Fold it into a triangle and glue it to the back of your phone for stability.
Congratulations! You've just made your very own paper mobile phone! Now, it’s time to show it off to your friends or use it in your imaginative play. Remember, the world is your oyster, so feel free to experiment with designs and colors!
Also Read This: How to Apply Thin Eyeliner for a Subtle, Defined Look on Dailymotion
4. Tips for Personalizing Your Paper Mobile Phone
Now that you’ve mastered the basics of creating a paper mobile phone, let’s explore how to make it truly your own! Personalization is what transforms a simple craft into something special. Here are some fun tips to consider:
1. Choose Your Favorite Colors: The colors you select reflect your personality. Whether you’re into bold, bright shades or soft pastels, let your preferences shine through.
2. Add Realistic Details: Think about the features that would make your phone resemble the latest models. You can draw a grid for the app icons, or maybe add fake charging ports and speakers. These little details will enhance your overall design.
3. Use Fun Textures: If you have patterned paper, consider using it for the back of your phone or decorative elements. Textured materials can make your creation pop!
4. Create Personalized Apps: What kind of apps do you wish were on your phone? Draw or write down your favorite games, social media, or even a weather app. This is a great way to express your interests.
5. Incorporate Your Name or Initials: Want to ensure no one else claims your special creation? Write your name or initials in an eye-catching font on the back or front of your phone.
6. Make It Functional (Sort Of!): While your paper phone won’t make calls, think about adding a foldable piece that resembles a flip phone or even creating a small pocket that holds tiny notes or drawings. This adds a playful and imaginative twist!
7. Get Creative with Accessories: Consider making paper accessories to accompany your phone, like a little paper charger, headphones, or even a tablet for added fun.
Remember, the key to personalization is to have fun and let your imagination roam free. Whether you're making it for yourself or as a gift, your paper mobile phone will be a unique piece of art crafted by your hands!
Also Read This: How to Copy from Dailymotion – Simple Guide for Downloading Videos and Clips
5. Creative Uses for Your Paper Mobile Phone
So, you've crafted your very own paper mobile phone! But what now? The fun doesn’t stop at just making it; there are countless creative uses for your paper model. Here are some ideas to get your imagination buzzing:
- Playtime Props: Use your paper phone as a prop in role-playing games. Whether you're pretending to be a spy or a tech-savvy teenager, your paper phone can add a playful touch!
- Learning Tool: If you’re teaching children or even adults about technology or design, this paper phone can serve as a visual aid. You can annotate the parts of the phone, showing where the screen, buttons, and camera are located, bridging the gap between theory and a hands-on experience.
- Artistic Expression: Why not encourage some artistic flair? Decorate your paper phone using colored markers, stickers, or even washi tape. Each paper phone can be unique and reflect the personality of its creator!
- Gift for a Friend: Handmade gifts are often a hit! Consider giving your paper phone to a friend who loves creative arts. You can personalize it by adding notes or doodles that only the two of you would understand.
- Storytelling Companion: Use the paper phone as a prop during storytelling sessions. Young storytellers can incorporate it into their tales, perhaps as the magical object that connects them to another world!
These are just a few examples of how you can use your paper mobile phone. The possibilities are virtually endless! Let your creativity run wild, and encourage others to come up with their unique ideas. Who knows, you might inspire a whole new trend!
6. Conclusion and Encouragement to Share Your Creations
As we wrap up this fun guide to making and using a paper mobile phone, it’s important to remember that crafting is all about joy and creativity. Not only does it allow you to engage in a fun activity, but it also opens doors for imaginative uses. So, whether you made a paper mobile phone for play, learning, or just for the sake of creativity, cherish the process!
Now, let’s talk about sharing! Don’t just keep your paper creations to yourself! Sharing is a fantastic way to inspire others while gathering ideas and feedback about your work. Consider these options:
- Social Media: Snap a picture of your paper mobile phone and share it on platforms like Instagram or Facebook. Use hashtags like #PaperCrafts or #DIYto connect with fellow crafters.
- Crafting Communities: Join local or online crafting groups. You can showcase your paper phone and even teach others how to make their own!
- Workshops: If you feel confident, organize a crafting workshop! Invite friends or community members to come and make their paper phones with you, creating a fun atmosphere of collaboration.
Remember, it's not just about the final product; it's about the joy of creation. So, gather your materials, get crafting, and let your imagination soar! Happy crafting!
 admin
admin


