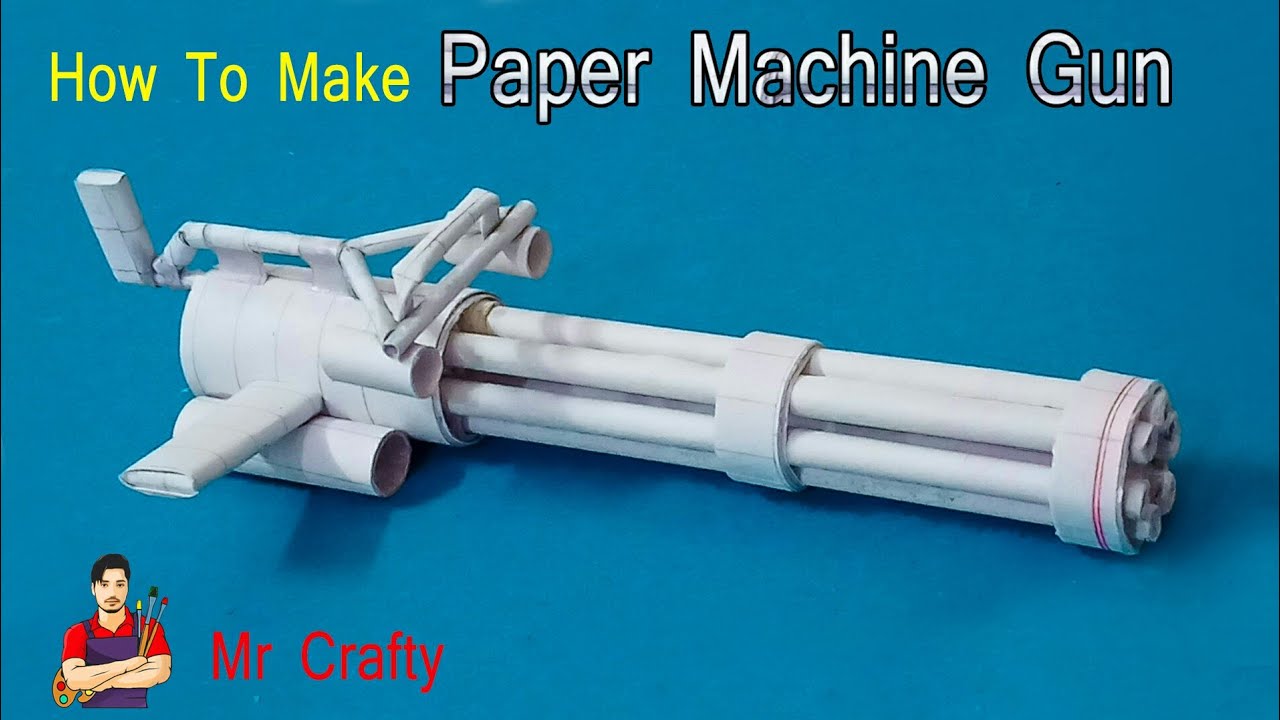
Have you ever wanted to create something fun and unique that also pays homage to childhood creativity? Making a paper machine gun that shoots is a fantastic project that combines art, engineering, and a touch of nostalgia. Whether you're looking to impress friends or simply unleash your inner craftsman, this DIY project is perfect for you. It's not just about making a toy; it's about the joy of creation and the satisfaction of seeing your handiwork in action. So, let’s get started on this exciting adventure!
Materials Needed
Before you dive into crafting your paper machine gun, it’s essential to gather all the necessary materials. Here’s a handy list to make sure you have everything you need:
- Cardstock or Construction Paper: This will be the main material for your gun. Choose thick paper for better durability.
- Scissors: A good pair of scissors is crucial for cutting your paper into the right shapes.
- Glue Stick or Tape: You'll need an adhesive to hold various parts together.
- Rubber Bands: These will provide the mechanism to launch your paper projectiles.
- Pencil or Pen: For marking measurements and designs on your paper.
- Ruler: To ensure accurate measurements for your gun parts.
- Craft Knife (optional): For more precise cuts, especially in intricate areas.
- Optional Decorations: Markers, stickers, or paint to personalize your paper machine gun.
With these materials on hand, you’ll be ready to unleash your creativity and make a paper machine gun that shoots! Gather your supplies, find a comfortable workspace, and let’s bring your vision to life!
Also Read This: Step-by-Step Guide to Reducing Chest Fat Using Dailymotion Videos
3. Step-by-Step Instructions
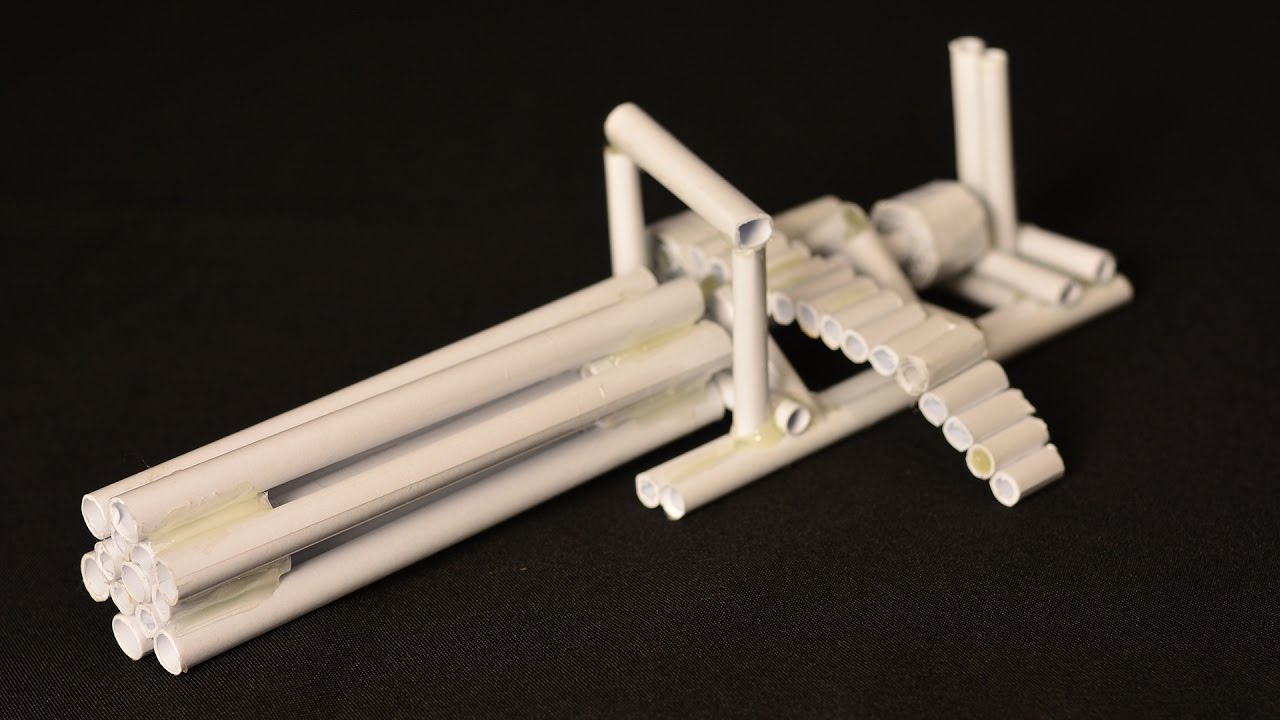
Ready to unleash your creativity? Making a paper machine gun that shoots can be a fun project! Here’s how to do it:
- Gather Your Materials: You’ll need:
- Sturdy paper or cardstock
- Scissors
- Glue stick or tape
- Rubber bands
- A straw (optional, for shooting)
And there you have it! Your very own paper machine gun ready to go!
Also Read This: Easy Tutorials for Making Lasagna on Dailymotion
4. Tips for Success
Building your paper machine gun can be a blast, but here are some tips to make sure it works well:
- Use Quality Materials: Sturdy paper or cardstock works best. Avoid thin paper as it may tear easily.
- Be Precise: When cutting, aim for straight lines and consistent sizes. This helps the parts fit together better.
- Test Your Design: Before securing everything with glue, do a dry fit to see how all the components come together. Adjust as needed!
- Experiment with Projectiles: You can use different sizes of paper balls or even small beads for varied shooting effects.
- Safety First: Always be cautious when shooting your paper gun. Avoid aiming at faces or fragile objects.
With these tips in mind, you’re all set to create an amazing paper machine gun! Happy crafting!
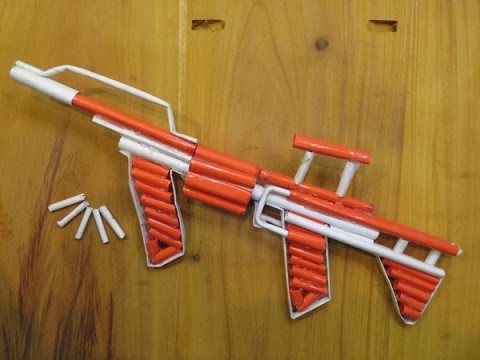
How to Make a Paper Machine Gun That Shoots
Building a paper machine gun can be a fun and creative project. Not only does it allow you to explore basic engineering principles, but it also provides a unique way to engage in imaginative play. In this guide, we will outline the materials needed and the steps to construct a simple paper machine gun that can shoot lightweight projectiles.
Materials Needed:
- Cardstock or thick paper
- Scissors
- Tape or glue
- Straws
- Rubber bands
- Small paper balls or lightweight projectiles
Steps to Build Your Paper Machine Gun:
- Design the Body: Cut a rectangular piece of cardstock approximately 12 inches long and 3 inches wide. This will be the main body of the gun.
- Create the Barrel: Cut a straw to about 6 inches long. This will serve as the barrel through which the projectiles will be shot.
- Assemble the Gun: Tape or glue the straw to one end of the cardstock body, ensuring it is securely attached.
- Add a Trigger Mechanism: Cut a smaller piece of cardstock (about 3 inches long) that can pivot as a trigger. Attach one end to the body with tape, leaving the other end free to pull down.
- Load and Shoot: Place a small paper ball into the straw, pull down the trigger, and release! The rubber band mechanism can be added for more power by attaching a rubber band from the trigger back to the body.
Safety Note: Always ensure that the projectiles are lightweight and that participants are wearing safety goggles during play.
Conclusion: Crafting a paper machine gun is not only an entertaining activity but also an educational experience, fostering creativity and problem-solving skills while ensuring safety and fun during playtime.
 admin
admin


