Welcome to our fun and creative journey into making a paper gun that actually shoots! This isn't just a child’s craft; it's a playful project that combines engineering with creativity. Whether you're looking to impress friends or just have a bit of fun during your free time, this guide will show you how to create a simple yet effective paper gun. Let’s dive right in and get started!
Materials Needed for Your Paper Gun
Before we roll up our sleeves and start crafting, let’s gather all the materials you’ll need. Don't worry; this list is super simple and most items are probably already lying around your house!
- Paper: You can use regular printer paper, construction paper, or any sturdy paper you have on hand. A4 or letter-sized paper works well for this project.
- Scissors: A pair of sharp scissors to cut the paper. Be careful while using them!
- Tape or Glue: You can use either tape or glue to hold your pieces together. Tape tends to be a bit quicker!
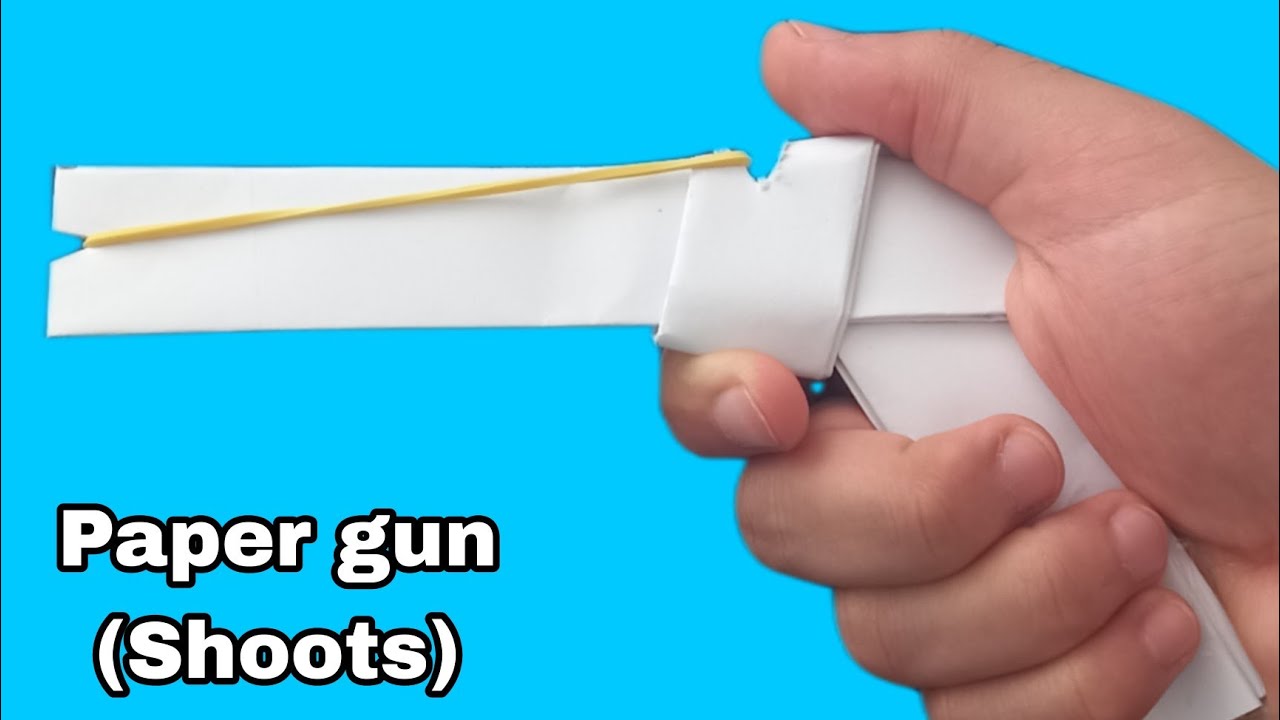
- Rubber Bands: These will be used as the firing mechanism for your paper gun. Make sure you have at least one, ideally a few of different sizes.
- Pencil or Pen: To mark where you’ll be cutting or folding the paper. A ruler can be handy too, especially for straight lines.
- A straw (optional): If you want your paper gun to shoot further and with more precision, adding a straw can be a great enhancement.
Once you have all these materials ready, you’re all set to start building your paper gun. There’s no need for fancy tools or materials; this project is all about using what’s accessible to spark your creativity. Remember, the most important part is to have fun and enjoy the process!
Also Read This: Quick Guide to Removing Age Restrictions from Dailymotion Content
3. Step-by-Step Instructions
Now that you’re excited about making a paper gun, let’s dive into the step-by-step instructions! This is a fun project that doesn't require a lot of materials, and you can do it right at home. Here’s how to create your very own paper gun that can shoot small pieces of paper!
What You'll Need:
- One sheet of paper (A4 or letter size works well)
- Scissors
- Tape or glue
- A rubber band (optional but recommended for better shooting)
- Small paper pieces or paper darts to shoot
Step 1: Create the Base
Begin by folding the sheet of paper in half lengthwise. This creates a strong base for your gun. Unfold the paper and you should see a crease down the center. Refold the paper into thirds—fold each side toward the center crease. This will add extra strength. Once done, fold the paper back in half along the original crease.
Step 2: Form the Barrel
Now, cut one section of the folded paper to create the barrel. You want to cut it so that it sticks out about 3 inches from one end of the folded paper. Be sure to cut only from one side. Once you have your barrel, you can roll up the cut section to make it more cylindrical and then tape it securely.
Step 3: Add a Trigger
To make the trigger, cut a smaller piece of paper (about 1 x 3 inches). Fold it in half and place it inside your gun’s body, just before the barrel. Secure it with tape but leave enough room for it to pivot slightly. When you squeeze it, it should push down on the rubber band (if using one) and release the paper projectile.
Step 4: Secure Everything with Tape
Once everything is in place, use tape to secure all joints and connections. Make sure that the barrel is firm and won’t come apart during use. The more secure everything is, the better your gun will perform.
Step 5: Make Your Projectiles
Now it’s time to make small paper darts! Cut small squares or rectangles from leftover paper. Each piece should be about 1 x 2 inches. Roll them tightly and give them a twist or fold to keep them secure. These will be your projectiles!
Step 6: Load and Fire!
Place one of your paper darts into the barrel, pull back on your trigger (or rubber band), and release! Watch as your paper dart flies through the air. With a bit of practice, you can improve your aim and distance!
Also Read This: Watch Tutorials for Making Tasty Vegetable Macaroni on Dailymotion
4. Tips for Making Your Paper Gun More Effective
Congratulations on making your paper gun! Now, let's talk about a few tips to enhance its performance. These simple tweaks can help you achieve greater shooting distance, accuracy, and fun during your paper gun battles.
Tip 1: Reinforce the Barrel
To ensure your dart can travel further, reinforce the barrel with extra layers of paper. Rolling a thin strip of paper and inserting it inside the barrel can create a tighter fit, allowing for improved aerodynamics.
Tip 2: Adjust the Size of Projectiles
The size of your paper darts really affects how they fly. Experiment with different sizes. Smaller, lighter darts will lose velocity quickly, while heavier ones may travel further but could drop more quickly. Finding the right size for distance and accuracy is key!
Tip 3: Use a Rubber Band
If you’re looking for a bit more “oomph” in your shot, consider integrating a rubber band into your design. Attach it to the back of the trigger so that it can add extra propulsion when released. Just make sure it’s not too tight or it may damage the paper gun.
Tip 4: Create a Better Grip
A good grip will improve your aiming precision. You can wrap the handle of your paper gun with tape or fabric to give yourself a firmer hold while firing. This also adds some style to your creation!
Tip 5: Test and Tweak
Don’t be afraid to test your design and make adjustments based on your results. Keep experimenting with different barrel lengths, projectile weights, and firing mechanisms until you find what works best for you. This is all part of the fun!
With these tips, your DIY paper gun will be shooting like a pro in no time. So, gather your materials, follow the steps, and get ready to have some paper shooting fun! Happy crafting!
Also Read This: Complete Guide to Remote Uploading Using URLs on Dailymotion
5. Safety Precautions When Using Your Paper Gun
When it comes to crafting and using a paper gun that shoots, safety should always be a top priority. While it may seem harmless since it's just made of paper, the potential for accidents and misunderstandings is real. Here are some important safety precautions to keep in mind:
- Never aim at people or pets: This might seem obvious, but it’s crucial. Even though your paper gun is made of lightweight materials, shooting paper projectiles can still cause discomfort or minor injury if aimed carelessly.
- Choose a safe shooting environment: Use your paper gun in open areas where there are no obstacles, fragile items, or valuable possessions. Parks or large rooms with plenty of space are excellent choices.
- Inspect your paper gun regularly: Check for any wear and tear. A damaged gun might malfunction or break apart while shooting, which could cause an injury. If you notice any fraying or ripping, take the time to repair or replace it.
- Limit the distance of your projectiles: Depending on how you construct your paper gun, some might shoot farther than others. If you're practicing or having fun, set boundaries on how far projectiles can travel to prevent accidents.
- Educate others: If you’re using your paper gun around friends or family, take a moment to explain how it works and the importance of safety. Everyone should be on the same page to ensure a worry-free experience.
- Keep small parts away from young children: If you decide to make a more complex design that involves small components (like rubber bands or clips), be cautious where you leave them. They can pose a choking hazard for younger siblings or visiting kids.
By following these safety precautions, you can enjoy your paper gun while minimizing risks. Remember, it's all about having fun and being responsible!
Also Read This: Build a Paper Jet Plane That Flies: Watch Tutorials on Dailymotion
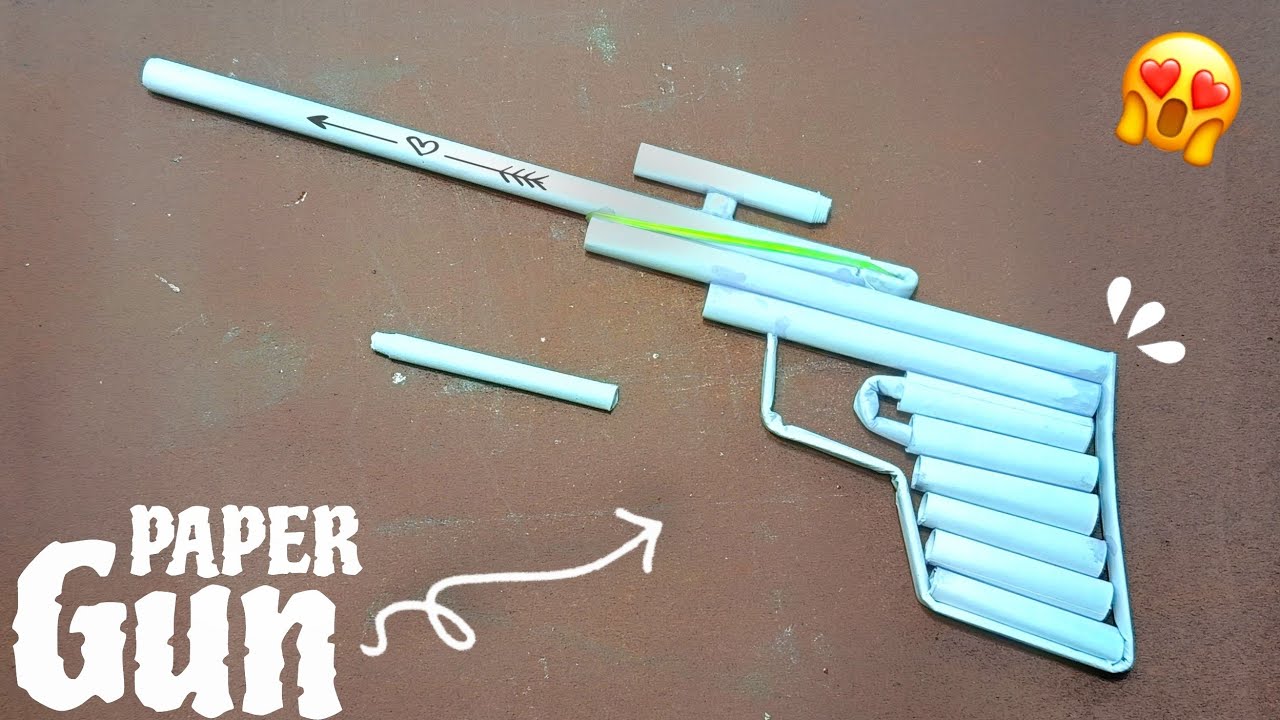
6. Creative Variations and Customizations
Now that you’ve got the basics down, why not take your paper gun to another level with creative variations and customizations? Personalizing your gun can be just as much fun as making it in the first place. Here are some exciting ideas to inspire your creativity!
- Color and Design: Use markers, colored pencils, or stickers to give your paper gun a unique look. Want a sleek black and silver design, or maybe a bright, tropical pattern? The sky's the limit!
- Modify the size: Experiment with different sizes of paper guns. A larger gun can be a powerful statement piece, while a smaller one might be easier to handle for younger players. Just remember: larger guns may need sturdier materials to hold their shape!
- Add sound effects: Consider integrating simple sound effects by using items like small bells or other materials that can mimic gun sounds. It adds an extra layer of fun to your project!
- Custom ammo: Instead of just normal paper projectiles, try using different types of paper or making darts from rolled-up pieces. Shaped ammo can change how your gun performs, giving you different shooting experiences!
For the ultimate customization challenge, you can even get into the mechanics of your paper gun! Consider how you can create a more complex system with various firing mechanisms. Look online for ideas on how to make elastic band systems or even mechanisms inspired by real guns!
Embrace your creativity! The fun of making a paper gun isn’t just in shooting but also in personalizing it to reflect your style and personality. Let your imagination take the lead, and enjoy the process as you make your paper gun truly yours!
Conclusion
In summary, making a paper gun that shoots is a fun and entertaining project that combines creativity with a bit of engineering. Not only does it stimulate your crafting skills, but it also offers a platform for exploring basic physics concepts, such as propulsion and trajectory. To recap the steps:
- Gather your materials: You’ll need paper, scissors, and tape.
- Construct the gun: Follow the folds and cuts outlined in the guide carefully.
- Test your design: Experiment with different types of ammunition for optimal shooting distance and accuracy.
Remember, safety first! Always use your paper gun responsibly, avoiding any targets that could cause harm or damage. Encourage others to join in on the fun and maybe even host a friendly competition to see whose design shoots the farthest!
Ultimately, this simple DIY project can spark interest in crafts and engineering, making it an excellent activity for individuals or groups. Whether you're a beginner or looking for a creative outlet, creating a paper gun that shoots can be a delightful way to pass the time.
 admin
admin


