Building a motor car at home might sound like a daunting task, but with the right guidance and enthusiasm, it's entirely achievable! Whether you're a seasoned mechanic or just a curious beginner, creating your own motor car can be a rewarding project. In this guide, we’ll walk you through the essential materials and steps you need to take to bring your dream vehicle to life. So, roll up your sleeves, and let’s dive into the world of DIY automotive engineering!
Materials Needed
Before we get our hands dirty, it’s crucial to gather all the materials you'll need for this exciting project. Here’s a detailed list to help you prepare:
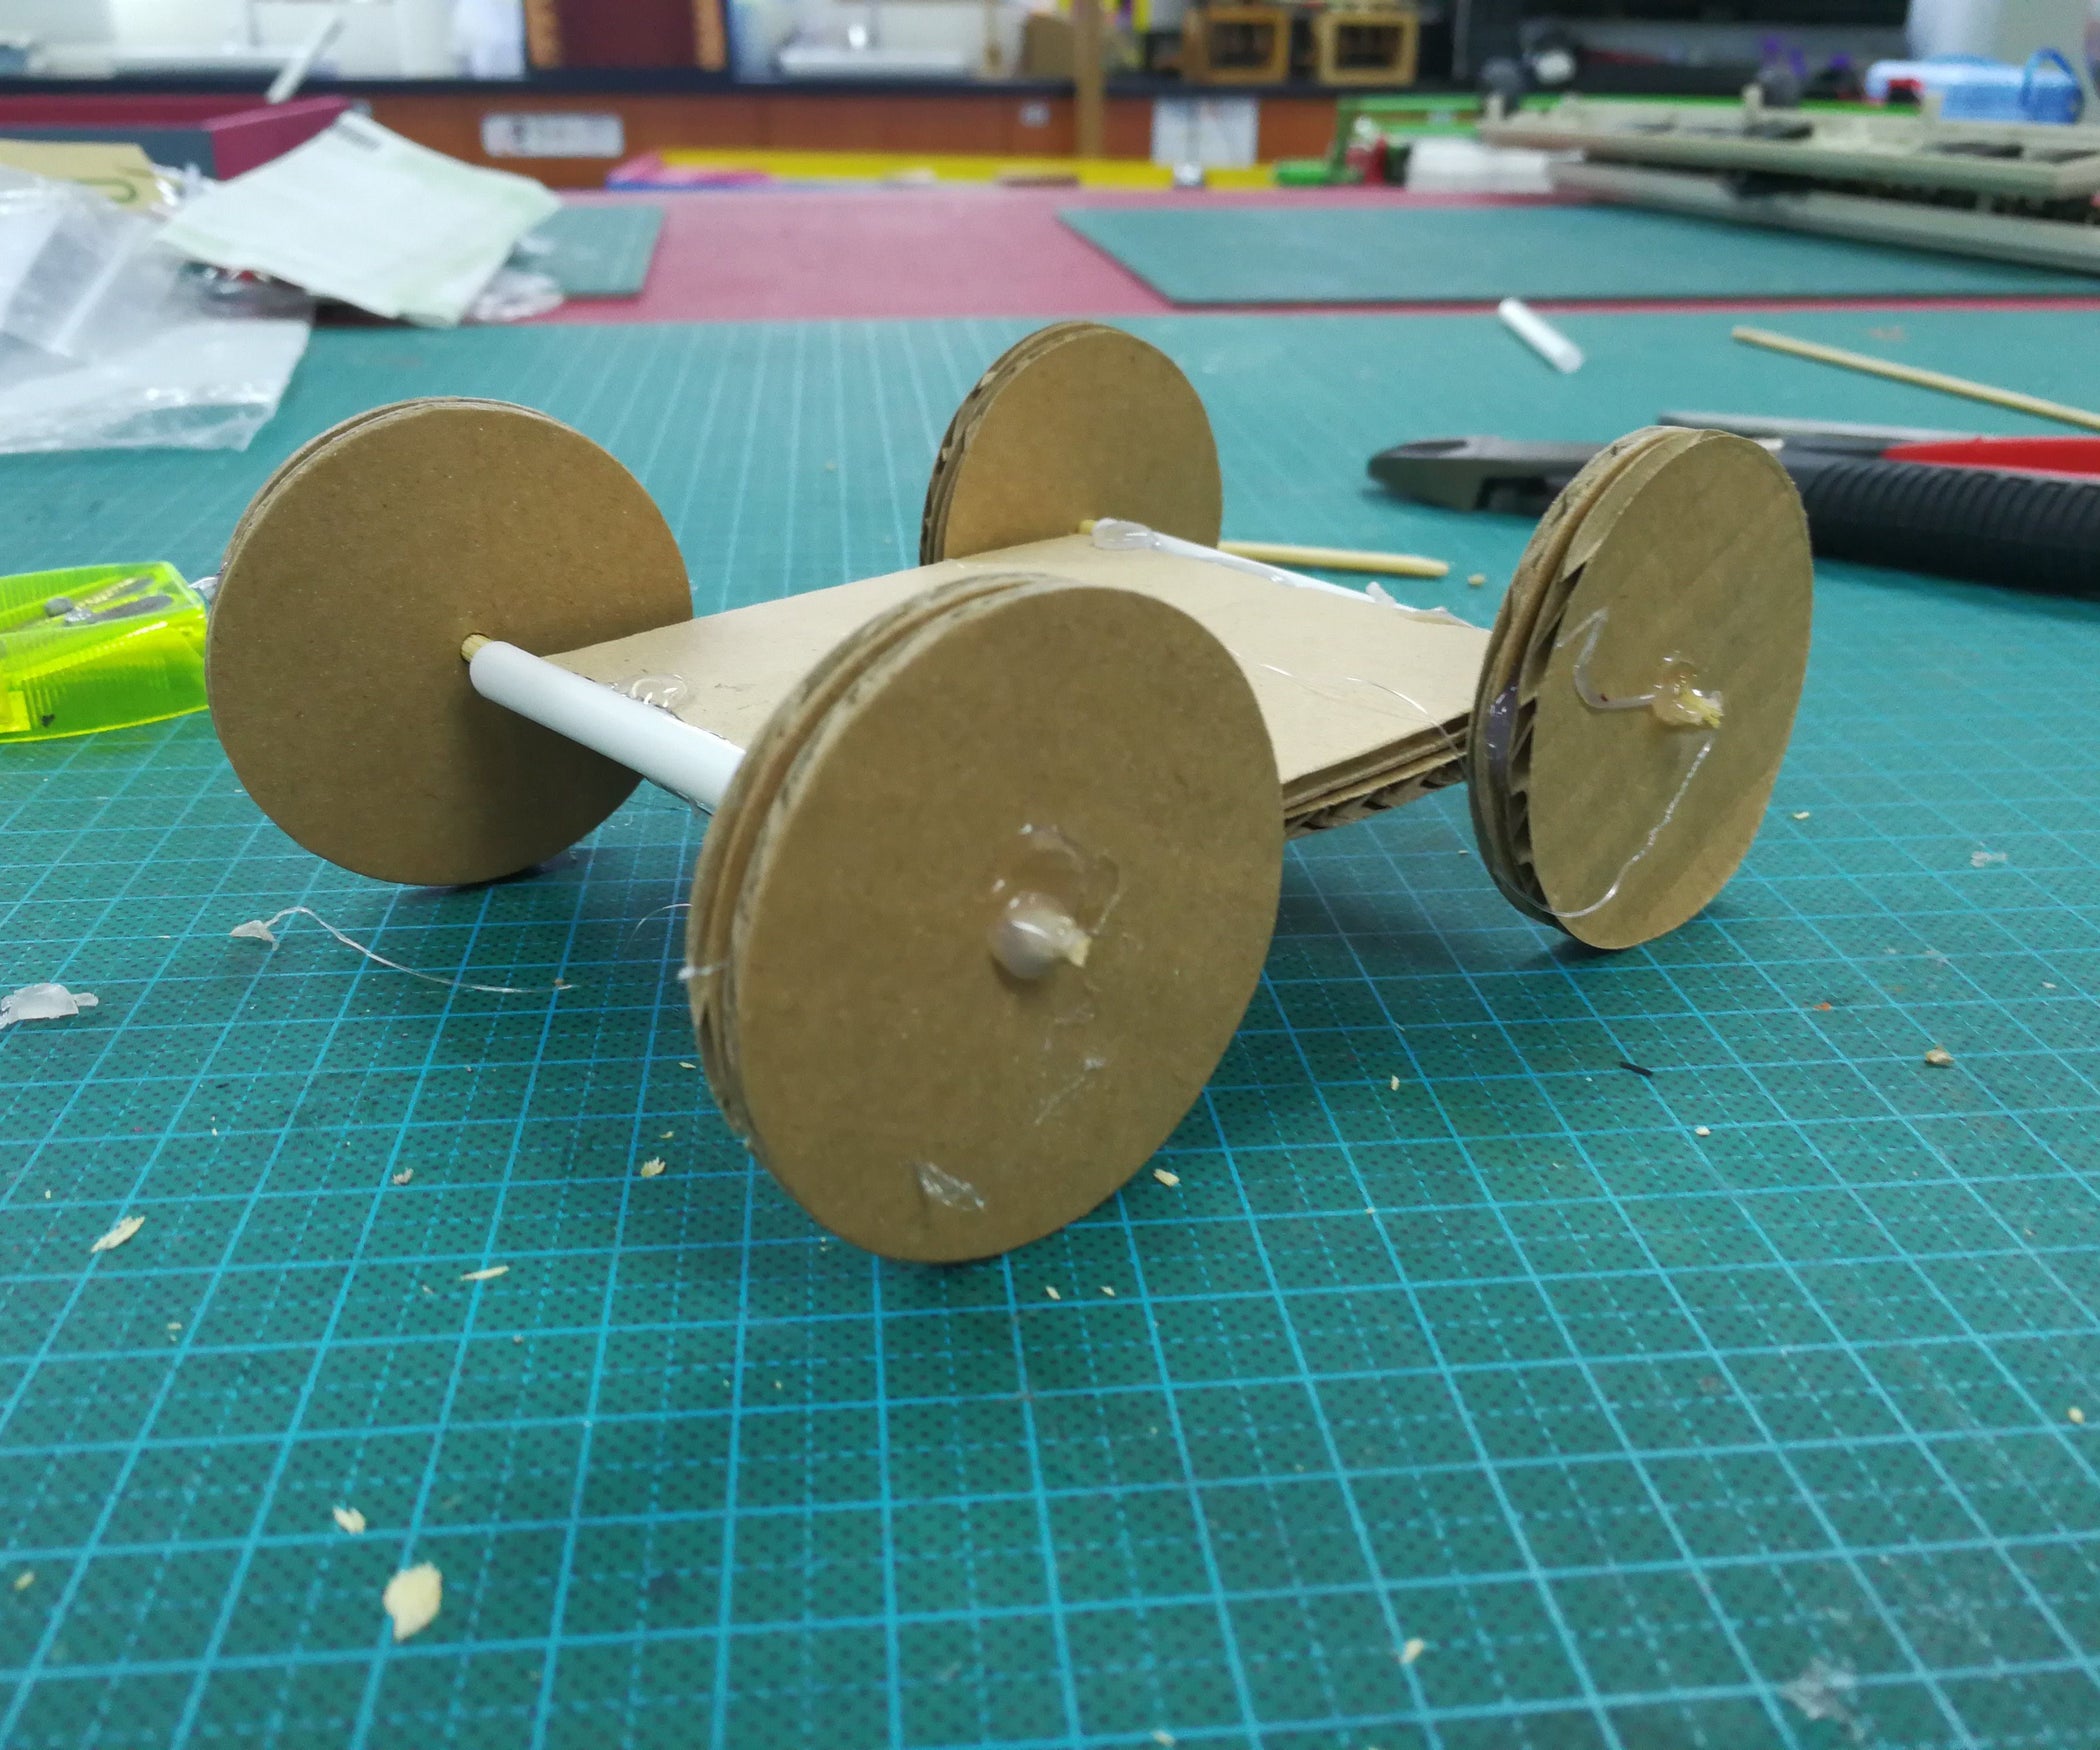
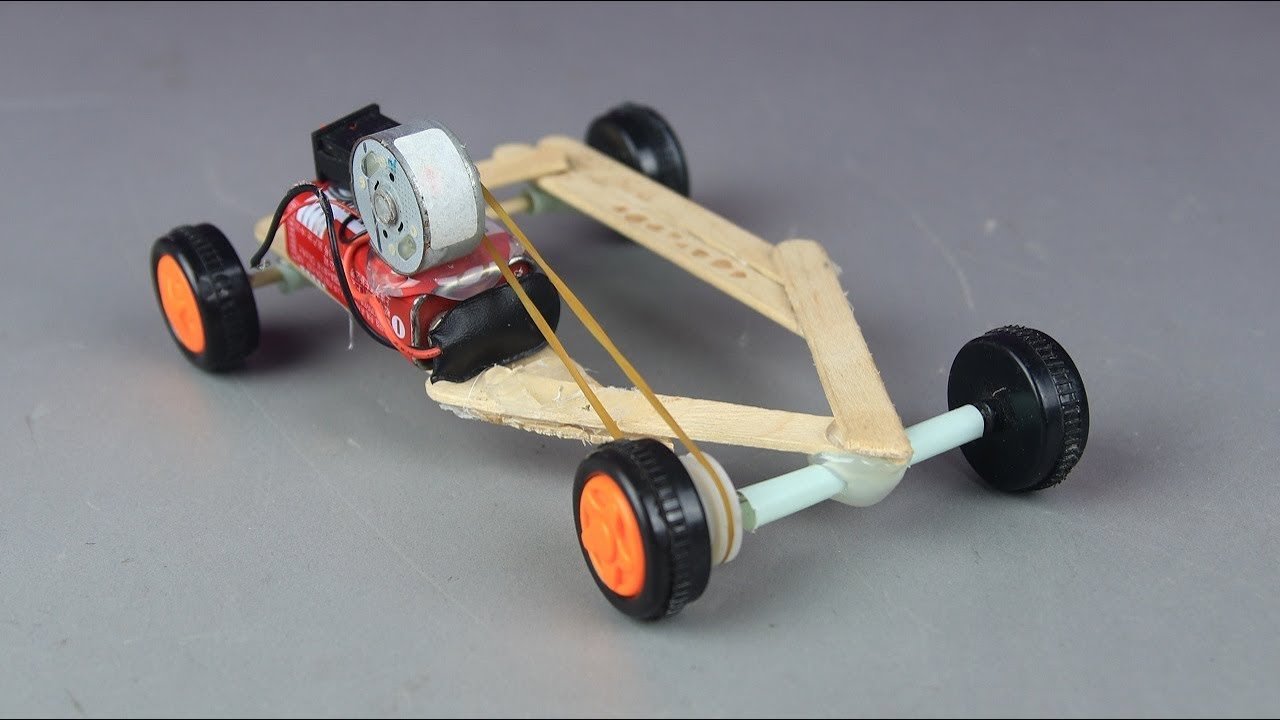
- Chassis: This is the frame of your car. You can use metal tubing, wood, or even recycled materials. Make sure it’s sturdy enough to support the weight of the car.
- Wheels: Four wheels are essential. You can repurpose old bicycle wheels or purchase new ones. Ensure they are suitable for the weight and design of your car.
- Axles: These will connect the wheels and allow them to spin. Look for durable metal rods that can handle the load.
- Motor: A small electric motor is perfect for this project. You might consider a 12V DC motor, which is easily available and provides good power.
- Batteries: You’ll need a reliable power source, like rechargeable batteries or a battery pack, to keep your motor running.
- Steering Mechanism: This can range from a simple lever system to a more complex steering wheel setup, depending on your design.
- Body Panels: For aesthetics and protection, use materials like plastic, metal sheets, or even cardboard.
- Wiring and Connectors: Don’t forget these! They are essential for connecting the motor to the power source and switches.
- Tools: Basic tools like screwdrivers, wrenches, and a drill will be necessary for assembly.
Having these materials ready will set you on the right path to building your very own motor car. Remember, creativity and patience are key in this fun DIY endeavor!
Also Read This: How to Download Dailymotion Video with aTube Catcher: Simple Steps for Beginners
Step-by-Step Instructions
Building a motor car at home may sound like a daunting task, but with the right approach and tools, it can be both fun and rewarding. Let’s break it down into manageable steps:
- Gather Materials: Before you start, collect all the necessary materials. You’ll need:
- A chassis (can be made from wood or metal)
- Wheels (4 sturdy wheels)
- A motor (electric or combustion, depending on your preference)
- Battery or fuel source
- Control system (wiring, switches, or remote controls)
- Tools (screwdriver, wrench, glue, etc.)
Also Read This: How to Connect TP-Link Router with PC: A Complete Guide Featured on Dailymotion
Safety Precautions
Safety should always be your top priority when building a motor car at home. Here are some essential precautions to keep in mind:
- Wear Safety Gear: Always wear safety goggles to protect your eyes from dust and debris. Gloves are also a good idea to protect your hands from sharp edges.
- Work in a Well-Ventilated Area: If you’re using any paints or chemicals, ensure your workspace is well-ventilated to avoid inhaling harmful fumes.
- Be Cautious with Electrical Components: When working with electricity, make sure to turn off the power before making any connections or adjustments. Double-check all wiring for proper insulation.
- Keep a Fire Extinguisher Nearby: If you're using combustible materials or working with fuel, have a fire extinguisher within reach just in case.
- Test in Safe Environments: Always test your car in an open, safe area away from pedestrians and traffic. This reduces the risk of accidents during testing.
- Follow Manufacturer's Instructions: If you're using pre-made components like motors or batteries, adhere to the manufacturer's safety guidelines and instructions.
By following these safety precautions, you can enjoy the building process while keeping yourself and others safe!
Also Read This: Comprehensive Guide to Saving Dailymotion Videos Without Extra Tools
5. Testing Your Motor Car
Congratulations! You've built your very own motor car, and now it's time for the exciting part: testing it! This step is crucial as it helps you identify any issues before hitting the road. Here’s a simple guide to ensure your test goes smoothly.
First, make sure your car is safe for testing:
- Inspect the Components: Check the wheels, brakes, and steering. Look for any loose parts or flaws.
- Test the Electrical System: If your car has lights or indicators, ensure everything is functioning correctly.
- Ensure Proper Fueling: Make sure you have enough fuel or charge in case you’re using an electric motor.
Now, let’s move on to the actual testing:
- Start Slow: Begin in a safe, open area. Take your car for a gentle spin to see how it handles.
- Check Steering and Control: Ensure that the steering responds smoothly and the car remains stable.
- Test the Brakes: Gradually apply the brakes at low speeds and make sure they engage properly.
- Observe Any Unusual Noises: Listen for any strange sounds that might indicate issues.
Finally, keep a notebook handy to jot down any observations. If everything checks out, you're ready to hit the road with your homemade motor car!
6. Conclusion
Creating a motor car at home is not just a fulfilling project; it’s a fantastic way to learn about engineering, mechanics, and the joy of building something from scratch. From gathering materials to testing your creation, each step is packed with discovery and excitement.
As you wrap up your motor car journey, remember:
- Safety First: Always prioritize safety during construction and testing.
- Learn and Innovate: Don’t hesitate to tweak designs based on your testing experience. Experimentation can lead to better performance!
- Share Your Experience: Share your journey with friends or online communities. Your insights could inspire others to embark on their own projects!
Whether you’re a hobbyist or someone looking to explore new skills, building a motor car can lead to endless possibilities. So, roll up your sleeves, stay curious, and keep creating!
 admin
admin


