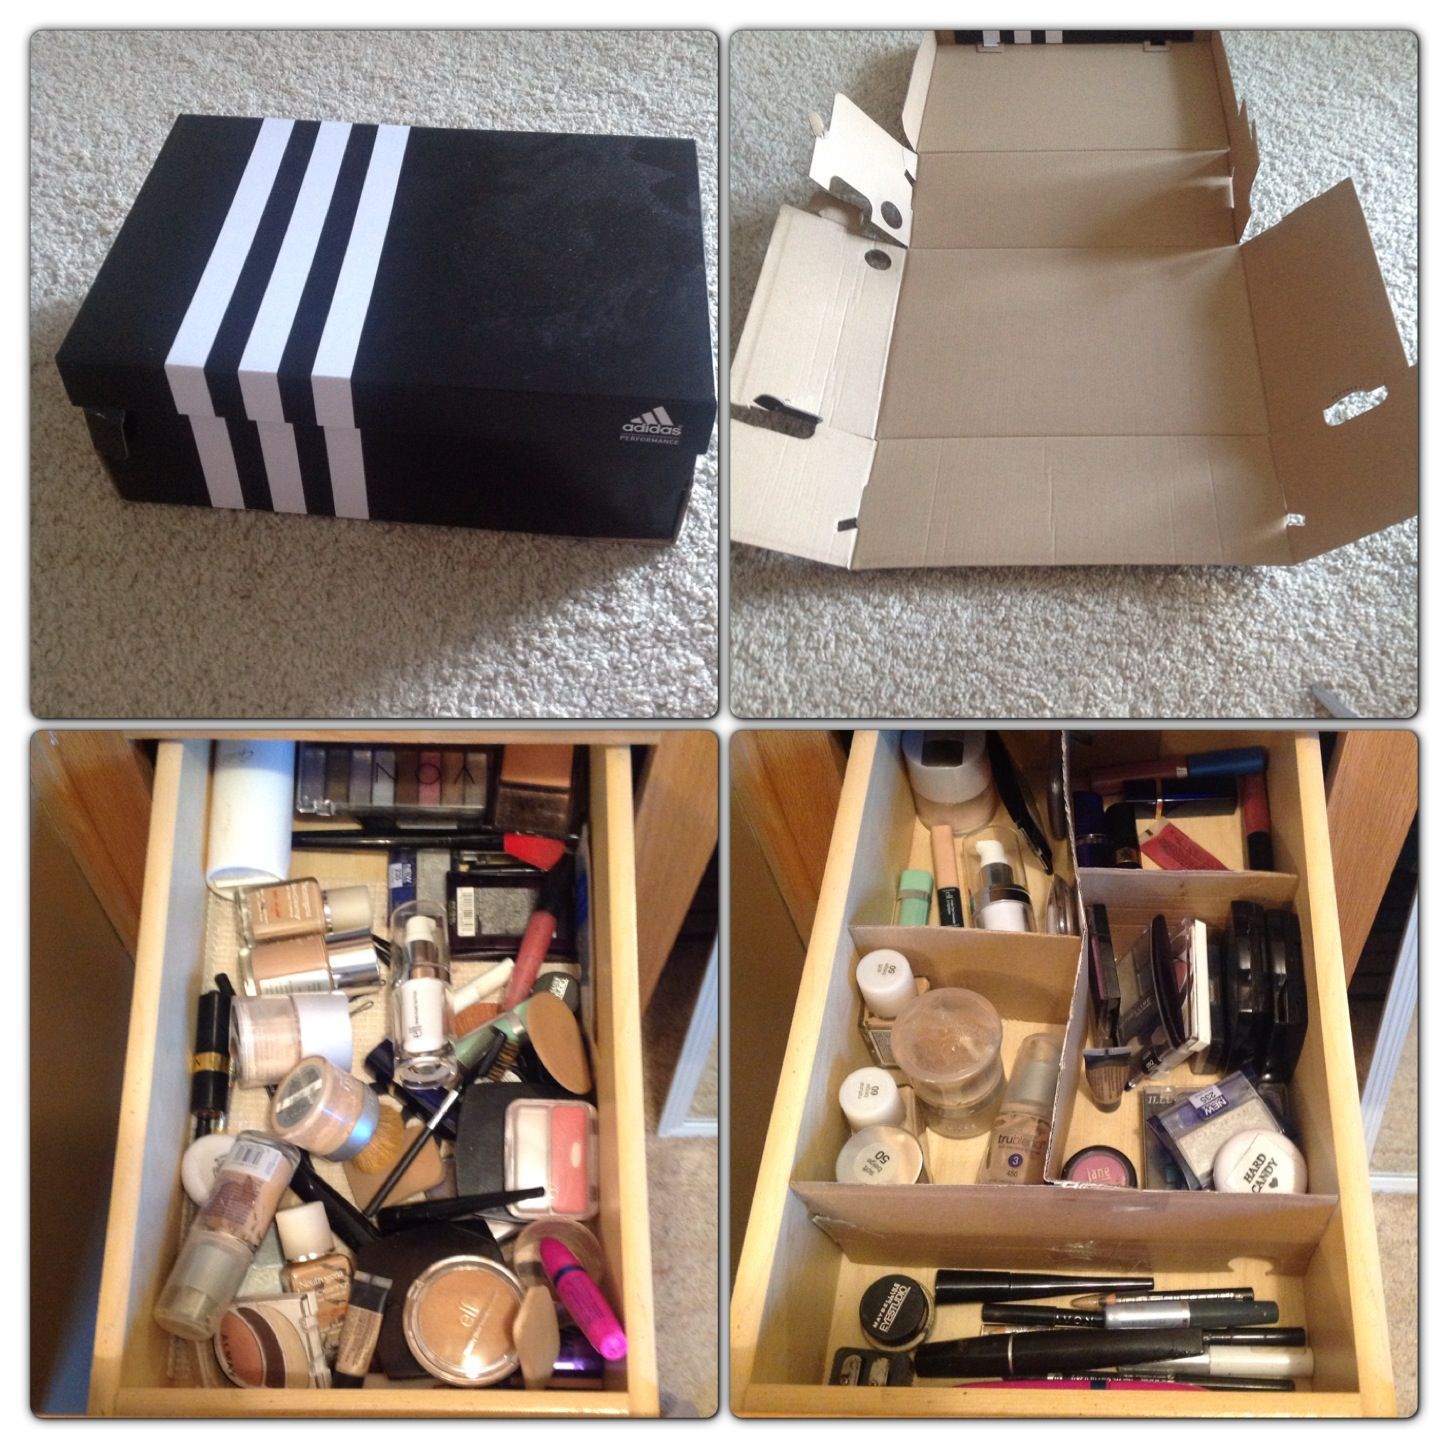
If you've ever found yourself tangled in a mess of lipsticks, brushes, and eyeshadows, you're not alone! Makeup organization can feel like a daunting task, especially when your beauty products seem to multiply overnight. But here's some good news: you can easily create your very own makeup box using an ordinary shoebox. Not only is this a fun and creative project, but it also allows you to customize your storage solution to fit your unique style. So, grab that empty shoebox and let’s dive into crafting a chic and functional makeup box!
Materials Needed for Your Shoebox Makeup Box
Before we roll up our sleeves and start crafting, let’s gather all the materials you'll need for this fun DIY project. You don’t have to break the bank to get started—most of the items are probably lying around your house or are easily obtainable at a local craft store. Here’s a straightforward list of materials:
- Shoebox: The main structure of your new makeup box. Make sure it’s clean and dry!
- Wrapping Paper or Paint: To give your box a fresh and appealing look. Pick colors or patterns that resonate with your style.
- Scissors: For cutting your wrapping paper or any dividers.
- Glue or Tape: Strong adhesive to secure your wrapping paper and any additional items.
- Ruler: To measure your box and cut materials accurately.
- Pencil: For marking dimensions on your wrapping paper or dividers.
- Dividers or Small Containers: To create sections within your shoebox to keep products organized. You can use cardboard cutouts or small plastic containers.
- Decorative Items: Stickers, washi tape, or glitter to add a personal touch to your box!
Once you have everything gathered, it’s time to unleash your creativity! Don’t feel limited by this list; if you have other materials or embellishments in mind, go ahead and incorporate them! The beauty of crafting is making it uniquely yours.
Getting started with your shoebox makeup box is not just about function but also about fun. Whether it's for your personal use or as a gift, this DIY project can be incredibly satisfying. So, let’s move forward and transform that humble shoebox into the perfect beauty organizer tailored just for you!
Also Read This: How to Make a Bow Hairstyle: A Quick and Easy Tutorial on Dailymotion
3. Step-by-Step Instructions for Creating Your Makeup Box
So, you're ready to dive into the fun and creative project of making a makeup box from a shoebox? Awesome! This is not just a practical solution to store your beauty essentials, but it's also a fantastic way to indulge your artistic side. Let’s roll up our sleeves and get started with some straightforward steps.
- Gather Your Materials: Before you begin, make sure you have everything you need. Here's a list of supplies:
- A clean shoebox
- Craft paper or fabric (for decoration)
- Scissors
- Glue or double-sided tape
- Ruler and pencil
- Some kind of embellishments (stickers, buttons, etc.)
- Optional: Paint and paintbrushes
Also Read This: How to Use Android Apps on PC via Dailymotion Easy Methods Explained
4. Personalizing Your Makeup Box Design
Now that you've got a beautiful shoebox makeup box, let's talk about how to personalize it further! Everyone’s style is different, and your makeup box should reflect your personality. Here are some fun ways to add some personal flair:
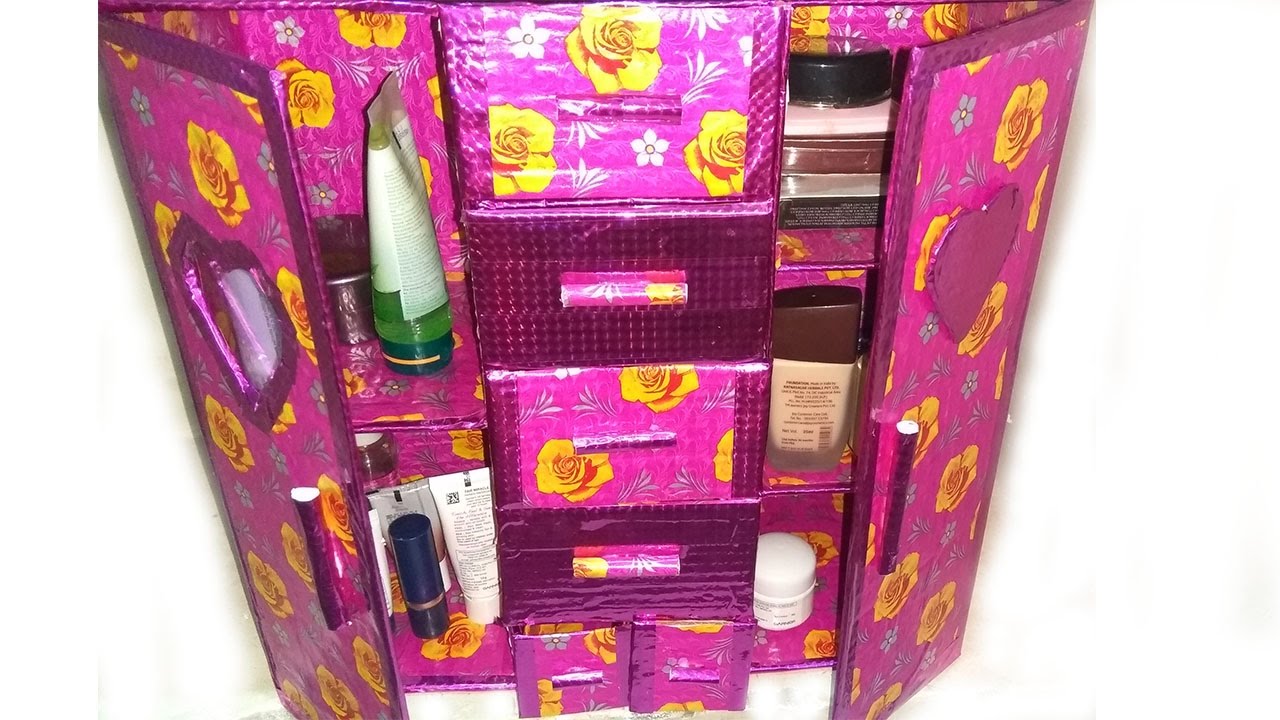
- Choose Your Color Palette: Think about your favorite colors! Whether you’re into bold and bright hues or soft pastels, choose a color scheme that makes you happy. You can paint the box, use colored paper, or even wrap it in fabric that speaks to your style.
- Add Photos: Consider adding some of your favorite photos or images. You could glue small photos of friends, inspirational quotes, or glamorous looks that inspire you. This makes your box not just a storage item, but a unique reflection of who you are.
- Incorporate Your Hobbies: If you love nature, add some leaf or flower prints. If you're into travel, maybe some map designs or travel-themed stickers. Your hobbies can bring a delightful twist to your makeup box.
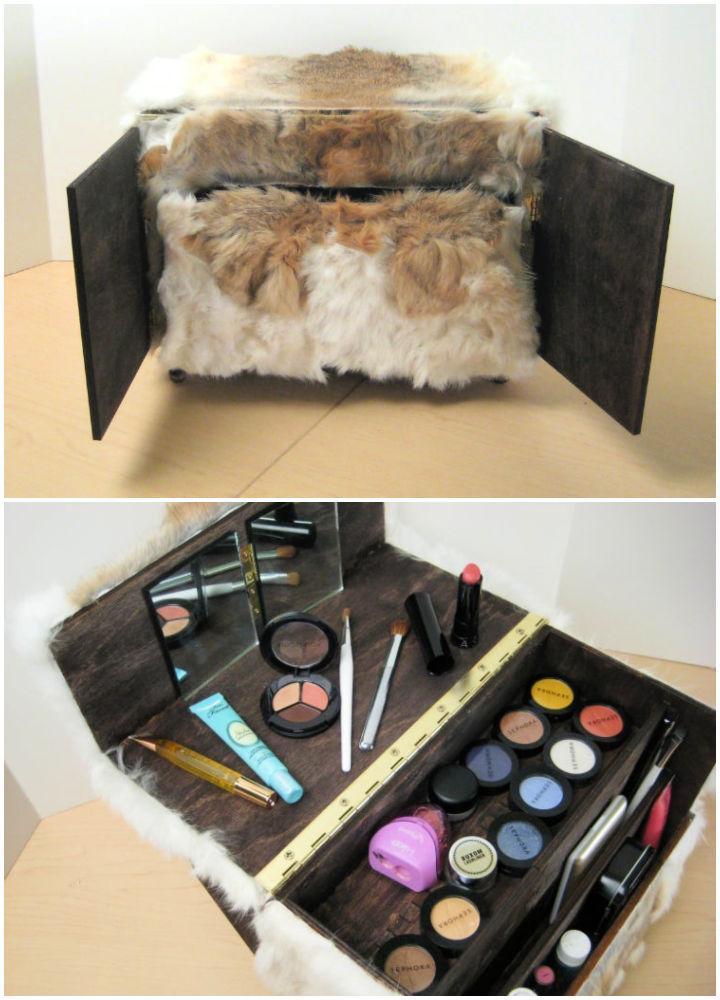
- Use Fabrics Wisely: If you went with fabric on your box, think about mixing textures. Maybe a burlap base with silk or satin ribbons can create an intriguing look. Consider a lace overlay for added elegance!
- Functional Personalization: Add a small mirror on the inside of the lid if you have one on hand. You could even design a foldable section for brushes or a small pocket for extra items like hair ties or bobby pins.
- Seasonal Designs: Consider changing your makeup box design seasonally! In the fall, you might opt for warm colors and autumnal décor, while the spring could feature floral patterns and light colors. This can keep your makeup box feeling fresh and exciting.
Remember, the best part about creating your own makeup box is that it can be as unique as you are! Have fun with it, and don’t hesitate to let your creativity soar. Happy crafting!
Also Read This: Exploring the User Experience on Dailymotion Compared to Other Platforms
5. Organizing Makeup and Beauty Products in Your Box
Now that you have your fabulous shoebox makeup box ready, it’s time to organize all your beauty products inside it! Keeping everything neat not only makes it look visually appealing but also saves time when you're rushing to get ready. Here are some effective tips to keep your makeup organized:
- Sort by Category: Start by sorting your makeup into categories such as eyes, lips, and face products. This will help you find what you need quickly.
- Use Dividers: If your shoebox is deep enough, consider adding some dividers. You can easily create these using cardboard strips or old file folders cut to size. This way, your products won't topple over each other.
- Storage Containers: Small containers or even old jars can be reused to store smaller items like lip glosses, eye pencils, and brushes. Labeling each container can also save you from digging around for that elusive lipstick!
- Keep Frequently Used Items Accessible: Make sure to keep your daily essentials at the top or in an easily accessible part of the box. That way, you won't have to dig deep every morning.
- Consider Rolling or Foldable Makeup Pouches: These handy little pouches can slide right into your shoebox. They keep everything tidy and can easily be pulled out when you need them.
One last tip: Remember to regularly review your collection. Toss out expired products and donate any gently used items that you no longer want. This will keep your box fresh and make room for new favorites!
Also Read This: How to Make Bridal Makeup: Simple Tips and Tricks on Dailymotion
6. Tips for Maintaining Your Shoebox Makeup Box
Maintaining your shoebox makeup box is crucial to ensure it stays functional and looking great over time. Here are some simple tips to keep everything in tip-top shape:
- Regular Cleaning: Dust and clean the inside and outside of your shoebox at least once a month. A damp cloth works wonders, and it prevents makeup residue from building up.
- Check Expiration Dates: Pay attention to the shelf life of your products. Makeup typically has expiration dates printed on them, so make it a habit to check and discard any old items.
- Avoid Excessive Heat: Keep your shoebox in a cool, dry place. Avoid leaving it in direct sunlight or near heat sources like radiators, as heat can cause makeup to spoil faster.
- Reorganize as Needed: If you find that your shoebox is becoming cluttered again, take some time to reorganize it! Sometimes, rethinking the layout can help optimize the space and make searching for products easier.
- Personal Touch: Feel free to redecorate your box from time to time. Adding new embellishments or a fresh coat of paint can make your makeup routine feel more enjoyable!
By following these tips, you can maintain a beautifully organized and functional shoebox makeup box that not only helps you stay on top of your beauty routine but also adds a little charm to your daily life. Happy organizing!
Conclusion and Inspiration for Future Craft Projects
Creating a creative makeup box using a shoebox is not only a fun and rewarding project but also a great way to personalize your beauty essentials. With just a few materials and a bit of imagination, you can transform an ordinary shoebox into a stylish and functional makeup organizer. Here are some key takeaways from this project:
- Eco-friendly: Upcycling a shoebox reduces waste and gives new life to something you already have.
- Customizable: You can customize your box to match your personal style or the decor of your vanity.
- Practical: A designated space for your makeup helps you stay organized and makes it easier to find what you need.
As you conclude this project, consider some inspiration for future craft endeavors:
| Project Idea | Description |
|---|---|
| Jewelry Organizer | Create a box with compartments to hold your favorite accessories. |
| Gift Box | Decorate a shoebox to use as a beautiful gift package for your friends and family. |
| Stationery Holder | Pimp out a shoebox to store notes, pens, and other stationery items. |
With endless possibilities, each craft project you undertake can further enhance your creativity and skills. Embrace the art of upcycling, and let your imagination lead the way to your next unique creation!
 admin
admin


