Have you ever found yourself struggling with a knot that just wouldn't hold? Whether you're securing a rope for a camping trip or tying a bow for a present, knowing how to tie a knot is a valuable skill. In this Dailymotion tutorial, we’ll break down the process step-by-step, making it easy for anyone to follow along. With just a few simple materials and a bit of practice, you'll be tying knots like a pro in no time!
Gathering Your Materials
Before diving into our knot-tying adventure, let’s make sure you have everything you need at your fingertips. Having the right materials will make the process smoother and more enjoyable. Here’s a list of what you’ll need:
- Rope or String: Choose a medium to thick rope, as it’s easier to handle. For practice, a length of about 3 feet works well.
- Scissors: These will come in handy if you need to cut your rope to a specific length.
- Tape Measure: If precision is important, use a tape measure to ensure your pieces are the right size.
- Marker: A marker can help you mark certain points on the rope if needed.
- Dummy Load: This could be anything from a weight to a piece of furniture that you can practice securing the knot to. It helps simulate real-life usage.
Once you’ve gathered your materials, you’ll be ready to follow along with our Dailymotion tutorial. Remember, the key is to take your time and practice each step as you go. Happy knot tying!
Also Read This: How to Get 6-Pack Abs at Home with Dailymotion Exercises and Tips
Step-by-Step Instructions
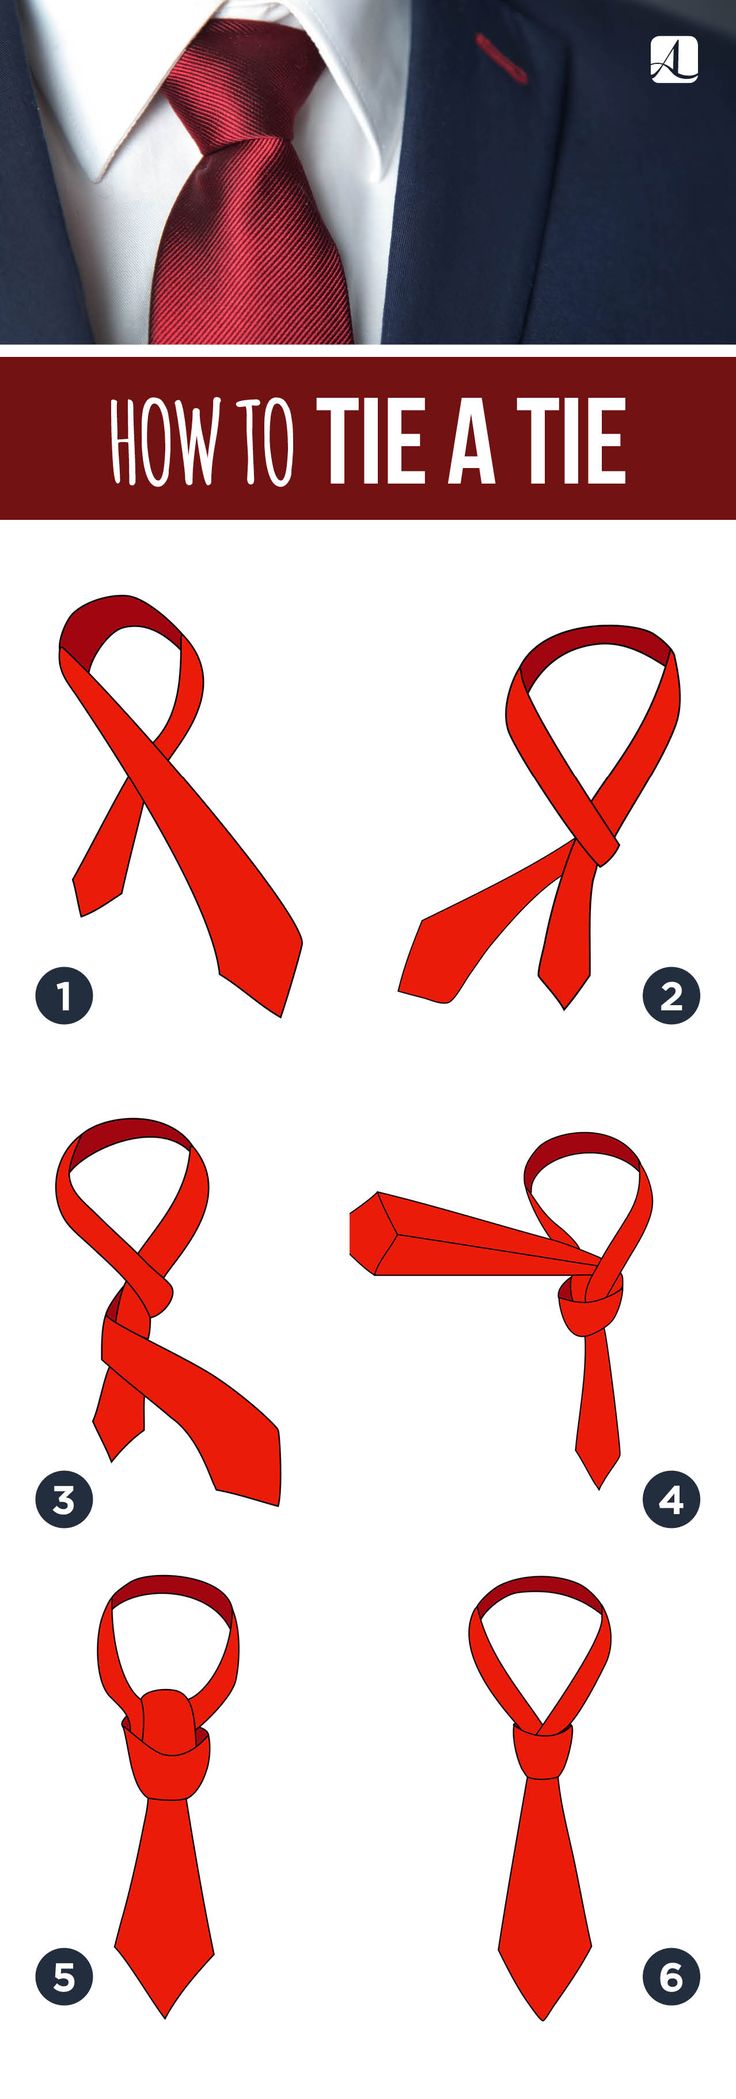
Making a knot tie might seem daunting at first, but with a bit of practice, you'll be tying them like a pro! Here’s a simple step-by-step guide to get you started:
- Prepare Your Tie: Start by draping the tie around your neck. The wide end should hang about 12 inches lower than the narrow end. Make sure the backside of the tie is facing away from you.
- Cross the Ends: Cross the wide end over the narrow end, forming an 'X' shape. Hold the intersection tightly.
- Wrap: Bring the wide end behind the narrow end. Then, pull it up through the loop around your neck.
- Thread Down: Pull the wide end down through the loop you just made in front. This is where your knot starts to take shape!
- Adjust: Hold the narrow end with one hand while using the other hand to slide the knot up to your collar. Make sure it’s snug but comfortable.
- Final Touches: Adjust the tie so the front is smooth and the back is neatly tucked in. You’re all set!
Practice makes perfect, so don’t hesitate to try a few times until you feel confident!
Also Read This: Don Shipley Videos on Dailymotion – Learn More About the Former Navy SEAL
Common Mistakes to Avoid
Even the best of us make mistakes when learning to tie a knot tie. Here are some common pitfalls and how to avoid them:
- Wrong Length: One of the biggest mistakes is not having the ends of the tie at the correct lengths. Always start with the wide end about 12 inches longer than the narrow end for best results.
- Skipping Steps: It’s tempting to rush through, but each step is crucial for a neat finish. Take your time to ensure you’re not skipping any key moves.
- Over-tightening: Pulling the knot too tight can lead to an uncomfortable fit. Aim for snugness that allows for comfort and ease of movement.
- Neglecting Fabric Types: Different fabrics behave differently. A silk tie may slide more easily than a wool one. Adjust your technique depending on the fabric to avoid slippage.
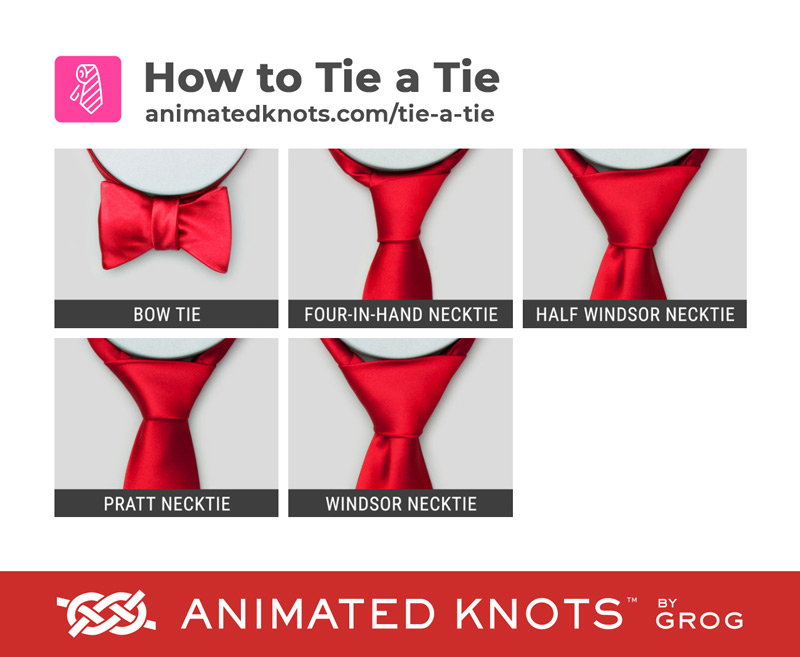
- Ignoring Collar Style: Some knots work better with specific collar styles. For instance, a Windsor knot pairs well with a spread collar, while a simple knot suits a button-down collar.
By keeping these common mistakes in mind, you’ll be able to tie your knot with style and confidence!
Also Read This: How to Stream Dailymotion on Chromecast Easily
5. Tips for Perfecting Your Knot Tie
Getting the perfect knot tie can feel like an art form. Here are some practical tips to help you refine your technique and achieve a polished look every time:
- Practice Makes Perfect: The more you practice, the more natural it will feel. Try practicing in front of a mirror to see how the knot looks as you tie it.
- Choose the Right Fabric: Different fabrics behave differently. For instance, a silk tie might slip easily, while a wool tie has more grip. Experiment to find what works best for you!
- Check Your Length: Before you make the knot, ensure that the lengths of the two ends of the tie are even. A good rule of thumb is to have the wider end hanging about 12 inches lower than the narrow end.
- Maintain Tension: While tying your knot, keep a firm but gentle tension. Too loose, and it won’t hold; too tight, and you’ll end up with an awkward shape.
- Finish with a Dimple: Creating a dimple just below the knot adds character and makes it look more professional. Just pinch the fabric as you tighten the knot to form it.
By incorporating these tips into your routine, you'll not only tie a knot that looks great but also feel more confident in your skills!
6. Conclusion
Mastering the art of knot tying can open up a world of stylish possibilities. Whether you're dressing for a job interview, a wedding, or just a casual outing, the right knot can elevate your whole outfit. Remember, it's not just about the knot itself; it's about how you wear it.
As you wrap up your journey into the world of knot tying, keep these takeaways in mind:
- Know your knots: Different occasions call for different styles.
- Practice regularly to build muscle memory.
- Don’t be afraid to explore; sometimes, experimenting with different knots can lead to discovering your personal favorite.
So, next time you reach for that tie, remember these tips and enjoy the process. Happy tying, and don’t forget to check out the Dailymotion tutorial for a visual guide!
 admin
admin


