If you're looking for a chic and elegant hairstyle that can easily transition from day to night, the French knot is your new best friend! This timeless updo is not only beautiful but also surprisingly easy to master once you get the hang of it. Whether you're dressing up for a formal occasion or just want to elevate your everyday look, the French knot delivers sophistication with a touch of effortless style. In this guide, we’ll take you through every step to create the perfect French knot, starting from the very basics. Let’s dive in!
Gathering the Necessary Tools and Products
Before we jump into the step-by-step process of creating a stunning French knot hairstyle, it’s important to make sure you have all the necessary tools and products at your disposal. A little preparation goes a long way in ensuring that your styling experience is smooth and enjoyable. Here’s what you’ll need:
- Hairbrush: A wide-tooth comb or a paddle brush works great for detangling your hair before you start styling.
- Hair ties: Have a couple of elastic hair ties on hand. Clear or matching your hair color can be ideal.
- Bobby pins: These will help secure your French knot in place. Depending on your hair's thickness, you may need several.
- Hair spray: A lightweight or flexible hold hair spray will help set your style while maintaining some movement.
- Texturizing spray or mousse: If your hair tends to be slippery, adding some texture with a product can keep the knot secure.
- Mirror: A handheld or wall-mounted mirror will allow you to see all angles of your hairstyle as you work.
Once you have gathered all these essentials, you’ll be well-equipped to create a flawless French knot. Keep in mind that while the basic tools are important, your choice of products can also affect the final look and hold of your hairstyle. For example, if you have fine or straight hair, a texturizing product can provide the grip needed to hold the knot. On the other hand, if you have thick or curly hair, a strong-hold hair spray will help keep everything in place without compromising the style.
Now that you have your tools and products ready, you're one step closer to impressing everyone with your gorgeous French knot. In the following sections, we’ll guide you through the actual process of creating this elegant hairstyle, so stay tuned!
Also Read This: How to Lose Weight at Home with Effective Exercises from Dailymotion
3. Step-by-Step Instructions for Making a French Knot
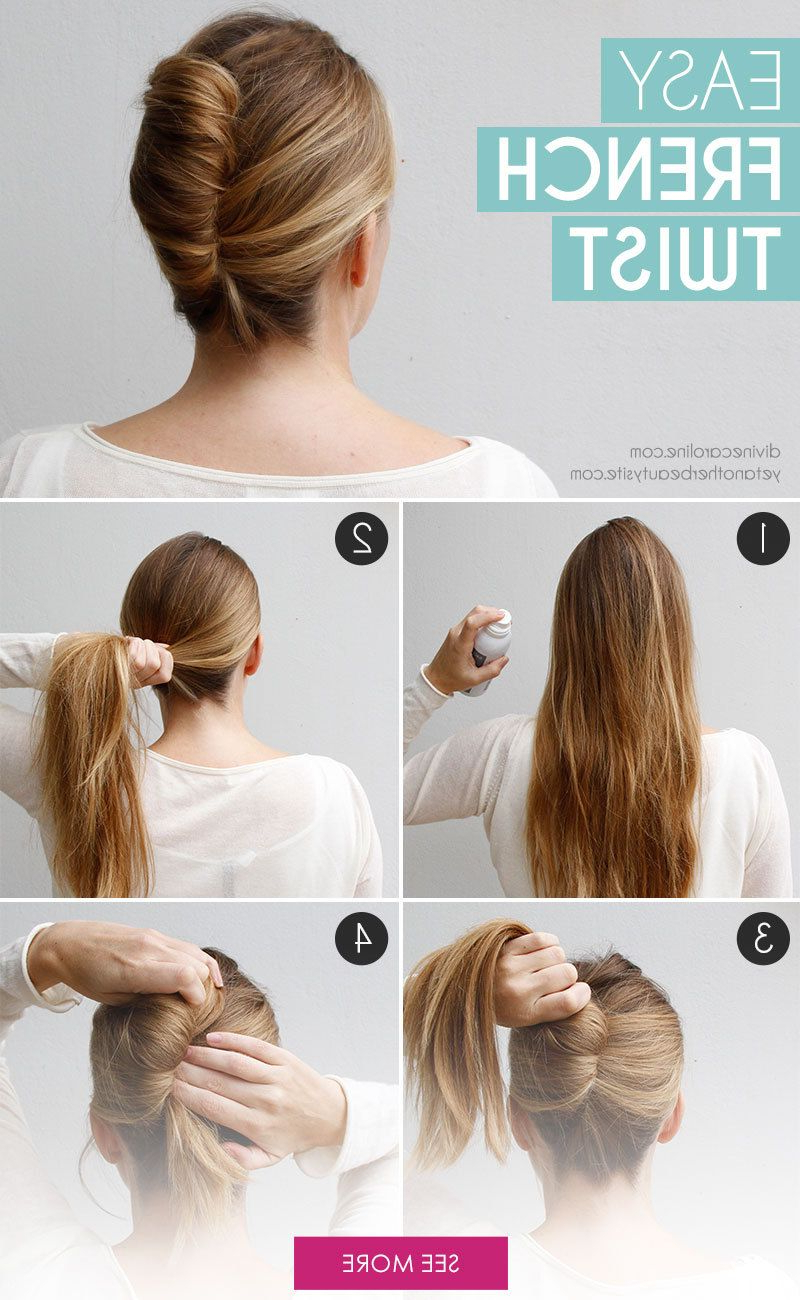
Creating a French knot hairstyle is not only chic but also surprisingly easy once you get the hang of it. Follow these steps, and you'll be able to fashion a lovely French knot in no time!
- Prep Your Hair: Start with clean, dry hair. If your hair is too slick, the knot might slip out, so a little texture can help. You can achieve this by using a light styling product or by slightly curling your hair.
- Gather Your Tools: You will need a good quality hair tie or elastic, bobby pins, and hairspray for hold. Optional: hair gel or mousse for added texture.
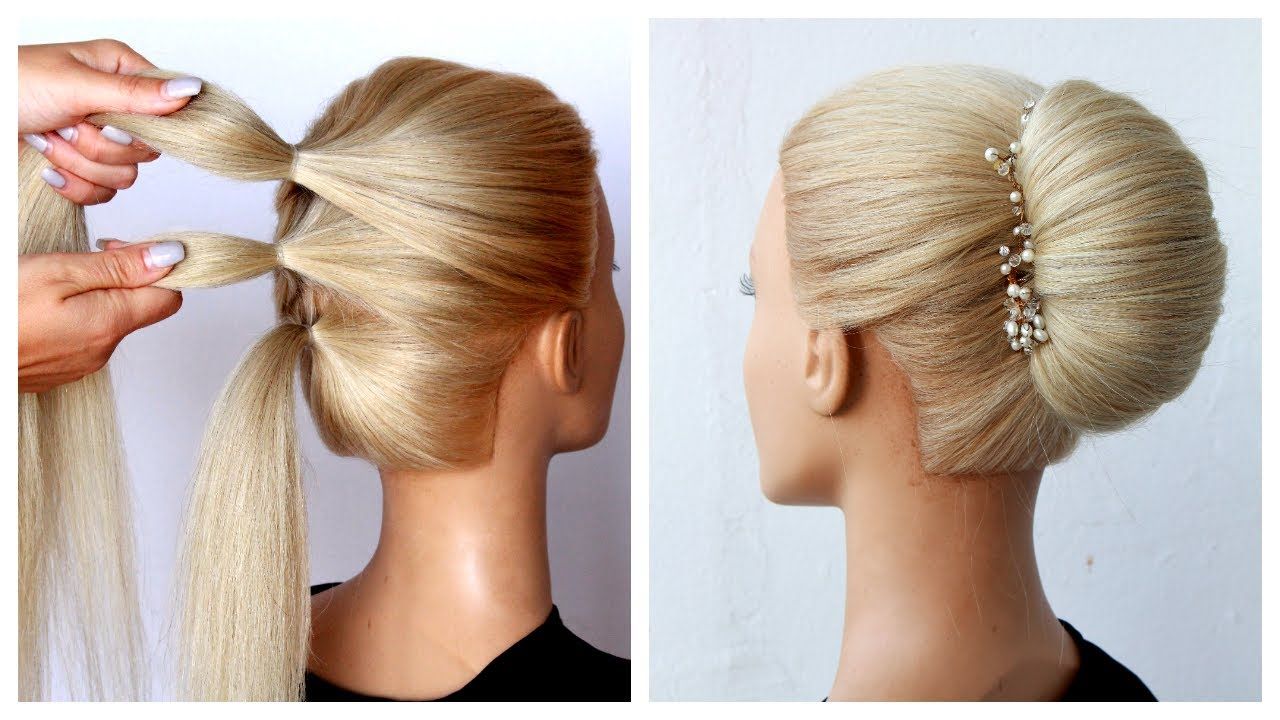
- Section Your Hair: Flip your head upside down and gather all your hair at the crown of your head. It’s easier if you focus on a high ponytail area.
- Create the Ponytail: Secure your hair with a hair tie. Don’t pull it too tight; you want your hair to have some volume.
- Form the Loop: Now, take the ponytail and create a loop by folding your hair downwards over the base of the ponytail. Hold the loop in place with one hand.
- Wrap the Ends: With your other hand, take the ends of your hair and start wrapping them around the base of the loop. Aim for 2-3 wraps, but make sure you don’t include the loop in this wrap.
- Secure the Bun: Once you’ve wrapped your hair, tuck the ends under the loop and secure everything with bobby pins. Make sure the bobby pins are inserted horizontally for better hold.
- Adjust for Perfection: After securing, adjust the knot to make it look fuller and more polished. Pull at the loop gently if you want more volume.
- Finish with Hairspray: Finally, spritz some hairspray over the hairstyle to keep everything in place. This will help maintain your look throughout the day!
And voila! You have your French knot completed. It’s a wonderful look for both casual outings and formal events, adding a touch of elegance and sophistication.
Also Read This: How to Get Dailymotion Off Your Computer
4. Common Mistakes to Avoid When Creating a French Knot
While the French knot is a fabulous hairstyle, there are a few common pitfalls to avoid to ensure your knot is perfect and stays in place. Here’s a quick rundown of things to watch out for:
- Too Tight or Too Loose: Making the ponytail too tight can cause discomfort, while a loose ponytail won't hold the knot well. Aim for a happy medium—tight enough for security, but with some give for comfort.
- Neglecting Texture: If your hair is too slippery, the knot can slide out. Adding a bit of texture with mousse or hairspray beforehand can make all the difference.
- Forgetting the Bobby Pins: Skipping bobby pins can lead to a lack of support for your knot. Make sure to secure it well, as a few well-placed pins can keep everything in check.
- Not Tucking Ends Properly: If the ends of your hair are sticking out or not properly tucked under, it can ruin the sleek look of the French knot. Take your time to hide them well!
- Skipping Hairspray: Don’t forget to finish with hairspray! This final step is crucial for longevity, helping your style withstand the day’s activities.
- Ignoring Face Shape: The way you style your French knot can depend on your face shape. Experiment with different placements—higher or lower on the head can make a big impact on how flattering the style is.
By noting these common mistakes and adjusting accordingly, you’ll master the French knot in no time! Happy styling!
Also Read This: Is Dailymotion a Pirate Website and How Does It Ensure Copyright Compliance
5. Styling Tips for a Perfect French Knot
Creating a stunning French knot is all about the details, so let’s dive into some styling tips that will elevate your look and help you achieve that perfectly polished finish.
1. Start with Clean, Dry Hair: Before you begin, make sure your hair is clean and dry. This will help the knot hold its shape better. If your hair is a bit too squeaky clean, you can add a little texture spray or dry shampoo to give it some grip.
2. Use the Right Tools: Having the right tools makes a world of difference! For a French knot, you’ll typically need:
- A fine-tooth comb
- Hair ties (preferably clear or matching your hair color)
- Bobby pins
- Hair spray or styling gel for setting
3. Get the Volume Right: Depending on the look you're going for, you might want a bit of volume at the crown of your head. You can achieve this by teasing your hair a bit at the roots before you start forming your knot. Just be gentle to avoid damaging your hair.
4. Experiment with Placement: The beauty of a French knot is that you can place it anywhere on your head. Try wearing it low for a more sophisticated look or high for a casual or bohemian vibe. You can even experiment with side knots for an edgier style!
5. Secure with Bobby Pins: As you form your knot, use bobby pins to secure the shape in place. It’s better to use several pins rather than just one or two to ensure that your knot is stable and won't come undone throughout the day.
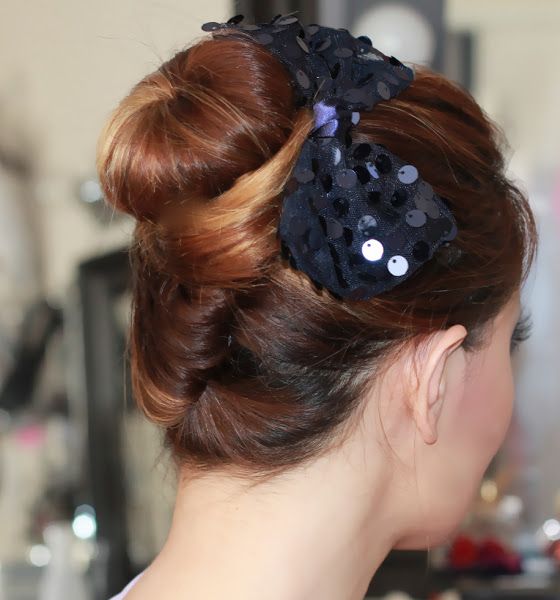
6. Add Decorative Elements: If you’re feeling fancy, consider adding decorative hairpins, small flowers, or even ribbons to your knot. This can take your look from simple to stunning in mere seconds!
7. Finish with Hair Spray: Finally, once everything is in place, give your hair a good spritz of hairspray. This will help keep flyaways at bay and ensure your knot stays in shape for the duration of your event.
Also Read This: Don’t Challenge the Lady Billionaire on Dailymotion: Watch Now
6. How to Make the French Knot Last Longer
After putting in all that effort to create a stunning French knot, the last thing you want is for it to fall apart halfway through your day! Here are some tried-and-true tips to help your French knot stay put:
1. Prep Your Hair: As mentioned earlier, starting with clean and dry hair is crucial. You can also spritz a little texturizing spray to add grip. The more grip your hair has, the less likely it is that your knot will slip.
2. Use Stronger Hair Ties: Opt for strong, elastic hair ties that can withstand the tension of a knot. Avoid using flimsy ties as they might snap or lose elasticity throughout the day.
3. Don't Overdo the Styling Products: While it’s tempting to load on the styling products, too much gel or mousse can make your hair heavy and cause your knot to sag. Use just enough to achieve hold, and steer clear of greasy products.
4. Pin It Securely: When securing your French knot with bobby pins, make sure they’re inserted horizontally against your knot, crossing over each other for maximum stability. Think of it as crisscrossing to lock everything in place.
5. Consider the Weather: If you know you’ll be out and about on a humid day, it’s worth choosing a strong hold hairspray that can combat frizz and maintain the shape of your knot.
6. Touch-Up Kits: If you have a busy day planned, consider carrying a few bobby pins and a travel-size hairspray in your bag for quick touch-ups when necessary.
By following these tips, you can ensure your French knot stays stylish and solid throughout whatever adventures come your way!
Also Read This: How to Create Games for PC on Dailymotion
7. Variations of the French Knot Hairstyle
If you think the French knot hairstyle is just one look, think again! There are so many variations you can try, each adding its own flair and personality. Whether you want something sleek and polished or a bit more bohemian and textured, there’s a French knot style for everyone. Let’s explore some fun variations!
- Messy French Knot: Perfect for a casual day out, this variation embraces imperfections. Start with slightly textured hair, pull it into a loose bun, and allow a few strands to escape for that effortless look.
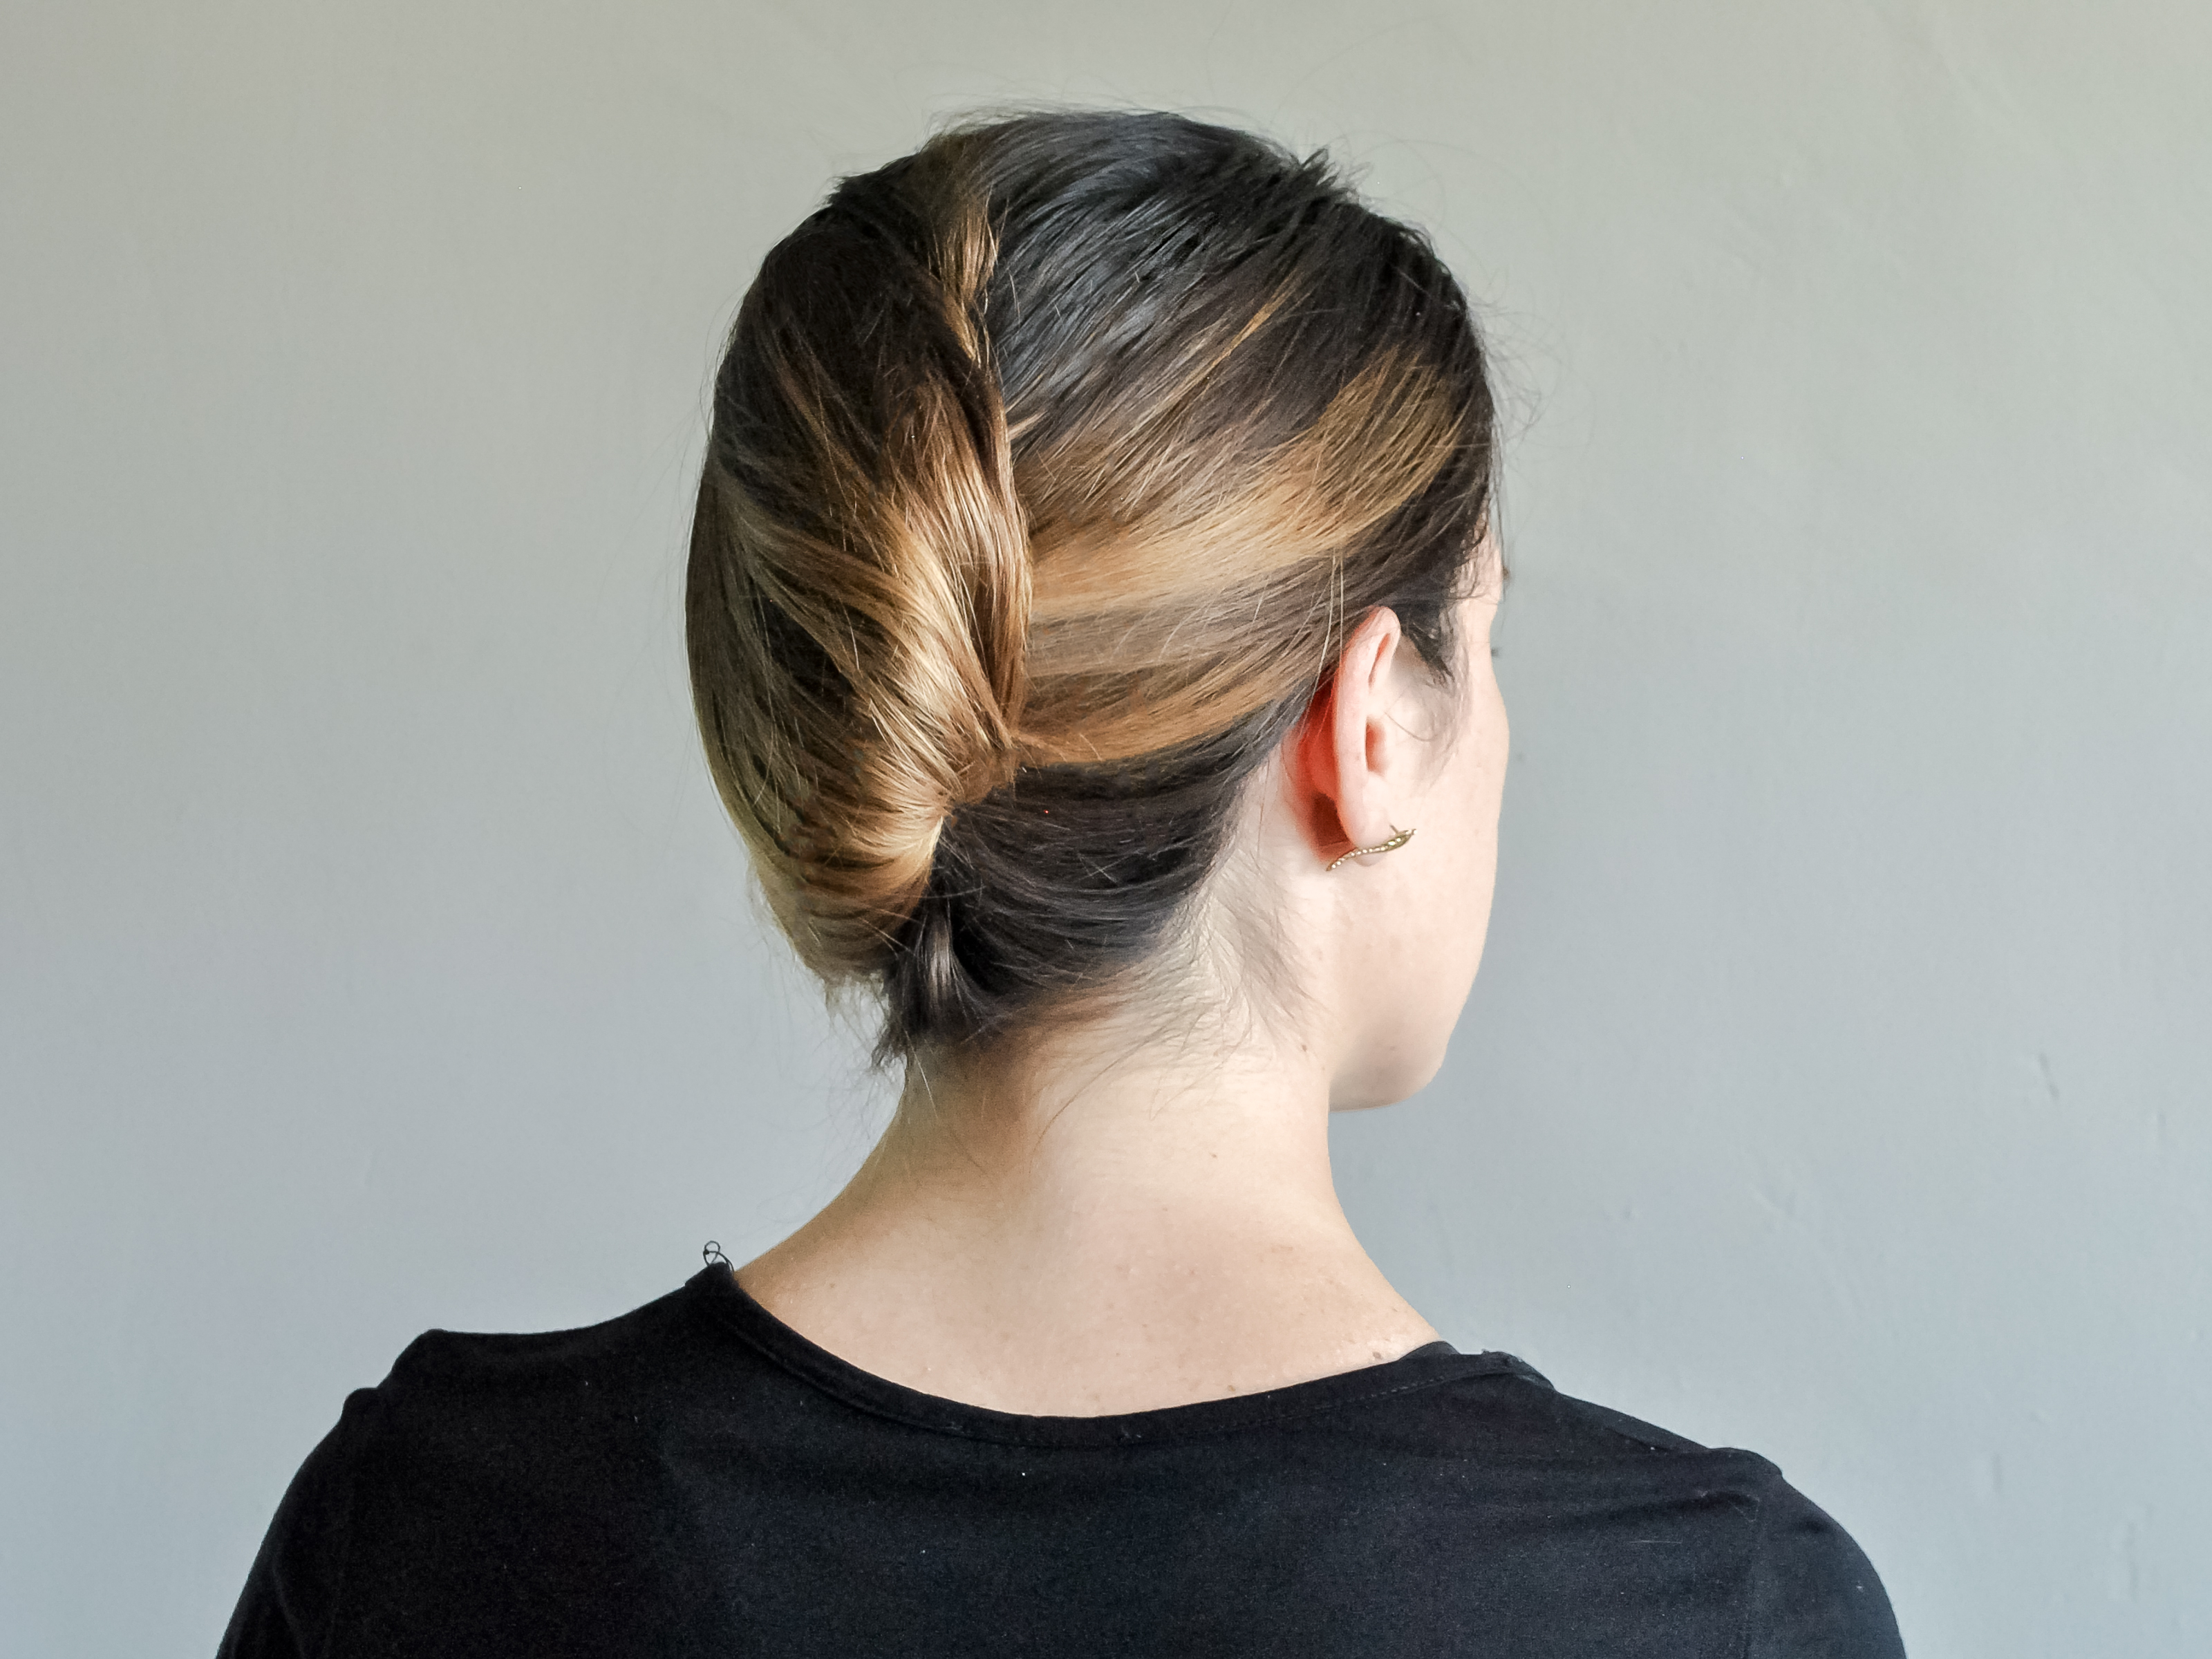
- Low French Knot: This is a more formal approach. Position the knot at the nape of your neck for an elegant touch that’s suited for weddings or classy events. Pair it with statement earrings for added glam!
- Side French Knot: Shift things to the side for a unique twist. This asymmetrical look works beautifully for both everyday wear and special occasions. Just create your knot on either side of your head, and you’re all set!
- Double French Knot: For the daring, why not try two knots instead of one? This playful style adds volume and drama to your hairstyle, making it a standout choice for festivals or parties.
- French Knot with Braids: Combine braiding with your French knot for an eye-catching look. You can incorporate braids at the front of your hair, leading into a classic French knot at the back. This adds texture and interest!
- Half-Up French Knot: If you want the best of both worlds, try a half-up version. Gather the top half of your hair into a French knot while leaving the rest down. It’s a lovely mix of formal and fun!
These variations allow you to express your style while enjoying the elegance of the French knot. Experimenting with different versions can also keep your routine fresh, so don’t hesitate to mix and match! Accessories like decorative pins or flowers can further enhance any of these looks.
8. Conclusion and Final Thoughts
And there you have it—a complete step-by-step guide to creating and experimenting with the classic French knot hairstyle! Whether you’re getting ready for a day at the office, a night out, or a special event, this versatile style can easily be adapted to fit any occasion.
Remember, the key to mastering the French knot is practice. Don’t be discouraged if your first attempts don’t turn out exactly how you imagined. Hair has a personality of its own, and with some patience, you can achieve that chic and sophisticated look you desire.
As you continue to explore the different variations of the French knot, keep in mind that hairstyling should be a fun and creative process. Feel free to add your twist, whether it’s through color, accessories, or unique elements like braids. The more you experiment, the more you’ll discover what works best for you!
So grab your hair ties, a few bobby pins, and some hairspray if you need it, and get ready to rock that gorgeous French knot. Embrace your inner stylist and enjoy the process—it’s all about feeling beautiful and confident in your hair! Happy styling!
 admin
admin


