Loom bands have taken the crafting world by storm, providing a fun and creative outlet for people of all ages. These colorful, stretchy rubber bands can be woven together to create beautiful bracelets, necklaces, and even intricate patterns. The best part? They’re not just for kids! Adults are also discovering the joy of loom band crafting, making it a delightful hobby that brings families together.
Whether you're looking to create a simple design or something more elaborate, loom bands are versatile and allow for endless creativity. With a variety of colors and styles available, you can personalize your creations to match any outfit or occasion. So, if you're ready to dive into the colorful world of loom bands, let’s get started!
Materials Needed

Before we jump into the fun of making your bracelet, you'll need to gather some materials. Here’s a handy list of everything you’ll need to get started:
- Loom Bands: The star of the show! Choose a variety of colors to make your bracelet pop.
- Loom Board: This is the tool that holds your bands in place while you weave. If you don’t have one, you can use your fingers or a hook instead.
- Hook Tool: A helpful tool for pulling bands through each other, especially for more intricate designs.
- Clips or C-clips: These are essential for securing the ends of your bracelet. They come in different sizes, so choose one that fits your design.
- Scissors: Handy for trimming any excess bands after you finish your bracelet.
- A Work Surface: A flat surface to work on makes crafting easier and more enjoyable.
Once you have all your materials gathered, you’re ready to start crafting your unique loom band bracelet! Remember, the joy of creating comes from experimenting with different colors and styles, so don’t be afraid to get creative.
Also Read This: How to Apply Nail Polish Perfectly: Get Salon-Quality Nails on Dailymotion
Step-by-Step Instructions
Making a bracelet with loom bands is a fun and rewarding activity that anyone can enjoy. Follow these simple steps to create your own colorful masterpiece!
- Gather Your Materials: You will need your loom, loom bands in various colors, a hook tool, and a clip or S-clips to secure your bracelet.
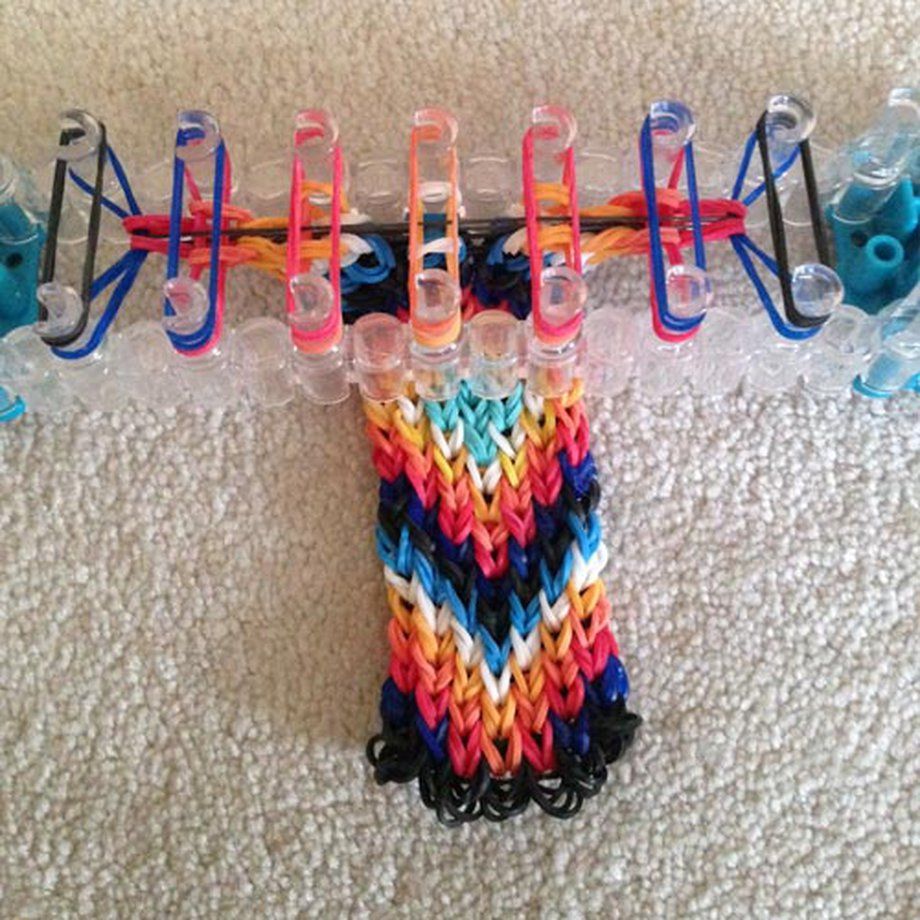
- Set Up the Loom: Position your loom with the pegs facing away from you. This is the typical setup for making bracelets, allowing for easier access to your bands.
- Start Placing Bands: Begin by placing your first band on the loom. Stretch it diagonally from one peg to the next; this creates a base. Continue placing bands in a similar diagonal pattern until you have a few layers.
- Add Color: To create a unique look, alternate colors as you add more bands. For example, after every two bands, switch to a different color. This simple trick can really make your bracelet pop!
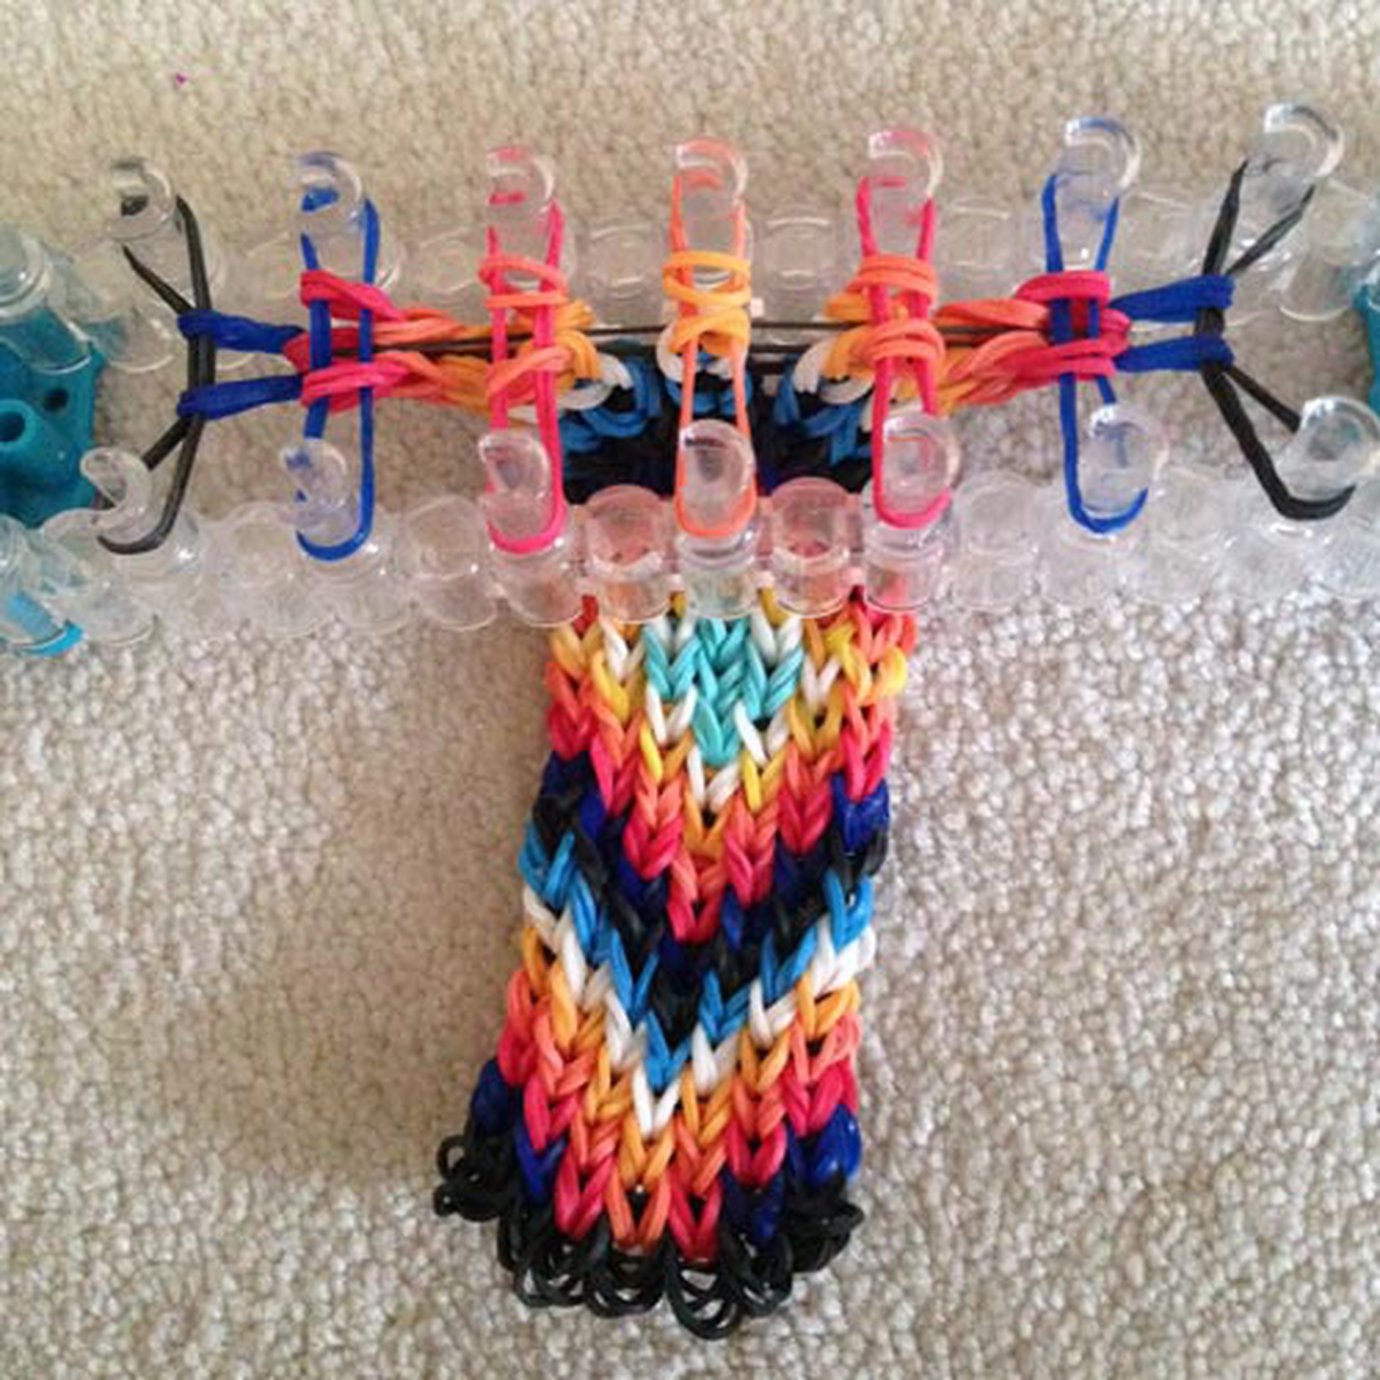
- Use the Hook: Once you have reached your desired length, take your hook tool and pull the bottom band over the top band on each peg. This creates the woven effect and secures the bands in place.
- Finish the Bracelet: Once everything is hooked together, gently slide the bracelet off the loom. Attach an S-clip to both ends to secure your creation.
- Enjoy Your Creation: Wear your new bracelet proudly or share it with friends! You can even make matching ones for a fun group activity.
Also Read This: How to Make Cream Cheese at Home: Easy Recipe on Dailymotion
Tips for Creating Unique Designs
Creating unique designs with loom bands is all about being creative and experimenting. Here are some helpful tips to elevate your bracelet-making game!
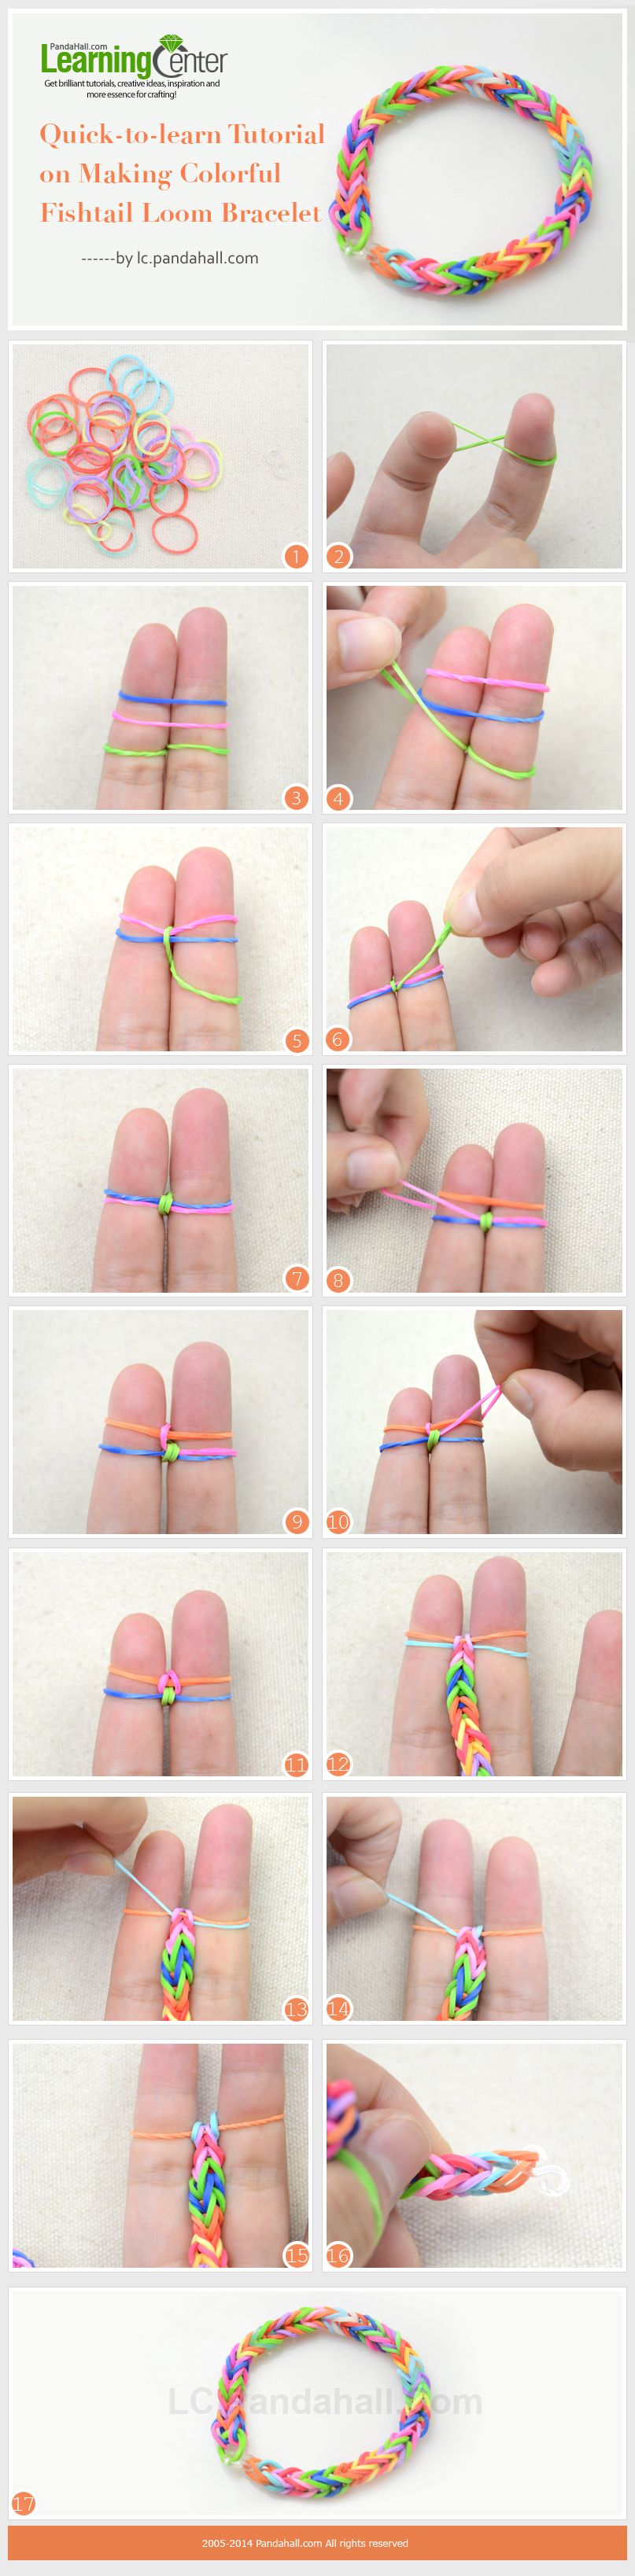
- Experiment with Patterns: Don't hesitate to try different patterns, like the fishtail, starburst, or the triple single. Each pattern has its own charm and style!
- Incorporate Beads: Add beads into your design for a touch of sparkle. Simply thread the bead onto a band before placing it on the loom.
- Mix Textures: Use different types of loom bands, such as glitter or metallic, alongside regular ones. This creates a dynamic look that's sure to stand out.
- Use a Color Wheel: To create harmonious color combinations, refer to a color wheel. Complementary colors can make your designs pop even more!
- Personalize with Charms: Attach small charms or pendants to your bracelet for a personal touch. This can be a great conversation starter!
- Practice Different Techniques: As you become more experienced, try advanced techniques like the ladder stitch or hexafish. YouTube tutorials can be incredibly helpful here!
Remember, the key to unique designs is to have fun and let your creativity shine!
Also Read This: How to Cut Potato Wedges: A Dailymotion Recipe Guide for Beginners
Common Mistakes to Avoid
When it comes to making bracelets with loom bands, it’s easy to get caught up in the excitement and overlook a few key details. Here are some common mistakes to avoid, ensuring your crafting experience is smooth and enjoyable.
- Overstretching the Bands: It’s tempting to pull the bands tight, but overstretching can lead to snapping. Always work with the right tension. If a band feels too tight, loosen it a bit.
- Ignoring the Instructions: Whether you're following a tutorial or using a pattern, skipping steps can result in a mishmash of colors and design. Take your time to read and follow each step carefully.
- Using the Wrong Loom: Different loom designs cater to specific styles of bracelets. Make sure you're using the right loom for the type of bracelet you want to create. A wrong loom can lead to frustration and unexpected results.
- Not Organizing Your Bands: A chaotic workspace can hinder your creativity. Use small containers or trays to separate your bands by color. This makes it easier to find what you need when you're in the zone.
- Skipping the Finishing Touch: Don’t forget the clasp! Many beginners overlook how to properly attach the clasp, which can lead to a bracelet that falls apart easily. Take the time to secure your bracelet with a sturdy closure.
Conclusion and Final Thoughts
Creating a bracelet with loom bands is not just about making a colorful accessory; it's a wonderful way to express your creativity. As you wrap up your crafting session, reflect on what you've made and the joy of the process. Here are some final thoughts to keep in mind:
- Practice Makes Perfect: Don’t be discouraged by initial mistakes. Each bracelet is a learning experience. With every creation, you’ll refine your technique and discover new styles.
- Explore Different Patterns: Once you’re comfortable with the basics, challenge yourself! Dive into more complex designs like fishtail or starburst patterns to elevate your skills.
- Share Your Creations: Show off your bracelets to friends and family! You might even inspire someone else to pick up the loom and start creating their own unique pieces.
- Enjoy the Process: Remember to have fun! Crafting is all about enjoying your time and expressing yourself. Don't stress over perfection; focus on the joy of creation.
So gather your bands, grab your loom, and get crafting. Who knows? Your next bracelet might just be a masterpiece!
 admin
admin


