Have you ever thought about creating your own battery at home? It might sound complex, but it can be a fun and educational DIY project! Making a homemade battery not only teaches you about chemical reactions but also gives you a sense of accomplishment. Plus, it’s a great way to explore renewable energy concepts and get hands-on experience with basic electronics. So, roll up your sleeves, and let’s dive into the fascinating world of battery construction!
Materials Needed for Battery Construction
To get started with your homemade battery project, you’ll need a few essential materials. Don't worry; most of these items are easy to find and often available in your kitchen or local store. Here’s a handy list of what you'll need:
- Two different types of metal: Copper and zinc are excellent choices. You can use a copper coin or wire for the copper part and a galvanized nail for the zinc.
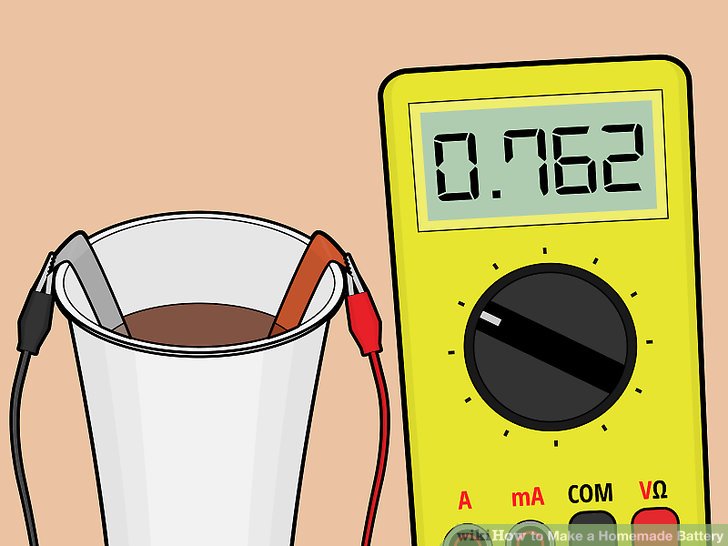
- Electrolyte solution: A simple saline solution works wonders. Just mix water with a bit of salt or sugar. Alternatively, you could use vinegar or lemon juice for a more acidic solution.
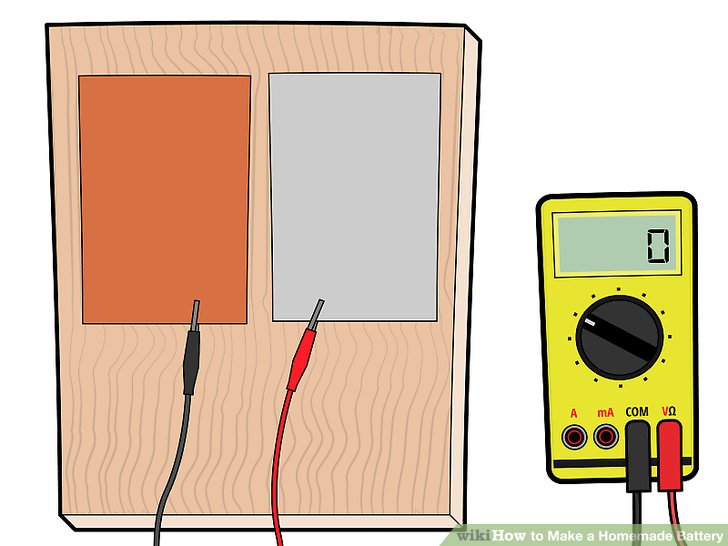
- Containers: You’ll need two small containers or cups. Plastic or glass works perfectly.
- Connecting wires: A couple of insulated wires with alligator clips will help you make the connections between different components.
- A multimeter (optional): If you want to measure the voltage produced by your homemade battery, having a multimeter handy can be quite helpful.
Now that you have your materials gathered, you’re all set to embark on this exciting DIY journey! Remember, safety first: wear gloves when handling any chemicals and work in a well-ventilated area. Happy building!
Also Read This: How to Use NetBeans for Java Programming: A Complete Guide for Beginners
3. Step-by-Step Instructions for Building Your Battery
Alright, let’s get our hands a little dirty and dive into the fun part! Making a simple battery at home can be a rewarding project. We'll focus on creating a basic lemon battery—yes, you heard it right! This project is not only educational but also a great way to impress your friends. Here’s how to do it:
- Gather Your Materials: You’ll need:
- 2 large lemons
- 2 copper coins or copper wires
- 2 galvanized nails (zinc)
- Connecting wires
- A small LED light (to test your battery)
And there you go! You’ve just made a simple lemon battery. It’s a great experiment to demonstrate how chemical energy can be converted into electrical energy. Plus, it’s a fun way to learn about circuits!
Also Read This: Can You Watch Age Restricted Videos on Dailymotion
4. Common Types of Homemade Batteries
Now that you’ve successfully created your lemon battery, let's explore other common types of homemade batteries you can try out. Each offers a unique perspective on how batteries work!
- Potato Battery: Similar to the lemon battery, a potato battery uses the same principle. You’ll need:
- A potato
- 2 copper coins or wires
- 2 galvanized nails
- Connecting wires
- An LED light
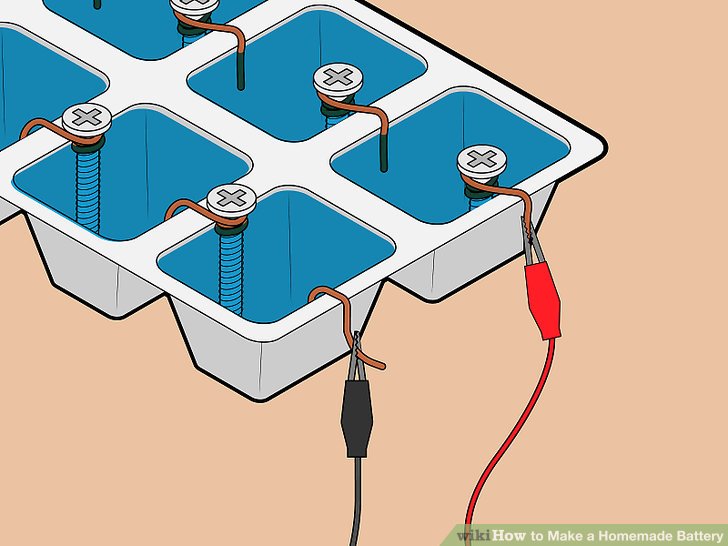
- Saltwater Battery: This one is a bit different but equally fascinating. You’ll need:
- A small container of saltwater
- 2 different metal electrodes (like copper and zinc)
- Connecting wires
- A small LED or a digital clock
- Aluminum-Air Battery: This type uses aluminum as an anode. You’ll need:
- A piece of aluminum foil
- Saltwater (or vinegar)
- A small LED light
- Connecting wires
Just follow the same steps as the lemon battery, replacing the lemon with a potato!
Dip the electrodes into the saltwater and connect them using wires to your LED. The saltwater acts as an electrolyte, generating a small current.
Place the aluminum in the saltwater, and connect it with wires to the LED. This battery can generate a surprising amount of energy!
Experimenting with these different types of homemade batteries can be a fantastic way to understand more about chemistry and electricity. Plus, you'll gain hands-on experience with basic electronic components!
Also Read This: Master the Art of Origami with This Simple Ball Tutorial
5. Safety Precautions When Making Batteries
When it comes to making your own battery at home, safety should always be your top priority. While this DIY project can be fun and educational, working with chemicals and electrical components can pose risks. Here are some essential safety precautions to keep in mind:
- Wear Protective Gear: Always wear safety goggles and gloves to protect your eyes and skin from any harmful substances. It’s a simple step that can save you from a lot of trouble.
- Work in a Well-Ventilated Area: Ensure that you're working in a space with good airflow. This is especially important if you’re using substances that may release harmful fumes. Open windows or use a fan to circulate air.
- Keep a Fire Extinguisher Nearby: Batteries can sometimes overheat or catch fire, especially if you're using flammable materials. Having a fire extinguisher within reach can be a lifesaver.
- Be Cautious with Acids: If your DIY battery uses acidic materials like vinegar or lemon juice, handle them carefully. If spilled, clean them up immediately to avoid any damage or injury.
- Don’t Overload Your Circuit: If you're connecting multiple batteries or devices, be mindful of the total load. Overloading can lead to overheating and possible damage to your components.
- Dispose of Materials Properly: After you’re done with your project, make sure to dispose of any leftover materials responsibly. Some battery components can be hazardous to the environment, so check local guidelines for disposal.
By following these precautions, you can help ensure a safer DIY battery-making experience. Remember, it's better to be safe than sorry!
Also Read This: How Peacock Birds Get Pregnant
6. Uses and Applications of Your Homemade Battery
So, you've successfully made your own battery—now what? The great news is that your homemade battery can be used in various creative ways. Here are some fun and practical applications:
- Power Small Electronics: Your homemade battery can be used to power small devices like LED lights, portable fans, or even small radio transmitters. It's a great way to experiment with simple circuits!
- Educational Purposes: This project is perfect for teaching kids about electricity, chemistry, and physics. Use it as a hands-on lesson to explain concepts like energy conversion and circuit building.
- Emergency Power Source: In a pinch, your homemade battery can serve as a backup power source for small devices during a power outage. Just ensure that it has enough charge to do the job!
- Art Projects: Get creative! Use your battery to power kinetic sculptures or interactive art installations. It's a unique way to merge art and science.
- Science Fair Projects: If you're looking for an impressive project for a school science fair, a homemade battery can stand out. You can demonstrate its working principle and even compare it with commercial batteries.
Homemade batteries open up a world of possibilities for experimentation and learning. Whether for practical use or fun projects, the sky's the limit! Enjoy exploring these applications, and who knows—you might spark a new interest in renewable energy or electronics.
Also Read This: How to Create Honeycomb Balls: DIY Tutorials on Dailymotion
7. FAQs About Homemade Batteries
Curious about making your own batteries? You’re not alone! Let’s tackle some frequently asked questions to clear up common doubts about homemade batteries.
What materials do I need to make a simple battery?
To create a basic battery, you’ll typically need:
- Zinc - Often sourced from a zinc-coated nail.
- Copper - A copper coin or wire works well.
- Electrolyte - You can use lemon juice, vinegar, or saltwater.
- Connectors - Wires to connect your battery to a circuit.
Are homemade batteries safe to use?
When made correctly, homemade batteries can be safe. However, always follow safety precautions:
- Wear gloves and goggles to protect yourself from any possible spills.
- Avoid ingesting any materials, especially the electrolyte.
- Ensure proper disposal of any used components.
Can homemade batteries power devices?
Yes, they can! However, the power output will be limited compared to commercially produced batteries. They are perfect for small projects, like lighting an LED or powering a small clock.
How long do homemade batteries last?
The lifespan of a homemade battery varies depending on factors such as:
- The type of materials used.
- The size of the battery.
- The load (what you’re powering).
Generally, you can expect them to last anywhere from a few hours to a couple of days.
Can I use other materials for DIY batteries?
Absolutely! You can experiment with different materials such as:
- Fruit - Like oranges or apples, which also have acidic juices.
- Vegetables - Potatoes and beets are surprisingly effective.
- Natural salts - Like baking soda mixed in water can create an electrolyte solution.
Feel free to get creative! Just remember to document your experiments to see what yields the best results.
8. Conclusion and Final Thoughts
Making a battery at home can be a fun and educational project! It not only introduces you to basic chemistry but also helps you understand the fundamental principles of electricity. Whether you're a hobbyist, a curious kid, or just someone looking to impress friends with a neat trick, this DIY project is perfect for you.
As you wrap up your battery-making adventure, keep a few things in mind:
- Experimentation is key: Don’t be afraid to try different materials or methods. Each combination can lead to exciting discoveries!
- Safety first: Always prioritize safety. It’s crucial to handle all materials responsibly.
- Share your experiences: If you find something unique or successful, share it with friends or online communities. You might inspire others to dive into the world of DIY batteries!
In conclusion, whether you're interested in sustainability, science, or just a fun weekend project, making a battery at home can be rewarding. So grab your materials, roll up your sleeves, and spark your creativity!
 admin
admin


