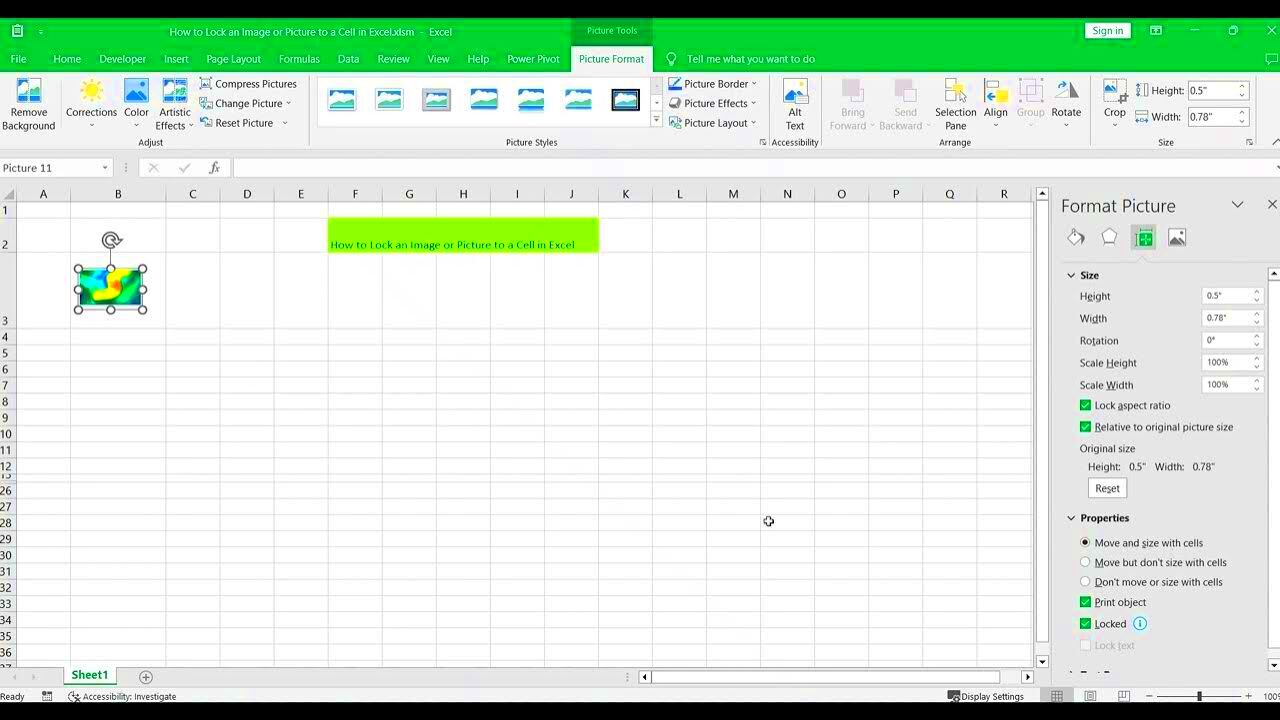
Locking images in Excel cells is a powerful way to prevent unwanted changes or accidental deletion. Whether you're creating a report, working on a presentation, or building a financial spreadsheet, keeping your images safe can save you a lot of time and hassle. In Excel, images are often added to enhance the visual appeal of your sheets or provide context. However, they can sometimes get moved or resized, causing confusion. By locking the image in a cell, you ensure it stays exactly where you want it.
Locking images is especially useful when sharing Excel files with others, ensuring that the images remain intact and in their original position. This feature gives you control over your worksheet's layout and ensures that everything stays organized.
Understanding Excel Image Insertion
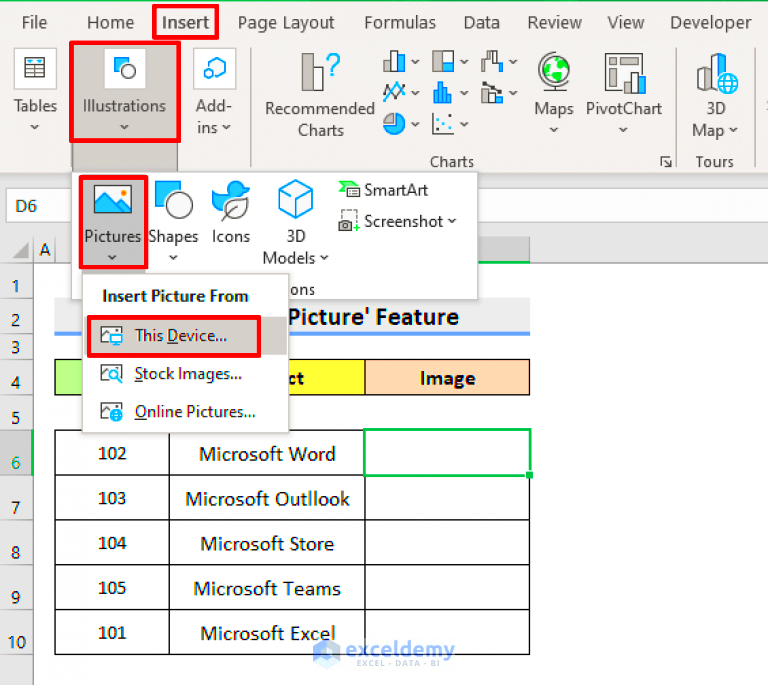
Before you can lock an image in Excel, it's important to understand how images are inserted into a spreadsheet. In Excel, you can easily insert images from your computer, from online sources, or even from a clipboard. Here's a quick overview of how this works:
- Insert from File: You can select an image stored on your computer and place it into the spreadsheet.
- Insert from Online: Excel allows you to search and insert images directly from the web.
- Insert from Clipboard: If you've copied an image, you can paste it directly into your Excel sheet.
Once an image is inserted, it is placed on top of the worksheet, floating freely above the cells. This means that when you move data around, the image might not stay in its intended location, which is why locking it in place becomes essential. Understanding this step is crucial as it lays the foundation for keeping your images secure and properly positioned.
Steps to Lock an Image in an Excel Cell
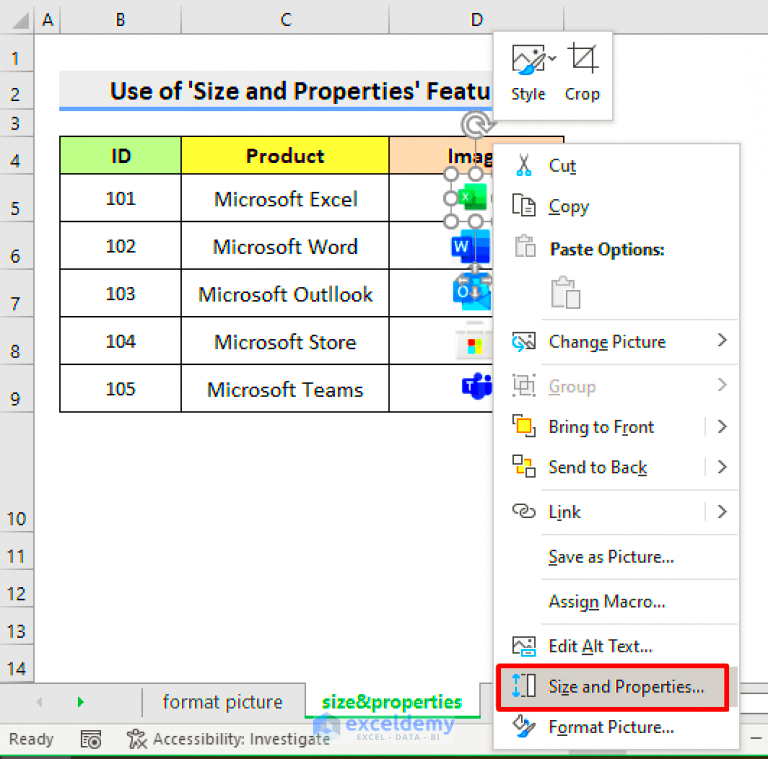
Locking an image in an Excel cell may seem complicated at first, but it’s actually a straightforward process. Follow these steps to make sure your image stays where you want it:
- Insert the Image: First, insert the image into your Excel sheet by using one of the methods mentioned earlier.
- Right-Click on the Image: After inserting the image, right-click on it to open a menu of options.
- Select 'Format Picture': In the right-click menu, choose the "Format Picture" option. This will open a formatting pane on the right side of your screen.
- Go to the 'Properties' Tab: In the Format Picture pane, click on the 'Properties' tab. Here you’ll see several options related to how the image behaves in relation to the cells.
- Select 'Move and Size with Cells': Choose the option that says "Move and Size with Cells." This ensures that the image will remain locked to the cell, even if the cell is resized or moved.
- Protect the Sheet: To finalize the process, you need to protect the sheet so that users cannot move or alter the image. Go to the 'Review' tab on the ribbon, and click on 'Protect Sheet.' You can set a password here if needed to prevent unauthorized changes.
By following these simple steps, your image will be locked in place and won't get moved or resized unless you intentionally unlock it. This makes it much easier to work with images in Excel without worrying about them being accidentally shifted around.
How to Format an Image for Locking in Excel
Before you lock an image in Excel, it’s important to make sure it’s properly formatted. A well-formatted image will fit better within your worksheet and look more polished. Here’s a simple guide to format your image before locking it:
- Resize the Image: First, adjust the image’s size to fit the cell or area where it will be placed. Click on the image and drag the corners to resize it. You can also use the 'Size' option in the 'Format' tab for precise measurements.
- Position the Image: Drag the image to the desired location on the sheet. If you're locking it to a specific cell, make sure it aligns correctly. You can use Excel's alignment tools to center or align the image to a grid.
- Adjust Image Properties: Click on the image and go to the 'Format Picture' pane. Here you can adjust things like the image’s brightness, contrast, and transparency. You can also add borders or effects if needed.
- Text Wrapping: Choose the right text wrapping option based on how you want the image to interact with other content. In most cases, selecting "In Front of Text" will keep the image above the text, but "Tight" or "Square" may be better if you want the text to wrap around the image.
Properly formatting your image ensures it fits neatly within your worksheet and doesn't interfere with other content. After formatting, you can proceed with locking the image, knowing it will stay in place exactly where you want it.
Setting Cell Protection in Excel
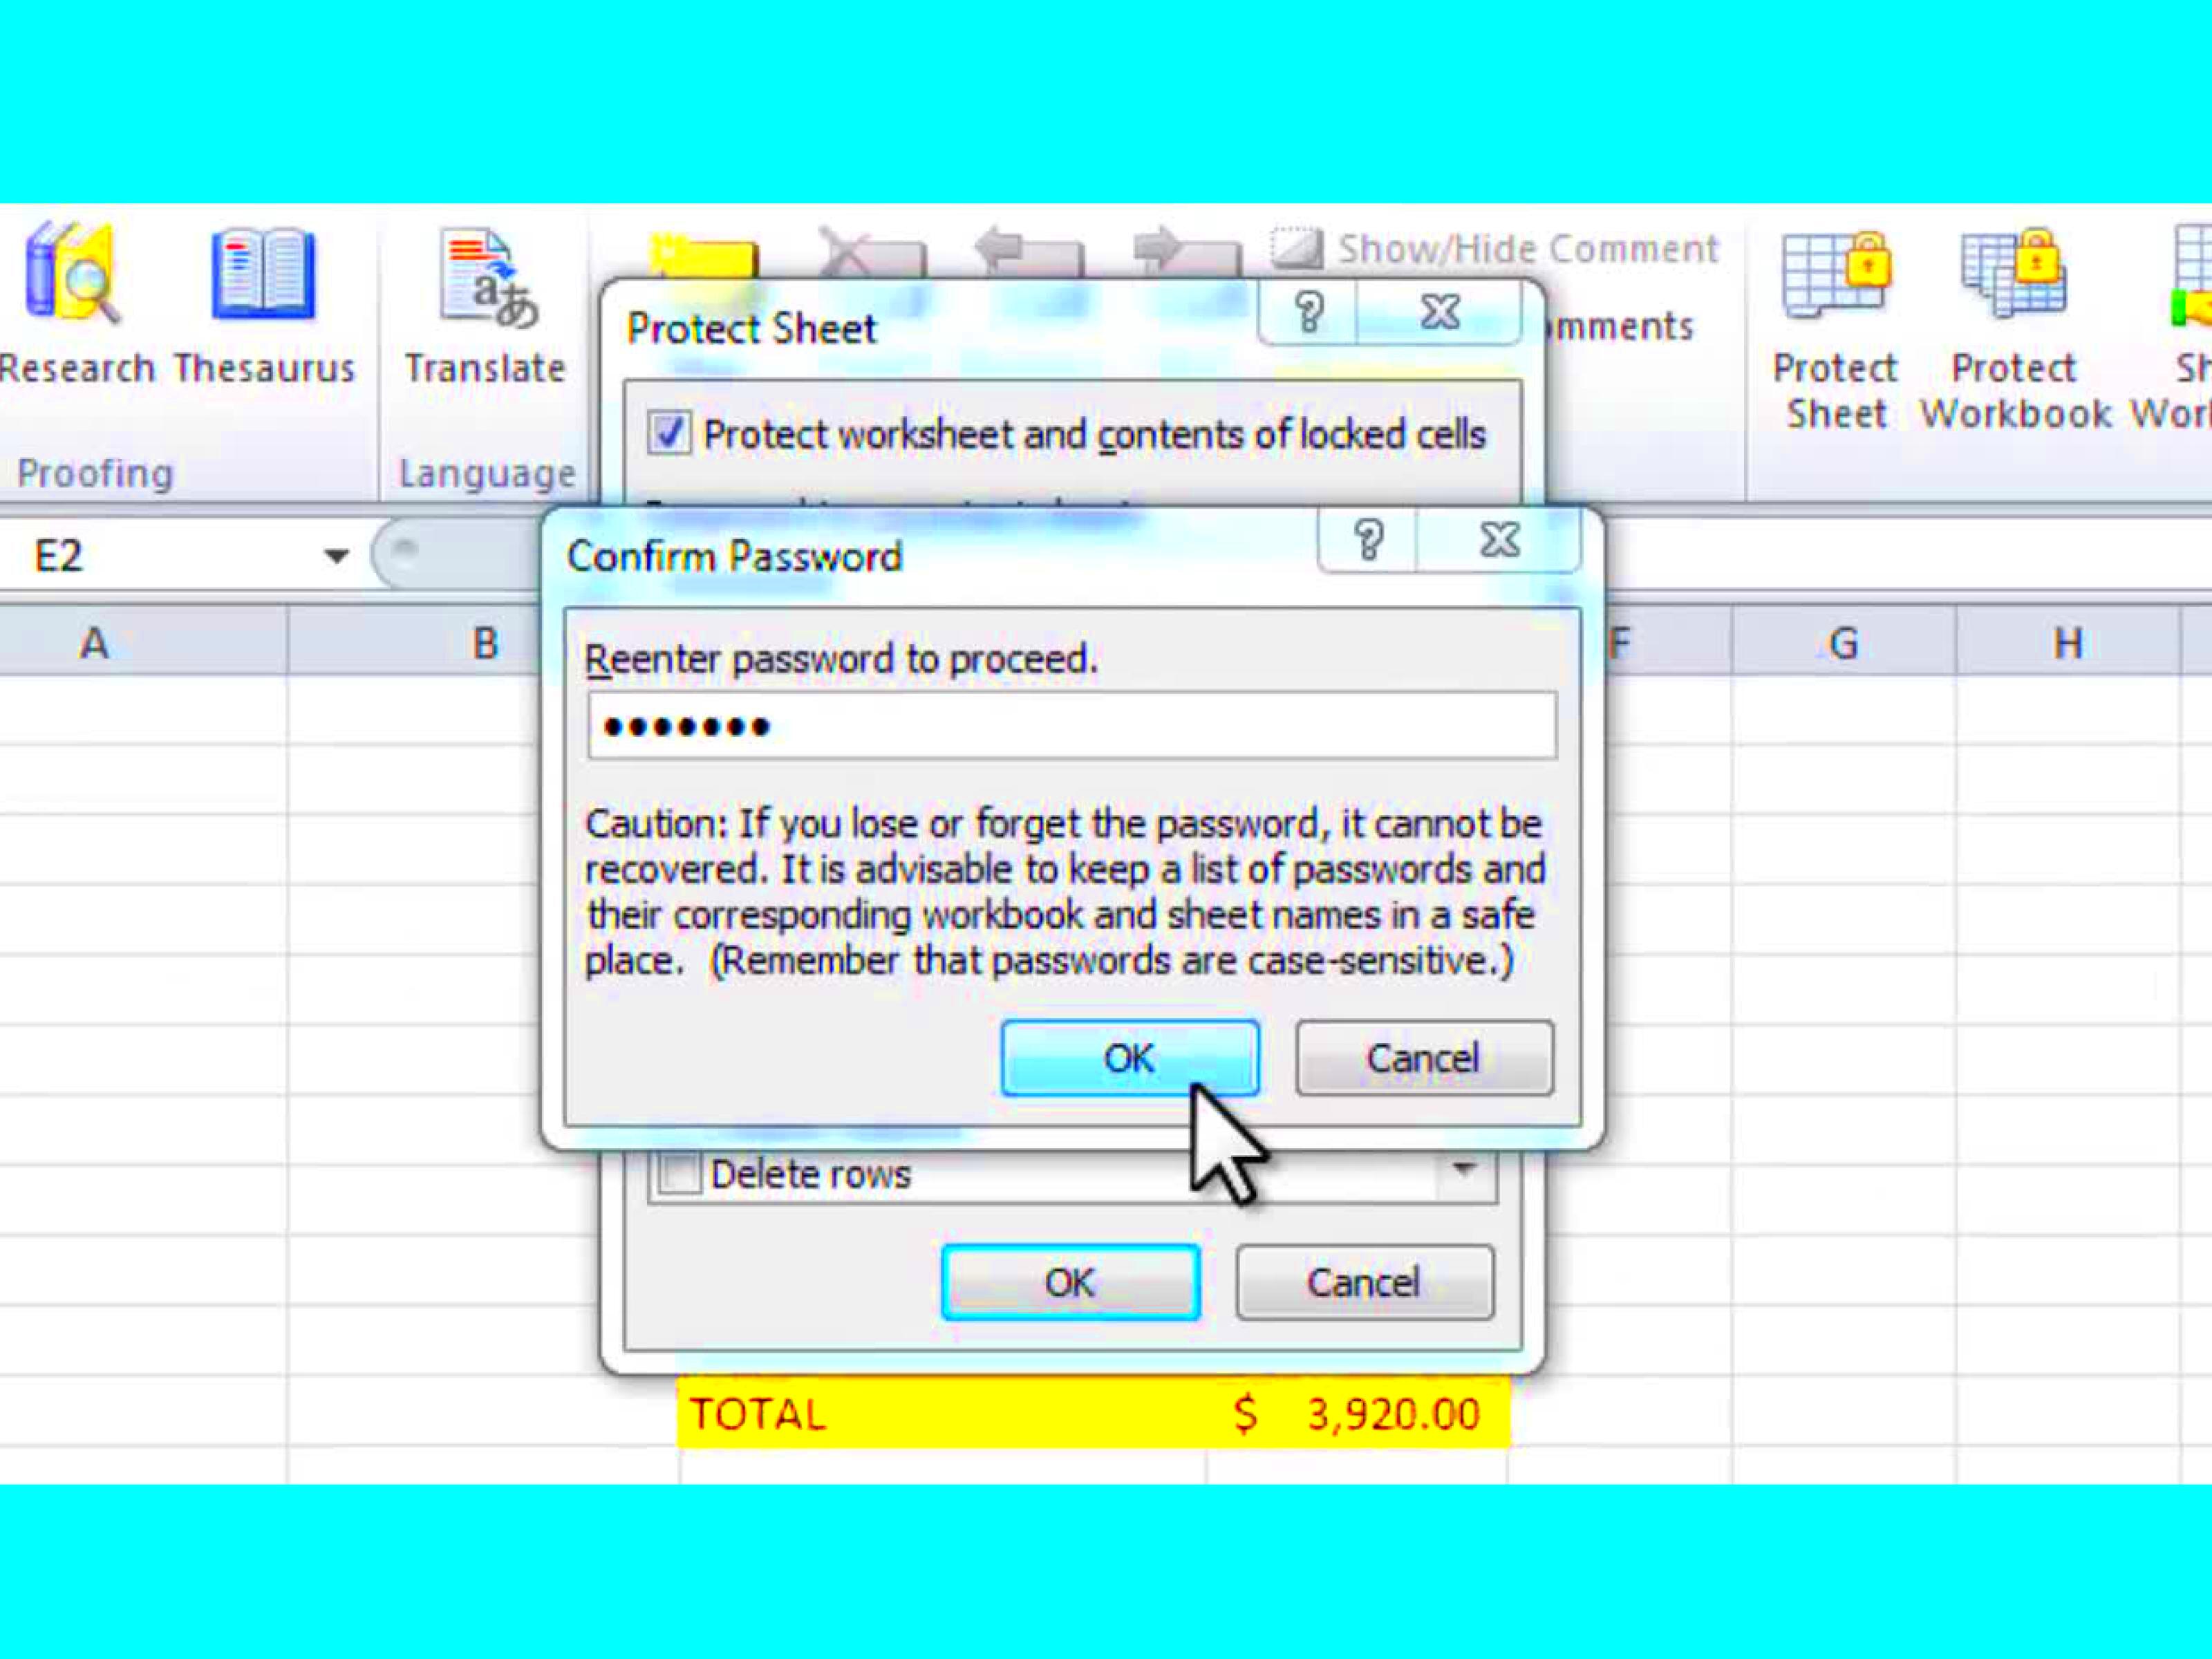
To lock an image in Excel, cell protection is a crucial step. Excel allows you to protect cells so that users can't make changes to them, including the images within those cells. Here’s how to set up cell protection to secure your image:
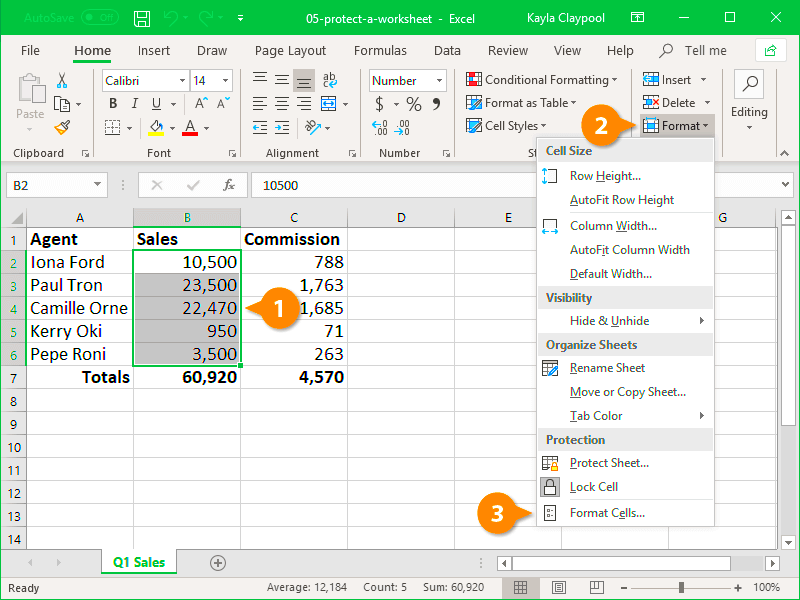
- Unlock All Cells: By default, all cells in Excel are locked, but this doesn't take effect until you protect the sheet. First, unlock the cells that you want to remain editable. Press Ctrl + A to select all cells, right-click, and choose 'Format Cells.' Under the 'Protection' tab, uncheck the 'Locked' option.
- Lock the Image: Next, right-click on the image, go to 'Format Picture,' and choose 'Properties.' Make sure you select 'Move and Size with Cells.' This will lock the image to the cell and ensure it stays in place.
- Protect the Sheet: After the cells and image are properly locked, go to the 'Review' tab and click on 'Protect Sheet.' You can set a password if necessary to prevent others from making changes to the protected cells or images.
Cell protection is an effective way to prevent unwanted modifications to your Excel sheet. By locking images and protecting the sheet, you ensure that both the data and the images stay secure while allowing other parts of the worksheet to be freely edited.
Common Issues and Troubleshooting When Locking Images
While locking images in Excel is generally a straightforward process, sometimes things don’t work as expected. Here are some common issues you might encounter when trying to lock images in Excel, along with troubleshooting tips to help you resolve them:
- Image Moving After Locking: If the image still moves after locking, it might be because the 'Move but Don't Size with Cells' option was selected instead of 'Move and Size with Cells.' Double-check the image’s properties and adjust accordingly.
- Sheet Protection Not Working: If your sheet protection isn’t working as expected, it could be because the wrong cells are locked or unlocked. Make sure that only the cells you want to remain editable are unlocked, and all others are locked.
- Image Not Resizing with Cells: If the image doesn’t resize with the cells, ensure that you’ve selected 'Move and Size with Cells' in the image properties. If this option is not selected, the image will remain fixed in size and will not adjust when the cell size changes.
- Protected Sheet Still Allowing Edits: If others are still able to edit or move locked images, make sure that sheet protection is enabled with a password. Sometimes users can accidentally unprotect the sheet, so setting a password adds an extra layer of security.
By following these troubleshooting steps, you can quickly resolve any issues and make sure your images stay locked in place within your Excel worksheet. If problems persist, try restarting Excel or checking for any updates that may fix bugs related to image locking.
How to Unlock an Image from a Cell
Sometimes you may need to make adjustments to an image that has been locked in a cell. Unlocking an image in Excel is a simple process, and it can be done in just a few steps. Here's how you can unlock an image and make any necessary changes:
- Select the Image: Click on the image you want to unlock. This will highlight it and bring up the image formatting options.
- Open the Format Picture Pane: Right-click the image and choose 'Format Picture' from the context menu. This opens the formatting options on the right side of your screen.
- Go to the Properties Tab: In the Format Picture pane, select the 'Properties' tab. You'll see different options regarding how the image interacts with cells.
- Change the Locking Setting: To unlock the image, select the option 'Don't Move or Size with Cells.' This removes the locking functionality, allowing you to move or resize the image freely.
- Remove Sheet Protection: If sheet protection was applied, go to the 'Review' tab and click on 'Unprotect Sheet.' You may need to enter a password if one was set during the protection process.
Once these steps are complete, the image will no longer be locked in place. You can now adjust its size, position, or remove it from the worksheet entirely. Remember to reapply sheet protection if you need to keep other elements in your workbook secure.
Best Practices for Locking Images in Excel
Locking images in Excel is an essential skill, especially when working with complex spreadsheets. Here are some best practices to ensure your images remain properly locked and your worksheet stays organized:
- Use the Right Image Format: Before locking, make sure your images are in the correct format (e.g., PNG, JPEG) and are optimized for Excel. Large image files can slow down the performance of your spreadsheet.
- Ensure Proper Alignment: Align the images properly with the cells to ensure they stay in place when you lock them. Use Excel’s alignment tools to adjust the image’s position relative to the cells.
- Lock Only Necessary Cells: When protecting your worksheet, only lock the cells that contain sensitive data or images. Unlock the cells that need to remain editable to allow others to make changes where needed.
- Use Password Protection: If you are sharing the workbook, it’s a good idea to protect the sheet with a password. This will prevent others from accidentally or intentionally unlocking images or making changes to your worksheet’s structure.
- Consider Using Layers: If your worksheet contains many images, consider placing them on separate layers. This can help prevent images from interfering with one another and make it easier to manage them when locking or unlocking.
By following these best practices, you can ensure that your images stay securely locked in place, enhancing the overall functionality and appearance of your Excel sheets.
FAQ
Here are some frequently asked questions about locking images in Excel, along with helpful answers:
- Can I lock multiple images in Excel? Yes, you can lock multiple images at once by selecting all the images and applying the lock settings in the 'Format Picture' pane.
- Will the image stay locked if I copy and paste the cells? If you copy and paste the locked cells to another worksheet, the image will remain locked, but only if you’ve selected the correct 'Move and Size with Cells' option.
- How do I prevent accidental image resizing? To prevent resizing, ensure that the 'Size with Cells' option is selected in the 'Properties' tab of the 'Format Picture' pane. You can also protect the sheet to prevent any changes.
- What happens if I don’t protect the sheet after locking an image? If you don’t protect the sheet, others can still move, resize, or delete the locked images. Protecting the sheet ensures that all locked elements remain secure.
- Can I lock an image to a specific cell even if I resize the cell? Yes, by selecting 'Move and Size with Cells' in the image properties, the image will adjust according to the cell’s size changes.
If you have any other questions or run into issues, don’t hesitate to consult Excel's help documentation or reach out for further assistance.
Conclusion
Locking images in Excel is a simple but effective way to maintain the integrity and organization of your spreadsheets. By following the steps to insert, format, and lock images, you can ensure that your visual elements remain intact and properly aligned with your data. Using Excel’s cell protection features provides an additional layer of security, preventing unwanted modifications to both images and other worksheet contents. Whether you are sharing a spreadsheet with colleagues or working on a project solo, these steps help maintain a clean and professional-looking worksheet. By unlocking images when needed and applying best practices for image management, you can efficiently control your Excel environment, ensuring everything stays where you want it to be. With these tips and tricks, you can confidently manage and protect your images in Excel, improving both the functionality and visual appeal of your work.
