Welcome to our guide on inserting stock footage into Adobe Animate! Adobe Animate is a powerful tool that empowers creators to produce engaging animations and interactive content. Whether you're a graphic designer, animator, or just someone who enjoys expressing creativity through digital media, Animate provides a versatile platform. With its user-friendly interface and rich features, you can bring your ideas to life, making it an essential tool for anyone looking to create polished animations. In this post, we'll dive into what stock footage is and how to effectively incorporate it into your projects!
What is Stock Footage?
Stock footage refers to pre-recorded video clips that can be licensed for use in various projects. Think of it as ready-made video content that can enhance your own productions without the need for extensive filming or production work. Here’s why stock footage is so popular:
- Cost-effective: Creating your own video content can be expensive. Stock footage provides a budget-friendly alternative, allowing you to access high-quality video at a fraction of the cost.
- Time-saving: Instead of spending hours or even days shooting your own footage, you can find pre-existing clips that fit your needs within minutes!
- Diverse selection: There is a vast library of stock footage available for nearly any subject you can imagine, from breathtaking nature scenes to dynamic urban settings.
Stock footage can be categorized into several types:
- Royalty-Free Footage: Once you purchase a license, you can use the footage without paying additional fees.
- Editorial Footage: These clips are intended for news and documentary projects and usually cannot be used for commercial purposes.
- Premium Stock Footage: High-quality clips often coming from professional filmmakers that may require a higher price point.
When using stock footage, you typically have the flexibility to edit the clips to fit your specific project requirements. This includes:
- Trimming the length to only use the essential parts.
- Adding effects, transitions, or overlays to create a unique look.
- Changing the color grading to match the aesthetic of your project.
Incorporating stock footage into Adobe Animate can elevate your animations significantly. It allows you to blend animated elements with real-world clips, providing a depth and richness that can captivate your audience. The next sections will guide you through the process of bringing stock footage into Adobe Animate, ensuring your creative vision comes to life seamlessly.
Also Read This: How Much Money Can You Make with Adobe Stock
3. Preparing to Insert Stock Footage
Before diving into the exciting process of inserting stock footage into Adobe Animate, there are a few important steps to prepare. Taking the time to get organized can make your workflow smoother and your final product more polished.
1. Choose the Right Stock Footage: Start with selecting the stock footage that fits your project. Whether you need a scenic background, lively action shots, or subtle animations, there are tons of resources available. Websites like Pexels, Unsplash, or Pond5 offer a variety of free and paid stock footage clips.
2. Check the Specifications: Ensure the footage you choose matches the required specifications for Adobe Animate. Most commonly, you’ll want to look at the resolution, frame rate, and file format. Adobe Animate supports formats like MP4, MOV, and AVI, so make sure your clips are in one of these formats to prevent compatibility issues later on.
3. Download and Save Your Clips: Once you’ve found the perfect clips, download them and save them to a dedicated folder. This will keep everything organized and make it easier to locate your assets when you need them. A well-structured folder can save you a lot of time; consider naming it something straightforward like “Stock Footage for Animation.”
4. Analyze Your Footage: After downloading, it’s good practice to watch your clips to see how they’ll integrate into your project. Look for sections you might want to cut, or special effects that could enhance your animation. This is also a great time to note down any adjustments you might need to consider later, such as color correction or audio synchronization.
5. Plan Your Animation: Think about how you want the stock footage to support your animation. Write down some ideas or create a storyboard to visualize how the footage will fit into your overall project. Will it serve as a background, or will it overlay with other graphic elements? Having a clear vision will help you make better edits once you import the footage.
With your stock footage selected and prepared, you're ready to move on to the next exciting stage: importing your clips into Adobe Animate for your creative magic to begin!
Also Read This: Understanding YouTube Editor Salaries
4. Steps to Import Stock Footage into Adobe Animate
Now that you've prepared your stock footage, it's time to bring it into Adobe Animate. Don’t worry; this process is straightforward! Just follow these simple steps:
- Open Your Project: Start by launching Adobe Animate and opening the project you want to work on. This can be an existing project or a new file.
- Go to the Library Panel: In Adobe Animate, locate the Library panel on the right side of the screen. If it’s not visible, you can go to Window > Library to open it up.
- Import Stock Footage: Click on the File menu at the top left, then select Import > Import to Stage or Import to Library. If you import to the stage, the footage will be directly placed onto your working area. Importing to the library allows more flexibility to position and animate later.
- Select Your Footage: Navigate to the folder where you saved your stock footage and select the clips you want to import. Click Open, and watch as the images start appearing in your Library panel.
- Drag Footage to the Stage: If you imported to the Library, drag and drop your selected clip onto the stage. You can position it wherever you’d like! If you imported directly to the stage, you’ll see it there already.
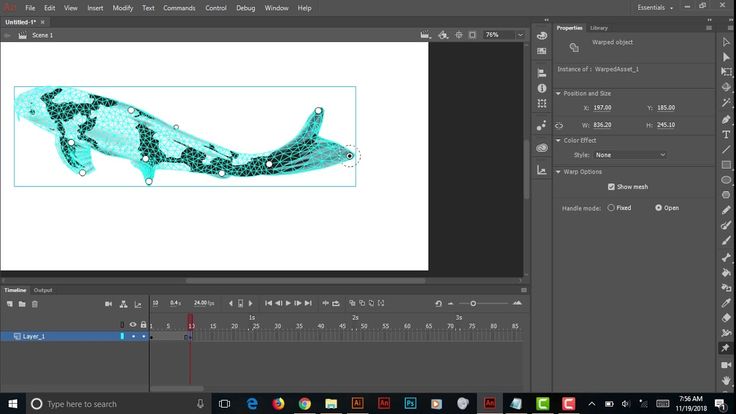
- Adjust Clip Properties: Select your clip on the stage and explore the Properties panel on the right side. Here, you can modify aspects such as position, size, and rotation. Don’t hesitate to play around with these settings until you achieve the look you want.
- Preview Your Work: Once you’ve placed and adjusted your stock footage, hit the Enter key or click the Play button to review how it flows with your animation. Make any necessary tweaks to ensure a smooth integration.
And there you have it! By following these steps, you should be able to effectively insert stock footage into your Adobe Animate projects seamlessly. With your footage now in place, you’re already on your way toward creating a stunning animation. Happy animating!
Also Read This: Maximizing Sales on Getty Images: Strategies for Optimizing Your Portfolio Performance
5. Editing and Integrating Stock Footage
Now that you've found and downloaded your stock footage, the next step is all about editing and integrating that footage into your Adobe Animate project. This phase is crucial, as it ensures that your footage not only fits your animation but also enhances the overall storytelling.
Step 1: Importing Your Footage
First things first, let's get that stock footage into Adobe Animate. To do this:
- Open Adobe Animate and navigate to File > Import > Import to Stage or use Import to Library if you want to keep your assets organized.
- Locate your downloaded stock footage file and click Open.
Once imported, you'll see your footage in the library panel, ready to be placed on the stage.
Step 2: Placing Footage on the Timeline
After importing, drag your footage from the library onto the stage. You can position it wherever you want, but be mindful of your existing animations and content.
Step 3: Trimming and Cropping
Your stock footage might not fit perfectly with your animation. To trim or crop the video:
- Select the video layer on the timeline.
- Use the PropertiesPanel to adjust the size or position. You can also utilize the Mask feature to create a specific shape for your footage.
- Play around with the timing by dragging the ends of the video layer on the timeline to adjust how long it plays.
Step 4: Adding Effects
To make your stock footage blend seamlessly into your animation, consider using some effects:
- Transparency: Adjust the opacity to layer your footage better with other elements.
- Filters: Add color correction or filters to maintain a consistent look with your animation.
- Sound: Don’t forget about audio! If your stock footage comes with sound, ensure it’s properly synced and doesn’t overpower your main audio elements.
Editing is all about refining your vision; experiment with different settings until you feel it complements your animation.
Also Read This: Master How to Cancel Your Shutterstock Account
6. Tips for Optimizing Your Project with Stock Footage
Integrating stock footage can elevate your project, but it’s also essential to keep it simple and efficient. Here are some handy tips to optimize your project:
1. Keep File Sizes in Check
Large stock footage files can slow down your project. Consider using lower-resolution versions for editing and switch to higher resolution for final output.
2. Use Pre-compositions
If you’re working with multiple video layers, grouping them into a pre-composition (or a symbol in Adobe Animate) can help reduce clutter on your timeline and make managing your project easier.
3. Limit Stock Footage Use
While stock footage is fantastic, overusing it can distract from your original content. Select clips that truly enhance your animation and maintain the focus on your story.
4. Test Your Animation’s Performance
Frequent performance testing is essential, especially if you’re incorporating many video assets. Use the Test Movie feature to see how your animation runs and make adjustments as needed.
5. Stay Consistent with Style
Ensure that the stock footage matches your project’s style. If you’re creating a cartoonish animation, using hyper-realistic footage might feel jarring. Stick to similar aesthetics to maintain coherence.
By following these tips, you'll improve your project’s workflow and ensure that your audience remains engaged without any distracting hiccups. Remember, it’s all about creating a cohesive and compelling experience!
Also Read This: how to change pixels of an image
7. Common Issues and Troubleshooting
Inserting stock footage into Adobe Animate can be a straightforward process, but like any software, you might run into some common issues along the way. Let's explore some of these hurdles and how to tackle them efficiently.
File Format Problems: One common issue is incompatible file formats. Adobe Animate supports various formats, but if you're using footage that’s not compatible, it will not import correctly. Before importing your footage, ensure that it's in a compatible format such as .MP4, .MOV, or .AVI. If it's not, consider converting it using software like HandBrake or Adobe Media Encoder.
Performance Issues: If your animation starts lagging or crashing after importing stock footage, your computer may be struggling with performance. Here are a few handy tips:
- Reduce the resolution of your footage before importing, especially if it's high-definition.
- Close unnecessary programs running in the background to free up resources.
- Make sure you have enough RAM and storage space; sometimes, upgrading your system can help.
Audio Syncing Problems: If your stock footage includes audio and it seems out of sync with your animation, double-check your timeline. Sometimes, animators inadvertently place audio tracks at the wrong frames. To fix it:
- Zoom in on your timeline for a precise view of where your audio track starts.
- Drag the audio track to sync it accurately with the animation.
Transparency Issues: If you notice that your footage has unwanted backgrounds or artifacts, it might be due to transparency settings. Ensure that the stock footage is properly keyed or that alpha channels are exported if you don't want any background.
By being aware of these common issues, you can navigate the process of inserting stock footage into Adobe Animate more confidently. Always keep troubleshooting resources handy, and don't hesitate to seek help from online forums and the Adobe community!
8. Conclusion and Further Resources
Inserting stock footage into Adobe Animate can dramatically enrich your animations, bringing a professional touch to your projects. As we’ve covered, the process involves selecting the right footage, properly importing it, and ensuring that it integrates seamlessly with your animation. With practice, you’ll find that stock footage can be a powerful tool in your creative arsenal.
As you continue to explore the possibilities within Adobe Animate, here are a few resources that can help:
- Official Adobe Animate Help Center - This is your go-to source for in-depth tutorials and troubleshooting tips.
- YouTube Tutorials - Visual learners will appreciate the variety of video tutorials available on YouTube regarding stock footage integration.
- Stock Footage Websites - Consider checking out websites like Shutterstock, Adobe Stock, or Pond5 to find high-quality footage suitable for your projects.
Don’t forget to experiment and have fun while incorporating stock footage into your animations. Each project is an opportunity for creativity and learning, so embrace the journey!
 admin
admin


