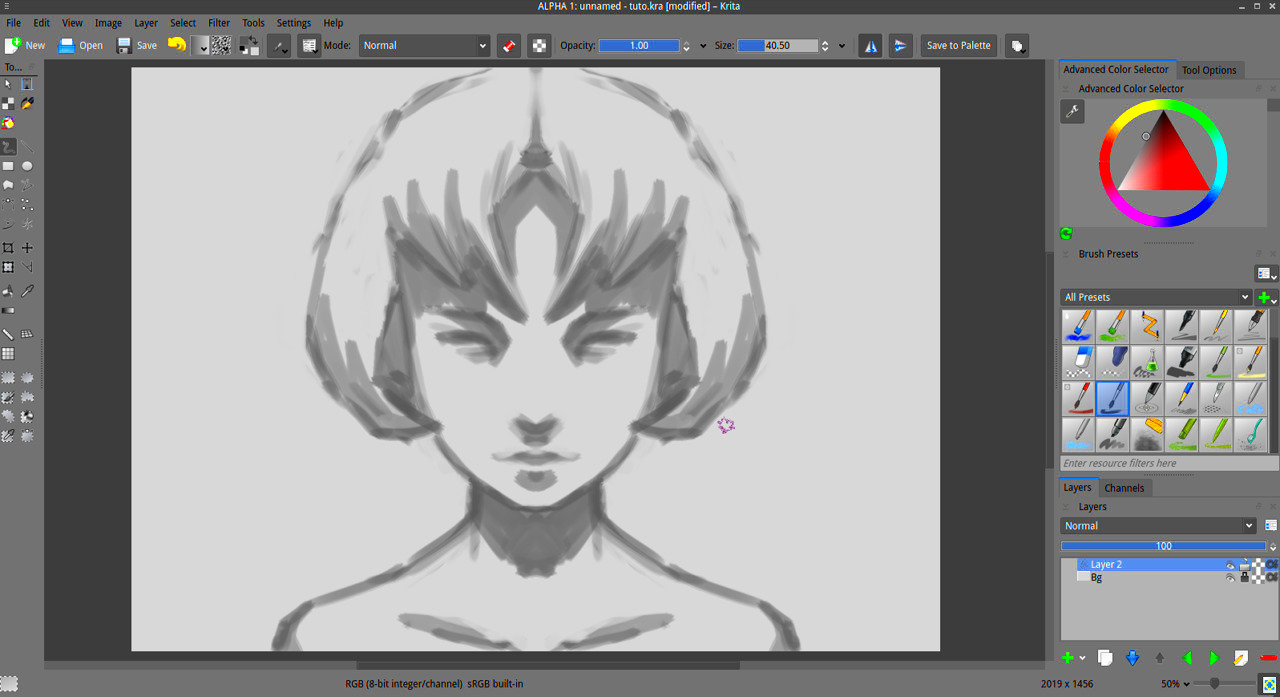
Krita is a free and open-source software designed for digital artists. It offers a wide range of tools and features that cater to illustrators, concept artists, and anyone who enjoys creating digital artwork. Whether you’re sketching, painting, or designing, Krita provides a user-friendly platform for beginners and professionals alike.
One reason Krita stands out is its affordability—it’s completely free, making it accessible to everyone. Additionally, it offers robust features like customizable brushes, layer management, and color blending tools. Many users praise Krita for its intuitive interface and active community that shares tutorials and resources.
If you’re just starting with digital art, Krita is an excellent choice. It combines simplicity with advanced tools, helping you grow your skills while exploring your creativity.
Steps to Insert an Image in Krita

Adding an image to your Krita project is simple. Follow these steps to get started:
- Open Krita: Launch the software and create a new canvas or open an existing project.
- Go to the Menu: Click on File in the top menu bar.
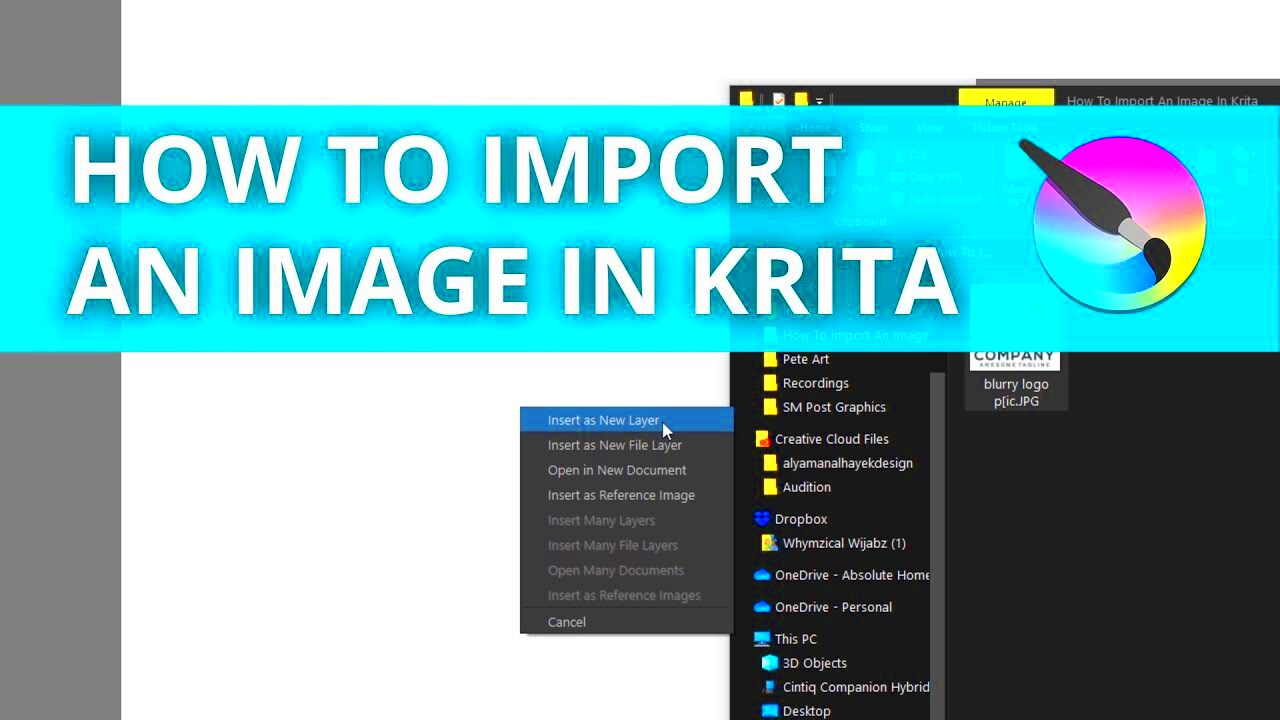
- Select Import: From the dropdown, choose Import and then Import as Layer.
- Choose the Image: Browse your computer to locate the image you want to add. Select it and click Open.
- Place the Image: The image will appear on your canvas as a new layer. You can move and resize it as needed.
That’s it! Your image is now part of your project, ready for editing or integration into your artwork.
Also Read This: Variation Visualization: Adding Variations to Your eBay Listings
How to Adjust the Inserted Image in Krita
After adding an image, you may need to adjust its size, position, or other properties. Here’s how you can do it:
- Resizing the Image: Use the Transform Tool (shortcut: Ctrl+T). Drag the corners of the image to resize it proportionally. Press Enter to confirm the changes.
- Rotating the Image: While using the Transform Tool, move your cursor near the image's corners until you see a rotation icon. Click and drag to rotate the image to your desired angle.
- Positioning the Image: With the Move Tool (shortcut: T), click and drag the image to reposition it on your canvas.
- Adjusting Opacity: Select the image layer in the Layers Panel. Use the opacity slider to make the image more transparent or solid.
- Clipping or Cropping: Use the Crop Tool to cut unwanted parts of the image.
These adjustments help you integrate the image seamlessly into your artwork. Don’t forget to save your project to keep your changes intact!
Also Read This: Understanding YouTube’s Move to Block Ad Blockers and How to Bypass It
Using Layers to Work with Images in Krita
In Krita, layers are crucial for organizing your project and working non-destructively with images. Layers let you separate different elements of your artwork, making it easy to edit or adjust individual parts without affecting the whole image. This feature is especially helpful when combining images with other elements like drawings, textures, or colors.
Here's how you can use layers effectively when working with images in Krita:
- Adding a New Layer: To add a new layer, go to the Layer menu and select New Layer. You can choose from various types like raster or vector layers depending on your needs.
- Layer Types: Krita offers different types of layers, such as image layers, paint layers, and filter layers. Each one serves a specific purpose. For images, use the Image Layer type.
- Layer Mask: Use a Layer Mask to hide parts of the image without permanently deleting them. This is perfect for creating smooth transitions or combining images in a seamless way.
- Organizing Layers: Name your layers for easy identification, especially when you have many layers. You can also group layers by selecting multiple layers and right-clicking to choose Group Layers.
- Layer Opacity: Adjusting the opacity of a layer allows you to control how visible or transparent an image is over others. This can be useful for blending images together.
Using layers in Krita not only improves your workflow but also gives you more control and flexibility when working with complex projects. Experiment with layers to create stunning artwork while keeping your options open for adjustments.
Also Read This: A Complete Guide to Embedding All Images in Illustrator
Tips for Better Image Integration in Krita
Integrating images into your artwork seamlessly can be challenging, but with the right techniques, it’s easy to make your images blend naturally into the canvas. Here are some tips to help you achieve better results:
- Use Adjustment Layers: Adjustment layers let you modify the brightness, contrast, and color of an image without permanently changing it. Use the Levels or Curves adjustments to match the image’s tone with the rest of your artwork.
- Work with Blending Modes: Blending modes help you control how layers interact with each other. For instance, you can use the Multiply mode to darken an image or Overlay to create more contrast.
- Match Colors: Ensure the color tones of your inserted image match the overall color scheme of your project. You can use the Color Picker tool to adjust the hues of your image to better fit the design.
- Soft Brushes for Blending: When blending an image into a painted background, use soft brushes to gently merge the edges of the image. This creates a more natural and smooth transition between the image and its surroundings.
- Use Gradients: Gradients can be a great way to transition from the image to the background. A subtle gradient around the edges of the image helps to soften the boundaries and integrate it into the composition.
By applying these tips, you can make your images feel like part of the scene rather than just pasted elements. Experimenting with these techniques will help you achieve more professional and polished results in Krita.
Also Read This: Using Image Herbicide Effectively
Common Issues When Inserting Images and How to Fix Them
While inserting images into Krita is relatively straightforward, there are a few common issues that users might encounter. Fortunately, these problems are usually easy to fix. Let’s take a look at some of the most frequent issues and their solutions:
- Image Not Displaying: Sometimes, after importing an image, it may not show up on the canvas. To fix this, make sure the image layer is selected and visible in the Layers Panel. Check the layer opacity and ensure it’s set to 100%.
- Image Quality Issues: If the image looks blurry or pixelated, check its resolution. High-resolution images (300 DPI or more) work best for digital art. You can also use the Resample option to change the image resolution in Krita.
- Layer Positioning Problems: If the image layer isn’t where you want it, make sure you’re using the Move Tool (shortcut: T) to adjust its position. Ensure the correct layer is selected in the Layers Panel.
- Image Not Resizing Properly: When resizing an image, it can become distorted if not scaled proportionally. Hold the Shift key while resizing to maintain the aspect ratio and avoid distortion.
- Wrong File Type: Krita supports a wide variety of file formats, but if the image file type isn’t supported, try converting it to a common format like PNG or JPEG before importing it.
These are just a few of the issues that may arise when working with images in Krita. By understanding and addressing these common problems, you can streamline your workflow and avoid frustration while working on your projects.
Also Read This: How to Create the David Beckham Hairstyle with This Trendy Hair Tutorial
Frequently Asked Questions about Using Images in Krita
If you're new to Krita or working with images for the first time, you might have some questions. Here are answers to some of the most frequently asked questions to help you get started:
- How do I import an image into Krita? To import an image, go to the File menu, select Import, and choose Import as Layer. Then browse for the image file on your computer and click Open. The image will be added as a new layer.
- Can I resize the image after inserting it? Yes, you can resize an image by selecting it and using the Transform Tool (shortcut: Ctrl+T). Click and drag the corners to resize, and press Enter to confirm.
- What should I do if my image looks pixelated? Ensure that the image you’re using is of high resolution. Low-resolution images may appear pixelated when resized. If needed, you can adjust the image resolution in the Image menu using the Resample option.
- How can I blend the image into my artwork? You can use blending modes to change how the image interacts with the layers beneath it. Options like Multiply or Overlay can help blend the image more naturally into the artwork.
- Can I remove parts of the image without deleting them? Yes, you can use Layer Masks to hide parts of the image non-destructively. Simply add a layer mask, paint over the areas you want to hide, and they’ll remain editable.
These answers should help you navigate working with images in Krita. If you encounter further questions, the Krita community and official documentation are great resources for troubleshooting.
Final Thoughts on Inserting Images in Krita
Inserting images into your Krita project is a straightforward process that can significantly enhance your digital artwork. By understanding how to import, adjust, and work with layers, you can easily integrate images into your designs. With the help of tools like transformation, blending modes, and layer masks, you can achieve a polished and professional look. Remember, practice and experimentation are key to mastering the integration of images into your artwork. So don’t hesitate to explore all the options Krita offers to make your creations stand out.


