Have you just purchased a new smartphone or need to switch your SIM card? Don’t worry; you’re not alone! In this guide, we’ll walk you through the steps to insert a SIM card in various smartphone models. Whether you’re a tech whiz or a beginner, our simple instructions will help you get your phone up and running in no time. So, let’s dive in and clear up any confusion about SIM cards!
Understanding SIM Card Types
Before we get into the nitty-gritty of inserting a SIM card, it’s essential to understand the different types of SIM cards available. Knowing which one suits your smartphone will save you time and potential headaches. Here’s a brief overview:
- Standard SIM: This is the original size and is quite rare in modern devices. It measures 25mm x 15mm.
- Micro SIM: A smaller version, measuring 15mm x 12mm. Many older smartphones, like the iPhone 4 and Samsung Galaxy S3, use this type.
- Nano SIM: The most common type used in new smartphones today, measuring just 12.3mm x 8.8mm. Phones like the iPhone 5 and Samsung Galaxy S6 utilize this size.
- eSIM: A digital SIM embedded directly in the smartphone, allowing you to activate a cellular plan without using a physical SIM card. It's becoming increasingly popular in newer devices.
Now that we've identified the types, let’s talk about how to determine which SIM card your smartphone requires. Here are a few tips:
- Check the Manufacturer's Website: Most smartphone manufacturers provide detailed specifications on their websites, including the type of SIM card used.
- Look at the SIM Tray: If you can access the SIM tray, often the size is printed near the slot or in the accompanying user manual.
- Ask Your Carrier: If you’re unsure, your mobile carrier can guide you on which type of SIM card you need for your device.
Understanding these SIM card types and their specific uses will ensure you’re well-prepared for the next step: inserting your SIM card! Stay tuned as we break down the insertion process for various smartphone models in the following sections.
Also Read This: How to Reverse or Rewind Uploaded Videos on Dailymotion
3. Preparing Your Smartphone for SIM Card Insertion
Before inserting a SIM card, it's essential to prepare your smartphone to ensure a smooth process. Here's what you need to do:
- Power Off Your Device: This is a crucial step! Turning off your smartphone helps prevent any potential damage or software issues. To power off, simply hold the power button and select the 'Power Off' option from the menu.
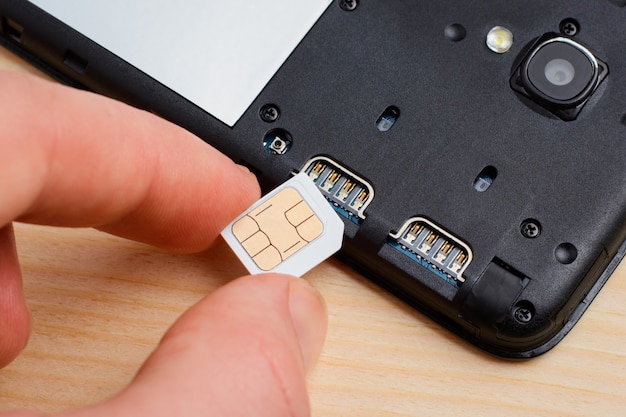
- Gather Your Tools: Depending on your smartphone model, you may need a SIM ejector tool or a small pin. Most smartphones come with a tool in the box, but if you can't find it, a paperclip can work just fine!
- Locate the SIM Card Slot: Check your user manual or search online to find the exact location of the SIM card slot for your phone model. This slot is often located on the side of the device.
Once you’ve powered off your device and gathered your tools, you’re ready to move on to the actual insertion process. Remember, taking these preparatory steps will help ensure that the insertion goes smoothly and without any hiccups!
Also Read This: How to Increase Height in One Week with Simple Exercises
4. Step-by-Step Instructions for Popular Smartphone Brands
Now that your smartphone is prepped, it’s time to dive into the step-by-step instructions for inserting a SIM card into some of the most popular smartphone brands:
Apple iPhone
- Locate the SIM card tray. It’s usually on the right side of your iPhone.
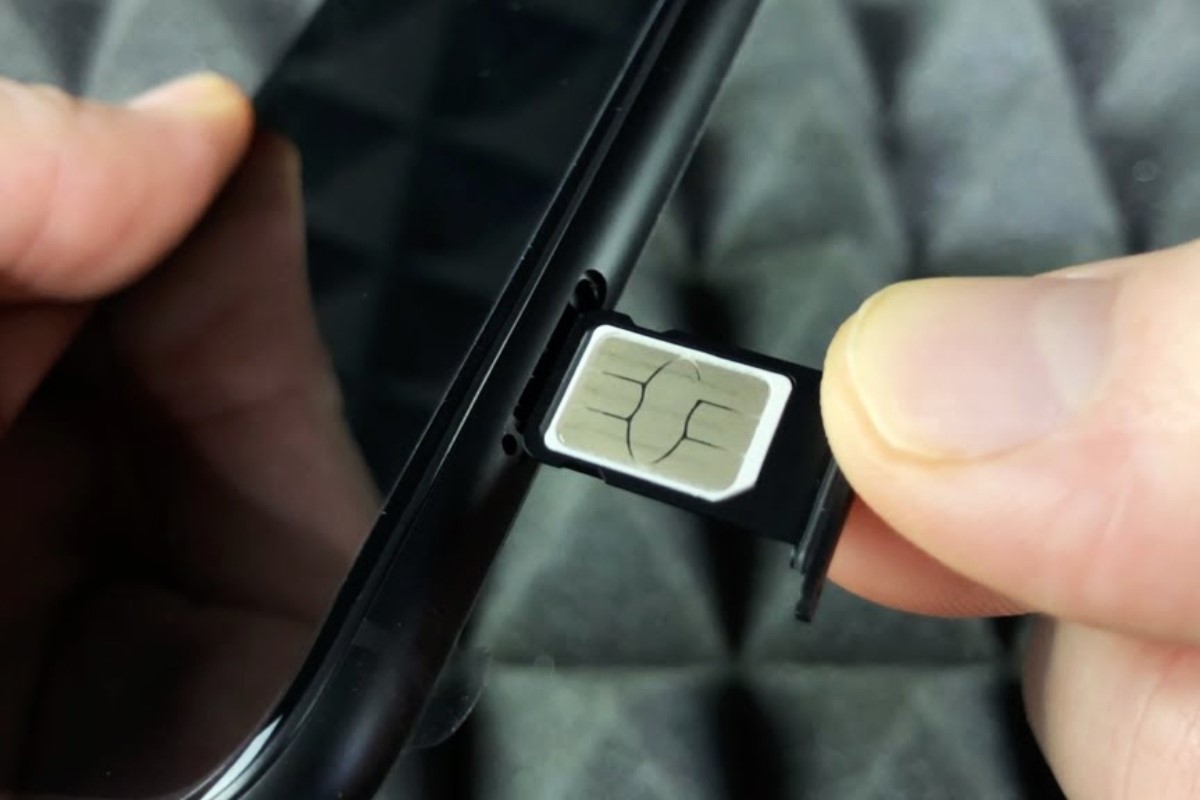
- Use the SIM ejector tool to gently push into the small hole next to the tray.
- The tray should pop out. Pull it out carefully.
- Place your SIM card into the tray, ensuring it's aligned correctly with the cutout.
- Slide the tray back into the iPhone until it clicks into place.
- Power on your iPhone, and your SIM card should be recognized!
Samsung Galaxy
- Find the SIM card slot, typically located on the top or side of your device.
- Using the SIM ejector tool, insert it into the pinhole to eject the tray.
- Carefully pull out the tray.
- Insert your SIM card into the tray—make sure it fits snugly in the designated slot.
- Reinsert the tray back into the device and push it in until it clicks.
- Turn on your Galaxy phone, and it should recognize the SIM card automatically!
Google Pixel
- Locate the SIM card tray on the left side of your Pixel phone.
- Use the SIM ejector tool to push into the small hole near the tray.
- Once the tray pops out, gently pull it out.
- Place your SIM card in the tray, ensuring it’s aligned correctly.
- Slide the tray back into the slot until it’s secure.
- Turn on your Pixel, and in a few moments, your network should be activated!
These instructions should cover the majority of users, but always remember to check the specific guidelines for your model if you run into any issues. Happy SIM card inserting!
Also Read This: How to Sign Up for Dailymotion Quick Registration Steps
5. Troubleshooting Common SIM Card Issues
So, you've inserted your SIM card and everything should be working smoothly, but sometimes tech just doesn't play nice. Don't worry! Here are some common SIM card issues and how to troubleshoot them.
1. No Service or Signal Issues
If you're seeing "No Service" or "Searching..." on your screen, it might not be a problem with your phone. Here's what you can do:
- Check Airplane Mode: Make sure Airplane Mode is off. You can usually find this in the settings or swipe down on your home screen for quick access.
- Restart Your Phone: A simple restart can fix many connectivity issues. Just turn it off, wait a few seconds, and turn it back on.
- Reinsert the SIM Card: Sometimes, the SIM card might not be seated properly. Power off your phone, take out the SIM card, then reinsert it securely.
2. SIM Card Not Recognized
If your phone isn't recognizing the SIM card, try these steps:
- Check for Damage: Inspect your SIM card for scratches or dirt. A clean, undamaged card is essential.
- Test the SIM Card in Another Phone: This will help you determine if the issue is with the SIM or the phone itself.
- Update Your Phone: Ensure your phone's software is up to date. Sometimes, compatibility issues can arise from outdated software.
3. SIM Card Locked
If your SIM card is locked, you'll need to enter the PIN. If you forget it, you may need to contact your carrier for assistance. They can provide you with the PUK code to unlock it.
4. Mobile Data Not Working
If your phone shows a signal but mobile data isn't working, try these:
- Check Data Settings: Go to your settings and ensure mobile data is enabled.
- APN Settings: Sometimes you might need to update the Access Point Name (APN) settings provided by your carrier.
By following these troubleshooting steps, you can likely resolve most issues related to SIM cards. If problems persist, it may be time to visit a store or contact your carrier for further assistance.
6. Conclusion
Inserting a SIM card might seem trivial, but it's a crucial step in getting your smartphone up and running. Whether you're switching carriers, upgrading your device, or simply replacing a damaged card, knowing how to handle your SIM card properly is essential.
Remember: Always handle your SIM card with care. A little attention goes a long way in avoiding issues. If you ever run into problems, keep the troubleshooting steps in mind, and don’t hesitate to reach out for help if needed.
Ultimately, understanding your device and its components, like the SIM card, empowers you to make the most out of your smartphone experience. Happy connecting!
 admin
admin


