When working with 3D modeling and animation in Blender, importing images is a crucial step that can significantly enhance your project. Whether you’re using images as references, textures, or backgrounds, they provide visual guides that make modeling and animation more accurate and realistic. Blender makes it easy to bring in images, offering various methods to suit different needs.
In this section, we’ll discuss why importing images into Blender is important and how it contributes to your overall workflow. If you’re new to Blender or 3D modeling in general, this guide will help you get started by showing you how images can assist in making your work more precise and professional.
Why You Should Import Images in Blender

Importing images into Blender is a simple yet powerful technique that can bring many benefits to your 3D modeling and animation projects. Here’s why you should consider using images in your Blender workflow:
- Improved Accuracy – Images provide reference points that help you model more precisely. Whether it’s a character design, architectural structure, or product model, having a clear visual guide ensures your work is realistic and accurate.
- Enhanced Creativity – Reference images can spark ideas, especially when you’re experimenting with complex designs or animations. They act as inspiration, helping you visualize your project more clearly.
- Better Textures and Backgrounds – Images aren’t just for reference. You can use them as textures or backgrounds in your scenes, giving depth and realism to your models.
- Efficient Workflow – With images in your scene, you spend less time guessing or adjusting as you work. You can model directly on top of the reference, saving time and reducing errors.
Incorporating images into your Blender projects is an essential step that makes modeling easier and your final product more polished.
Steps to Import an Image into Blender

Now that you understand why importing images is important, let’s dive into the steps to actually bring an image into Blender. Whether you’re using the image as a background, a reference for modeling, or a texture, the process is simple and quick. Follow these steps to import an
- Step 1: Open Blender – Start by opening Blender and creating a new project or opening an existing one where you want to add an image.
- Step 2: Go to the 3D Viewport – Click on the 3D Viewport, the area where you do most of your modeling. This is where the image will be imported into your scene.
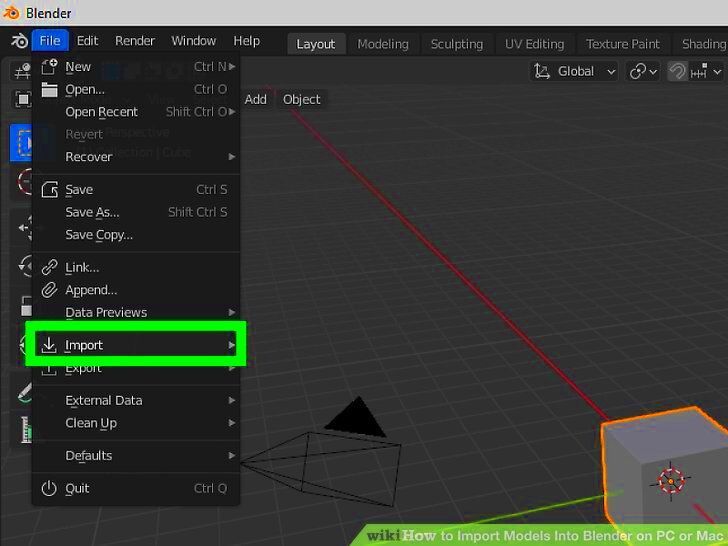
- Step 3: Open the Image Import Menu – Press Shift + A to open the “Add” menu. From there, choose “Image” and select “Reference” or “Background” depending on how you plan to use the image.
- Step 4: Select Your Image File – A file browser will appear. Browse your computer to find the image you want to import, then click to select it. The image will now appear in the 3D Viewport.
- Step 5: Position the Image – Once the image is in the viewport, you can move, rotate, and scale it as needed to fit your scene or model. Use the transform tools (G, R, and S) to adjust its placement.
- Step 6: Adjust Image Settings (Optional) – If needed, you can adjust the image’s opacity, display settings, or align it to match your model. You can also use the properties panel for finer control.
Following these steps will allow you to easily import and position images in Blender, making your 3D modeling and animation process more efficient and accurate.
Different Methods of Importing Images in Blender
Blender offers multiple ways to import images into your scene, each suited for different purposes. Depending on how you want to use the image—whether as a reference, texture, or background—the method you choose will vary. Understanding these options will help you work more efficiently and give you greater flexibility in your 3D projects. Let’s explore the different methods of importing images in Blender:
- Using the Add Menu – This is the most common method. Simply press Shift + A to open the Add menu, then select “Image” and choose between “Reference” or “Background.” Reference images are used for modeling, while background images are typically used for scene environments.
- Image as Plane Add-on – If you want to import an image as a flat plane in your scene, enabling the "Images as Planes" add-on is a great option. This method automatically applies the image as a texture to a plane object. To enable it, go to Edit > Preferences > Add-ons, search for "Images as Planes," and check the box. Then, you can use Shift + A > Image > Images as Planes to add the image.
- Drag and Drop – Another simple method is to drag an image file directly from your file explorer and drop it into Blender’s 3D Viewport. This will create an image object, which you can manipulate within your scene.
- Using the Image Texture Node – If you are working with materials, you can add images directly to your shaders using the Image Texture node in the Shader Editor. This method is ideal when you want to apply the image to a 3D object’s surface.
These methods give you flexibility in how you use images in your projects, allowing you to choose the best one based on your specific needs in Blender.
Setting Up Image References for 3D Modeling
Using image references in Blender can significantly improve the accuracy of your 3D models. By placing reference images of the object you're modeling, you can match shapes, proportions, and details more precisely. Setting up these references correctly is key to a smooth modeling process. Here’s how to set up image references in Blender:
- Step 1: Import the Image – First, import your reference image using any of the methods we discussed earlier (such as the Add menu or drag-and-drop). Make sure the image is aligned to the correct axis (front, side, top) depending on your modeling needs.
- Step 2: Position and Scale the Image – After the image is imported, use the G key to move it, R to rotate, and S to scale it. Position the image so that it aligns with your model. For example, a side view reference image should be placed on the side view of the 3D viewport.
- Step 3: Set Image Opacity – To make the reference image less distracting while you work, you can adjust its opacity. Go to the Properties Panel and reduce the transparency to a level that lets you see your model clearly without being overwhelmed by the image.
- Step 4: Lock the Image – To prevent accidental movement of the reference image, lock it in place. You can do this by selecting the image in the Outliner and disabling its "Selectable" option. This ensures that the image remains stationary while you work on your model.
- Step 5: Add Multiple Views – For more complex models, consider adding multiple reference images from different angles. This will help you capture the full shape and proportions of the object from all perspectives.
Setting up image references is a simple yet powerful way to ensure that your 3D models are accurate and realistic. By following these steps, you’ll have a solid foundation for your modeling process.
Using Images for Textures and Backgrounds
Images play an essential role not only in reference but also as textures and backgrounds in Blender. Using images as textures adds realism to your 3D models, while using them as backgrounds can set the scene for your animations or renders. Here’s how you can effectively use images for these purposes:
Using Images as Textures
Textures bring life and detail to your 3D models. Here’s how to use images as textures in Blender:
- Step 1: Open the Shader Editor – To apply a texture, go to the Shader Editor. This is where you’ll connect the image to your material’s shader.
- Step 2: Add an Image Texture Node – In the Shader Editor, press Shift + A, then go to Texture > Image Texture to add the image texture node. Connect this node to your material’s shader, such as the Principled BSDF shader.
- Step 3: Load the Image – Click on the image texture node and open the image file you want to use. This will apply the image as a texture to the model’s surface.
- Step 4: Adjust UV Mapping – Make sure your model’s UV mapping aligns correctly with the image texture. Use the UV Editor to adjust how the texture is applied across the 3D model.
Using Images as Backgrounds
Images can also be used as backgrounds in Blender to add depth to your scene or help with composition. To set an image as a background:
- Step 1: Go to the Viewport – In the 3D Viewport, press Shift + A, choose Image, and select “Background” to load your image.
- Step 2: Position the Image – Position the background image so that it fits with the camera view. You can adjust the image's opacity and scale to make it fit into your scene.
- Step 3: Set Image for Render – If you want the image to be part of your final render, make sure it's placed in the background layer and correctly aligned with the camera’s perspective.
Using images as textures and backgrounds can significantly enhance the visual appeal of your models and scenes, adding realism and depth that will impress your viewers.
Common Issues and Solutions When Importing Images
While importing images into Blender is generally straightforward, you might encounter a few issues along the way. These problems can range from image scaling to visibility issues in the 3D viewport. Here are some of the most common problems users face when importing images into Blender, along with solutions to help you fix them:
- Image Not Appearing in the Viewport – One of the most common issues is when the image doesn’t appear after importing. This can happen if the image is placed outside of the camera view or the 3D Viewport. To solve this, select the image and use the G key to move it closer to the camera view or adjust the viewport's perspective to ensure the image is within view.
- Incorrect Image Orientation – Sometimes, images may be imported at the wrong orientation, which can confuse your modeling process. To fix this, simply use the R key to rotate the image to the correct position.
- Image Blurry or Pixelated – If your image looks blurry or pixelated, this may be due to low resolution or scaling issues. Make sure the image file you're importing is of high quality, and check the scale settings to ensure the image is not stretched out.
- Opacity Issues – In some cases, the image may appear too faint or transparent. You can adjust the opacity settings in the Properties Panel to make the image more visible. Make sure you’re not using excessive transparency.
- Not Able to Select Image – If you can't select or move the image in the viewport, check the Outliner. You may have accidentally disabled its selectability, so go to the Outliner and make sure the image is marked as selectable.
By understanding and addressing these common issues, you can ensure that your image importing process in Blender goes smoothly and efficiently.
Best Practices for Importing Images into Blender
To make your image importing process in Blender as smooth and efficient as possible, it’s essential to follow best practices. By incorporating these tips, you’ll ensure that the images you use in your projects are clear, well-positioned, and optimized for your modeling and animation needs:
- Use High-Quality Images – Always choose images with high resolution for reference and textures. Low-quality images can distort or pixelate when zooming in or applying them to models.
- Organize Your Image Files – Keep your image files organized in clearly labeled folders. This makes it easier to find and import the right image when working on large projects.
- Align Images to Correct Axes – When using reference images, ensure they are aligned correctly with Blender’s axes (X, Y, Z). For example, side view images should be aligned to the Y-axis, front view to the X-axis, and so on. This ensures that your model is accurate from all angles.
- Optimize Image File Size – Large image files can slow down Blender. If your image is unnecessarily large, reduce its resolution or use a file format like PNG or JPEG for smaller sizes without losing quality.
- Lock Image Position – After positioning a reference image in your scene, consider locking it in place to avoid accidental movement. This keeps your reference in the correct position while modeling.
- Use the Right Type of Image – Choose whether you need a background image, a reference image, or a texture, and use the appropriate import method for each. Using the correct method for the right purpose helps with your workflow.
- Check Image Aspect Ratio – Pay attention to the aspect ratio of your image to prevent distortion when it is applied as a texture or reference. Correcting the aspect ratio ensures your image looks proportionally accurate.
By following these best practices, you can avoid many common pitfalls and make your Blender projects more efficient and organized. A well-managed image workflow will save you time and improve the quality of your work.
FAQ
Q: How do I make sure my image stays in the correct position in Blender?
A: To keep your image in place, make sure to lock it in the Outliner. You can also use the Shift + A method to add images as background or reference, ensuring they stay in position while you work on other elements of your project.
Q: Can I use an image as a reference and a texture at the same time?
A: Yes, you can. Blender allows you to use an image both as a reference for modeling and as a texture for a 3D model. You’ll need to import them separately, using different methods (e.g., one as a reference through the Add menu, and the other as a texture through the Shader Editor).
Q: Why is my reference image not visible in the viewport?
A: This could be because the image is placed outside of the viewport's camera view or is too transparent. Try moving the image closer to the camera and adjusting its opacity settings in the properties panel.
Q: How can I scale my reference image accurately?
A: You can scale your reference image by selecting it and pressing the S key. For more precise scaling, use the properties panel to manually enter the scale values based on your model’s requirements.
Q: What is the difference between a reference image and a background image in Blender?
A: A reference image is typically used to guide modeling and can be viewed in any part of the viewport. A background image, on the other hand, is placed behind the 3D scene and is usually intended for environmental or scene-building purposes.
Conclusion
Importing images into Blender is an essential skill for 3D modeling and animation, providing you with the necessary tools to create accurate and realistic models. Whether you use images as references, textures, or backgrounds, understanding how to properly import and position them will streamline your workflow and enhance the overall quality of your project. By following the steps and best practices outlined in this guide, you can avoid common issues and optimize your image usage in Blender. Keep experimenting with different image import methods to find what works best for your specific needs, and your 3D creations will improve significantly in both detail and efficiency.


