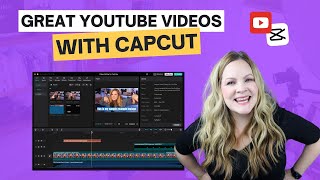
CapCut has become a favorite among content creators for its user-friendly interface and powerful editing tools. Whether you’re crafting a vlog, a tutorial, or a fun skit, CapCut offers everything you need to bring your visions to life. With the rise of video content on platforms like YouTube, knowing how to import and edit YouTube videos in CapCut can elevate your projects and keep your audience engaged.
Editing YouTube videos allows creators to enhance their storytelling, improve visual quality, and add that professional touch. Plus, CapCut's features like filters, effects, and music integration make the process not just efficient but also enjoyable. Let’s dive into how you can seamlessly import your YouTube videos into CapCut!
Step-by-Step Guide to Importing YouTube Videos into CapCut

Ready to get started? Importing your favorite YouTube videos into CapCut is a breeze if you follow these simple steps. Let’s break it down:
- Get the YouTube Video Link:
Start by locating the video you want to edit on YouTube. Click on the Share button below the video and copy the link. This link is essential for the next steps.
- Download the YouTube Video:
Since CapCut doesn’t directly import videos from YouTube, you need to download the video first. Use reliable online services or apps like Y2Mate or 4K Video Downloader to save the video to your device.
- Open CapCut:
Launch the CapCut app on your device. If you don’t have it yet, it’s available for free on both Android and iOS platforms. Once open, tap on the New Project button to start editing.
- Import the Video:
Now, it’s time to import your downloaded YouTube video. Tap on Media, navigate to the folder where you saved the video, and select it. CapCut will automatically import the video into your project timeline.
- Edit as Desired:
Once your video is imported, the fun begins! You can trim clips, add text, apply transitions, and incorporate background music. Take advantage of CapCut’s extensive library of effects and filters to enhance your video’s visual appeal.
- Export Your Finished Video:
When you’re happy with your edits, it’s time to export. Tap on the Export button in the top right corner, choose your desired resolution and frame rate, and save your masterpiece. You can now upload it back to YouTube or share it on other platforms!
And there you have it! By following this simple guide, you can efficiently import YouTube videos into CapCut and start creating engaging content in no time. Happy editing!
Also Read This: Is the Pac-12 Network Available on YouTube TV? Streaming Sports Content
3. Understanding CapCut's Editing Features

CapCut is more than just a basic editing tool; it’s a treasure chest of features designed to help you create stunning videos effortlessly. Whether you’re new to video editing or a seasoned pro, understanding what CapCut offers can really elevate your projects.
Key Features of CapCut:
- User-Friendly Interface: The layout is intuitive, making it easy to navigate through tools and features. You won’t need a manual to get started!
- Multi-Layer Editing: You can work with multiple video and audio layers, allowing for complex edits and creativity. This is particularly useful when you want to add background music or overlay text.
- Effects and Filters: CapCut provides a wide range of filters and effects to enhance your videos. From vintage looks to modern aesthetics, there’s something for every style.
- Text and Stickers: Adding text overlays and fun stickers is a breeze. You can customize fonts, colors, and animations to match your video's vibe.
- Transitions: Smooth transitions between clips can make your video feel professional. CapCut has numerous transition effects to choose from, allowing for seamless flow.
- Audio Editing: CapCut doesn’t just stop at video; it also includes a robust set of audio tools. You can mix, trim, and add sound effects or voiceovers easily.
To get the most out of these features, spend some time exploring each one. Play around with effects and transitions to see how they change the mood of your video. Remember, video editing is a creative process, so don’t be afraid to experiment!
Also Read This: Does YouTube TV Have Turner Classic Movies and How to Access Classic Films
4. Best Practices for Editing YouTube Videos in CapCut
Editing YouTube videos in CapCut can be a fun experience, but to ensure your content stands out, it’s essential to follow some best practices. Here’s how to make your editing process more efficient and your videos more engaging.
1. Start with a Clear Structure:
Before diving into editing, outline your video. Having a clear introduction, body, and conclusion will help you stay focused on your message and make it easier for viewers to follow along.
2. Keep It Concise:
Attention spans are short! Aim for an engaging pace. Trim unnecessary parts and get to the point quickly. Aim for a balance where your content is informative but not overly lengthy.
3. Use High-Quality Assets:
When importing clips and audio, always choose high-resolution files. Poor quality can distract viewers and lower the overall production value of your video.
4. Incorporate Engaging Thumbnails:
Your video thumbnail is the first impression viewers get. Spend time creating eye-catching thumbnails using CapCut’s editing features. Use bold text and intriguing images to entice clicks!
5. Optimize for YouTube:
Remember to export your videos in the right format and resolution for YouTube. A resolution of 1080p (1920x1080) is ideal for clarity. Also, use relevant tags and descriptions to improve discoverability.
6. Preview and Get Feedback:
Always preview your edited video before uploading. Consider sharing it with friends or family for constructive feedback. Sometimes a fresh pair of eyes can catch things you might have missed!
By following these best practices, you’ll enhance your editing skills and produce videos that not only look great but also resonate with your audience. Happy editing!
Also Read This: Can You Share Playlists with YouTube’s Family Plan
5. Common Issues and Troubleshooting When Importing Videos
Importing YouTube videos into CapCut can be a breeze, but sometimes you might encounter a few hiccups along the way. Don't worry! Here are some common issues and their solutions to ensure a smoother editing experience.
1. Video Format Compatibility
One of the most frequent issues is video format compatibility. CapCut supports several formats, but if your YouTube video is in a less common format, it might not import correctly. To resolve this:
- Check the format of your downloaded video. Common compatible formats include MP4 and MOV.
- If the format isn't compatible, consider converting the video using a reliable converter tool before importing it into CapCut.
2. Downloading Issues
Sometimes, the issue starts even before you get to CapCut, right at the downloading stage. If your video doesn't download fully or gets interrupted, you may face problems importing it. Here’s what you can do:
- Make sure you have a stable internet connection during the download.
- Use trusted download tools or websites that ensure a complete download.
3. Insufficient Storage Space
If your device lacks enough storage, you might run into trouble importing your video files. Here’s how to check and resolve this:
- Check your device’s storage settings to see if you're running low.
- If space is tight, consider deleting unnecessary files or transferring some to an external storage device.
4. CapCut App Issues
Sometimes, the problem might lie within the CapCut app itself. If the app is glitching, try these steps:
- Close and restart the app. This can often resolve minor glitches.
- Check for any updates available for CapCut. Updating the app can fix bugs and improve performance.
5. Unsupported Video Length
Although CapCut allows for lengthy video projects, exceptionally long videos can sometimes cause issues. To address this:
- If your video exceeds the maximum limit (usually around 1-2 hours), consider trimming it down before importing.
If you encounter any other issues, don’t hesitate to check CapCut’s support forums or their official help center. Community forums can often provide solutions from users who have experienced the same problems. Happy editing!
6. Conclusion: Enhance Your Video Editing Experience with CapCut
Now that you've explored how to import YouTube videos into CapCut and the common issues that might arise, it’s time to reflect on how CapCut can transform your editing experience. This user-friendly app is packed with features that can elevate your video projects, making them more engaging and professional.
Whether you're a beginner or a seasoned editor, CapCut offers:
- Intuitive Interface: The layout is straightforward, allowing you to focus on creativity rather than getting lost in complicated menus.
- Rich Features: With options for transitions, effects, and music, your videos can stand out effortlessly.
- Seamless Sharing: Once you finish editing, sharing your masterpiece on social media platforms is just a click away.
Taking the time to troubleshoot any potential issues ensures that your editing sessions are as smooth as possible. Remember, practice makes perfect—so don’t hesitate to experiment with different features and techniques within CapCut. You’ll soon discover all sorts of creative ways to enhance your videos.
So go ahead, unleash your creativity with CapCut! Download your favorite YouTube videos, tackle those edits with confidence, and watch your storytelling skills flourish. Happy editing!
 admin
admin


