Ever felt overwhelmed managing your YouTube channel alone? You're not alone! Granting others access can lighten your load and help you manage your content more effectively. In this guide, we’ll walk you through the process of giving access to your YouTube channel. By the end, you’ll know exactly how to manage permissions and collaborate seamlessly with your team!
Understanding YouTube Channel Permissions

Before diving into the nitty-gritty of granting access, it’s important to understand the types of permissions available on YouTube. Depending on what role you assign, users will have different levels of access to your channel’s features. Let’s break it down:
| Permission Level | Access Rights |
|---|---|
| Owner | Can manage everything including adding or removing others, accessing analytics, and monetizing content. |
| Manager | Can edit and publish content, view analytics, and manage comments but cannot remove the owner. |
| Editor | Can edit existing videos and upload new ones but cannot access settings or view analytics. |
| Viewer | Can only view the channel's performance metrics but can't make any changes. |
Knowing these permission levels helps you make informed decisions when inviting others to collaborate. For instance, if you're just looking for someone to edit your videos, you might want to opt for the 'Editor' role instead of making them a Manager.
Understanding these distinctions keeps your channel secure and ensures that everyone knows their role in the collaboration. Being clear about permissions sets up a good foundation for teamwork and helps avoid any mishaps!
Also Read This: Mastering Image Highlighting Techniques in Canva
Step 1: Sign In to Your YouTube Account

Alright, let’s get started! The very first step in giving access to your YouTube channel is to sign in to your account. If you're already logged in, that's great! If not, don’t worry; we’ll walk you through it.
Here’s what you need to do:
- Open your web browser: Fire up your favorite browser, whether it’s Chrome, Safari, or Firefox.
- Go to YouTube: Type in www.youtube.com in the address bar and hit enter.
- Click on the Sign In button: In the top right corner, you’ll see a “Sign In” button. Click on it.
- Enter your credentials: Input your email address and password associated with your YouTube account. If you have two-factor authentication enabled, follow the prompts to complete that process.
And just like that, you’re in! If you encounter any issues, double-check your credentials or consider resetting your password. It’s crucial to have access to your account before we dive deeper into managing permissions.
Also Read This: How to Remove Unwanted Content and Update Your Behance Profile
Step 2: Navigate to YouTube Studio

Now that you’re signed in to your YouTube account, it’s time to head over to YouTube Studio. This is where all the magic happens when it comes to managing your channel!
Here’s a quick guide to get there:
- Locate your profile icon: In the top right corner of the YouTube homepage, you’ll see your profile picture or icon. Give it a click.
- Select YouTube Studio: In the dropdown menu that appears, find and select “YouTube Studio.” This will take you to the dashboard that allows you to manage your channel.
Once you’re in YouTube Studio, you’ll see an array of options on the left side of the screen, including analytics, videos, comments, and more. This is your command center for everything related to your channel!
With these easy steps, you’re one step closer to managing permissions and sharing access with others who help you with your content. Ready to move on? Let’s do it!
Also Read This: How to Upload Your Images to Getty with Ease
Step 3: Access the Permissions Section
Now that you've set yourself up for success by signing into YouTube Studio, it's time to dive into the permissions section. This area is where all the magic happens when it comes to managing who can access your channel and what they can do with it. Don't worry, I’ll guide you through it!
To access the permissions section, follow these simple steps:
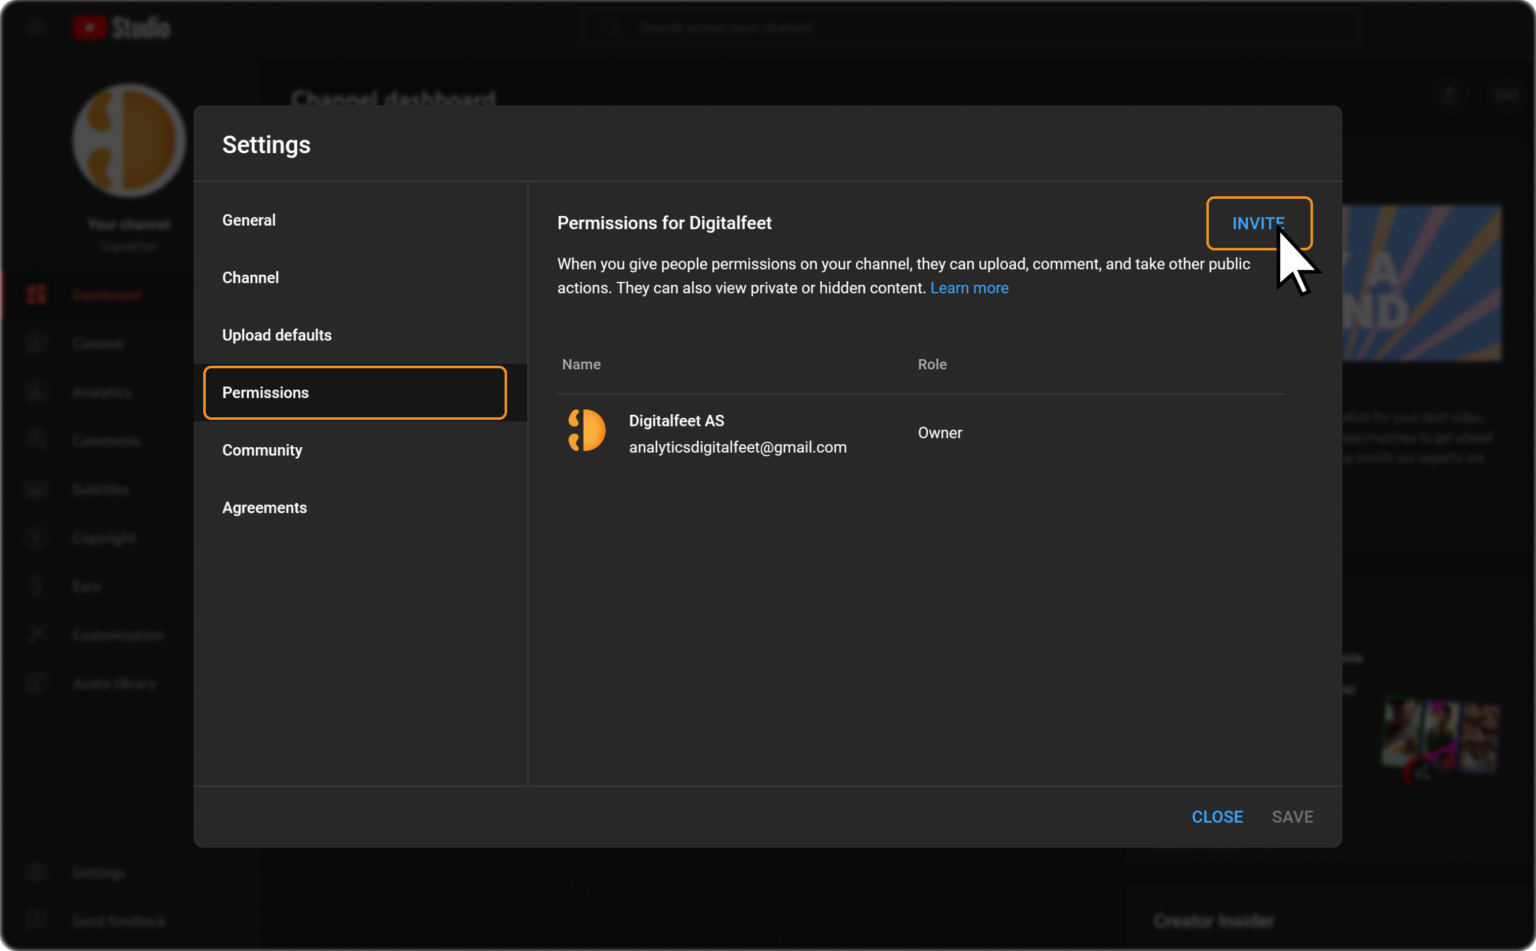
- In the YouTube Studio dashboard, look for the menu on the left side of the screen.
- Scroll down and click on Settings. This will open a new pop-up window.
- In the settings menu, select Permissions. This is where you can view current users and their roles.
You will see a list of people who currently have access to your channel, along with their roles. These roles can range from Viewer to Manager, and each role has different levels of access. Here’s a brief overview of the roles:
| Role | Description |
|---|---|
| Viewer | Can view content and analytics but cannot make changes. |
| Editor | Can edit content and make changes but not manage permissions. |
| Manager | Can edit, manage permissions, and has full access to the channel. |
Understanding the permissions will help you manage your team more effectively and keep your channel running smoothly!
Also Read This: Flightless Skies: Uninstalling Microsoft Flight Simulator 2020
Step 4: Invite Users to Access Your Channel
Once you've accessed the permissions section, it's time to bring in the people who will help you manage your channel. Inviting users is a straightforward process, and I'm here to make it as easy as pie for you!
To invite users, just follow these steps:
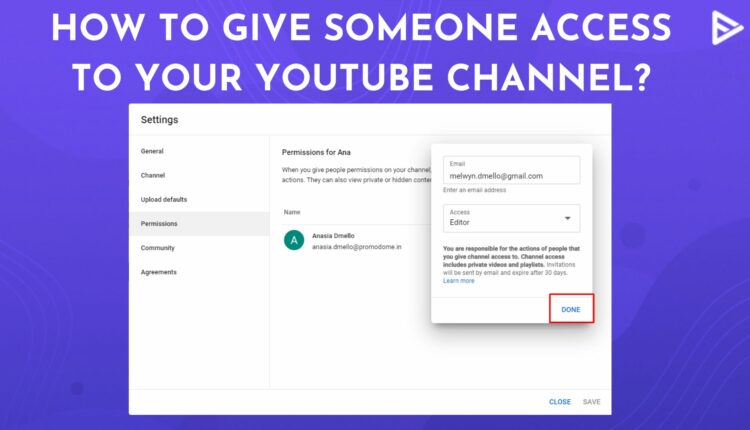
- In the Permissions section, you will notice a button that says Invite. Click on this, and a new window will pop up.
- Enter the email address of the person you want to invite. Make sure it's the email associated with their Google account.
- Choose a role for the user from the dropdown menu. This will determine what they can do with your channel.
- After selecting the role and entering the email, click Send Invitation.
That's it! The user will receive an invitation via email. Once they accept it, they’ll be able to access your channel with the permissions you've granted them. Keep in mind that it's important to invite only those you trust, as they will have access to your channel's valuable content and settings!
Seeing your team grow, and having the right people in the right roles, can transform your YouTube journey. Happy inviting!
Also Read This: How to Slow Down Video Playback Speed on Dailymotion for Learning
Step 5: Choose the Appropriate Permissions Level
Now that you've made it this far in managing your YouTube channel’s permissions, it's time to carefully consider the access level you want to assign to each collaborator. YouTube allows you to choose from several permission levels, each offering different capabilities. Here’s a breakdown of what each level entails:
- Owner: This is the highest level of access. Owners can manage everything, including granting other permissions, editing the channel, and viewing detailed analytics.
- Manager: Managers can edit the channel and manage videos, comments, and playlists, but they can't remove the owner or manage permissions.
- Editor: Editors can add videos and edit existing ones, but they won’t have access to channel settings or permissions management.
- Viewer: Viewers can only watch the videos and comment. They don’t have any editing rights, making this a good option for those who merely want to engage without modifying anything.
When deciding which permission level to assign, think about the role of each collaborator. Are they going to be making big changes to your content, or will they simply need to see what’s happening on the channel? Choose wisely, as these permissions will affect how your team can work together!
Also Read This: How to Save PDFs as Images on iPhone
Step 6: Send the Invitation
Now that you’ve selected the appropriate permissions level, it’s time to send out those invitations! This part is straightforward, but it’s crucial for ensuring your collaborators can start contributing effectively. Here’s how to send the invitation:
- Click on the Add User button after selecting the appropriate permission level.
- Enter the email address of the person you want to invite. Make sure it’s the same email they use for their Google account!
- Review the permissions one last time to ensure you’ve set everything up correctly.
- Hit Send Invitation!
Once you send the invitation, the recipient will receive an email with a link to accept the invitation. It’s that simple! Just a quick note: they’ll need to accept the invitation to start managing the channel, so make sure to follow up with them if you don’t see them active right away. After they accept, they're officially part of your channel management team!
Also Read This: Number of Stock Images Included with Adobe Creative Cloud
Step 7: Managing User Permissions
Now that you've granted access to your YouTube channel, it's time to manage user permissions effectively. This step is crucial for ensuring that the right people can do the right things on your channel. Here’s how you can do it:
- Access the Settings: Navigate to YouTube Studio by clicking on your profile picture and selecting “YouTube Studio”. From there, head over to the left sidebar and click on “Settings”.
- Select Permissions: In the settings menu, click on “Permissions”. You’ll see a list of all the users you’ve invited to manage your channel.
- Review Existing Permissions: Take a moment to assess what each user can do. Permissions can range from basic access, where users can view your analytics and manage comments, to advanced roles that allow them to edit videos, upload new content, or even manage monetization settings.
- Modify Permissions: If you find that a user needs a different level of access, simply click on their role and choose from the options available. Here are the common permission roles:
- Manager: Full access to everything, including making changes to content and channel settings.
- Editor: Can upload videos, edit them, and manage comments but can't set monetization or change channel settings.
- Viewer: Can see channel analytics but can’t make any changes.
Managing user permissions is an ongoing process, and it’s a good idea to regularly review who has access to your channel. This not only keeps your channel secure but also ensures that everyone involved understands their responsibilities!
Conclusion
By following this step-by-step guide on how to give access to your YouTube channel, you've equipped yourself with vital knowledge for managing permissions smoothly. As your channel grows, you may need to delegate responsibilities to different users, making understanding these steps even more crucial.
Remember, the way you manage your permissions can directly impact your channel’s performance. Ensuring the right people have the right access can streamline your content creation process and help maintain your brand's integrity.
What’s next? Keep an eye on your channel’s analytics with your new team members, collaborate on content, and most importantly, have fun creating! If you ever need to adjust permissions in the future, just revisit the steps outlined above. Happy YouTubing!
 admin
admin


