Photopea is a free, web-based tool that mimics the functionality of advanced design software like Photoshop, making it an excellent choice for those who want to create custom designs without the hefty price tag. Whether you're a graphic designer, photographer, or simply someone who loves creating, Photopea offers powerful features right at your fingertips. One key element of custom design in Photopea is learning how to fill the canvas with an image. This allows you to work with your design in a way that feels natural and adaptable to your needs.
Creating custom designs involves selecting the right images, placing them in your project, and adjusting them to suit your creative vision. Photopea simplifies this process, offering intuitive tools that even beginners can grasp quickly. With just a few clicks, you can add images, resize them, and use layers to bring your vision to life. Whether you're designing for social media, marketing materials, or personal projects, Photopea gives you the flexibility to do it all without needing expensive software or advanced skills.
Understanding the Basics of Photopea
Photopea is a powerful online photo editor with a user-friendly interface, designed to cater to a wide range of design tasks. From basic photo editing to intricate design work, Photopea provides a robust set of tools that mimic desktop software like Adobe Photoshop. It's ideal for both beginners and experienced designers who need a free and accessible solution for their projects.
Key features of Photopea include:
- Layer Management: Work with multiple layers for better control and precision.
- Wide File Support: Photopea supports various formats, including PSD, JPG, PNG, and GIF.
- Customizable Interface: Adjust the workspace to suit your preferences, making the process more efficient.
- Advanced Editing Tools: Photopea includes tools like selection, masking, filters, and text editing that are typically found in high-end software.
While it may seem intimidating at first, Photopea’s design tools are straightforward, and there are plenty of tutorials to help you along the way. Once you understand the basics, it becomes an invaluable tool for any design project.
Also Read This: How to View Your LinkedIn Posts and Manage Your Content
Setting Up Your Canvas in Photopea
Before you start adding images and creating your custom design in Photopea, it’s important to set up your canvas correctly. The canvas is the space where all your design elements will come together, and its size will dictate how your project fits and looks. Setting the right dimensions and resolution is key to achieving professional results.
Here’s a quick guide to setting up your canvas in Photopea:
- Step 1: Open Photopea in your browser and click on File > New to start a new project.
- Step 2: Choose your canvas size. For most designs, a standard size like 1920x1080 pixels works well, but you can adjust the dimensions based on your specific needs.
- Step 3: Set the resolution. A resolution of 300 dpi is ideal for print projects, while 72 dpi is perfect for digital designs.
- Step 4: Select a background color or transparency. If you want a transparent background, make sure to select that option. Otherwise, you can choose a color or pattern to fill the background.
Once your canvas is set up, you’re ready to start adding images and design elements. Setting up the right canvas size from the beginning saves you time later and ensures your design fits the intended medium, whether it’s for a website, print, or social media.
Also Read This: How to Download from VectorStock for Free: A Step-by-Step Tutorial
Choosing the Right Image for Your Design
When you're working on a custom design, choosing the right image can make all the difference. An image that's clear, high-quality, and fits the theme of your design can elevate your project and make it stand out. On the other hand, a poor-quality
Here are a few tips for choosing the perfect image:
- Resolution: Choose high-resolution images. A good rule of thumb is to select images that are at least 300 dpi if you plan to print them. For digital designs, 72 dpi is typically sufficient.
- Theme and Style: Make sure the image fits the style and tone of your design. For instance, if you're working on a modern, minimalist design, choose images with clean lines and simple backgrounds.
- File Format: Ensure the image is in a format Photopea supports, like PNG, JPG, or PSD. PNG is ideal for images with transparent backgrounds, while JPGs are great for photographs.
- Color Scheme: Consider how the image’s colors will complement the overall color scheme of your design. Images that clash with the background or other elements can make your design look unbalanced.
Once you've chosen your image, you can easily import it into Photopea and start incorporating it into your project. A good image can serve as the foundation of your design, so take the time to select one that complements your overall vision.
Also Read This: A Complete Guide to Embedding Videos in Your Behance Portfolio
How to Fill the Canvas with an Image in Photopea
Now that you've chosen the right image, the next step is filling the canvas with it in Photopea. Whether you want the image to cover the entire canvas or simply fill a portion of it, Photopea gives you the flexibility to adjust it to your needs. Here's how you can do that:
- Step 1: Open Photopea and your existing canvas. If you haven't set up your canvas yet, follow the earlier steps to do so.
- Step 2: Import the image you want to use by selecting File > Open and choosing your image file from your computer.
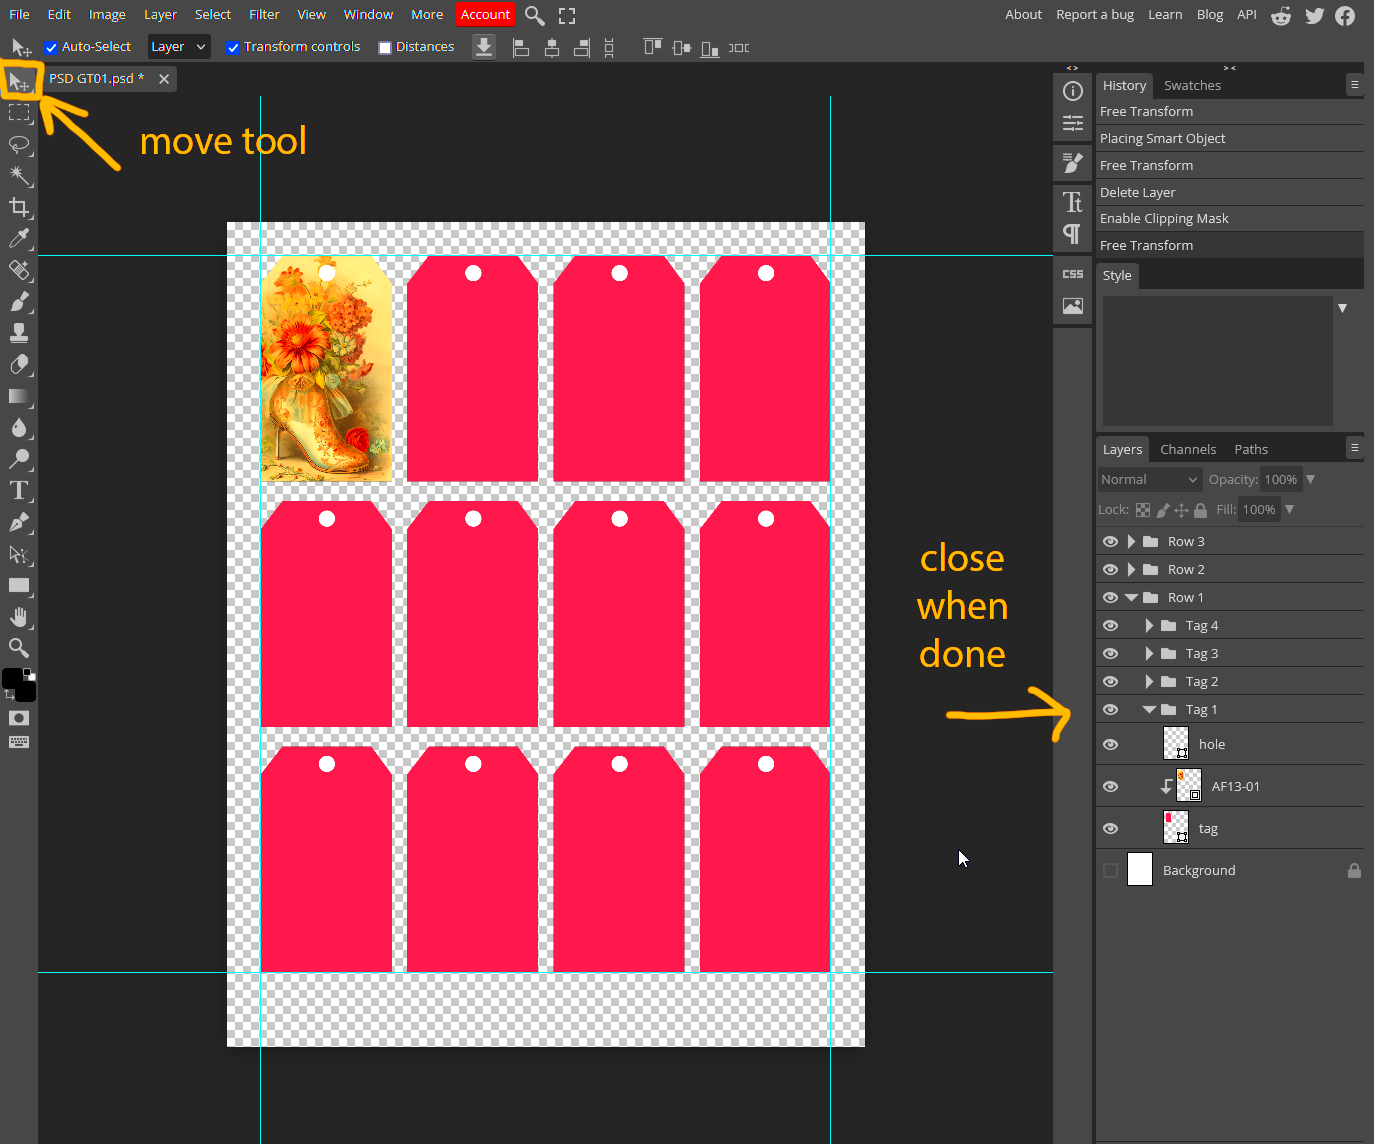
- Step 3: Once the image is open, go to the Move Tool (shortcut: V) to select and move the image.
- Step 4: To make the image fill the canvas, you can resize it by holding down the Shift key while dragging the corners of the image. This will maintain its aspect ratio while expanding it to cover the entire canvas.
- Step 5: If necessary, adjust the image’s placement so that the key elements of the image are positioned well on the canvas. You can also use the Transform options (Ctrl + T) to rotate or scale the image to fit perfectly.
Remember, when filling the canvas, it’s important to balance the image’s size and the composition of your design. You don’t want the image to be stretched out too much, as this can reduce its quality. Once your image fits the canvas, you’re ready to move on to other adjustments!
Also Read This: how do you rotate an image in google docs
Resizing and Adjusting the Image
After placing your image on the canvas, resizing and adjusting it becomes necessary to ensure it works perfectly with your design. In Photopea, you have a range of tools and options to tweak the image size, orientation, and overall appearance to match your vision. Here’s how you can go about resizing and adjusting your image:
- Step 1: Select the image layer in the Layers panel. This ensures that you’re adjusting the right layer without affecting other elements of your design.
- Step 2: To resize the image, go to Edit > Free Transform or press Ctrl + T (Command + T on Mac). This will create a bounding box around the image.
- Step 3: Click and drag the corners of the bounding box to resize the image. Holding down the Shift key while resizing will maintain the aspect ratio, ensuring the image doesn’t get distorted.
- Step 4: If you need to rotate the image, simply hover just outside one of the corners until you see a rotation icon. Then, click and drag to rotate the image to your desired angle.
- Step 5: You can also adjust the image’s position by selecting the Move Tool (shortcut: V) and dragging the image into place.
- Step 6: Use other adjustment options like Brightness/Contrast, Hue/Saturation, or Levels to fine-tune the image’s color and brightness if necessary.
Once your image is resized and adjusted, make sure it aligns well with the other elements in your design. It’s essential to keep the composition balanced, so your design looks cohesive and polished. Photopea’s flexibility makes it easy to adjust every aspect of your image, ensuring it fits seamlessly into your project.
Also Read This: How to Save Images from TikTok
Using Layers for Advanced Editing
When working on custom designs in Photopea, layers are one of the most powerful tools available to you. They allow you to separate different elements of your design, making it easier to manage and edit each part independently. By using layers, you can create complex designs without worrying about ruining other elements, as each piece is contained in its own layer. This is especially useful when you're combining multiple images, text, and shapes, or when you want to make specific adjustments to certain parts of your design.
Here's how to use layers effectively in Photopea:
- Adding Layers: To add a new layer, click on Layer > New > Layer, or simply press Shift + Ctrl + N (Cmd + N on Mac).
- Managing Layers: You can reorder, hide, or delete layers by using the Layers Panel. Drag layers up or down to change their stacking order, or click the eye icon next to a layer to hide or show it.
- Adjusting Layer Opacity: Each layer has an opacity setting, which controls how transparent it is. This is helpful for blending images or creating overlay effects.
- Layer Styles: You can apply various effects like drop shadows, glows, and bevels to a layer by right-clicking the layer and selecting Blending Options.
- Using Layer Masks: Layer masks allow you to hide or reveal parts of a layer without permanently deleting any content. This is essential for non-destructive editing.
By mastering layers in Photopea, you can take your designs to the next level, allowing for detailed adjustments, creative effects, and complex compositions without fear of making irreversible changes.
Also Read This: How to Read Image Metadata to Understand the Source and Details
Exporting Your Design from Photopea
Once you've completed your design, the final step is exporting it in the format you need. Photopea makes it easy to export your designs for both web and print use. Whether you're sharing it online, printing it on a brochure, or using it for a social media campaign, exporting the design properly ensures it looks its best in any medium.
Here’s how to export your design in Photopea:
- Step 1: Make sure all layers are how you want them to appear. If necessary, flatten the image by going to Layer > Flatten Image.
- Step 2: To export the design, click on File > Export As and choose your desired file format. Some popular formats include:
- Step 3: Adjust the export settings based on your needs. For example, if you’re exporting as PNG, make sure the transparency option is selected. If you’re exporting as JPEG, adjust the quality setting.
- Step 4: Once you’re happy with the settings, click Save, and the file will be downloaded to your computer.
| File Format | Best For |
|---|---|
| PNG | Images with transparent backgrounds or high-quality web graphics. |
| JPEG | Photographs or designs that don’t require transparency. |
| GIF | Simple graphics or animated images. |
| PSD | Saving the project to continue editing in the future. |
Choosing the right format is crucial depending on where and how the design will be used. Once exported, your design is ready to be printed or shared with the world!
Also Read This: Can You Make Money on Rumble? Exploring Revenue Opportunities for Content Creators
FAQ
Q1: Can I work with multiple images in Photopea?
Yes! Photopea allows you to import and work with multiple images at once. You can add them as separate layers and adjust each one independently.
Q2: How do I resize an image without losing quality in Photopea?
To resize an image without distorting it, hold down the Shift key while dragging the corners of the image. This will maintain the aspect ratio and prevent it from becoming stretched or pixelated.
Q3: What file formats can I use in Photopea?
Photopea supports a wide range of file formats, including PSD, PNG, JPG, GIF, TIFF, and many others. You can open, edit, and save these formats in the program.
Q4: Can I use Photopea for printing designs?
Yes, Photopea is ideal for creating print designs. When exporting, make sure to use a resolution of 300 dpi for high-quality prints. You can also use CMYK color mode for print projects.
Q5: How do I add text to my design in Photopea?
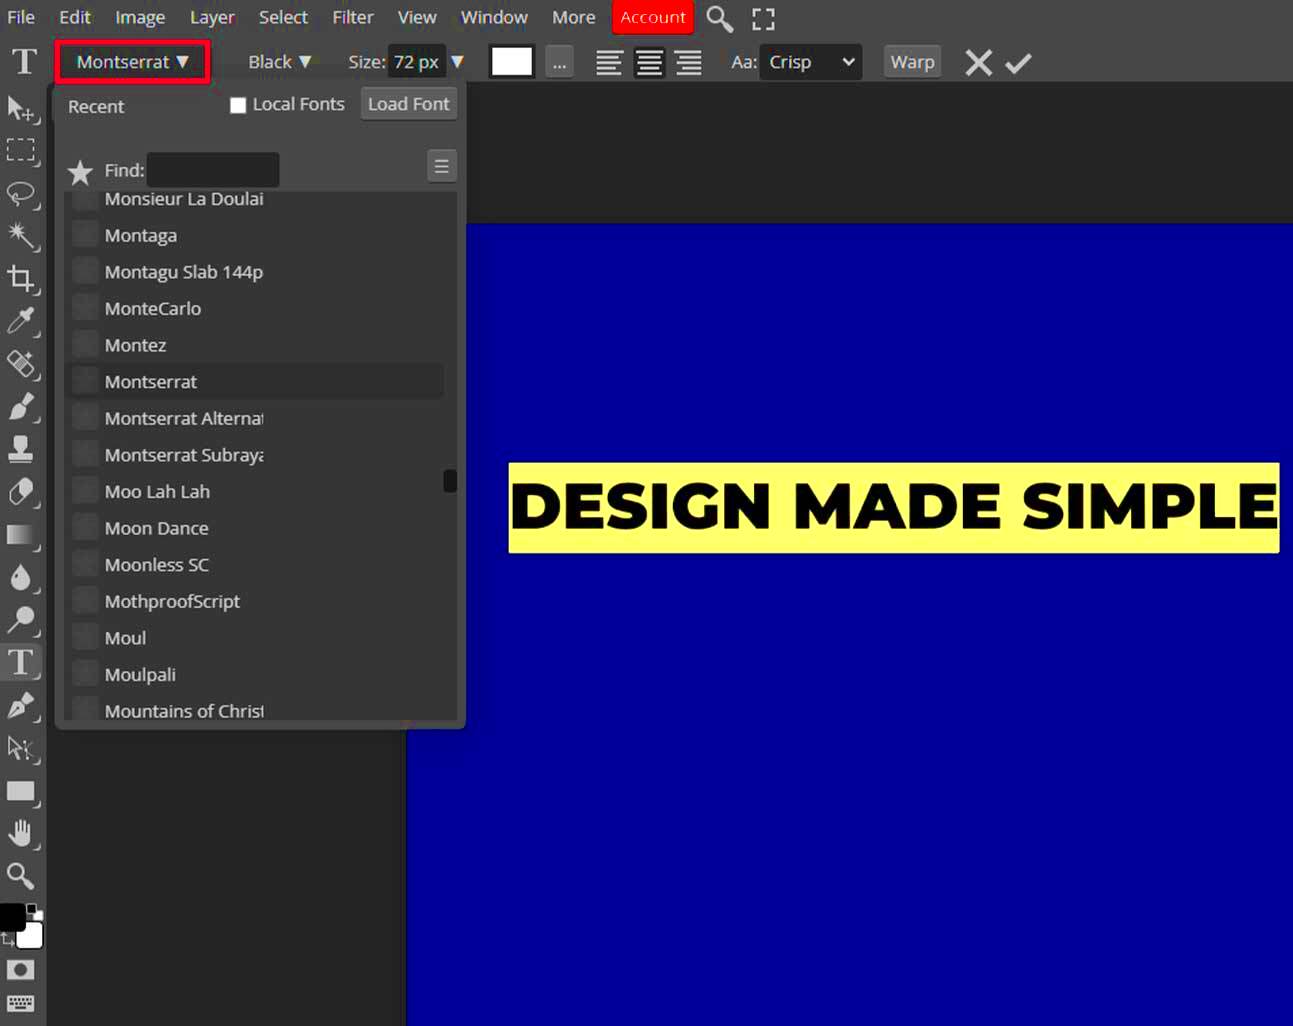
To add text, select the Text Tool from the toolbar, click on the canvas, and start typing. You can adjust the font, size, color, and positioning to suit your design needs.
These FAQs address some common questions, but don't hesitate to explore Photopea's tutorials and documentation for more in-depth guidance!
Conclusion
In conclusion, Photopea offers a robust set of tools for creating custom designs, whether you're working on images for print or digital media. From setting up your canvas and selecting the right images to using layers for advanced editing and exporting your final work, Photopea empowers users to bring their creative ideas to life efficiently. Its user-friendly interface and powerful features make it an excellent choice for both beginners and experienced designers. By following the steps outlined in this guide, you can easily create professional-looking designs with confidence. Whether you're designing for social media, marketing, or personal projects, Photopea provides all the tools you need to succeed.
