Canva is a fantastic graphic design tool that’s perfect for both beginners and seasoned designers. With its user-friendly interface and a plethora of features, it allows anyone to create stunning visuals with ease. One of the coolest features in Canva is the ability to fill shapes with images. This opens up a world of creative possibilities, whether you’re designing a social media post, a presentation, or a flyer. Let’s dive into how you can easily fill shapes with images in Canva!
Step-by-Step Guide to Fill a Shape with an Image
Ready to get started? Here’s a straightforward guide to help you fill a shape with an image in Canva:
- Open Canva: First, log in to your Canva account. If you don’t have one, creating an account is free and takes just a few minutes!
- Create a New Design: Click on the “Create a design” button. Choose the type of project you want to work on, like a social media post or a presentation.
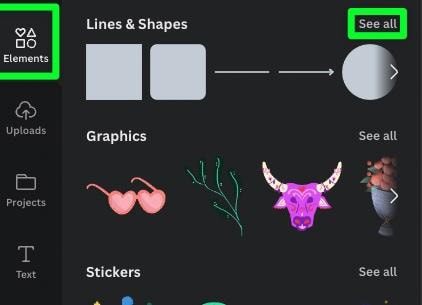
- Add a Shape: On the left sidebar, navigate to the “Elements” tab. Search for “Shapes” and select the shape you want to use. You can choose from circles, squares, triangles, and more. Click on it to add it to your design.
- Resize and Position the Shape: Once you’ve added your shape, you can resize it by dragging the corners. Position it wherever you like on your canvas.
- Select the Shape: Click on the shape to select it. You’ll see a toolbar appear at the top of the screen.
- Fill the Shape with an Image: With the shape selected, click on the “Fill” option in the toolbar. Then, select “Image” from the dropdown menu. You can upload your own image, use one from Canva’s library, or even select from free stock images available in the platform.
- Adjust the Image: After filling the shape, you might want to adjust the image. Click on the shape again, and you’ll see options to crop or reposition the image inside the shape to get the perfect fit.
- Finalize Your Design: Once you’re satisfied with how your shape looks, feel free to add text, additional elements, or modify other aspects of your design. Don’t forget to save your work!
And that’s it! You’ve successfully filled a shape with an image in Canva. This technique can really enhance your designs, making them more engaging and visually appealing. Experiment with different images and shapes to see what unique combinations you can create!
Also Read This: How to Access the Website Editor on Behance Using Behance’s Website Editing Tools
3. Tips for Choosing the Right Image
Choosing the right image to fill your shape in Canva can make a huge difference in the overall look and feel of your design. Here are some tips to help you select the perfect image:
- Match the Theme: Ensure the image aligns with the overall theme of your design. For example, if you’re creating a summer flyer, go for bright, vibrant images that evoke warmth and fun.
- High Resolution: Always opt for high-resolution images. Blurry or pixelated pictures can distract from your message. Aim for images that are at least 300 DPI for print and 72 DPI for web.
- Focus on Composition: Consider the composition of the image. Look for images where the main subject is clear and not too busy. This helps maintain clarity when placed within a shape.
- Color Palette: Think about the colors in your image. They should complement the rest of your design. You can use Canva’s color palette tool to ensure everything harmonizes beautifully.
- Emotion and Engagement: Choose images that evoke emotion or tell a story. An image that connects with viewers can make your design much more impactful.
To find the right image, consider browsing Canva's extensive library or uploading your own. Remember, it’s all about enhancing your design, so take your time to choose wisely!
Also Read This: Mastering the Art of Selling Stock Photos on Adobe
4. Adjusting and Editing Your Image Within the Shape
Once you’ve selected your image, adjusting and editing it within the shape is where the magic happens. Here’s how to do it effectively:
- Resize and Position: After placing your image in the shape, you can easily resize or reposition it. Click on the image, and drag the corners to scale it up or down. Use the arrow keys for fine-tuning its position.
- Crop for Effect: Sometimes, you might want to focus on a specific part of the image. Use the crop tool to select the area you want to show. This is especially useful if your image has important details that need highlighting.
- Apply Filters: Canva offers various filters to enhance your image. Experiment with brightness, contrast, and saturation to make your image pop. A quick adjustment can turn a good image into a great one!
- Adjust Transparency: If you want your image to blend seamlessly with the shape, consider adjusting its transparency. This can create beautiful overlays if you're layering images or text on top.
- Experiment with Effects: Don’t hesitate to explore Canva’s effects, like shadows or glow. These can add depth to your design and make your image stand out within the shape.
By following these tips for adjusting and editing, you can ensure your image not only fits the shape but also elevates your entire design. Remember, creativity is key, so don’t be afraid to experiment until you find what works best for you!
Also Read This: Joining YouTubers in Roblox for Fun Collaborations
5. Common Issues and Troubleshooting
When you’re working in Canva, it’s not uncommon to run into a few hiccups along the way, especially when it comes to filling shapes with images. Don’t worry, though; most issues are pretty easy to troubleshoot. Here are some of the common pitfalls and how to solve them:
- Image Not Filling the Shape Properly: If your image doesn’t fill the shape as expected, check if you’ve selected the correct image. Sometimes, you might end up with a smaller image that doesn’t cover the entire shape. To fix this, try using an image with a higher resolution or resize the image by dragging the corners until it fits perfectly.
- Shape Not Accepting Image: If you find that your shape is not accepting an image at all, ensure that you’ve locked the shape layer. Unlocked layers can sometimes interfere with the layering of elements. Simply click on the layer and check the lock icon in the toolbar.
- Image Appearing Blurry: Using low-resolution images can lead to a blurry appearance once filled into a shape. Always opt for images that are at least 300 DPI (dots per inch) for better clarity. You can find high-quality images on platforms like Unsplash or Pexels.
- Color Adjustments Not Showing: If you’ve applied a color adjustment to your shape and it’s not reflecting on the image, check your layer settings. Color adjustments often apply to the selected layer, so make sure the shape layer is active when making those adjustments.
By keeping these common issues in mind, you’ll be better prepared to navigate any obstacles that may arise while filling shapes with images in Canva. Remember, practice makes perfect, and the more you play around with the tools, the more comfortable you’ll become!
6. Conclusion and Additional Resources
Filling shapes with images in Canva is a fantastic way to enhance your designs and make them stand out. With just a few simple steps, you can create eye-catching visuals that convey your message effectively. To recap:
- Choose the right shape from the elements panel.
- Upload or select an image that aligns with your design.
- Fill the shape with your image and adjust as necessary.
If you’re eager to dive deeper into the world of Canva, here are some additional resources to enhance your skills:
- Canva Design School: This is an excellent starting point for learning new techniques and design principles. You can find tutorials and courses tailored to different skill levels.
- YouTube Tutorials: There are countless tutorials available on YouTube, covering everything from basic shape filling to advanced design techniques. Channels like “Design with Canva” offer step-by-step guides.
- Canva Community: Join the Canva Community forums and Facebook groups where designers share tips, tricks, and get feedback on their work. It’s a great place to learn from others' experiences.
So, roll up your sleeves and start experimenting! The possibilities in Canva are endless, and with a bit of creativity, you can produce stunning visuals that will impress your audience. Happy designing!
 admin
admin