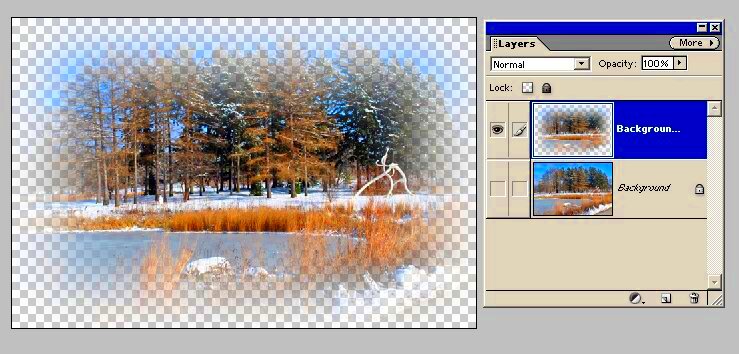
Fading the edges of an image in Photoshop is a simple yet effective technique that can help create beautiful transitions and soften the borders of your visuals. Whether you're looking to blend an image into a background or simply want a more polished look, fading edges can add depth and subtlety to your design. This effect is particularly useful for creating a soft vignette around your
Step-by-Step Guide to Fading Image Edges in Photoshop

Fading edges in Photoshop involves a few simple steps, but you can experiment with different settings to achieve the look that suits your image best. Here’s a straightforward guide to get you started:
- Open Your Image: Start by opening the image you want to work with in Photoshop. You can do this by selecting File > Open and browsing to your file location.
- Create a New Layer: Go to Layer > New > Layer. This step ensures that you don’t alter your original image.
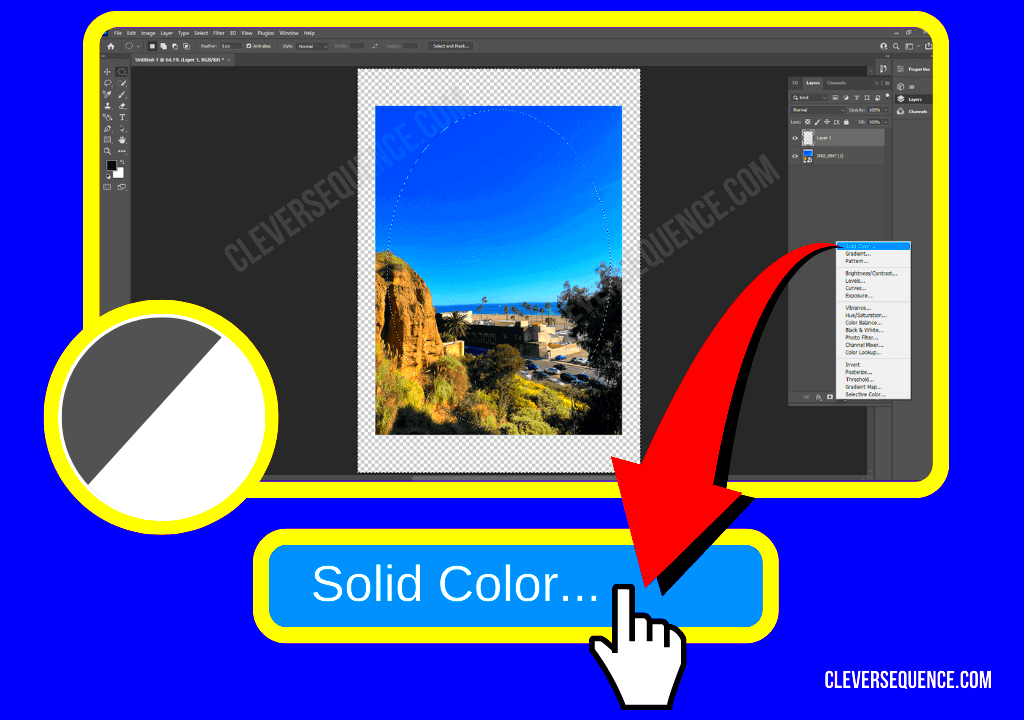
- Apply a Gradient: Choose the Gradient Tool from the toolbar (G). In the top menu, select a radial gradient (a circle-like gradient) for a smooth fade effect.
- Adjust the Gradient: Click and drag on the canvas to apply the gradient. Start from the center and drag towards the edge, adjusting the gradient to fit the desired fade effect.
- Change Layer Mode: In the Layers panel, change the layer blending mode to something like Soft Light or Overlay for a more subtle fade.
- Mask the Layer: If needed, add a layer mask to refine the fading effect. Use the brush tool to soften or remove areas where the gradient should not be visible.
Experiment with these settings to perfect your fade effect. You can always go back and adjust the gradient or layer mask to make the fade more pronounced or subtle.
Also Read This: Upscaling AI Images in Photoshop
Using Layer Masks for Fading Edges

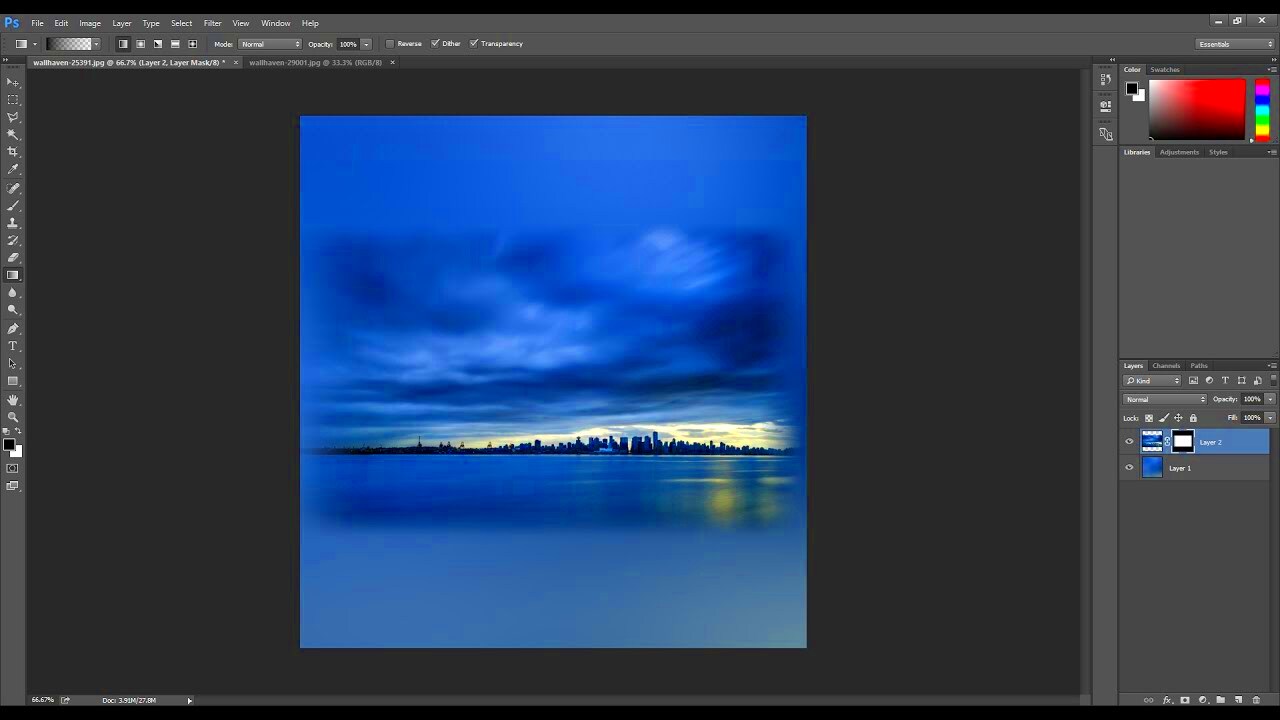
Layer masks are one of the most powerful tools in Photoshop when it comes to fading edges. With a layer mask, you can hide or reveal parts of a layer without permanently deleting any image data. This flexibility makes it easy to create smooth transitions and control exactly how the edges of your image fade. Here’s how to use layer masks for this effect:
- Create a New Layer Mask: After selecting the layer with your image, click on the Add Layer Mask button at the bottom of the Layers panel. This will add a white mask, which means the entire layer is visible.
- Select the Brush Tool: Choose the Brush Tool (B) from the toolbar. Adjust the brush size and softness to fit the edges you want to fade.
- Paint on the Layer Mask: With the mask selected, start painting with black on the areas where you want to create a fade effect. The black paint hides the image, creating a soft fade. Adjust the opacity of your brush for a more gradual effect.
- Refine the Mask: Switch between black and white brushes to fine-tune the mask. White will bring back parts of the image, while black continues to fade the edges. Use different brush opacities to make the transition smoother.
Layer masks give you full control over the fading process. You can always adjust the mask by painting over it again or using the Gaussian Blur filter to soften the fade even more. This method is especially useful when you want to create a more organic, non-destructive fade effect.
Also Read This: How to Print an Image to a Specific Size for Accurate Dimensions
Adjusting Opacity and Brush Settings

When it comes to fading the edges of an image in Photoshop, adjusting the opacity and brush settings can make a world of difference. By tweaking these settings, you can control how soft or intense the fade effect looks, giving you more flexibility and precision. Whether you're using a brush on a layer mask or applying a gradient, these adjustments can ensure your fade looks seamless and natural. Here's how you can get the most out of opacity and brush settings:
- Adjusting Brush Opacity: When you select the Brush Tool (B) and start painting on a layer mask, the opacity controls how much of the image is hidden. Lowering the opacity creates a subtle fade, while higher opacity makes the effect more defined. You can adjust the brush opacity at the top of your screen or by using the number keys on your keyboard (press '1' for 10%, '2' for 20%, and so on).
- Softness of the Brush: The softness of your brush determines how smooth the transition from visible to faded areas will be. A soft brush (with a low hardness setting) creates a smooth, gradual fade. To adjust this, go to the brush settings and reduce the hardness to around 0-20% for a gentle fade.
- Flow vs. Opacity: While opacity controls the overall transparency of the brush, flow controls how much paint is applied with each stroke. A low flow gives you a more controlled fade that you can build up gradually. Higher flow results in a more immediate and stronger effect.
- Brush Size: Don’t forget to adjust the size of the brush as well. A larger brush size will cover more area and create a wider fade, while a smaller brush gives you more precision around the edges. You can adjust the size by pressing the left or right bracket keys on your keyboard.
By adjusting these settings, you can control exactly how the fade looks, making it as subtle or pronounced as you need for your project.
Also Read This: Understanding iStock Images A Beginner’s Guide to Their Collections
Creating a Custom Gradient for Edge Fading

Custom gradients are another great way to fade the edges of your image in Photoshop. Gradients allow you to create a smooth, controlled transition from one color (or transparency) to another, which is perfect for edge fading. With custom gradients, you can fine-tune the transition to fit your image perfectly, giving it a more artistic or professional look. Here’s how you can create a custom gradient for edge fading:
- Select the Gradient Tool: First, select the Gradient Tool (G) from the toolbar. In the top menu, click on the gradient preview to open the Gradient Editor.
- Create Your Custom Gradient: In the Gradient Editor, you can adjust the gradient stops. Drag the left stop to make the fade begin earlier or change its color. The right stop controls where the fade ends, so you can adjust this for a smoother transition to transparency.
- Choose Transparency: For edge fading, you’ll likely want to end the gradient in transparency. To do this, set the right gradient stop to “Transparent” by clicking on the color box and selecting “Opacity Stops.” This will create a fade effect where the image edges gradually become invisible.
- Apply the Gradient: Once you’ve created your custom gradient, select the layer you want to apply it to. Click and drag on the canvas to apply the gradient. Start from the center and drag toward the edge of the image to create the fade. You can experiment with the angle and length of your drag to adjust how soft or strong the fade is.
Custom gradients give you a lot of control over the fade’s appearance. You can fine-tune the colors, opacity, and direction to create the perfect transition for your image edges.
Also Read This: How to Apply Foundation Step-by-Step for Beginners
Using Filters for Edge Fading
Filters can be a quick and effective way to create a soft fade around the edges of your image. By using blur or distortion filters, you can achieve smooth transitions that look natural and professional. One of the most popular filters for fading edges is the Gaussian Blur, but there are other options that can provide unique effects. Here's how to use filters for edge fading in Photoshop:
- Gaussian Blur for a Soft Fade: The Gaussian Blur filter is commonly used to soften the edges of an image. To use it, first, create a duplicate of your image layer. Then, select the duplicate layer and go to Filter > Blur > Gaussian Blur. Adjust the Radius slider to control how much blur is applied. A higher radius will create a more pronounced fade.
- Using the Lens Blur Filter: If you want a more complex blur effect that mimics a shallow depth of field, the Lens Blur filter is a great choice. Apply it in the same way as Gaussian Blur but with more refined settings for a realistic out-of-focus edge effect.
- Motion Blur for Dynamic Fading: Motion Blur can create a sense of movement in your fade. It’s especially useful if you're looking to give the image edges a direction. Go to Filter > Blur > Motion Blur and adjust the angle and distance to simulate motion while fading the edges.
- Radial Blur for Circular Fade: Radial Blur is perfect for creating a circular fade effect from the center of the image. This can give your image a soft, focus-like appearance where the edges blur into nothingness. Select Filter > Blur > Radial Blur and choose Zoom or Spin for the effect.
Using filters is a fast and effective way to achieve a beautiful, soft fade effect. You can experiment with different blur options to create unique and artistic edge fading for your images.
Also Read This: How to Insert an Image in Blackboard Discussion
Common Mistakes to Avoid When Fading Image Edges
Fading edges in Photoshop can be a great way to enhance your images, but it's easy to make mistakes that can ruin the effect. Whether you’re a beginner or a seasoned user, being aware of these common pitfalls can help you avoid frustration and create a more polished result. Here’s a list of the most common mistakes to watch out for:
- Overdoing the Fade: One of the most common mistakes is over-applying the fade. Too much fading can make your image look unnatural or poorly blended. Aim for a subtle transition, especially when using layer masks or gradients. Start with a low opacity and gradually increase it if necessary.
- Harsh Transitions: If the fade from visible to transparent is too abrupt, the effect will look sharp and unrealistic. To avoid this, use soft, gradual brushes or adjust the gradient to create smoother transitions. You can also apply a Gaussian Blur to soften the edges of the mask.
- Neglecting the Background: The fade should blend smoothly into the background. If your image doesn’t match the surrounding colors or tones, the effect will be jarring. Make sure to choose gradients or brush settings that complement your background for a seamless transition.
- Using Inconsistent Brush Settings: If you’re using the brush tool on a layer mask, it’s easy to forget about brush hardness or opacity settings. A soft brush is key to a natural fade, and inconsistent settings can create patchy or uneven transitions.
- Ignoring the Image’s Focus: The fade effect should not distract from the focal point of your image. Avoid fading the central subject too much, as it can reduce the impact of the image. The edges should fade gently without overwhelming the core of the composition.
By being mindful of these common mistakes, you can ensure your image fading looks clean, professional, and visually appealing.
Also Read This: How to Make an Image Smaller Using CSS
FAQ
Here are answers to some of the most frequently asked questions about fading image edges in Photoshop:
- 1. What tools can I use to fade edges in Photoshop?
- You can use several tools to fade edges, including the Brush Tool, Gradient Tool, and Layer Masks. Filters like Gaussian Blur and Lens Blur also work well for this effect.
- 2. How do I ensure a smooth fade?
- To create a smooth fade, use a soft brush with low opacity or a gradient with a soft transition. Be sure to adjust the settings to avoid harsh lines or abrupt changes in opacity.
- 3. Can I fade edges non-destructively?
- Yes, you can. The best way to do this is by using layer masks. This allows you to hide parts of the image without permanently altering the original content.
- 4. How do I adjust the intensity of the fade?
- The intensity of the fade can be controlled by adjusting the brush opacity, gradient settings, or filter radius. You can also fine-tune it using the layer’s blending mode.
- 5. What is the best method for fading edges in a portrait image?
- For portraits, use a soft brush with low opacity on a layer mask. Make sure to keep the focus on the subject while gently fading the background. A subtle gradient or blur filter can also help achieve a nice effect.
Conclusion
Fading the edges of an image in Photoshop is a simple yet powerful way to enhance your photos and designs. Whether you're using gradients, layer masks, or filters, the key is to keep the fade subtle and smooth. Avoid common mistakes like over-fading or harsh transitions, and always aim for a seamless blend between the subject and background. With practice and the right techniques, you can achieve a polished, professional result that enhances the overall look of your image. Remember, the goal is to create a natural transition that complements your design, not distract from it.


