Are you tired of searching for that perfect song or podcast episode only to find it buried in a YouTube video? If you're using a Chromebook, extracting audio from YouTube videos can be a breeze! In this post, we'll dive into why you might want to extract audio and how to do it effortlessly. Let’s get started!
Why Extract Audio from YouTube Videos?
There are plenty of reasons why someone might want to extract audio from YouTube videos. Here are just a few:
- Convenience: Having audio files allows you to listen on the go, without needing to stream the video.
- Offline Listening: Save your favorite tracks or podcasts for when you’re offline, such as during a long flight or while hiking.
- Focus on Content: Sometimes, you might only want the audio, especially if you're interested in lectures or tutorials.
- Create Playlists: Build custom playlists of your favorite audio content without the distraction of visuals.
- Personal Use: Use the audio for personal projects, like making a mashup or remix.
For example, imagine you found an insightful interview on YouTube that you’d love to listen to while cooking dinner. By extracting the audio, you can enjoy the conversation without being glued to the screen. Plus, it saves valuable data if you’re on a limited plan!
Essentially, extracting audio gives you flexibility and convenience. With a few simple steps, you can transform lengthy videos into easy-to-access audio files. So, whether you're a student looking for lecture notes, a music enthusiast wanting to save a track, or just someone who enjoys podcasts, extracting audio from YouTube videos can be a game changer!
Also Read This: Can You Block Channels on YouTube TV and How to Manage Your Preferences
3. Tools and Software Needed for Audio Extraction
Extracting audio from YouTube videos on a Chromebook is a straightforward process, but it does require the right tools. Fortunately, there are several user-friendly options available that can help you get the job done without the hassle. Let's dive into some of the most effective tools and software you can use:
- Online Audio Extractors: Websites like ytmp3.cc and Online Video Converter allow you to paste the YouTube link and convert it to audio format easily. They are typically free, and you don't need to install any software.
- Chrome Extensions: Extensions like YouTube to MP3 Converter can be added directly to your browser. They integrate seamlessly into your browsing experience, allowing you to convert videos with a single click.
- Desktop Applications: While Chromebooks primarily use web-based applications, some Android apps are compatible. Apps like YouTube to MP3 Converter by Freemake can be downloaded via the Google Play Store, providing an easy way to extract audio.
- Command Line Tools: For tech-savvy users, tools like youtube-dl can be run in a Linux environment or via Crostini on your Chromebook. This tool allows for advanced options and batch downloads if you're extracting audio from multiple videos.
Each of these tools has its strengths, so you can choose the one that best fits your needs. Whether you prefer the simplicity of online converters or the power of command line tools, there's something for everyone!
Also Read This: How to Respond to Comments on YouTube: Best Practices
4. Step-by-Step Guide to Extracting Audio on a Chromebook
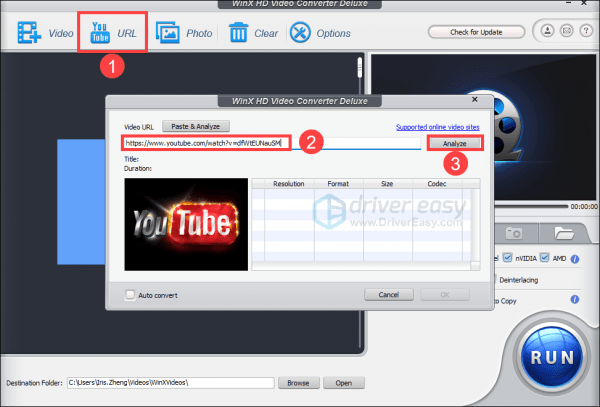
Ready to extract audio from a YouTube video on your Chromebook? Let’s break it down into easy-to-follow steps. We’ll use an online audio extractor as an example since it’s the most straightforward method.
- Find Your Video: Start by opening your Chrome browser and navigating to YouTube. Find the video from which you want to extract audio.
- Copy the Video URL: Click on the address bar at the top, highlight the entire link, and copy it (Ctrl + C).
- Visit an Audio Extractor Site: Open a new tab and go to an audio extraction website, such as ytmp3.cc.
- Paste the URL: In the converter's input box, paste the video URL you copied (Ctrl + V).
- Select Audio Format: Choose your desired format, typically MP3 is the most compatible and widely used.
- Start the Conversion: Click the “Convert” button. The site will process the video, which usually takes just a few moments.
- Download the Audio: Once the conversion is complete, a download link will appear. Click on it to save the audio file to your Chromebook.
And voilà! You’ve successfully extracted audio from a YouTube video. You can find the downloaded file in your Chromebook's Downloads folder, ready to listen to whenever you like. This method is quick, efficient, and doesn’t require any additional software installation.
Give it a try, and soon you'll be extracting audio from all your favorite videos with ease!
Also Read This: How to Skip Commercials on YouTube TV: A Quick Method
5. Using Online Services for Audio Extraction
If you're looking for a quick and hassle-free way to extract audio from YouTube videos, online services can be a fantastic option. These platforms allow you to convert and download audio files directly from your browser without needing to install any software. Here’s a step-by-step guide on how to do it:
1. Choose a Reliable Online Service
There are several online services available, but it's essential to pick one that's both reliable and user-friendly. Some popular choices include:
- YTMP3 - Simple interface that converts videos to MP3.
- YTMP4 - Allows you to convert to different formats.
- FLVTO - Offers additional features like video downloads.
2. Copy the YouTube Video Link
Navigate to YouTube and find the video from which you want to extract audio. Click on the address bar of your browser and copy the URL. It should look something like this: https://www.youtube.com/watch?v=example.
3. Paste the Link in the Online Service
Head over to the chosen online service. You'll typically see a designated field where you can paste the copied link. Click on the field and use Ctrl + V (or Command + V on a Mac) to paste in the URL.
4. Select Your Desired Format
Most services will give you the option to choose the format for your audio file. MP3 is the most common and widely supported format, but some services may also offer options like WAV or AAC.
5. Start the Conversion
Once you've selected the format, there will usually be a button labeled something like “Convert” or “Download.” Click it, and the service will begin processing your request. This may take a few moments, depending on the length of the video.
6. Download Your Audio File
After the conversion is complete, a download link will appear. Simply click on it to save the audio file to your Chromebook. You can now enjoy your favorite tunes or sound bites wherever you like!
Also Read This: How Much Does Diesel Creek Make on YouTube? Revenue Breakdown
6. Using Chrome Extensions to Extract Audio
Another convenient way to extract audio from YouTube videos is by using Chrome extensions. These tools are integrated directly into your browser, making the process seamless and efficient. Here’s how to get started:
1. Find and Install a Chrome Extension
There are several Chrome extensions available that can help you extract audio from YouTube. Some of the most popular ones include:
- Video DownloadHelper: This extension lets you download videos and audio from many sites, including YouTube.
- Audio Downloader Prime: A user-friendly tool specifically designed for audio extraction.
- YouTube MP3 Downloader: Focused solely on converting YouTube videos to MP3 format.
To install an extension, go to the Chrome Web Store, search for the extension by name, and click “Add to Chrome.” Follow the prompts to complete the installation.
2. Navigate to a YouTube Video
After installing your chosen extension, go to YouTube and find the video from which you want to extract audio. Play the video briefly to ensure the extension recognizes it.
3. Use the Extension to Extract Audio
Once the video is playing, look for the extension icon in the upper right corner of your browser. Click on it, and it will present you with options to download the audio. Choose your preferred format, typically MP3, and confirm your selection.
4. Download the Audio File
The extension will start processing your download. Once it’s finished, a download link will appear, allowing you to save the audio file directly to your Chromebook. Enjoy your audio extraction experience!
Using online services or Chrome extensions makes it incredibly easy to extract audio from YouTube videos, giving you the freedom to enjoy your favorite content on the go!
Also Read This: How to See Someone's Subscribers on YouTube: A Quick Guide
7. Tips for High-Quality Audio Extraction
When it comes to extracting audio from YouTube videos, quality is key. Nobody wants to end up with muffled sounds or distorted tracks, right? Here are some handy tips to ensure you're getting the best audio possible:
- Choose High-Quality Videos: Start with videos that have high-quality audio. Look for uploads that are in HD (720p or above). The better the original video quality, the better your audio extraction will be.
- Use Reliable Tools: Not all audio extraction tools are created equal. Look for reputable online converters or Chrome extensions that have positive reviews. Tools like 4K Video Downloader or YTMP3 are often recommended for their reliability and ease of use.
- Adjust Audio Settings: If the tool you’re using allows it, check the audio settings. Opt for formats like MP3 or WAV, as they balance quality and file size effectively. Higher bitrates (like 256 kbps or 320 kbps) will give you crisp sound.
- Check Your Internet Connection: A stable and fast internet connection will help in maintaining the quality of the audio being processed. A shaky connection can lead to interruptions or lower quality audio.
- Edit After Extraction: Don’t hesitate to use audio editing software afterward to enhance your audio. Tools like Audacity allow you to edit the audio, remove background noise, and even adjust levels for a polished end product.
By following these tips, you’ll be well on your way to extracting high-quality audio from your favorite YouTube videos. Happy listening!
8. Legal Considerations When Extracting Audio
While extracting audio can be a fun and practical way to enjoy your favorite content, it’s essential to navigate the legal waters carefully. Here are some key points to consider:
- Copyright Laws: Most YouTube videos are protected by copyright. Extracting audio without permission can infringe on the creator's rights. Always check if the content is copyrighted or if the creator has provided explicit permission to use their material.
- Use of Content: If you plan to use the extracted audio for personal enjoyment, you’re generally in a safer zone. However, if you intend to use it for commercial purposes or share it publicly, you must obtain the necessary permissions.
- Creative Commons Licenses: Some videos are uploaded under Creative Commons licenses, which allow for certain uses. Check if the video has this designation and follow the specific guidelines outlined in the license.
- Fair Use Policy: In some cases, you might be able to invoke fair use—especially for educational or commentary purposes—though this can be tricky and varies by jurisdiction. When in doubt, consult a legal expert.
- Consider Alternatives: Instead of extracting audio, consider looking for audio that is explicitly licensed for reuse. Websites like Free Music Archive or Incompetech offer music and sounds that can be used freely in your projects.
Staying informed about these legal considerations will help you enjoy your audio extraction activities while respecting the rights of content creators. Always err on the side of caution, and you’ll keep it all above board!
 admin
admin


