Have you ever watched a YouTube video and found yourself squinting at the screen, trying to decipher what's being said? You're not alone! YouTube captions can transform your viewing experience. They not only provide a written version of the spoken content but also make videos accessible to a wider audience, including those with hearing impairments. In this post, we'll explore how to edit captions effectively and why it's essential for every content creator to prioritize accessibility.
Importance of Accessibility in Video Content
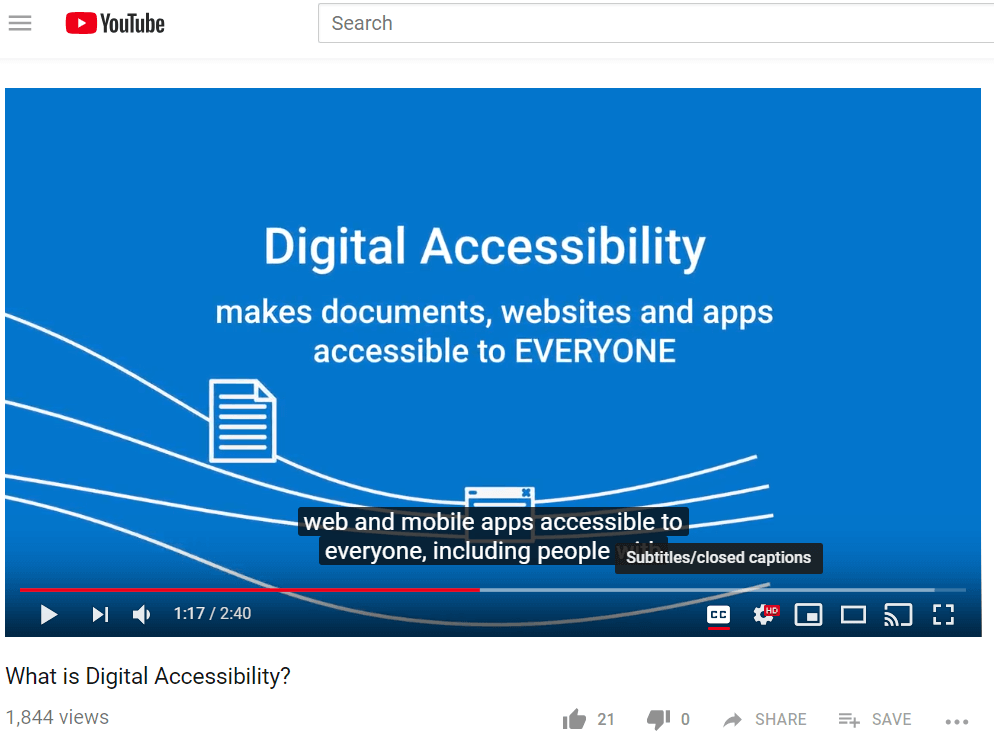
Imagine this: you're at a coffee shop, and you want to watch a tutorial on how to make the perfect latte. The problem? It's too noisy to hear the video. This is where captions come in. By including accurate and synced captions, you're ensuring that viewers in similar situations can still enjoy your content.
Here are some key reasons why accessibility in video content is crucial:
- Inclusivity: Captions allow people with hearing impairments to engage with your videos. According to the World Health Organization, over 5% of the world's population experiences disabling hearing loss. By editing captions, you're opening the door to a more inclusive audience.
- Better Comprehension: Captions can help non-native speakers and those learning a new language follow along more easily. Seeing the words while hearing them makes it easier to grasp the content. This dual-channel engagement enhances understanding.
- SEO Benefits: Edited captions can improve your video's searchability. Search engines can index the text from captions, potentially boosting your video’s visibility on platforms like Google and YouTube itself.
- Capturing Attention: In today's fast-paced world, viewers often skim through videos or mute them altogether while multitasking. Captions draw attention to the content, encouraging viewers to stay engaged even without sound.
- Legal Compliance: Depending on your location, there may be legal requirements for accessibility in your content. Failing to provide captions could result in penalties or exclusion from certain platforms.
So, the next time you’re creating a video, think about all the people you might be missing out on by not including or editing captions. It’s not just about making your video accessible; it’s about creating a more connected community where everyone can participate, learn, and enjoy your content.
Also Read This: How to Upload on YouTube from iPhone Quickly and Easily
3. Step-by-Step Guide to Editing Captions
Editing captions on your YouTube videos is a straightforward process that significantly enhances accessibility for your audience. Let’s break it down into easy steps:
- Log into Your YouTube Account: Start by visiting the YouTube website and logging into your account. Make sure you’re using the account that uploaded the video you want to edit.
- Navigate to YouTube Studio: Click on your profile picture in the top right corner, then select “YouTube Studio” from the dropdown menu. This is your hub for managing your video content.
- Find Your Video: On the left sidebar, click on “Content.” You’ll see a list of all your uploaded videos. Find the video for which you want to edit the captions.
- Access the Subtitles Section: Click on the video title or thumbnail to open the video details page. On the left side, find and click on “Subtitles.”
- Select the Language: If you’ve already added captions, you’ll see the languages listed. Click on the language you want to edit. If you haven’t added captions yet, you can click “Add” to create new ones.
- Edit the Captions: Here’s where the fun begins! Click on “Edit” next to the caption track. You can now see the text displayed alongside the video timeline. Make any necessary adjustments to the timings, spelling, or phrasing to improve clarity and accuracy.
- Use the Playback Feature: To ensure your edits are in sync with the video, use the playback feature to preview your changes. This will help you catch any mistakes and make sure everything flows smoothly.
- Save Your Changes: Don’t forget to hit “Publish” once you’re happy with your edits. Your changes will be live, making your video more accessible to those who rely on captions.
And voilà! You’ve just edited your video captions. Remember, this process isn’t just about correcting mistakes; it’s about making your content more engaging and inclusive for everyone.
Also Read This: What Adblocker Works on YouTube in 2024? Best Options for Blocking Ads
4. Tools and Features for Caption Editing in YouTube
YouTube provides a robust set of tools and features to enhance your caption editing experience. Let’s take a closer look at what’s available:
- Auto-Generated Captions: One of YouTube's standout features is its ability to automatically generate captions using speech recognition technology. While not perfect, this tool is a great starting point that you can then refine.
- Editing Interface: The editing interface allows you to view the video alongside the captions, making it easy to make real-time adjustments. You can drag and drop text segments to adjust timing and make edits on the fly.
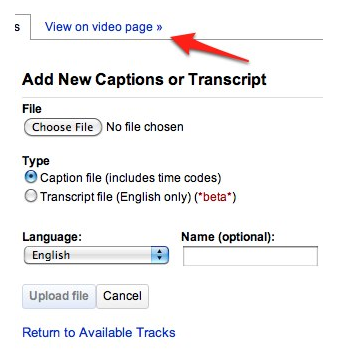
- Caption Formats: YouTube supports various caption formats, including SRT and VTT. This flexibility means you can upload captions created in external software, which can be beneficial for those who prefer to work offline.
- Multi-Language Support: If your audience is diverse, YouTube allows you to add captions in multiple languages. Simply click “Add Language” and provide the translations to cater to a global audience.
- Collaborative Editing: If you work with a team, you can collaborate on caption editing. By sharing the video with team members, each person can contribute to improving the caption quality.
- Analytics on Captions: YouTube also provides insights on how viewers interact with your captions. This will give you a sense of whether people are using them and how effective they are.
By leveraging these tools and features, you can make your video content more accessible, ensuring that everyone can enjoy and understand your creations. So dive in, start editing, and make your videos shine for all viewers!
Also Read This: How to Download Sound from YouTube Videos for Editing and Use
5. Best Practices for Creating Accessible Captions
Creating accessible captions is not just about transcribing audio; it’s about ensuring that everyone, including those who are deaf or hard of hearing, can enjoy your video content. Here are some best practices to help you produce high-quality captions:
- Timing is Everything: Ensure that captions appear on screen in sync with the audio. This can be crucial for comprehension. A good rule of thumb is to display captions slightly before the speaker begins to speak.
- Keep It Concise: Aim for short, punchy sentences. Long captions can be overwhelming, so break them down into manageable phrases. Ideally, each caption should contain no more than two lines.
- Use Appropriate Formatting: Use line breaks to separate thoughts and avoid clutter. This makes it easier for viewers to read. Consider using italics for off-screen voices or sound effects to provide additional context.
- Include Relevant Sounds: Don’t just focus on spoken dialogue. Include descriptions of relevant sound effects, music, or background noises. For example, “(upbeat music playing)” helps set the scene for viewers.
- Choose a Legible Font: Select a clear, sans-serif font for captions. Font size should be large enough to read on small screens, and the color should contrast well with the background.
By following these best practices, you’ll create captions that not only enhance accessibility but also improve the overall viewing experience for all audiences.
6. Common Mistakes to Avoid When Editing Captions
Even seasoned creators can make mistakes when it comes to editing captions. Here are some common pitfalls to avoid, ensuring your captions are as effective as possible:
- Neglecting Punctuation: Proper punctuation is crucial for readability. Failing to use periods, commas, or question marks can confuse viewers about tone and meaning.
- Overloading Captions: Avoid cramming too much text into a single caption. This can overwhelm viewers. Stick to 32-40 characters per line and ensure they have enough time to read each caption before they disappear.
- Ignoring Language Variations: Be mindful of regional dialects, slang, and cultural references. Ensure that your captions are easily understood by your target audience, which may involve adapting language and terms.
- Forgetting About Accessibility Guidelines: Familiarize yourself with accessibility standards like the Web Content Accessibility Guidelines (WCAG). It ensures compliance and that your content is accessible to everyone.
- Not Reviewing for Errors: Always proofread your captions for typos and grammatical errors. Even minor mistakes can distract viewers and undermine your credibility. Consider having a second pair of eyes review your captions.
By avoiding these common mistakes, you’ll not only create more professional-looking captions but also foster a more inclusive environment for your audience.
 admin
admin


