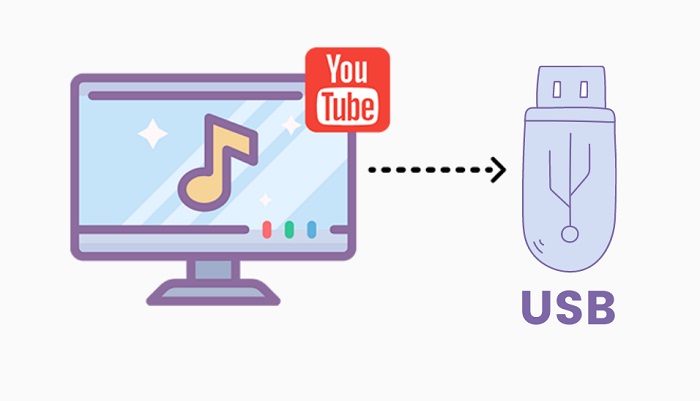
Are you looking for a convenient way to transfer your favorite YouTube videos to a USB flash drive? You're in the right spot! Whether you want to enjoy those videos offline or back them up for safety, transferring them is easier than you might think. This guide will walk you through the process step-by-step, ensuring that you can have your video content close at hand without a hitch. Let’s get started!
Requirements for Transferring Videos

Before diving into the wonderful world of transferring YouTube videos, it's important to gather a few essential tools and requirements. Here’s what you’ll need:
- A Computer: You’ll need a laptop or desktop to download the videos. While some mobile apps exist, using a computer is often more straightforward.
- YouTube Video Link: Have the link to the video you wish to download handy. You can find this in your browser’s address bar when watching the video.
- Video Downloader Software: There are many options available, both free and paid, that can help you download YouTube videos. Some popular choices include:
- YTD Video Downloader
- 4K Video Downloader
- Freemake Video Downloader
- USB Flash Drive: Ensure you have a USB flash drive with enough storage capacity for the videos you want to save. Generally, a 16GB or larger USB drive should suffice.
- Stable Internet Connection: A good Wi-Fi or internet connection is critical for downloading videos without interruptions.
- File Management Skills: Basic skills to navigate your computer’s file explorer will help you easily transfer downloaded files to your USB drive.
Once you have all these pieces in place, you're ready to start transferring those YouTube gems to your USB flash drive! Let's move on to the next steps together.
3. Step-by-Step Guide to Downloading YouTube Videos

Downloading YouTube videos may seem complicated, but with the right tools and steps, you’ll find it quite simple! Here’s a straightforward guide to help you kick off your downloading journey:
- Choose a Downloader Tool: Start by selecting a reliable video downloader. There are many options available, both free and paid. Some popular choices include:
- 4K Video Downloader
- YTD Video Downloader
- ClipGrab
- Freemake Video Downloader
- Install the Software: Once you’ve chosen the downloader, download and install it on your computer. Follow the setup instructions until the installation finishes.
- Open YouTube and Find Your Video: Launch your web browser, navigate to YouTube, and locate the video you want to download.
- Copy the Video URL: Right-click on the video’s address bar and select "Copy". Alternatively, you can click the share button under the video and choose "Copy Link".
- Paste in the Downloader: Open the downloader you installed and find the option that says “Paste Link.” Click on it, and your video URL will be automatically inserted.
- Select Video Format and Quality: Choose your desired file format (such as MP4) and the quality level (like 720p or 1080p) from the available options.
- Download the Video: Click on the “Download” button and wait for the process to finish. Depending on the video size and your internet speed, this might take a few moments.
And voila! You've successfully downloaded your YouTube video, and it’s ready for the next step—transferring it to your USB flash drive!
4. How to Transfer Downloaded Videos to a USB Flash Drive
Transferring your downloaded YouTube videos to a USB flash drive is an easy process. Just follow these steps, and you’ll have your videos accessible on any device that supports USB!
- Insert Your USB Flash Drive: Plug your USB drive into an available USB port on your computer. You should see a pop-up notification indicating that it's been recognized.
- Open File Explorer (Windows) or Finder (Mac): Navigate to the location where you saved your downloaded video. In Windows, click on the folder icon usually found on your taskbar, and for Mac, open Finder from your Dock.
- Drag and Drop the Video: Locate your downloaded video file. Click on it and hold the mouse button down, then drag it over to your USB drive in the File Explorer or Finder window until you see it highlight. Release the mouse button to drop the file.
- Copy and Paste Method: Alternatively, you can right-click on the video file and select "Copy." Then, right-click anywhere in the USB drive window and select "Paste."
- Safely Eject the USB Drive: After the video has been transferred, it's essential to safely eject your USB drive. Right-click on the USB drive icon in Windows and select “Eject.” On Mac, click the eject button next to the drive name in Finder.
That’s all it takes! You’ve now successfully transferred your downloaded YouTube videos to your USB flash drive. Enjoy watching them whenever and wherever you want!
Troubleshooting Common Issues
Transferring YouTube videos to a USB flash drive is usually a straightforward process, but like any tech-related task, a few hiccups can pop up along the way. Let's tackle some of the common issues you might encounter and how to resolve them.
- Downloading Errors: If you're having trouble downloading videos, it might be due to restrictions on the video itself or a slow internet connection. Make sure your internet is stable and consider using a different video downloader or even restarting the one you're using.
- Incompatible File Formats: Sometimes, the video file format might not be compatible with your device. If you find that your video won’t play, use a conversion tool to change the file type to something more universally accepted, such as MP4.
- Full USB Drive: Ensure your USB flash drive has enough space for the videos you want to store. If it's full, delete some files or move them to another location to free up space.
- USB Drive Not Recognized: If your computer isn't recognizing the USB, try plugging it into a different port or another computer. It might also help to reformat the USB drive if the issue persists, but be sure to back up any important files first!
- Slow Transfer Speeds: This can be frustrating! Ensure you're using a USB 3.0 drive and connecting it to a USB 3.0 port for optimal speed. Sometimes, the quality of the USB drive matters as well, so investing in a reputable brand can make a difference.
Conclusion
Transferring YouTube videos to a USB flash drive doesn't have to be a complicated or daunting task. With the right tools and a clear understanding of the process, you'll find that you can easily access your favorite content offline. Just remember to respect copyright laws and only download videos for which you have permission.
To recap, here are the key steps:
- Choose a reliable video downloader.
- Select the video you want to transfer.
- Download the video in your desired format.
- Safely transfer the downloaded video to your USB flash drive.
Whether you're on a road trip, in a waiting room, or simply lounging at home, having your favorite videos on a USB can be immensely handy. With these tips in mind, you’re now equipped to tackle the process with confidence. Happy viewing!


