Drawing flowers is a fun and rewarding activity that anyone can learn. Whether you're a beginner or have some experience, you can create beautiful flower sketches with a little practice. In this guide, we will walk you through the steps of drawing flowers, from choosing the right flower to adding color and detail. The best part? You don't need any fancy tools or equipment—just basic materials and a little patience.
The key to drawing flowers is understanding their shapes, textures, and how to translate that onto paper. You'll learn how to break down complex flowers into simple shapes that are easier to draw. We’ll also share some tips on adding details like petals, leaves, and stems to bring your flower sketches to life.
Choosing the Right Flower to Draw
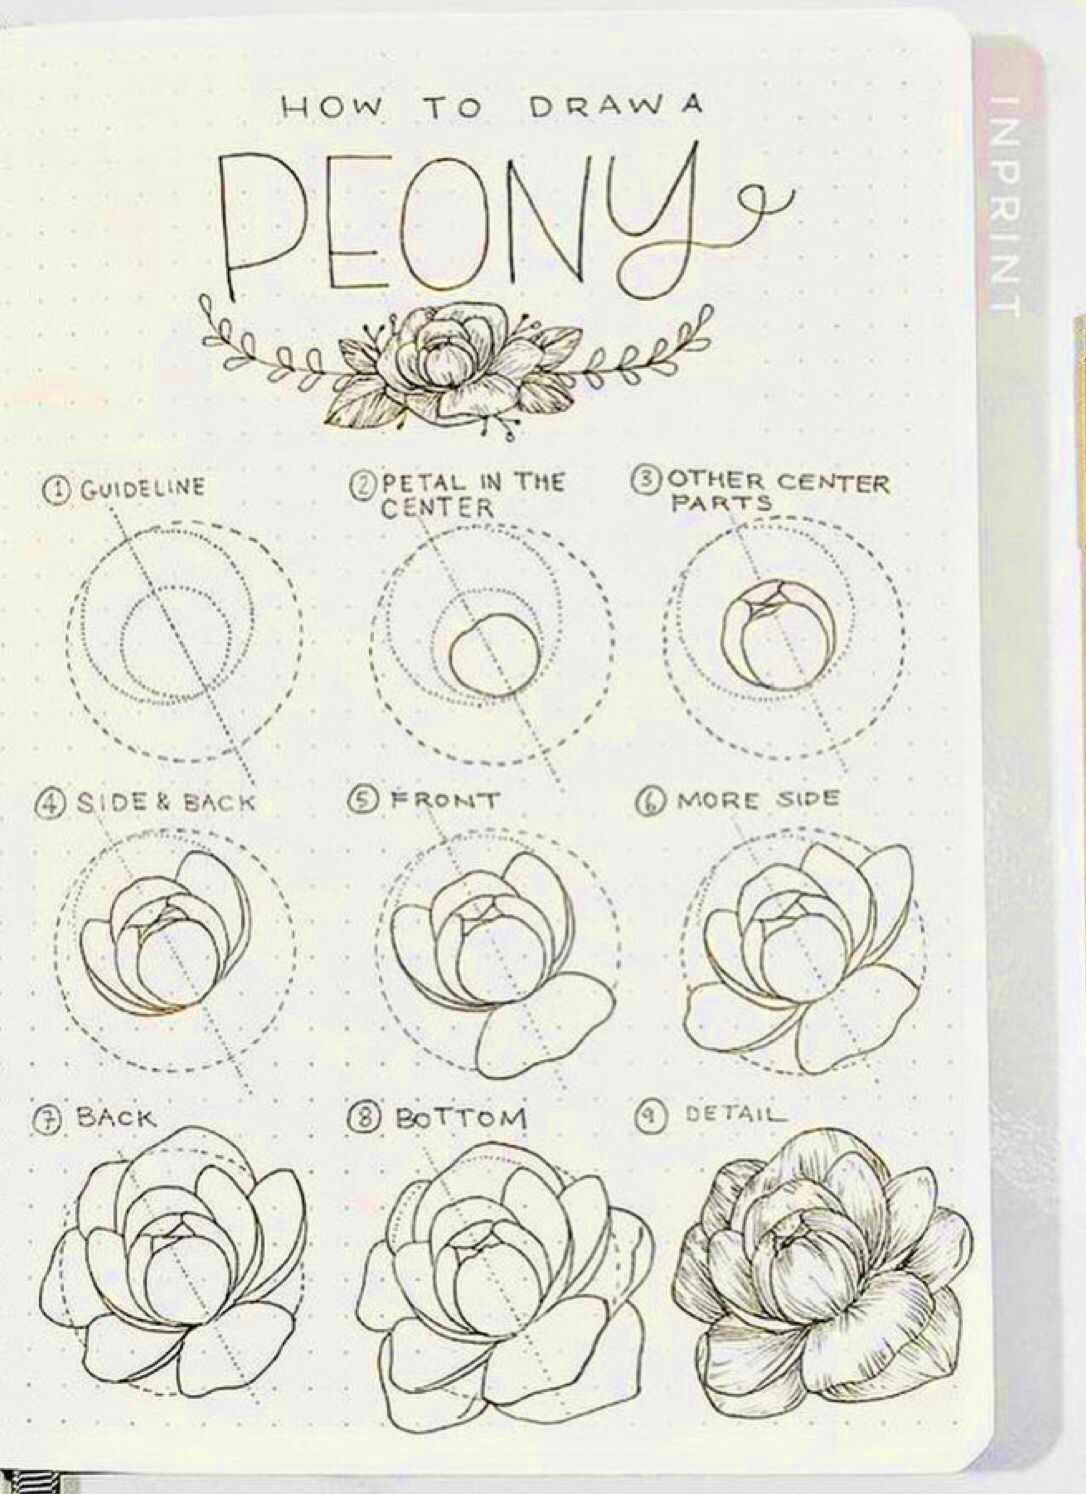
Choosing the right flower to draw is one of the first steps in creating your artwork. If you're just starting, it's important to pick a flower that isn't too complicated. Here are some simple flowers that are perfect for beginners:
- Sunflower: A large, easy-to-draw flower with simple petals and a circular center.
- Daisy: With its symmetrical petals, a daisy is a great flower to practice drawing.
- Tulip: A tulip has a smooth, clean shape that's perfect for learning basic curves and lines.
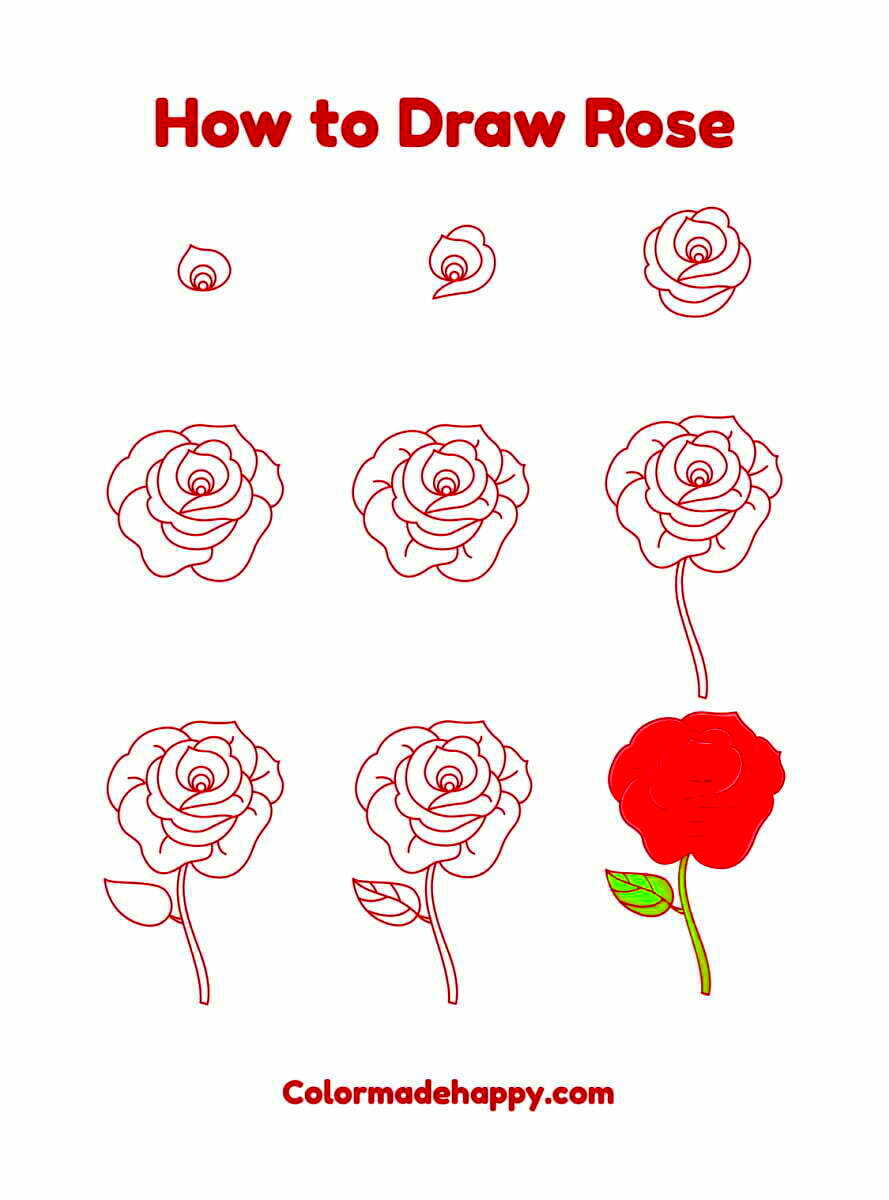
- Rose: Though it’s a bit more detailed, starting with a basic rose shape can help you practice intricate designs.
Once you've picked a flower, look at it closely and try to break it down into simple parts: petals, stem, and leaves. By doing so, you can focus on one area at a time, making it easier to draw. Don’t be discouraged if your first attempt isn’t perfect—each drawing is a chance to improve.
Preparing Your Workspace for Drawing
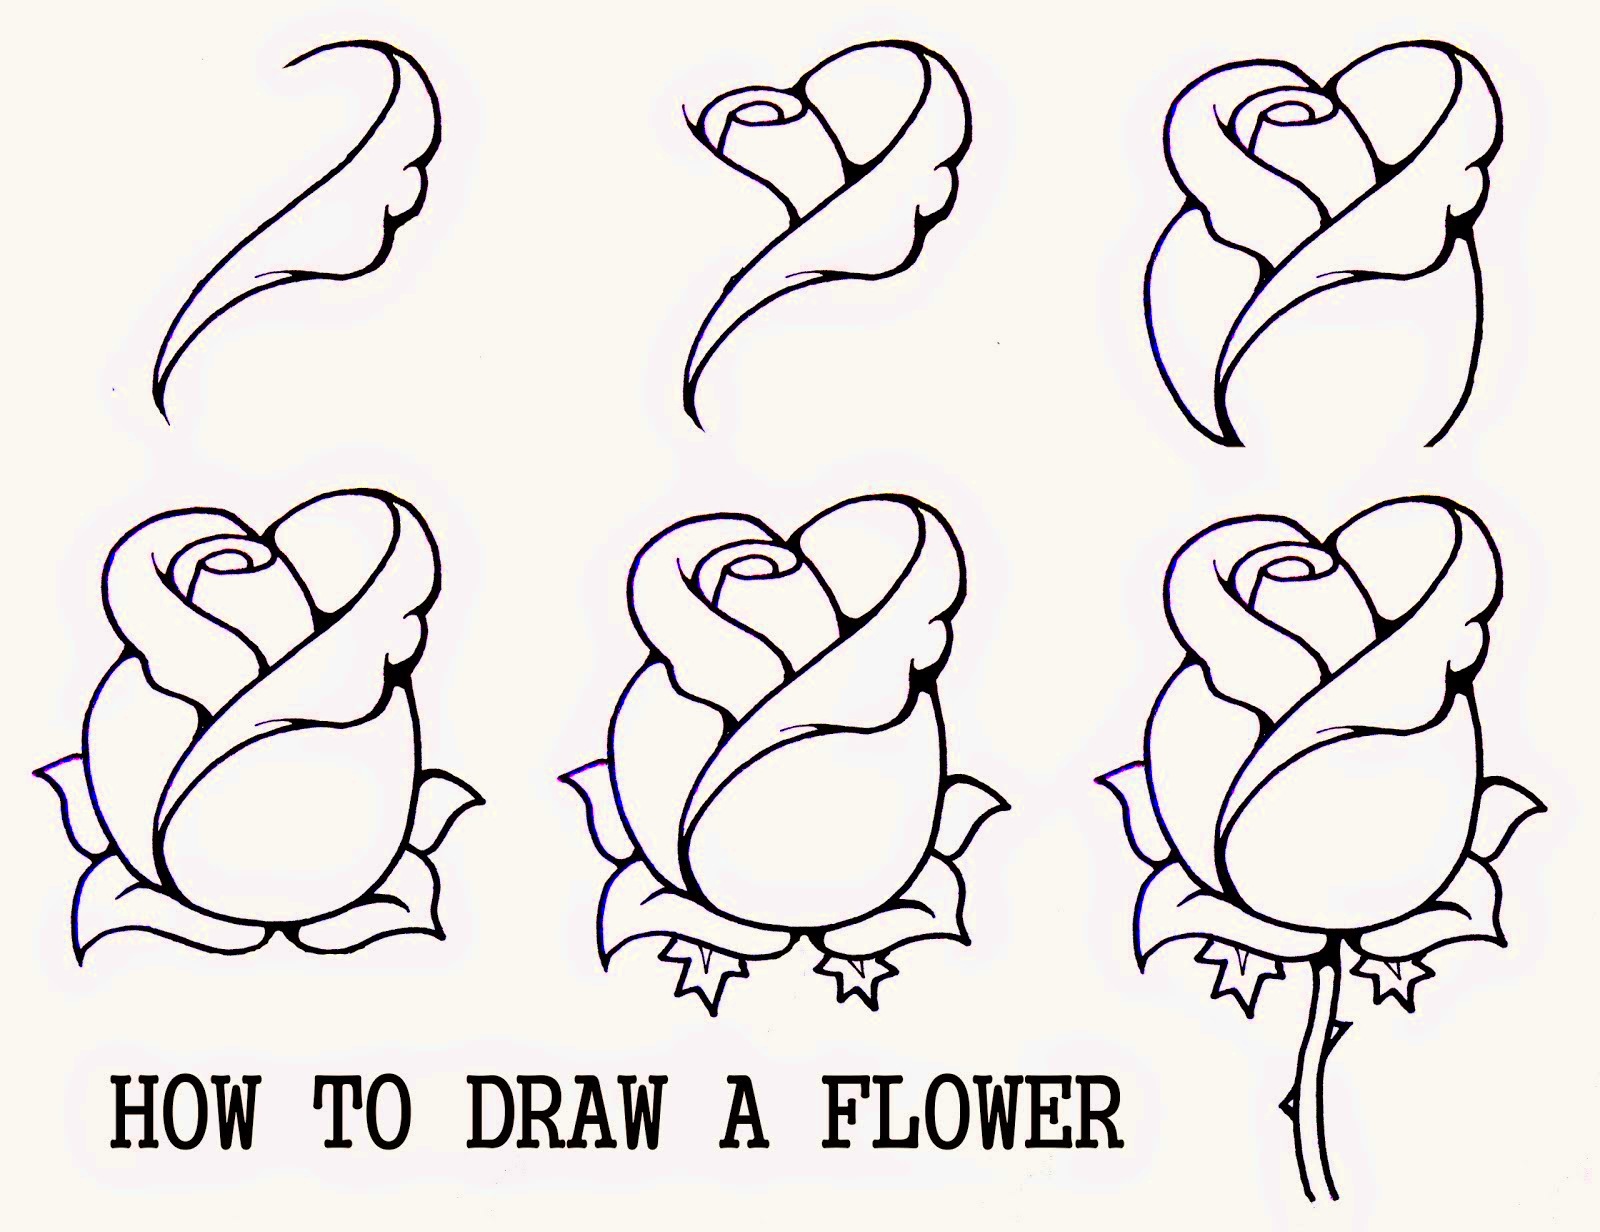
Before you begin your flower drawing, it’s important to set up a comfortable and organized workspace. A well-prepared environment can make your drawing process much smoother and enjoyable. Here’s how you can prepare your workspace:
- Choose a well-lit area: Good lighting helps you see details clearly and reduces strain on your eyes. Natural light is ideal, but if you're drawing at night, use a bright desk lamp.
- Gather your materials: All you need to get started is a pencil, eraser, paper, and optionally, colored pencils or markers for coloring. Keeping your materials within easy reach will help you stay focused on the drawing.
- Use a comfortable chair: Since you’ll be sitting for a while, make sure you have a chair that supports your back and allows you to sit at a comfortable height.
- Clear your workspace: A clutter-free desk will help you focus better. Keep only the materials you need on your workspace to avoid distractions.
Setting up a tidy and comfortable workspace helps you feel more relaxed, which in turn can improve the quality of your drawings. So, take a moment to arrange your materials before you start—this small effort can make a big difference!
Sketching Basic Shapes for Flowers
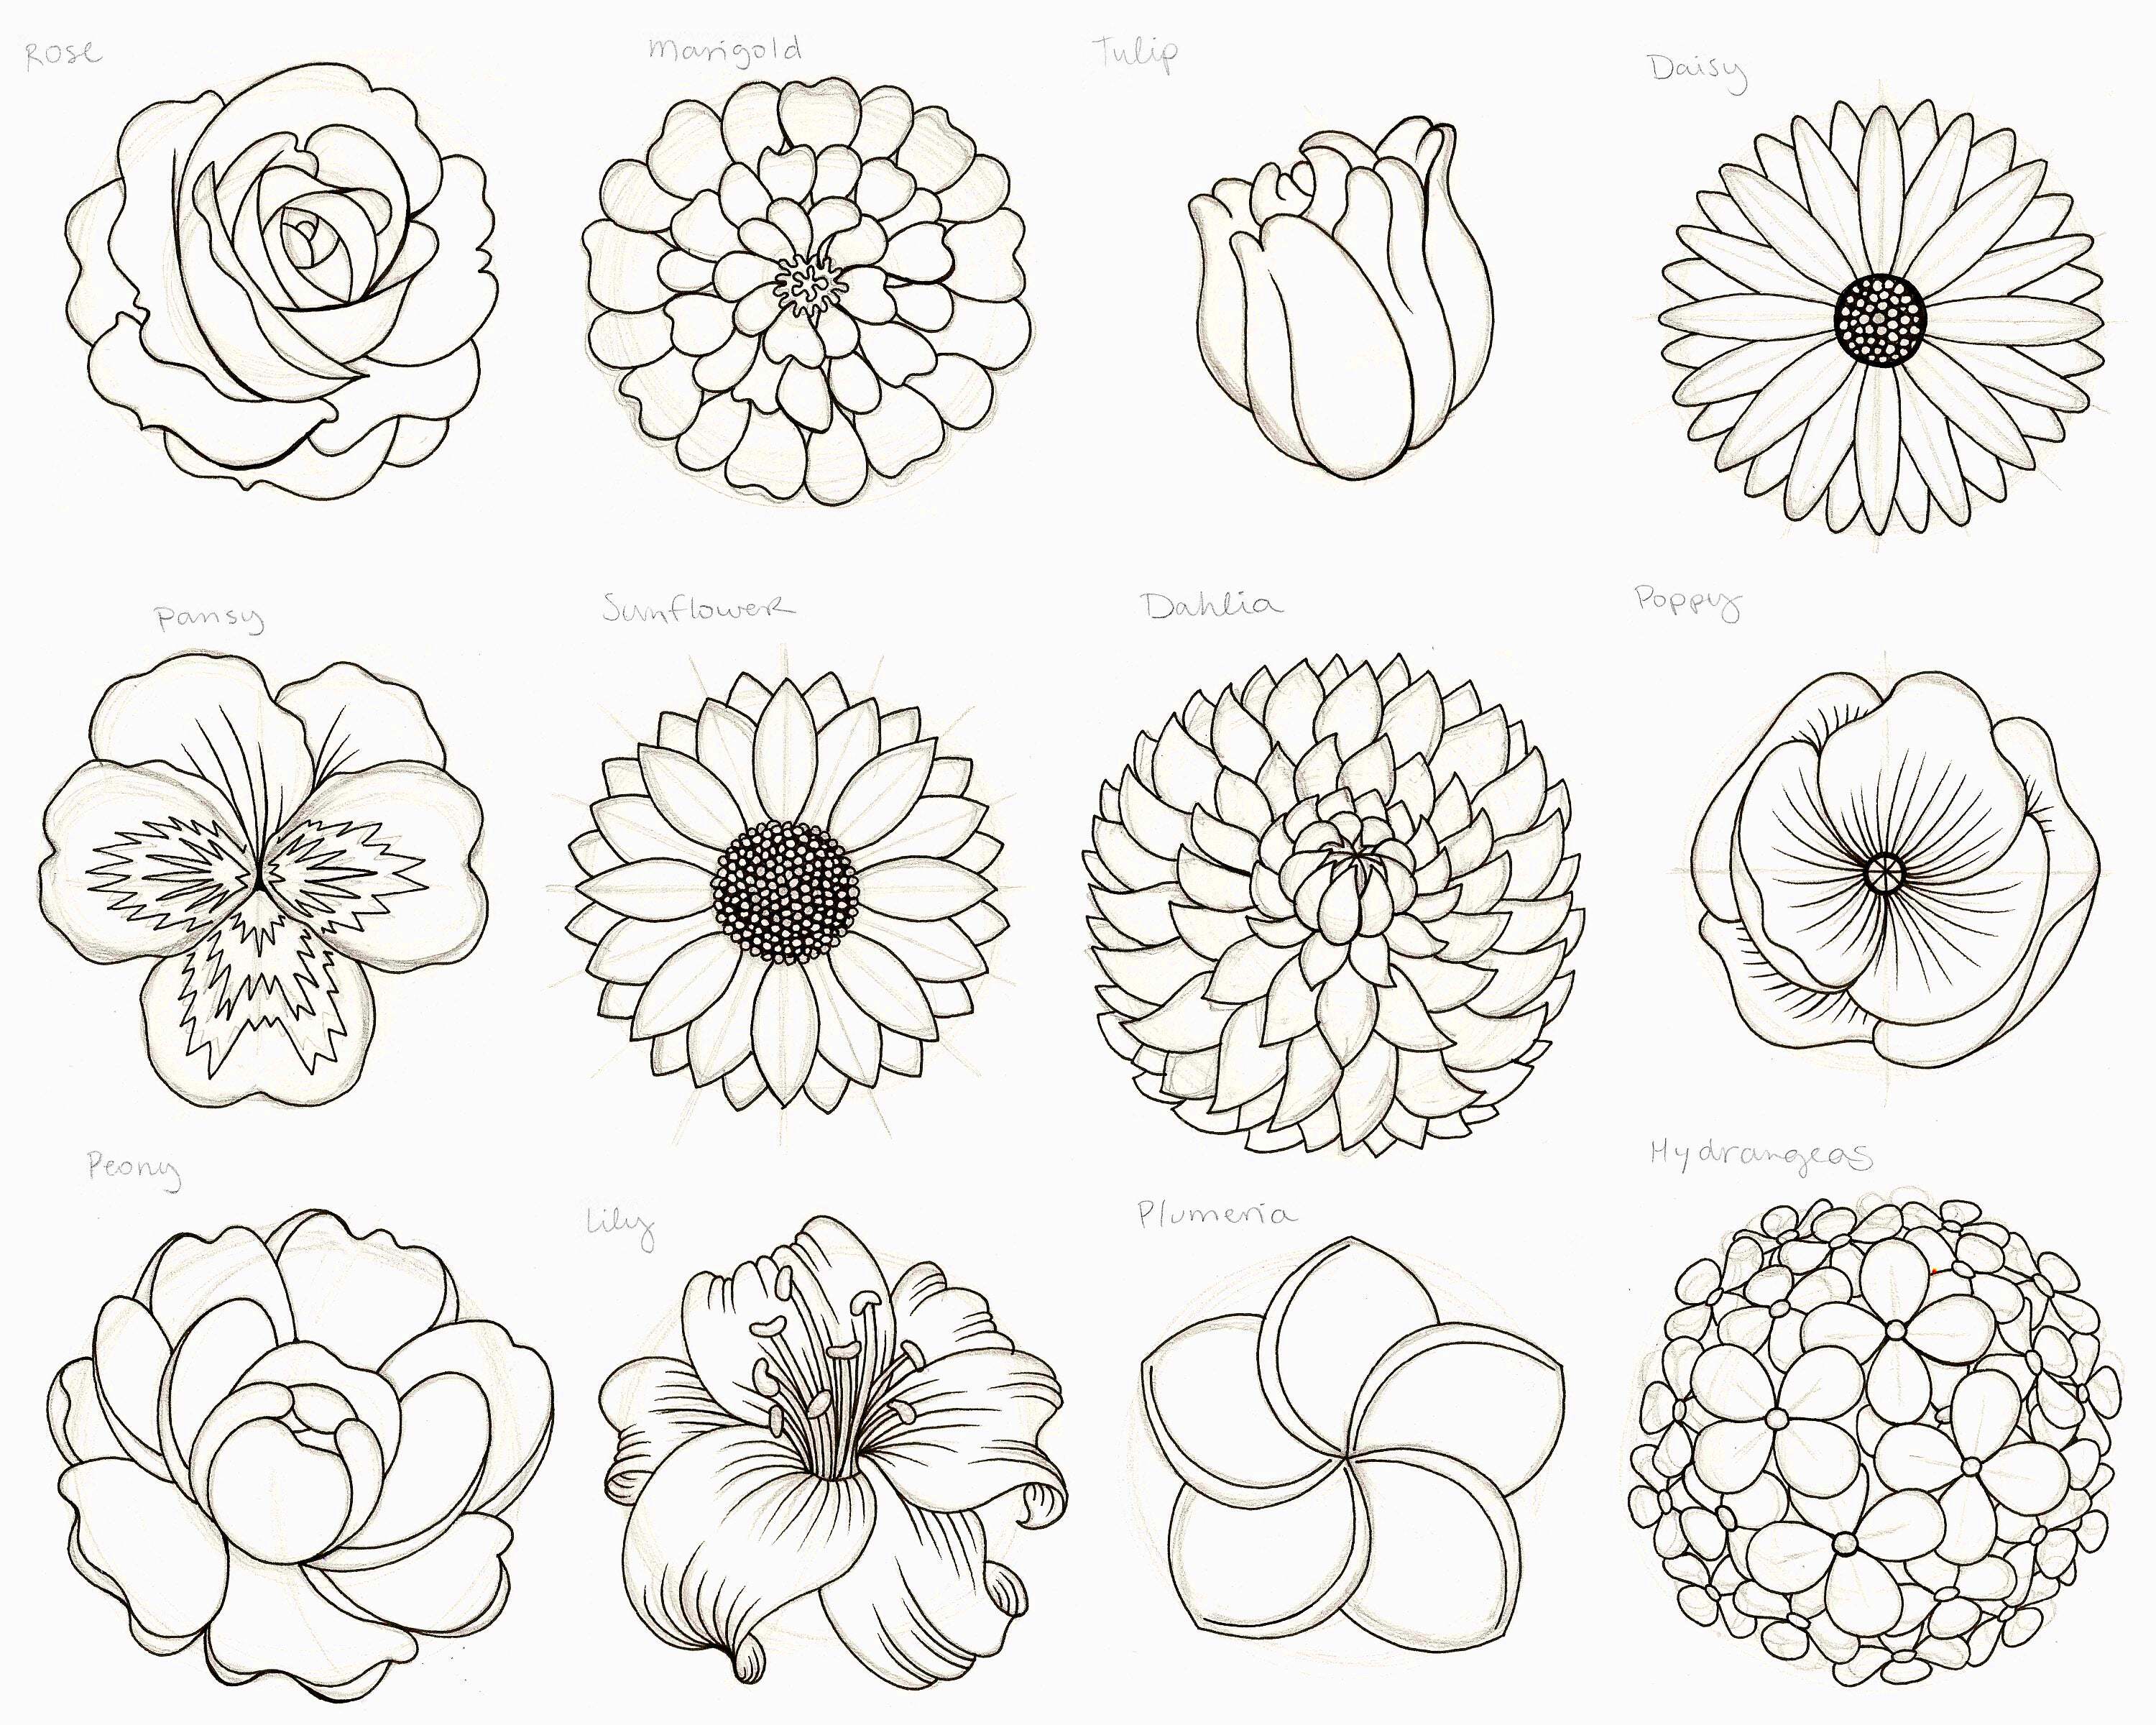
Before diving into details, it's important to start with the basic shapes that make up the structure of a flower. Think of flowers as combinations of simple forms—circles, ovals, and lines. Starting with these shapes allows you to create a solid foundation for your drawing and helps you focus on proportions and placement without getting overwhelmed by details.
Follow these steps to sketch the basic shapes of a flower:
- Start with a circle: Draw a circle for the center of the flower. This will serve as the focal point where all the petals will meet.
- Outline the petals: Use ovals or elongated shapes around the center. Petals are usually symmetrical, so try to keep the shapes even as you sketch them.
- Draw the stem and leaves: Sketch a line or two extending downward from the flower for the stem. Add simple leaf shapes on either side to complete the structure.
Don’t worry about getting everything perfect. This stage is about laying out the shapes and getting the proportions right. Once you have your basic structure in place, you can go back to refine and add details. This method of breaking the flower down into basic shapes is a great way to build confidence and improve your overall drawing skills.
Adding Petals and Details to Your Flower Sketch
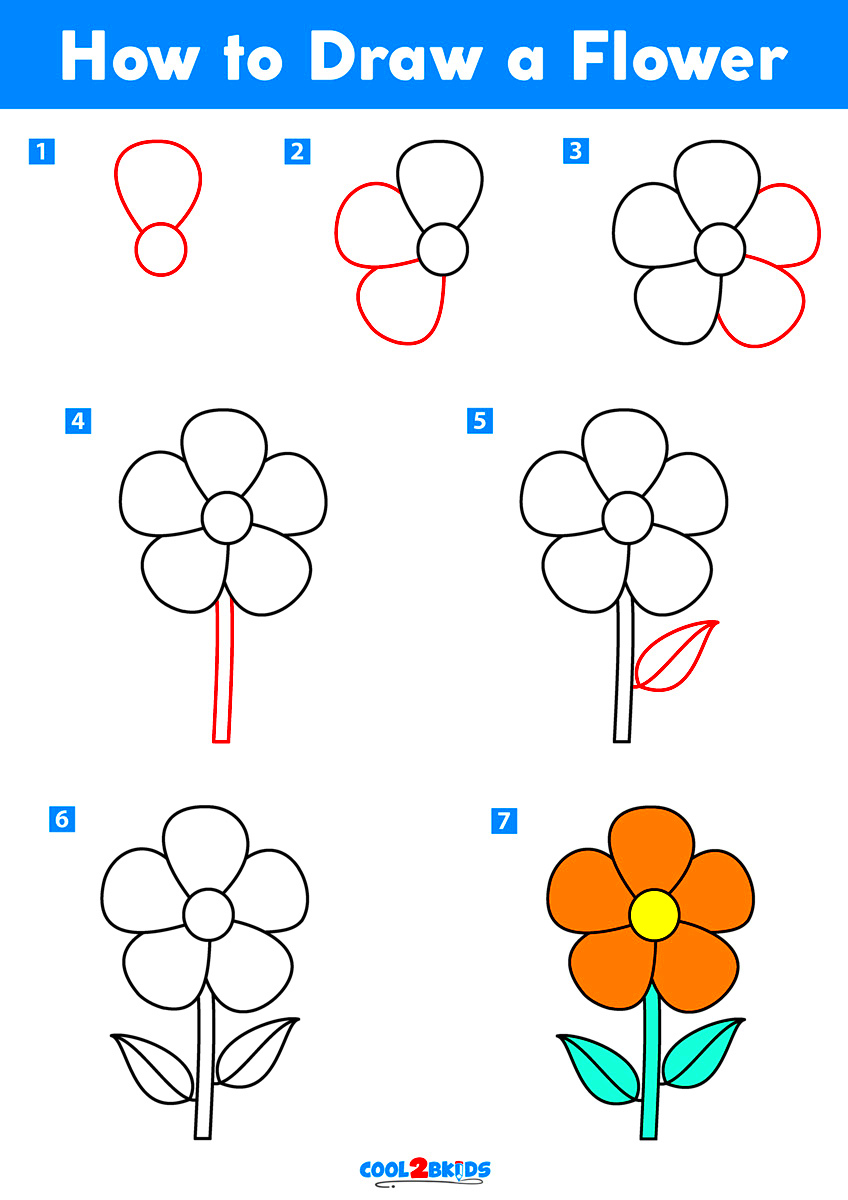
Now that you have the basic shapes of your flower, it’s time to add more definition and detail. This is where your flower will start to come alive. Petals, texture, and other small features like veins on the leaves or the center of the flower will give your drawing depth and realism.
Here’s how to add petals and details to your sketch:
- Refine the petal shapes: Go over the outline of each petal, making them more defined and natural-looking. Add slight curves or points where the petals meet the center of the flower.
- Add texture to the center: The center of most flowers (like sunflowers or daisies) has small details such as seeds or patterns. You can add tiny circles or lines to give it texture.
- Draw veins on the leaves: Add fine lines along the leaves to show veins. This adds realism and gives the leaves more dimension.
Don’t hesitate to adjust the shape of the petals or leaves as you go along. Flowers come in various shapes and sizes, so feel free to experiment with different petal arrangements or leaf positions. By paying attention to the small details, you’ll make your flower drawing more interesting and lifelike.
Shading and Coloring Your Flower Drawing
Shading and coloring can bring your flower drawing to life, turning a simple sketch into a vibrant piece of art. Whether you’re using pencils, colored pencils, or markers, adding these elements can help create depth and dimension, making your flowers look more realistic and dynamic.
Here are some tips for shading and coloring your flower drawing:
- Start with light shading: Using a pencil, gently shade the areas that would naturally be darker, such as the petals near the base or the underside of the leaves. Keep the pressure light at first, and build it up gradually.
- Use blending techniques: To smooth out your pencil shading, use a blending stump or a soft tissue to blend the pencil marks. This gives the shading a softer, more natural appearance.
- Color the petals: Choose vibrant colors for the petals. If you're using colored pencils, layer the colors by applying them lightly and gradually adding more layers for depth. Experiment with color gradients to make the petals look realistic.
- Add depth to the center: For flowers like daisies or sunflowers, use darker shades in the center to create contrast with the bright petals.
- Highlight with white or light colors: Use a white pencil or a light-colored marker to add highlights to the petals. This will give them a shiny, fresh look.
Shading and coloring is a way to enhance the natural beauty of your flower, so take your time and experiment with different techniques. Whether you prefer a soft, delicate flower or a bright, bold one, the right coloring and shading can make a huge difference in the final result.
Common Mistakes to Avoid When Drawing Flowers
Even experienced artists make mistakes while drawing flowers, but knowing what to avoid can help you improve faster. Here are some common mistakes people make when drawing flowers and how to avoid them:
- Not starting with basic shapes: Skipping the step of sketching basic shapes can make your flower look unbalanced or disproportionate. Always start with simple circles and ovals to lay out the structure first.
- Ignoring symmetry: Flowers, especially daisies and roses, tend to have symmetrical petals. If your petals are uneven or don’t match each other in size, your drawing will look off. Pay attention to how each petal mirrors the other.
- Overcomplicating the details: Adding too many tiny details at once can overwhelm you. Start simple, focusing on the basic shapes and structure, and gradually add the finer details as you go along.
- Not observing the flower closely enough: Sometimes, artists forget to closely observe their subject. Look closely at the flower you’re drawing to capture its true shape, texture, and proportions. Avoid drawing from memory alone.
- Skipping shading and depth: A flat flower drawing can look lifeless. Without shading, your flower won’t have depth or dimension. Spend time adding light and shadow to give your drawing more volume and realism.
By keeping these common mistakes in mind, you can avoid frustration and create better flower drawings. Remember, every mistake is an opportunity to learn and improve!
Practice Tips for Mastering Flower Drawings
Like any skill, drawing flowers gets easier with practice. The more you draw, the better you will understand the shapes, textures, and details that make flowers unique. Here are some tips to help you improve your flower drawing skills:
- Practice with different flowers: Each flower has its own characteristics, so try drawing a variety of flowers. Start with simple ones like daisies or sunflowers, then move to more complex flowers like roses or lilies.
- Use reference images: Don’t be afraid to use photos or real flowers as references. Observing the flower closely can help you capture details like petal shapes, leaf veins, and color variations.
- Focus on one part at a time: Drawing flowers can feel overwhelming at first, so focus on one element, like the petals or the stem, before moving on to others. Breaking down the drawing into smaller tasks makes it easier to manage.
- Draw regularly: The more you practice, the more confident you'll get. Try to draw at least a few flowers each week. Over time, you’ll see improvement in your technique and style.
- Experiment with different media: Don't limit yourself to just pencils. Try colored pencils, watercolors, or even markers. Experimenting with different tools and techniques can open up new ways to express your artistic vision.
By following these practice tips and being patient with yourself, you’ll gradually master the art of drawing flowers. Remember, practice makes perfect!
Frequently Asked Questions
Here are some common questions people have when learning how to draw flowers:
- What is the easiest flower to draw? Simple flowers like daisies, sunflowers, and tulips are great for beginners. They have basic shapes and fewer intricate details, making them easier to draw.
- Can I use a pen instead of a pencil? Yes! While pencils are ideal for sketching, you can use pens to outline your flower once you’re happy with your pencil sketch. Just be careful to avoid mistakes, as pens are harder to erase.
- How do I make my flower drawings look more realistic? Adding shading, varying the pressure of your pencil, and focusing on small details like leaf veins and petal textures can make your flowers look more realistic. Pay attention to light and shadow.
- Do I need to use colored pencils to color my flower drawings? No, you don’t have to use colored pencils. You can also use watercolors, markers, or even crayons. The key is to layer your colors and add depth to the petals and leaves.
- How long does it take to get good at drawing flowers? It depends on your practice routine, but with regular practice, you can start seeing improvement in just a few weeks. Don't rush it—enjoy the process and focus on steady progress.
We hope these answers help! Don’t be afraid to keep asking questions as you develop your flower-drawing skills. Keep practicing, and soon enough, you’ll see significant improvement!
Conclusion
Drawing flowers is a fulfilling and enjoyable process, whether you’re just starting or refining your skills. By following simple steps, from choosing the right flower to mastering shading and coloring techniques, you can improve your ability to capture the natural beauty of flowers. Remember, the key to success lies in practice, patience, and paying attention to the details. Each drawing is an opportunity to learn and grow as an artist. Don’t be discouraged by mistakes—embrace them as part of the learning journey. Keep experimenting with different flowers and techniques, and most importantly, enjoy the creative process!
 admin
admin


