When you capture stunning photos on your Canon camera, the next step is transferring those images to your computer. Downloading your photos is an essential task for organizing, editing, and sharing your memories. Whether you’re a beginner or an experienced photographer, knowing how to quickly and efficiently move your images from the camera to your computer can make your workflow smoother. In this guide, we’ll walk you through the entire process, step by step, so you can easily enjoy your photos on a bigger screen or back them up for safekeeping.
Prepare Your Canon Camera for Image Transfer

Before transferring images, you need to ensure that your Canon camera is ready. Here are the steps to get started:
- Turn on your Canon camera: Press the power button to power up the camera.
- Check your image storage: Make sure you have enough space on your memory card or camera’s internal storage to save new photos.
- Ensure your camera is in the right mode: Set the camera to playback mode so you can view and access the photos you want to transfer.
- Charge your camera: It’s always a good idea to make sure your camera has enough battery to complete the transfer process.
Taking a few minutes to ensure your camera is ready will make the transfer process much easier and quicker.
Also Read This: Optimal Timing for Posting YouTube Shorts to Maximize Engagement
Connect Your Canon Camera to the Computer

Now that your camera is prepared, it’s time to connect it to your computer. There are a few methods to do this, so you can choose whichever is most convenient for you:
- Using a USB cable: Most Canon cameras come with a USB cable that you can plug directly into your camera and your computer. After plugging both ends in, your computer will recognize the camera as an external device, allowing you to access the files.
- Using a card reader: If you prefer not to use a USB cable, you can remove the memory card from your camera and insert it into a card reader. The card reader is then connected to your computer, allowing you to access your photos.
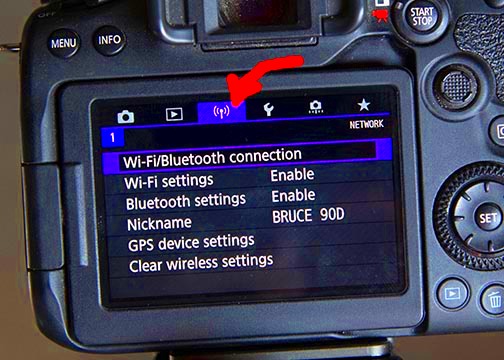
- Using Wi-Fi or Bluetooth: Some Canon cameras allow you to transfer images wirelessly using built-in Wi-Fi or Bluetooth. This can be especially useful for quick transfers without the need for cables.
Once your camera or card reader is connected to the computer, you’ll see your images appear on your screen, ready to be downloaded.
Also Read This: What Happens When an Image is Rejected on Alamy Can It Be Resubmitted
Choose the Right Method for Downloading Images
Choosing the right method to download images from your Canon camera is important because it ensures a smooth and hassle-free transfer. There are a few different ways you can go about this, and the best method for you depends on your preferences and the tools you have available. Whether you want to use Canon’s software, a file explorer, or wireless options, each method has its benefits.
Here’s a breakdown of the main ways to download your images:
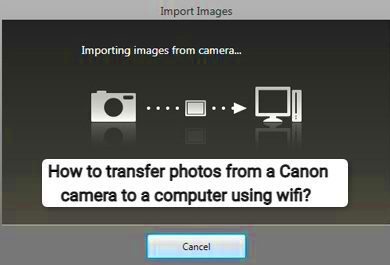
- Using Canon Software: Canon provides official software like EOS Utility or Image Transfer Utility. These programs are designed to work seamlessly with your camera and provide advanced features like batch downloads, file management, and image editing options.
- Manually via File Explorer: If you prefer a simple, no-frills approach, you can manually copy files from your camera or memory card to your computer. This method doesn’t require any special software but does involve a few extra steps to organize your files after the transfer.
- Wireless Transfer: Some Canon cameras offer wireless capabilities, which allow you to transfer images without the need for cables or software. This is especially convenient if you want to move your images quickly without dealing with physical connections.
Each of these methods works well, but choosing the right one will depend on your needs, the available software, and how many images you want to transfer.
Also Read This: How to See Who Watched Your YouTube Videos Privacy and Analytics
Step-by-Step Process to Download Images Using Software
If you choose to use Canon’s official software, you’ll have access to a streamlined, organized method for transferring your photos. Below is a step-by-step guide on how to use the Canon EOS Utility or Image Transfer Utility:
- Install the Software: First, make sure you have the necessary software installed on your computer. You can download EOS Utility or the Image Transfer Utility from Canon’s official website.
- Connect Your Camera: Using the USB cable that came with your camera, connect your Canon camera to your computer. Once the connection is made, open the Canon software.
- Launch EOS Utility: Open the EOS Utility or Image Transfer Utility software on your computer. The software should automatically detect your camera.
- Choose the Download Option: The software will give you several options for downloading your images. Select the “Download Images” option to begin transferring your files.
- Select Photos to Transfer: You can either choose to download all images or select specific ones to transfer. The software will display thumbnails of the photos on your camera.
- Start the Transfer: Once you’ve chosen your images, click the “Download” button. The software will handle the rest, downloading your selected images to a folder on your computer.
- Complete the Process: After the transfer is finished, you can safely disconnect your camera from the computer. Your images should now be available in the folder you selected.
This method ensures that your images are properly downloaded and organized in a way that makes it easy to manage them later.
Also Read This: Download Vimeo Videos to MP4 in Less Than a Minute by Using This Quick Method
Manually Transferring Images Without Software
If you prefer not to use Canon’s software, you can easily transfer your images manually. This method is straightforward and doesn’t require any additional tools besides your computer and camera. Here’s how to do it:
- Connect Your Camera or Memory Card: Plug your Canon camera into the computer using a USB cable, or remove the memory card from your camera and insert it into a card reader. The computer should automatically detect the device.
- Open File Explorer (Windows) or Finder (Mac): On your computer, open File Explorer if you’re using Windows, or Finder if you’re using a Mac. Your camera or card reader should appear as a new device in the file browser.
- Navigate to Your Photos: Open the camera or memory card folder to find the “DCIM” folder, which contains your images. Inside this folder, you’ll find all the photos stored on the camera or memory card.
- Select the Photos: Click and drag to select the images you want to transfer. You can hold down the “Ctrl” key (Windows) or the “Command” key (Mac) to select multiple images.
- Copy the Files: Right-click and choose the “Copy” option. Then, navigate to the folder on your computer where you want to store the images, right-click, and choose “Paste” to transfer the files.
- Organize Your Photos: Once the images are on your computer, you can move them into different folders, rename them, or begin editing them as needed.
This method is quick and effective, especially if you’re transferring just a few images or don’t want to install additional software. However, it might require a bit more manual organization afterward.
Also Read This: How Do I Resize an Image in Paint for Simple Editing and Adjustments
Common Issues and How to Fix Them
While downloading images from your Canon camera to your computer is usually a smooth process, sometimes things can go wrong. Whether you encounter technical issues or simple mistakes, knowing how to troubleshoot can save you time and frustration. Here are some of the most common problems you might face and how to fix them:
- Camera Not Recognized by Computer: If your computer doesn't recognize your camera when connected, try the following:
- Ensure the camera is powered on.
- Check the USB cable for any damage or try a different cable.
- Try connecting your camera to a different USB port.
- Restart your computer and camera and attempt the connection again.
- Files Not Showing Up: If you can’t see your images in File Explorer or Finder, make sure:
- The memory card is properly inserted into the card reader.
- The camera is set to the correct mode (Playback or USB mode).
- You are navigating to the right folder (usually labeled “DCIM” for digital images).
- Slow Transfer Speed: If the transfer process is taking longer than expected, consider:
- Using a high-quality USB cable or card reader.
- Removing any unnecessary files from your memory card to speed up the transfer.
- Transferring fewer images at a time to avoid overwhelming your computer.
- Images Not Displaying Properly: If some images appear corrupted or incomplete, try:
- Copying the files to your computer again.
- Using a photo recovery tool if files were corrupted during transfer.
By following these troubleshooting tips, you can resolve most common issues and get your images safely transferred to your computer without a hitch.
Also Read This: The Best Camera Gear for Travel Photography
FAQ
Here are some frequently asked questions that can help clarify the image transfer process:
- How do I know if my camera is properly connected to the computer?
If your camera is properly connected, it should show up as a new device in File Explorer (Windows) or Finder (Mac). You might also see a pop-up message indicating that new devices have been detected.
- Can I transfer images wirelessly from my Canon camera?
Yes, many Canon cameras have built-in Wi-Fi capabilities that allow you to wirelessly transfer images. You will need to connect your camera to a Wi-Fi network and follow the on-screen instructions in your camera’s settings to begin the transfer.
- What if my Canon camera doesn’t have a USB port?
If your camera lacks a USB port, you can remove the memory card and use a card reader to transfer the images. Alternatively, you may be able to use Bluetooth or Wi-Fi to wirelessly transfer the images to your computer.
- How do I recover lost images during transfer?
If some images were lost or corrupted during transfer, you can use data recovery software to try and retrieve them. Many programs are available that specialize in recovering lost or corrupted media files.
- What’s the best way to organize my photos after transferring them?
After transferring your photos, it’s a good idea to create folders based on events, dates, or locations to help you find specific images later. You can also rename files to make them more descriptive and easier to search through.
Conclusion
Transferring images from your Canon camera to your computer is a simple yet essential process that helps you organize, edit, and share your photos. Whether you choose to use Canon’s software, manually copy the files, or transfer wirelessly, each method has its advantages. By following the steps in this guide and troubleshooting any potential issues, you can ensure a smooth and efficient transfer every time. With your photos safely on your computer, you can take full control of your images and make the most of your photography experience.


